文章目录
资讯列表
今天我们在之前建好的文件 news.vue 中完成资讯列表,先看代码:
<template>
  <view class="news">
    <view class="news_item" v-for="(item,index) in newsList" :key='index'>
      <image :src="item.goods_small_logo"></image>
      <view class="right">
        <view class="title">{{item.goods_name}}</view>
        <view class="info">¥{{item.goods_price}}</view>
      </view>
    </view>
  </view>
</template>

<script>export default {
    data() {
      return {
        newsList:[]
      }
    },
    methods: {
      async getNews(){
        const res = await this.$myRequest({
          url:'/api/public/v1/goods/search',
          data: {
            query: '零食'
          }
        })
        this.newsList = res.data.message.goods
      },
    },
    onLoad() {
      this.getNews()
    }
  }</script>

<style lang="scss">.news{
  .news_item{
    display: flex;
    padding: 10rpx 20rpx;
    border-bottom: 1px solid $shop-color;
    image{
      width: 200rpx;
      height: 200rpx;
      min-width: 200rpx;
      min-height: 200rpx;
    }
    .right{
      margin-left: 15rpx;
      display: flex;
      flex-direction: column;
      justify-content: space-between;
      .title{
        font-size: 30rpx;
      }
      .info{
        font-size: 24rpx;
      }
    }

  }
}</style>
运行程序如图:
由于我们没有真实的资讯列表的接口,我们用之前的商品列表搜索接口来做,和之前的功能一样的,编写请求接口的方法,然后在 onLoad 中调用,如果不清楚返回数据结构,可以 console.log 打印下,之前都写过了,这里不再赘述,然后给 data 中的 newsList 赋值,然后使用 v-for 来循环展示数据即可
完成之后,我们可以把资讯展示部分封装成为 news-item 组件,在 components 中新建 news-item.vue 组件,然后把刚才的 news-item 部分复制过来,同时把相应的样式拿过来,news-item.vue 完整代码如下:
<template>
  <view>
  <view class="news_item" v-for="(item,index) in list" :key='index'>
    <image :src="item.goods_small_logo"></image>
    <view class="right">
      <view class="title">{{item.goods_name}}</view>
      <view class="info">¥{{item.goods_price}}</view>
    </view>
  </view>
  </view>
</template>

<script>export default {
    props:['list']
  }</script>


<style lang="scss">.news_item{
    display: flex;
    padding: 10rpx 20rpx;
    border-bottom: 1px solid $shop-color;
    image{
      width: 200rpx;
      height: 200rpx;
      min-width: 200rpx;
      min-height: 200rpx;
    }
    .right{
      margin-left: 15rpx;
      display: flex;
      flex-direction: column;
      justify-content: space-between;
      .title{
        font-size: 30rpx;
      }
      .info{
        font-size: 24rpx;
      }
    }

  }</style>
然后我们修改 news.vue,首先使用 import 引入 news-item 组件,然后在 components 中注册,然后可以在页面中使用了,我们放在之前资讯部分即可。由于是要循环数据,所以我们需要把这个页面获取的值传递过去,也就是使用:list=newsList传过去,我们看 news.vue 的完整代码:
<template>
  <view class="news">
    <news-item :list='newsList'></news-item>
  </view>
</template>

<script>import newsItem from "../../components/news-item/news-item.vue"
  export default {
    data() {
      return {
        newsList:[]
      }
    },
    methods: {
      async getNews(){
        const res = await this.$myRequest({
          url:'/api/public/v1/goods/search',
          data: {
            query: '零食'
          }
        })
        this.newsList = res.data.message.goods
      },
    },
    components:{
      'news-item':newsItem
    },
    onLoad() {
      this.getNews()
    }
  }</script>

<style lang="scss">.news{

}</style>
相应的,我们再看刚才 news-item.vue 中,我们使用了 props来接收刚才传过来的值,然后在循环时,也使用 list 这个变量循环即可
资讯详情
我们对列表页改进下,练习使用下过滤器。在列表展示时增加展示时间,由于时间返回是一个时间戳格式,我们可以使用过滤器修改格式后展示,修改 news-item.vue 如下:
<template>
  <view>
  <view class="news_item" v-for="(item,index) in list" :key='index'>
    <image :src="item.goods_small_logo"></image>
    <view class="right">
      <view class="title">{{item.goods_name}}</view>
      <view class="info">
        <text>价格:¥{{item.goods_price}}</text>
        <text>发布时间:{{item.add_time | formatDate}}</text>
      </view>
    </view>
  </view>
  </view>
</template>

<script>
  export default {
    props:['list'],
    filters:{
      formatDate(date){
        const nDate = new Date(date*1000)
        const year = nDate.getFullYear()
        const month = (nDate.getMonth()+1).toString().padStart(2,0)
        const day = nDate.getDay().toString().padStart(2,0)
        return year+'-'+month+'-'+day
      }
    }
  }
</script>


<style lang="scss">
  .news_item{
    display: flex;
    padding: 10rpx 20rpx;
    border-bottom: 1px solid $shop-color;
    image{
      width: 200rpx;
      height: 200rpx;
      min-width: 200rpx;
      min-height: 200rpx;
    }
    .right{
      margin-left: 15rpx;
      display: flex;
      flex-direction: column;
      justify-content: space-between;
      .title{
        font-size: 30rpx;
      }
      .info{
        font-size: 24rpx;
        text:nth-child(2){
          margin-left: 20rpx;
        }
      }
    }

  }
</style>
运行结果如图:
可以看到过滤器中我们封装一个函数,参数是你拿到的时间戳,如果是13位直接用,如果是10位*1000,然后分别获得年月日,拼接起来返回即可。我们在获得月时,需要+1,然后使用padStart进行了处理,如果不满两位,就在前面加一个0
我们也可以在 main.js 中定义一个全局的过滤器:
Vue.filter('formatDate',(date)=>{
  const nDate = new Date(date*1000)
  const year = nDate.getFullYear()
  const month = (nDate.getMonth()+1).toString().padStart(2,0)
  const day = nDate.getDay().toString().padStart(2,0)
  return year+'-'+month+'-'+day
})
接下来我们完成资讯详情,我们首先在 news-item.vue 中增加点击事件navigator,然后使用在这个方法里使用this.$emit来触发父组件中itemClick方法。navigator这个方法还需要传入 goods_id
<template>
  <view>
  <view class="news_item" @click="navigator(item.goods_id)" v-for="(item,index) in list" :key='index'>
  ......
  </view>
  </view>
</template>

<script>
  export default {
    ......
    methods:{
      navigator(id){
        this.$emit('itemClick',id)
      }
    }
  }
</script>

......
然后我们来到父组件 news.vue ,注册itemClick方法,然后调用goDetail,在这个方法里跳转详情页即可
<template>
  <view class="news">
    <news-item @itemClick='goDetail' :list='newsList'></news-item>
  </view>
</template>

<script>
  ......
  export default {
    ......
    methods: {
      ......
      goDetail(id){
        console.log(id)
        uni.navigateTo({
          url:'/pages/news-detail/news-detail?id='+id
        })
      }
    },
    ......
  }
</script>
......
然后我们创建详情页,新建 news-detail.vue 组件,我们在 onLoad 中接收传过来的值,然后调用详情的接口,由于我们这里没有资讯详情的接口,所以我们先调用商品详情的接口,下一节我们完成商品详情时,直接使用这个页面即可
<template>
  <view class="news_detail">

  </view>
</template>

<script>
  export default {
    data() {
      return {
        id:0,
        detail:{}
      }
    },
    methods: {
      async getDetail(){
        const res = await this.$myRequest({
          url:'/api/public/v1/goods/detail',
          data: {
            goods_id: this.id
          }
        })
        this.detail = res.data.message
        console.log(res)
      },
    },
    onLoad(options) {
      this.id = options.id
      this.getDetail()
    }
  }
</script>

<style>

</style>
商品详情
在首页,点击商品列表中的商品要跳转商品详情,所以我们在 goods_list.vue 中增加 click 方法,点击商品调用 this.$emit触发父组件的goodsItemClick,同时把 goods_id 传过去
<template>
  <view class="goods_list">
    <view class="goods_item" v-for="item in goods" @click="navigator(item.goods_id)">
      ......
    </view>
  </view>
</template>

<script>export default {
    ......
    methods:{
      navigator(id){
        console.log(id)
        this.$emit('goodsItemClick',id)
      }
    }
  }</script>
在首页中,goods-list 组件中注册goodsItemClick方法,触发这个方法时,调用页面中的 goGoodsDetail 方法
<goods-list @goodsItemClick='goGoodsDetail' :goods='goods'></goods-list>
//导航到商品详情
      goGoodsDetail(id){
        uni.navigateTo({
          url:'/pages/goods_detail/goods_detail?id='+id
        })
      }
需要新建 goods_detail 页面,完整代码如下:
<template>
  <view class="goods_detail">
    <swiper indicator-dots>
      <swiper-item v-for="(item,index) in swipers" :key="index">
        <image :src="item.pics_mid_url"></image>
      </swiper-item>
    </swiper>
    <view class="box1">
      <view class="price">
        <text>¥{{message.goods_price}}</text>
        <text>¥8788</text>
      </view>
      <view class="goods_name">{{message.goods_name}}</view>
    </view>
    <view class="line"></view>
    <view class="box2">
      <view>库存:{{message.goods_number}}</view>
      <view>重量:{{message.goods_weight}}</view>
    </view>
    <view class="line"></view>
    <view class="box3">
      <view class="tit">详情介绍</view>
      <view class="content">
        <rich-text :nodes="message.goods_introduce"></rich-text>
      </view>
    </view>
  </view>
</template>

<script>export default {
    data() {
      return {
        id:0,
        swipers:[],
        message:{}
      }
    },
    methods: {
      async getGoodsDetail(){
        const res = await this.$myRequest({
          url:'/api/public/v1/goods/detail',
          data: {
            goods_id: this.id
          }
        })
        console.log(res)
        this.swipers = res.data.message.pics
        this.message = res.data.message
      },
    },
    onLoad(options) {
      this.id = options.id
      console.log(this.id)
      this.getGoodsDetail()
    }
  }</script>

<style lang="scss">.goods_detail{
  swiper{
    height: 700rpx;
    image{
      width: 100%;
      height: 100%;
    }
  }
  .box1{
    padding: 10px;
    .price{
      font-size: 35rpx;
      color: $shop-color;
      line-height: 80rpx;
      text:nth-child(2){
        font-size: 30rpx;
        color: #ccc;
        text-decoration: line-through;
        margin-left: 20rpx;
      }
    }
    .goods_price{
      font-size: 32rpx;
      line-height: 60rpx;
    }
  }
  .line{
    width: 750rpx;
    height: 10rpx;
    background:#eee;
  }
  .box2{
    padding: 0 10px;
    font-size: 32rpx;
    line-height: 70rpx;
  }
  .box3{
    .tit{
      font-size: 32rpx;
      padding-left: 10px;
      border-bottom: 1px solid #eee;
      line-height: 70rpx;
    }
    .content{
      font-size: 28rpx;
      padding: 10px;
      line-height: 50rpx;
    }
  }
}</style>
首先,在 onLoad 中拿到传过来的 id,然后调用获取商品详情的接口,打印看下返回数据结构如下:

商品详情页分为了三个部分,导航,商品名称,商品介绍这三部分
首先使用 swiper 组件,在其中使用 v-for 来循环 swiper-item 组件来展示商品轮播图
然后在第二部分展示商品名称等内容
最后在第三部分使用rich-text富文本显示组件来展示商品详情的介绍
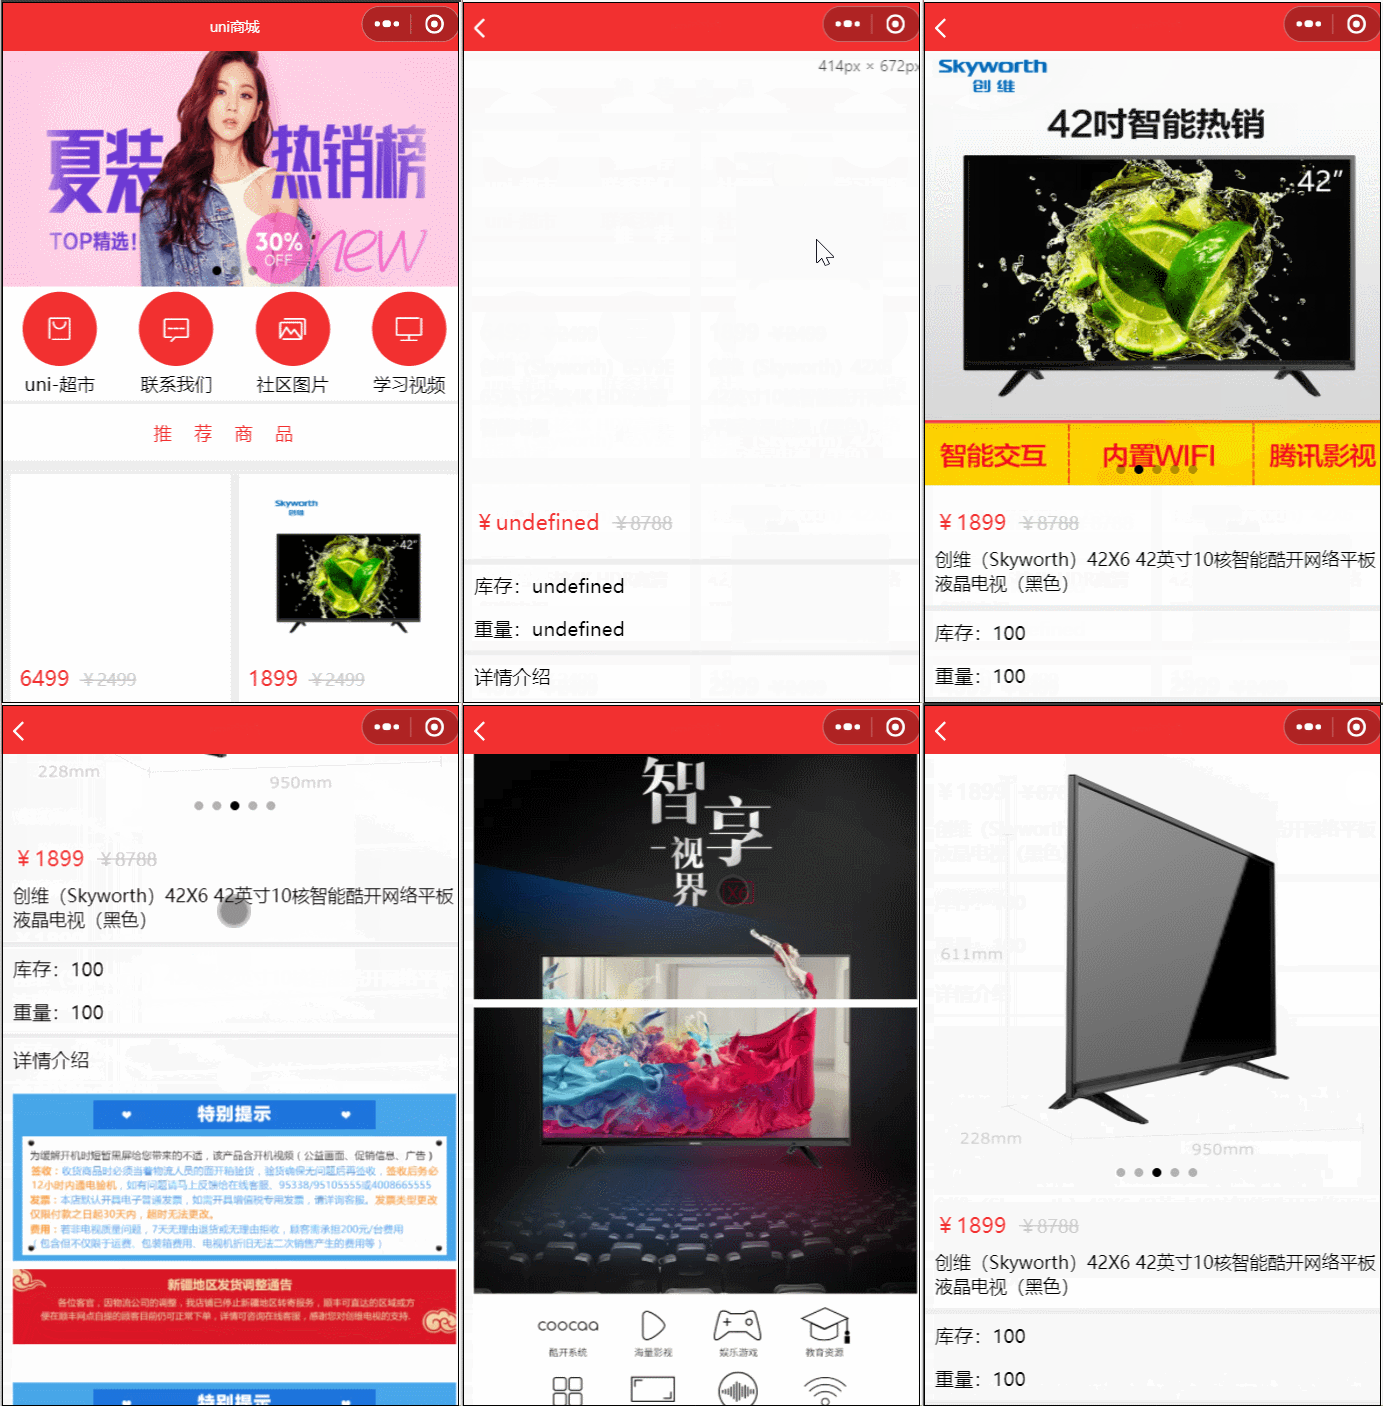
最后运行程序如下:

最后,底部需要有一个商品导航,我们可以直接用官网提供的扩展组件:uni-goods-nav
商品导航
商品详情完成后还差底部的商品导航,我们不需要自己写,有现成的扩展组件:uni-goods-nav 商品导航,在页面可以点击下载&安装
点击绿色按钮使用HBuilderX导入插件,在HBuilderX中选中我们的项目,导入成功后,我们在 goods_detail.vue 中直接使用即可,我们可以先把官网的基本用法的代码粘过来,看看效果:
<template>
  <uni-goods-nav :fill="true"  :options="options" :buttonGroup="buttonGroup"  @click="onClick" @buttonClick="buttonClick" />
</template>
<script>

export default {
  data () {
    return {
      options: [{
      icon: 'headphones',
      text: '客服'
    }, {
      icon: 'shop',
      text: '店铺',
      info: 2,
      infoBackgroundColor:'#007aff',
      infoColor:"red"
    }, {
      icon: 'cart',
      text: '购物车',
      info: 2
    }],
      buttonGroup: [{
        text: '加入购物车',
        backgroundColor: '#ff0000',
        color: '#fff'
      },
      {
        text: '立即购买',
        backgroundColor: '#ffa200',
        color: '#fff'
      }
      ]
    }
  },
  methods: {
    onClick (e) {
      uni.showToast({
        title: `点击${e.content.text}`,
        icon: 'none'
      })
    },
    buttonClick (e) {
      console.log(e)
      this.options[2].info++
    }
  }
}
</script>
我们运行来看看效果,点击进入商品详情页,发现只有把商品介绍拉到底部商品导航才能展示出来:

我们修改代码,将组件用view包裹,同时改变层级:
<view class="goods_nav">
    <uni-goods-nav :fill="true"  :options="options" :buttonGroup="buttonGroup"  @click="onClick" @buttonClick="buttonClick" />
</view>
修改样式:
.goods_nav{
    position: fixed;
    bottom: 0;
    width: 100%;
}
现在样式正常了,但是拉到底部好像把详情遮挡了一些,所以我们修改 box3 的样式,增加一个 padding-bottom 即可
我们对其中的参数进行介绍:
首先看data中的options,对应左侧的客服、店铺、购物车这三个图标按钮,可以修改图片和文字以及角标。buttonGroup对应着右侧的加入购物车和立即购买这两个按钮
然后我们来看方法onClick,是左侧三个按钮点击时所触发的事件,它们三个共用这个事件怎么区分呢?我们可以来打印下其中的参数 e
onClick (e) {
    console.log(e)
}
分别点击客服、店铺、购物车,打印内容如下:

所以,我们可以根据 index 来区分点击的是左侧的哪个按钮
而 buttonClick 则是右侧按钮的点击事件。可以用同样的方法进行区分


