文章目录
创建组件
在 uni-app 中,可以通过创建一个后缀名为vue的文件,即创建一个组件成功,其他组件可以将该组件通过import的方式导入,在通过components进行注册即可。我们来试一下:
我们在项目中新建 components 目录,同时在其中创建 test.vue 文件,这样一个组件就创造好了

我们在 index.vue 中使用它:
<template>
  <view class="content">
    <test></test>
  </view>
</template>

<script>import test from "@/components/test.vue"
  export default {
    components:{
      test
    }
  }</script>

组件生命周期
<script>
  export default {
    name:"test",
    data() {
      return {
        num:3
      };
    },
    beforeCreate() {
      console.log("beforeCreate","在实例初始化之前被调用")
      console.log(this.num)
    },
    created() {
      console.log("created","实例创建完成")
      console.log(this.num)
    }
  }
</script>
打印结果:
beforeCreate 在实例初始化之前被调用
undefined
created 实例创建完成
3
可以看到在 beforeCreate时,数据其实还没有初始化,所以打印结果是 undefined
create时,实例创建完成,所以打印出了结果 3
我们接着看:
<template>
  <view id="myview">
    这是一个test组件
  </view>
</template>

<script>export default {
    ......
    beforeMount() {
      console.log("beforeMount",document.getElementById('myview'))
    },
    mounted() {
      console.log("beforeMount",document.getElementById('myview'))
    }

  }</script>
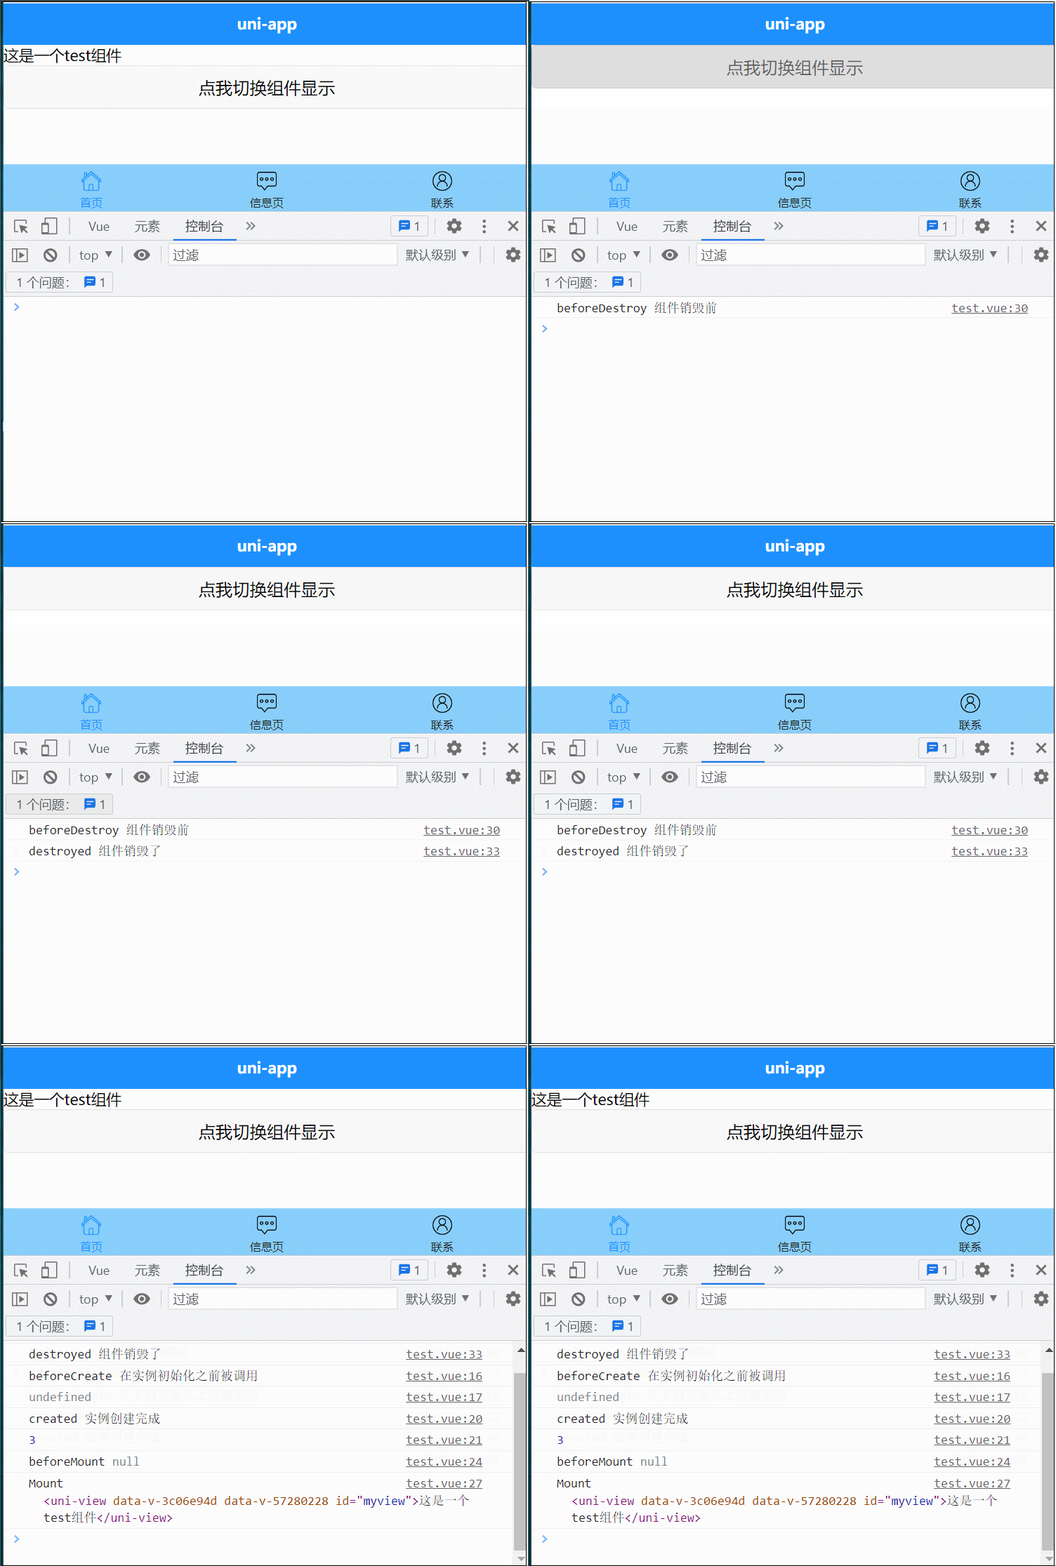
为了看效果,我们运行程序到浏览器,查看打印结果:

可以看到beforeMount时,组件还没有渲染到页面上
mounted时,组件就渲染到页面上了,所以在这个方法里操作 dom
beforeUpdate和updated仅H5平台支持,也就是在数据更新前后调用,这里不做演示
我们来演示 beforeDestroy 和 destroyed,首先修改 index.vue,使用一个变量来隐藏或显示 test 组件,然后增加一个按钮来改变这个变量的值
<view class="content">
    <test v-if="flag"></test>
    <button @click="changeFlag">点我切换组件显示</button>
  </view>
</template>

<script>
  import test from "@/components/test.vue"
  export default {
    components:{
      test
    },
    data(){
      return{
        flag:true
      }
    },
    methods:{
      changeFlag(){
        this.flag = !this.flag
      }
    }
  }
</script>

<style>
</style>
然后在 test.vue 中打印这两个生命周期变化
beforeDestroy() {
      console.log("beforeDestroy","组件销毁前")
    },
    destroyed() {
      console.log("destroyed","组件销毁了")
    }
来看下运行结果:

总结:
create可以在其中初始化一些数据
mounted可以在其中操作dom
destoryed可以来销毁定时器,可以这样写:
<script>export default {
    name:"test",
    data() {
      return {
        initId:null
      };
    },
    created() {
      this.initId = setInterval(()=>{
        console.log("执行定时器")
      },1000)
    },
    destroyed() {
      clearInterval(this.initId)
    }
  }</script>
组件之间的通讯方式
父给子组件传值
我们继续在上边的 index.vue 中写,我们把一个值为 “Hello” 的变量 title 传给 test 组件。使用 :title=‘title’传递给 test 组件。其中第一个 :title 相当于 key,在 test 组件中接收时,就用相同的 key 接收,当然可以起别的名字,相应的 test 组件用对应的名字接收即可。这里为了规范,我们就使用 title。后边引号内的 title 是要传递的值
<template>
  <view class="content">
    <test :title="title"></test>
  </view>
</template>

<script>import test from "@/components/test.vue"
  export default {
    components:{
      test
    },
    data(){
      return{
        title:'Hello'
      }
    }
  }</script>
在 test 组件内使用 props 接收
<template>
  <view>
    这是一个test组件{{title}}
  </view>
</template>

<script>export default {
    name:"test",
    props:["title"]
  }</script>
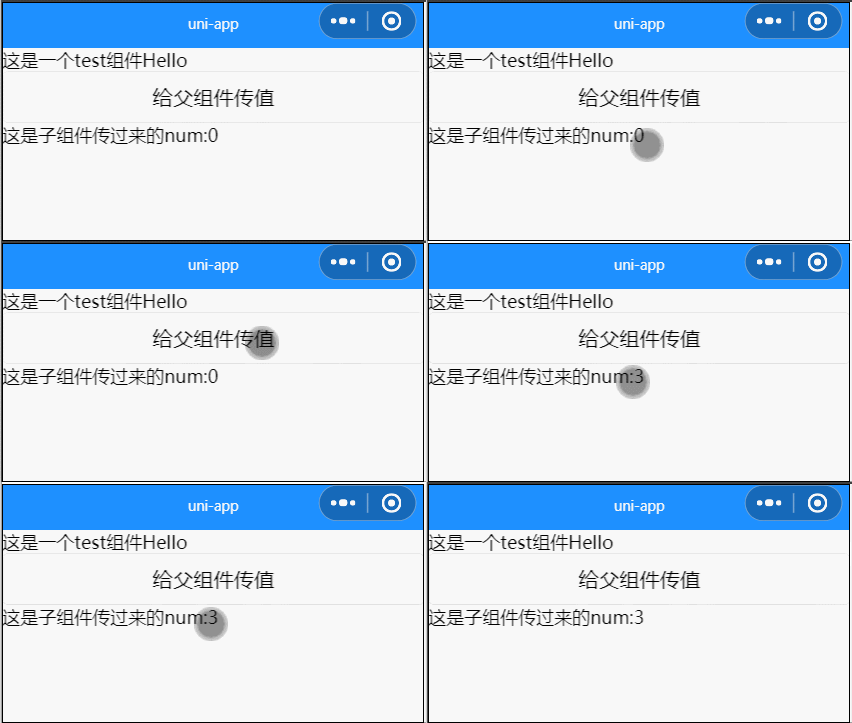
运行程序:

子给父组件传值
在 test.vue 中增加一个按钮,并添加点击事件,点击后使用this.$emit给父组件传值,第一个参数是自定义事件,这个需要在父组件增加对应方法。第二个参数就是要传过去的值
<template>
  <view>
    ......
    <button @click="sendNum">给父组件传值</button>
  </view>
</template>

<script>export default {
    name:"test",
    data(){
      return{
        num:3
      }
    },
    methods:{
      sendNum(){
        this.$emit("myEvent",this.num)
      }
    },
    ......
  }</script>
在父组件 index.vue 中,使用子组件的地方注册子组件中的自定义事件@myEvent="getNum",当子组件触发 myEvent 方法时,会调用父组件的 getNum 方法,在这个方法中,我们接收传过来的参数即可拿到子组件传的数据:
<template>
  <view class="content">
    <test :title="title" @myEvent="getNum"></test>
    这是子组件传过来的num:{{num}}
  </view>
</template>

<script>import test from "@/components/test.vue"
  export default {
    components:{
      test
    },
    data(){
      return{
        ......
        num:0
      }
    },
    methods:{
      getNum(num){
        this.num = num
      }
    }
  }</script>

兄弟组件传值
思路是由 uni.$on来注册一个全局的自定义事件,然后由 uni.$emit 触发。我们新建 a.vue 和 b.vue,并在 index.vue 中使用
修改 index.vue
<template>
  <view class="content">
    <test-a></test-a>
    <test-b></test-b>
  </view>
</template>

<script>import testA from "@/components/a.vue"
  import testB from "@/components/b.vue"
  export default {
    components:{
      "test-a":testA,
      "test-b":testB
    }
  }</script>
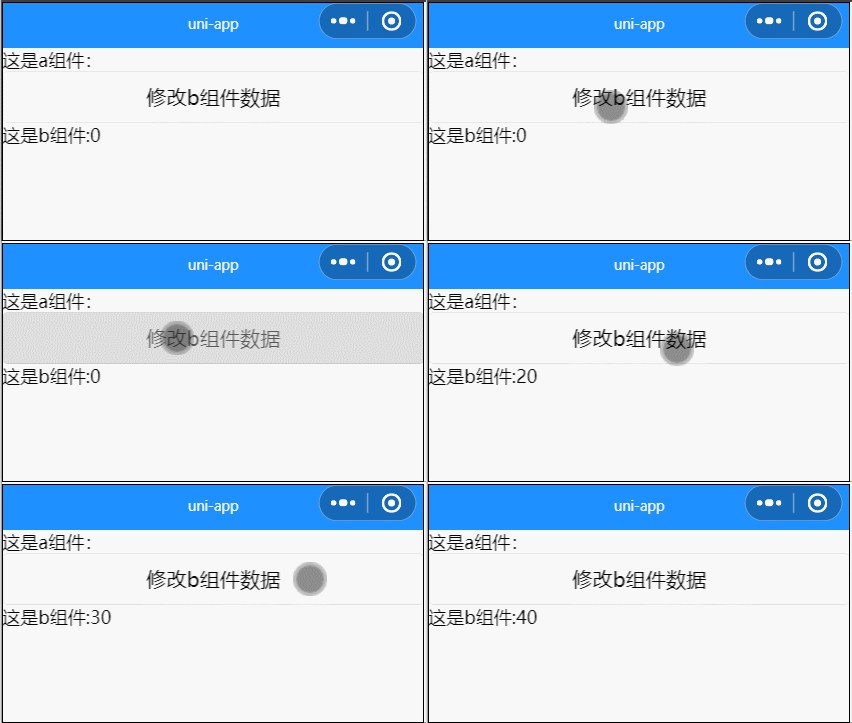
我们希望通过 a 、b 组件间通讯,通过 a 修改 b 中的 num 值。所以我们在 b 组件中注册一个事件,当有人触发事件时,修改 b 中 num 的值,传的参数是多少 num 就 += 多少
<template>
  <view>
    这是b组件:{{num}}
  </view>
</template>

<script>export default {
    name:"b",
    data() {
      return {
        num:0
      };
    },
    created() {
      uni.$on('updateNum',num=>{
        this.num+= num
      })
    }
  }</script>
a.vue 中我们给 button 增加点击事件,通过uni.$emit调用在 b 组件中定义的方法 updateNum,并传入参数 10,所以每次点击按钮 b 中的 num 就增加 10

uni-ui组件库的介绍和使用
uni-ui是DCloud提供的一个跨端ui库,它是基于vue组件的、flex布局的、无dom的跨全端ui框架
uni-ui不包括基础组件,它是基础组件的补充
我们来演示下使用日历组件, 点击下载&安装跳转 uni-calendar 日历页面,点击使用 HBuilderX 导入插件按钮

如果刚才的页面登录了账号的话,会打开 HBuilder 的这个页面,选择我们的项目导入日历插件(如果没有打开这个页面,请看下一小节的错误解决)

这样根目录下会增加 uni-calendar 目录和文件

我们在 index.vue 中使用下,直接放入以下代码即可:
<uni-calendar
    :insert="true"
    :lunar="true"
    :start-date="'2019-3-2'"
    :end-date="'2019-5-20'"
    @change="change"
     />
运行:

uni_modules处理外部应用请求未能完成
如果上一小节安装日历插件,HBuilder 有如下提示:


可以尝试打开工具——插件安装,找到 uni_modules 进行卸载

然后在安装新插件选项卡中,找到 uni_modules 重新安装即可


