
lamp的源码安装
lamp 环境搭建
httpd 2.4
mysql 5.6
php 5.4
1.先将apr的源码 传递给linux
2.如果牵扯到源码的安装的话,就需要检测域编辑环境,必须检测四个开发组件是否存在。开发工具,开发库,软件开发(传统软件开发、图形软件开发)
3.检测四个开发组
[root@localhost ~]# vim /etc/yum.repds.d/rhel-debuginfo.repo
[root@localhost ~]#
[root@localhost ~]# yum grouplist
Loaded plugins: rhnplugin, security
This system is not registered with RHN.
RHN support will be disabled.
Setting up Group Process
Development Libraries开发库
Development Tools开发工具
X Software Development图形界面软件开发
Legacy Software Development传统界面软件开发
4.接下来安装httpd myaql php
php需要建成httpd的模块,php必须调用与mysql
5.将最新的包传到linux
[root@localhost ~]# ll
total 6524
drwxr-xr-x 2 root root 4096 Apr 12 07:59 Desktop
-rw------- 1 root root 1175 Apr 11 22:10 anaconda-ks.cfg
-rw-r--r-- 1 root root 982243 Apr 14 02:17 apr-1.4.6.tar.gz
-rw-r--r-- 1 root root 829779 Apr 14 02:17 apr-util-1.5.1.tar.gz
-rw-r--r-- 1 root root 4780289 Apr 14 02:17 httpd-2.4.4.tar.bz2
-rw-r--r-- 1 root root 35236 Apr 11 22:10 install.log
-rw-r--r-- 1 root root 3995 Apr 11 22:09 install.log.syslog
如果想要正常的配置编译和安装httpd-2.4.4,就必须先安装apr可移植运行库。
apr-1.4.6.tar.gz(主要包含一些库)
apr-util-1.5.1.tar.gz(主要包含一些工具)
先安装库,在安装工具
注意:若系统中已安装过apr,则需要先卸载掉
\
6.[root@localhost ~]# cd /usr/local/src/
[root@localhost src]# ll
total 8
drwxr-sr-x 25 5000 10001 4096 Feb 8 07:17 apr-1.4.6
drwxr-xr-x 19 500 1000 4096 Sep 8 2012 apr-util-1.5.1
[root@localhost src]# cd apr-1.4.6/
[root@localhost apr-1.4.6]# ls
CHANGES apr.dep build.conf emacs-mode memory tables
LICENSE apr.dsp buildconf file_io misc test
Makefile apr.dsw config.layout helpers mmap threadproc
Makefile.in apr.mak config.log include network_io time
Makefile.win apr.pc config.nice libapr.dep passwd user
NOTICE apr.pc.in config.status libapr.dsp poll
NWGNUmakefile apr.spec configure libapr.mak random
README atomic configure.in libapr.rc shmem
apr-1-config build docs libtool strings
apr-config.in build-outputs.mk dso locks support
目录中有configure和README文件
7.先查看安装路径默认在哪里
Installation directories:
--prefix=PREFIX install architecture-independent files in PREFIX
[/usr/local]
注意:local类似与一个公共目录,如果大家都把可运行的一些文件都放到它的目录下,会显得比较混乱。所以再专门为它写个名字
[root@localhost apr-1.4.6]# ./configure --help | less
[root@localhost apr-1.4.6]#
[root@localhost apr-1.4.6]# ./configure --prefix=/usr/local/apr
如果大家想要了解更多的关于APR的知识,就到apache的官网上去查看一下。
8.make makeinstall
在目录中会生成很多文件
[root@localhost ~]# cd /usr/local/apr
[root@localhost apr]# ll
total 16
drwxr-xr-x 2 root root 4096 Apr 14 06:35 bin
drwxr-xr-x 2 root root 4096 Apr 14 06:35 build-1
drwxr-xr-x 3 root root 4096 Apr 14 06:34 include
drwxr-xr-x 3 root root 4096 Apr 14 06:35 lib
bin中包含一些二进制的可执行文档
lib包含一些库文件
include包含一些头文件
9.[root@localhost src]# cd apr-util-1.5.1/
[root@localhost apr-util-1.5.1]# ls
CHANGES README buckets configure encoding libaprutil.rc uri
LICENSE apr-util.pc.in build configure.in export_vars.sh.in memcache xlate
Makefile.in apr-util.spec build-outputs.mk crypto hooks misc xml
Makefile.win aprutil.dsp build.conf dbd include renames_pending
NOTICE aprutil.dsw buildconf dbm ldap strmatch
NWGNUmakefile apu-config.in config.layout docs libaprutil.dsp test
Makefile.in/Makefile.win configure
有makefile文件,所以必须make,在make之前,先进行配置
--with-apr=PATH prefix for installed APR or the full path to
apr-config
安装好了apr-1.5.1
10. $ ./configure --prefix=PREFIX
$ make
$ make install
$ PREFIX/bin/apachectl start
11.pcre的安装
[root@localhost ~]# yum install pcre
Loaded plugins: rhnplugin, security
This system is not registered with RHN.
RHN support will be disabled.
Setting up Install Process
Package pcre-6.6-2.el5_1.7.i386 already installed and latest version
Nothing to do
[root@localhost ~]# yum list all | grep pcre
12.--enable-so DSO 动态共享对象
--enable-ssl 让我们的apache能够支持ssl
--enable-rewrite 支持重定向的时候使用
--with-apr 指明虚拟机,为了让阿帕更好的移植,需要一个虚拟机的概念,路径为apr-config
--with-apr-util apr可移植的工具,路径为apu-config
--with-pcre 若不使用,则容易报错
--with-z z就是zlib 是一个压缩库,通过网络传送网页的时候,为了优化,则可以实行压缩技术。
--enable-mpms-shared=all 包含了所有的模块
全部选择之后,运行。
然后make makeinstall
13.切换到apache
[root@localhost httpd]# cd /usr/local/apache/
[root@localhost apache]# ll
total 52
drwxr-xr-x 2 root root 4096 May 2 13:56 bin
drwxr-xr-x 2 root root 4096 May 2 13:56 build
drwxr-xr-x 2 root root 4096 May 2 13:56 cgi-bin
drwxr-xr-x 3 root root 4096 May 2 13:56 error
drwxr-xr-x 2 root root 4096 May 2 13:14 htdocs
drwxr-xr-x 3 root root 4096 May 2 13:56 icons
drwxr-xr-x 2 root root 4096 May 2 13:56 include
drwxr-xr-x 2 root root 4096 May 2 13:56 logs
drwxr-xr-x 4 root root 4096 May 2 13:56 man
drwxr-xr-x 14 root root 12288 Feb 19 04:28 manual
drwxr-xr-x 2 root root 4096 May 2 13:56 modules
14.[root@localhost apache]# cd man
[root@localhost man]# ll
total 8
drwxr-xr-x 2 root root 4096 May 2 13:57 man1
drwxr-xr-x 2 root root 4096 May 2 13:57 man8
15.[root@localhost man]# vim /etc/man.config
[root@localhost apache]# ln -s /usr/local/apache/include /usr/include/apache
[root@localhost man]# man apachectl
16.安装mysql
先将安装包插入到linux中,mysql-5.6.10.tar.gz
然后解压
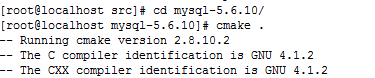
Cmake
跨平台make 作用就和configure的一样
安装cmake
安装源代码的具体步骤
Shell> groupadd mysql
Shell> useradd -r -g mysql mysql
Shell> cd /usr/local
Shell> tar zxvf /path/to/mysql-VEREION-OS.tar.gz
Shell> ln -s full-path/to/mysql-VERSION-OS. Mysql
Shell> cd mysql
Shell> chown -R mysql .
Shell> chgrp -R mysql .
Shell> scripts/mysql_install_db --user=mysql
Shell> chown -R root
Shell> chown -R mysql data
# Next command is optional
Shell> cp support-files/my-medium.cnf /etc/my.cnf
Shell> bin/mysql_safe --user=mysql &
# Next command is optional
Shell> cp support-files/mysql.server /etc/init.d/mysql.server
[root@localhost cmake-2.8.10.2]# make && make install
之后make && make install
可能需要20分钟左右的时间,大家要耐心等待。
[root@localhost mysql-5.6.10]# cd /usr/local/mysql/
[root@localhost mysql]# groupadd mysql
groupadd: group mysql exists
[root@localhost mysql]# useradd -r -g mysql mysql
useradd: user mysql exists
[root@localhost mysql]# chown -R mysql .
[root@localhost mysql]# chgrp -R mysql .
[root@localhost mysql]# scripts/mysql_install_db --user=mysql
[root@localhost mysql]# chown -R root .
[root@localhost mysql]# chown -R mysql data
[root@localhost mysql]# cd support-files/
[root@localhost support-files]# ls
binary-configure my-default.cnf mysql.server solaris
magic mysql-log-rotate mysqld_multi.server
[root@localhost support-files]# cp my-default.cnf /etc/my.cnf
cp: overwrite `/etc/my.cnf'?
[root@localhost support-files]# cp mysql.server /etc/init.d/mysqld
cp: overwrite `/etc/init.d/mysqld'?
[root@localhost support-files]# chmod a+x /etc/init.d/mysqld
[root@localhost support-files]# service mysqld start
Starting MySQL: [ OK ]


