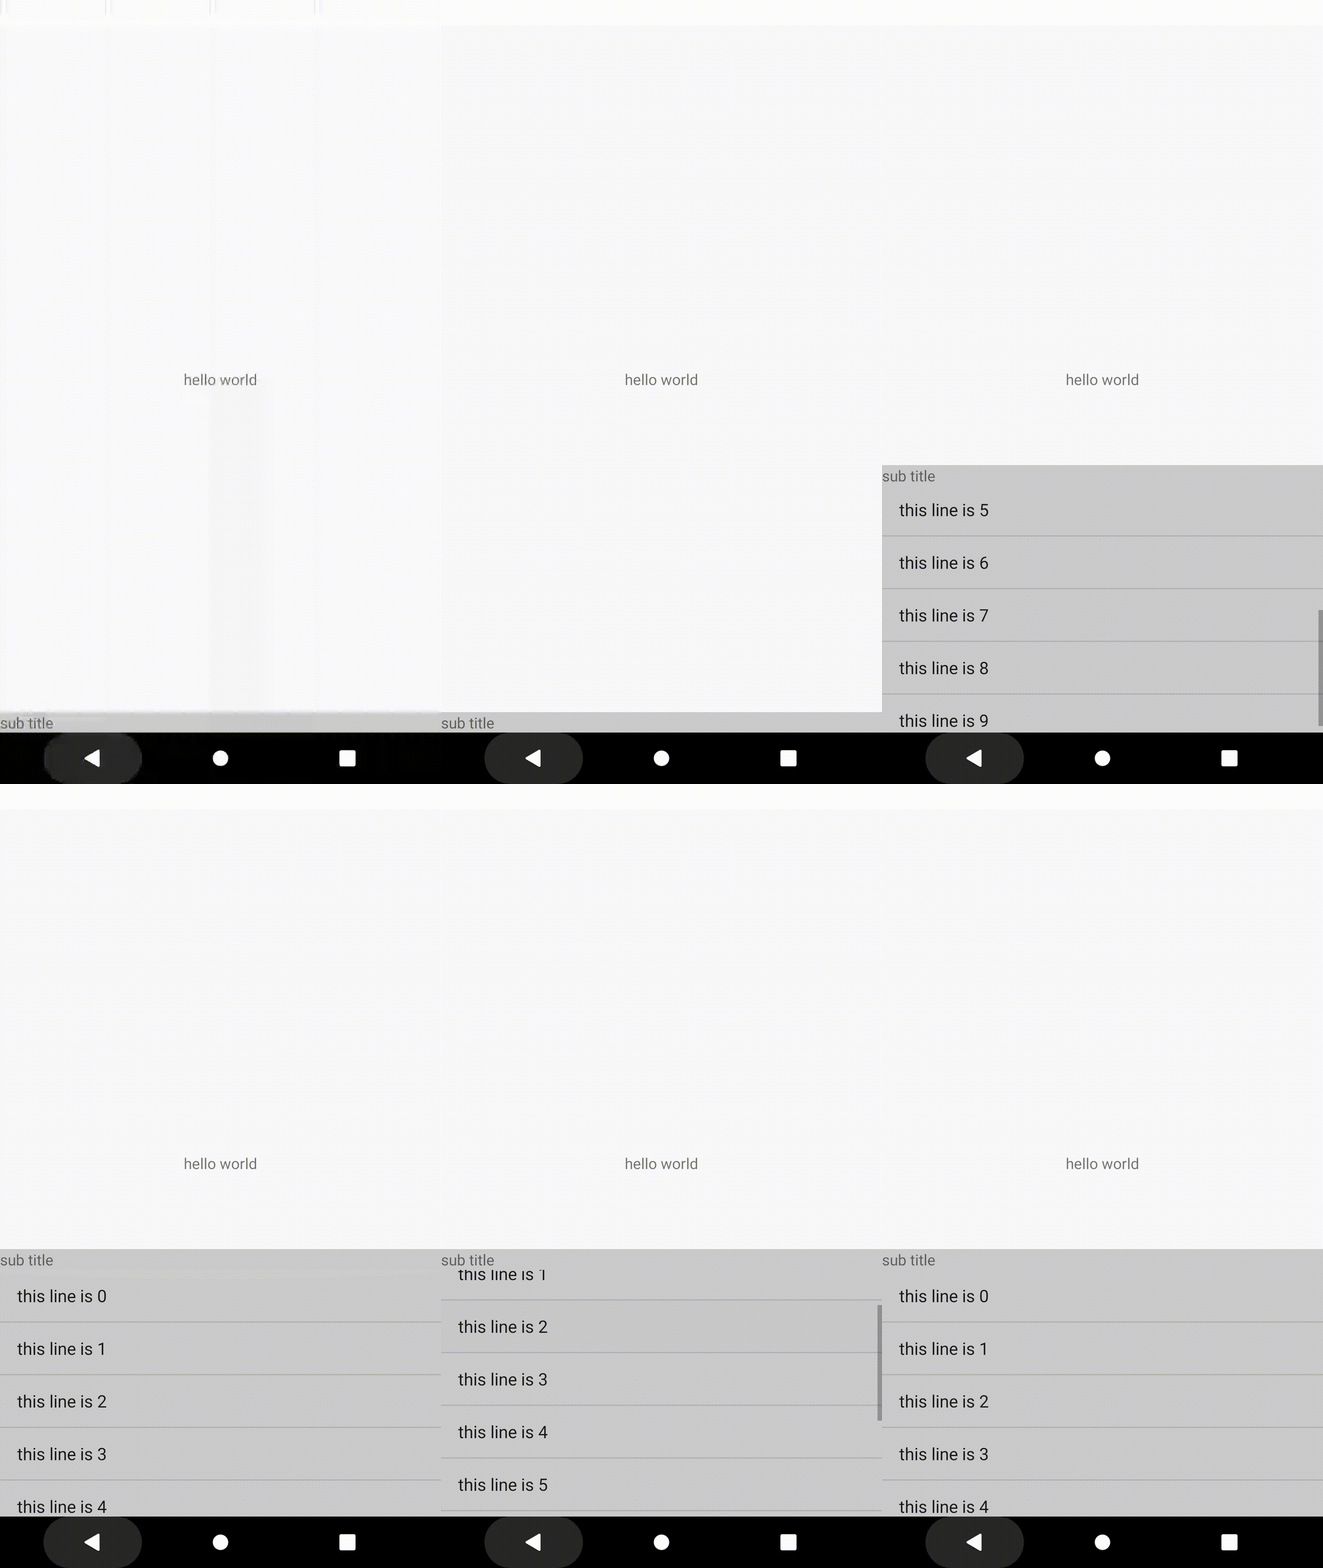
Android的事件传递机制是处理控件触摸等事件需要基本掌握的,而且网上资料也很多,本文只是简要介绍一下。而前一段时间在项目中对于滑动控件的嵌套使用导致内部控件的滑动受到影响,因此,本文重点介绍一下滑动控件嵌套使用时的冲突解决。
首先,介绍一下事件传递机制,Android的事件分发与传递过程是在Activity、ViewGroup、View中进行传递的,主要涉及dispatchTouchEvent()、onInterceptTouchEvent()、onTouchEvent()三个方法。
dispatchTouchEvent:方法返回为true表示事件被当前视图消费掉,返回为false表示交给父类的onTouchEvent处理,返回为super.dispatchTouchEvent表示继续向下分发该事件。
onInterceptTouchEvent:该方法在ViewGroup中才有,方法返回为true表示拦截这个事件并交由自己的onTouchEvent方法进行处理,返回为false表示不拦截,需要继续传递给子视图。如果返回super.onInterceptTouchEvent,事件拦截分两种情况:
- 如果该ViewGroup存在子View且点击到了该子View,则不拦截,继续分发给子View 处理(相当于return false)。
- 如果该ViewGroup没有子View或者有子View但是没有点击子View(此时ViewGroup相当于普通View),则交由该ViewGroup的onTouchEvent处理(相当于return true)。
onTouchEvent:方法返回为true表示事件被当前视图消费掉;返回为false表示当前视图不处理这个事件,它会被传递给父视图的onTouchEvent方法进行处理。如果return super.onTouchEvent(ev),事件处理分为两种情况:
- 如果该View是clickable或者longclickable的,则表示消费了该事件, 与返回true一样。
- 如果该View不是clickable或者longclickable的,则表示不消费该事件,将会向上继续传递,与返回false一样。
下面给出一个表示事件传递流程的图:

按照View的树形结构,dispatchTouchEvent的事件传递流程是从上往下传的,即Activity --> ViewGroup --> View;而onTouchEvent的事件传递流程是从下往上传的,即View --> ViewGroup --> Activity。
通过上述事件传递的流程,可知处理子控件与父控件的事件冲突,可以通过重写上面的三种方法,控制事件的传递或消费。
处理控件的滑动冲突一般有两种实现方式:
- 外部拦截法:点击事件都先经过父控件的拦截处理,如果父控件需要此事件就拦截,否则就不拦截。具体实现:重写父控件的onInterceptTouchEvent方法,在内部做出相应的拦截。
- 内部拦截法:父控件不拦截任何事件,而将所有的事件都传递给子控件,如果子控件需要此事件就直接消耗,否则就交由父控件进行处理。具体实现:通过在子控件中调用requestDisallowInterceptTouchEvent(true)方法,就不会执行父控件的onInterceptTouchEvent,即可将事件传递到子控件。
上述两种方式可根据实际需求选择合适的实现方法。
下面根据一个实例给出内部拦截法具体如何使用。
该实例以页面的底部滑动栏通过CoordinatorLayout布局作为父控件,内部嵌套ListView的方式实现。底部滑动栏的实现通过CoordinatorLayout与BottomSheetBehavior的结合使用实现,本文不做具体讲解。

下面先看一下Activity的实现:
public class ScrollActivity extends AppCompatActivity {
    private LinearLayout bottomLayout;
    private MyListView listView;

    @Override
    protected void onCreate(@Nullable Bundle savedInstanceState) {
        super.onCreate(savedInstanceState);
        setContentView(R.layout.activity_scroll);

        bottomLayout = findViewById(R.id.bottom_layout);
        listView = findViewById(R.id.listView);

        initView();
    }

    private void initView() {
        BottomSheetBehavior bottomSheetBehavior = BottomSheetBehavior.from(bottomLayout);
        bottomSheetBehavior.setState(BottomSheetBehavior.STATE_COLLAPSED);
        bottomSheetBehavior.setFitToContents(true);
        bottomSheetBehavior.setPeekHeight(50);

        List<String> list = new ArrayList<>();
        for (int i = 0; i < 10; i++) {
            list.add("this line is " + i);
        }

        listView.setAdapter(new ArrayAdapter<>(this, android.R.layout.simple_list_item_1,
                android.R.id.text1, list));
    }
}
layout布局文件的实现:
<?xml version="1.0" encoding="utf-8"?>
<RelativeLayout xmlns:android="http://schemas.android.com/apk/res/android"
    xmlns:app="http://schemas.android.com/apk/res-auto"
    android:layout_width="match_parent"
    android:layout_height="match_parent">

    <TextView
        android:layout_width="wrap_content"
        android:layout_height="wrap_content"
        android:layout_centerInParent="true"
        android:text="hello world" />

    <android.support.design.widget.CoordinatorLayout
        android:layout_width="match_parent"
        android:layout_height="match_parent">

        <LinearLayout
            android:id="@+id/bottom_layout"
            android:layout_width="match_parent"
            android:layout_height="wrap_content"
            android:background="#CCCCCC"
            android:orientation="vertical"
            app:layout_behavior="android.support.design.widget.BottomSheetBehavior">

            <TextView
                android:layout_width="wrap_content"
                android:layout_height="wrap_content"
                android:text="sub title" />

            <com.test.view.MyListView
                android:id="@+id/listView"
                android:layout_width="match_parent"
                android:layout_height="230dp" />

        </LinearLayout>

    </android.support.design.widget.CoordinatorLayout>

</RelativeLayout>
对于冲突的解决关键是MyListView的实现,它继承自ListView,并覆写了其dispatchTouchEvent方法:
public class MyListView extends ListView {

    public MyListView(Context context) {
        super(context);
    }

    public MyListView(Context context, AttributeSet attrs) {
        super(context, attrs);
    }

    @Override
    public boolean dispatchTouchEvent(MotionEvent ev) {
        if (canScrollVertically(this)) {
            getParent().requestDisallowInterceptTouchEvent(true);
        }
        return super.dispatchTouchEvent(ev);
    }

    public boolean canScrollVertically(AbsListView view) {
        boolean canScroll = false;
        if (view != null && view.getChildCount() > 0) {
            //判断是否在ListView顶部,即第一个Item完全可见
            boolean isOnTop = view.getFirstVisiblePosition() == 0
                    && view.getChildAt(0).getTop() == 0;

            if (!isOnTop) { //不在顶部,即ListView可向上滑动
                canScroll = true;
            }
        }

        return canScroll;
    }
}
通过在canScrollVertically()方法中判断ListView是否已经在顶部来确定ListView是否需要向上滑动,如果不在顶部,则ListView可以向上滑动,此时调用requestDisallowInterceptTouchEvent(true)方法告诉父控件由子控件ListView来处理此事件。
其实,在本例中ListView可以使用RecyclerView替代,而且无需自定义控件来拦截事件,因为RecyclerView本身就做了类似的处理,查看其源码可以看到也是使用requestDisallowInterceptTouchEvent(true)方法实现的。
最后,看一下源码中对requestDisallowInterceptTouchEvent方法的说明,它定义在ViewParent.java接口类中:
/**
     * Called when a child does not want this parent and its ancestors to
     * intercept touch events with
     * {@link ViewGroup#onInterceptTouchEvent(MotionEvent)}.
     *
     * <p>This parent should pass this call onto its parents. This parent must obey
     * this request for the duration of the touch (that is, only clear the flag
     * after this parent has received an up or a cancel.</p>
     *
     * @param disallowIntercept True if the child does not want the parent to
     *            intercept touch events.
     */
    public void requestDisallowInterceptTouchEvent(boolean disallowIntercept);
该方法可以对父控件和祖先控件都起作用。


