
cacti文档
简介:
cacti是用php语言实现的一个软件,它的主要功能是用snmp服务获取数据,然后用rrdtool(Round Robin Database,环形数据库),储存和更新数据,当用户需要查看数据的时候用rrdtool生成图表呈现给用户。
Mysql配合PHP程序存储一些变量数据并对变量数据进行调用,如:主机名、主机ip、snmp团体名、端口号、模板信息等变量。 snmp抓到数据不是存储在mysql中,而是存在rrdtool生成的rrd文件中(在cacti根目录的rra文件夹下)。rrdtool对数据的更新和存储就是对rrd文件的处理,rrd文件是大小固定的档案文件(Round Robin Archive),它能够存储的数据笔数在创建时就已经定义。
cacti架构(cacti的英文意思是仙人掌)
Cacti是一个c/s架构的,他主要监网络接口流量,监控CPU的负载,内存使用,磁盘空间等,还监控服务器中的WEB、mail、ftp、数据库等,当然还能监控网络设备性能,配置文件,路由数,以及机房温度,电压,湿度,风扇,电源,等运行状态。
安装步骤:
一.需要安装的包:
yum install net-snmp net-snmp-utils net-snmp-devel net-snmp-libs php-mysql mysql-devel rrdtool-php php-snmp lib-tool autoconf automake make libxml2-devel php-gd php-xml net-snmp-utils httpd (呵呵,有点多啊,但是这总比在安装时遇到蛋疼的依赖和报各种错好得多)
二.配置snmp
参考文档地址:http://www.cyberciti.biz/nixcraft/linux/docs/uniqlinuxfeatures/mrtg/
/etc/init.d/snmpd start
snmpwalk -v 1 -c public localhost IP-MIB::ipAdEntIfIndex
#若没有snmpwalk命令,则yum install net-snmp-utils
Timeout: No Response from localhost #若输出结果为此则对snmp进行配置
vim /etc/snmp/snmpd.conf
Find line:
com2sec notConfigUser default public替代为:
com2sec local localhost public
com2sec mynetwork 192.168.0.0/24 public
Find lines:
group notConfigGroup v1 notConfigUser
group notConfigGroup v2c notConfigUser
Replace with:
group MyRWGroup v1 local
group MyRWGroup v2c local
group MyRWGroup usm local
group MyROGroup v1 mynetwork
group MyROGroup v2c mynetwork
group MyROGroup usm mynetwork
Find line:
view systemview included system
Replace with:
view all included .1 80
Find line:
access notConfigGroup "" any noauth exact systemview none none
Replace with:
access MyROGroup "" any noauth exact all none none
access MyRWGroup "" any noauth exact all all none
/etc/init.d/snmpd reload
snmpwalk -v 1 -c public localhost IP-MIB::ipAdEntIfIndex
会得到如下结果:
IP-MIB::ipAdEntIfIndex.127.0.0.1 = INTEGER: 1
IP-MIB::ipAdEntIfIndex.192.168.0.46 = INTEGER: 6
三.安装cacti
tar -zxf cacti-0.8.7h.tar.gz -C /var/www/html/cacti
1.配置mysql
/etc/init.d/mysqld start
shell>mysqladmin create cacti
cd /var/www/html/cacti
shell>mysql cacti < cacti.sql #导入数据库
2.创建用户cactiuser
shell>mysql -uroot -ppassword
mysql>grant all on cacti.* to cactiuser@localhost identified by "cacti";
mysql>flush privileges;
3.编辑include/config.php指定数据库类型、名字、主机、用户、和密码
cd /var/www/html/cacti/include
vim config.php
$database_type = "mysql";
$database_default = "cacti";
$database_hostname = "localhost";
$database_username = "cactiuser";
$database_password = "cacti";
$database_port = "3306";
$database_ssl = false;
4.设置权限
chown -R cactiuser.cactiuser rra/ log/
5.在/etc/crontab中添加一行
*/5 * * * * cactiuser php /var/www/html/cacti/poller.php
6.用browser浏览
http://ip/cacti/

登录,默认用户名和密码均为admin
四.spine的安装
Spine is a very fast poller engine, written in C. It is an optional replacement for cmd.php. If you decide to use it, you will have to install it explicitely. It does not come with cacti itself.
The easiest way is to install Spine using rpm or ports. You will find packages for Spine at the main cacti site or from your distribution.To compile Spine, please download it to any location of your liking. Then, please issue from the downloaded directory following commands
spine 是一个由C语言编写的非常快的轮询引擎。它是cmd.php的可选替代。使用需要安装,cacti本身不附带。cmd.php采集数据存在很大的延迟,执行效率很低。从添加设备到是被up,spine只需不到一分钟,而cmd等的时间较长,超过10分钟。当设备down后2分钟之内spine可以发出alert,而cmd可能需要10分钟以上。
shell>aclocal
shell>libtoolize --force
(glibtoolize --force on Max OS)
shell>autoheader
shell>autoconf
shell>automake
shell>./configure
shell>make
shell>make install
cd /usr/local/spine/etc
cp -p spine.conf.dist spine.conf.dist
vim spine.conf #根据实际情况配置spine
DB_Host localhost
DB_Database cacti
DB_User cactiuser
DB_Pass cacti
DB_Port 3306
DB_PreG 0
在浏览器中cacti界面
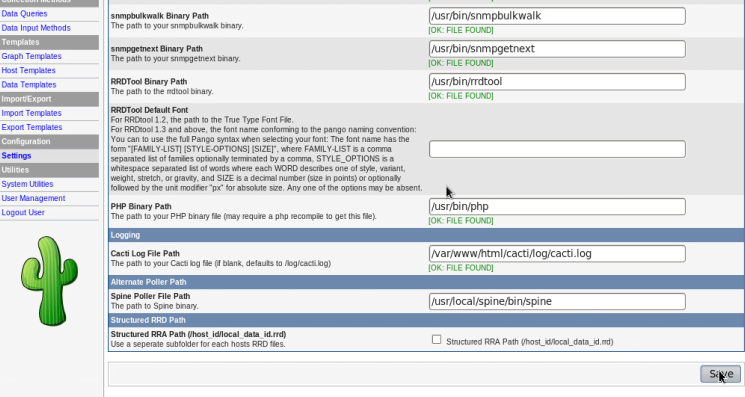
console--Settings--Paths
在Spine Poller File Path后填上“/usr/local/spine/bin/spine”,点击保存
点击上面的Poller选项
Poller Type后选择spine

五.安装插件管理补丁
0.8.8a版本及其以上不用安装此补丁,解压安装包后已有plugins目录
tar -zxf cacti-plugin-0.8.7h-PA-v3.0.tar.gz -C /var/www/html/cacti
cd /var/www/html/cacti
patch -p1 -N < cacti-plugin-0.8.7h-PA-v3.0.diff
会产生一个plugin目录
mysql cacti < pa.sql #导入数据库文件
在浏览器中操作
在左边栏选择User Management,勾选最下方的Plugin Management,点击save
左边栏的Plugin Management就能使用了
六.插件的安装
#安装settings
tar -zxf settings-v0.71-1.tgz -C /var/www/html/cacti/plugins #安装插件均解压到这个目录里
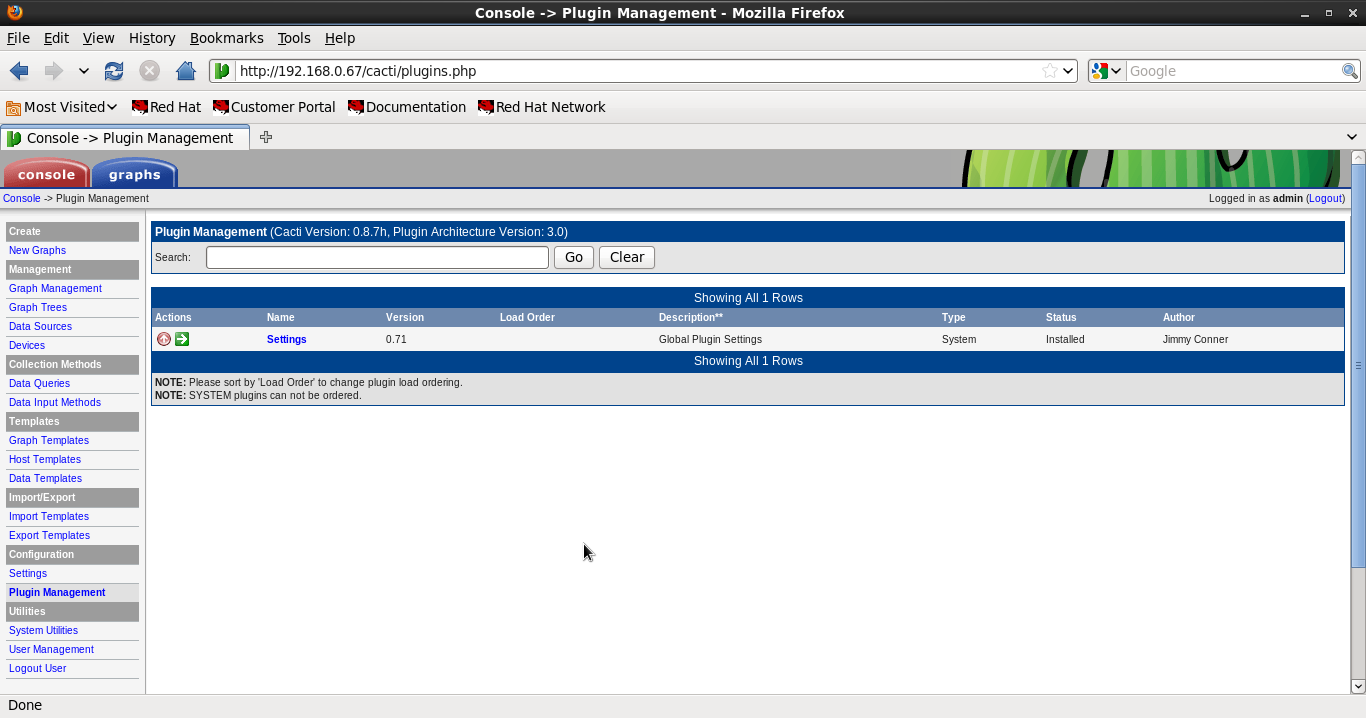
浏览器console界面,点击Plugin Management,然后一次点击安装、激活插件
安装monitor,thold过程和上面相同。

七.添加监控设备
虚拟机中的cacti监控宿主机ip为:192.168.0.46
配置46的snmp,配置文件cacti服务器一样,可以拷贝一份
然后开启snmpd服务,
在cacti服务器上检测能否取到数据,
snmpwalk -v 1 -c public 192.168.0.46 IP-MIB::ipAdEntIfIndexIP-MIB::ipAdEntIfIndex.127.0.0.1 = INTEGER: 1
IP-MIB::ipAdEntIfIndex.192.168.0.46 = INTEGER: 6
若为如上结果,则能取到数据。
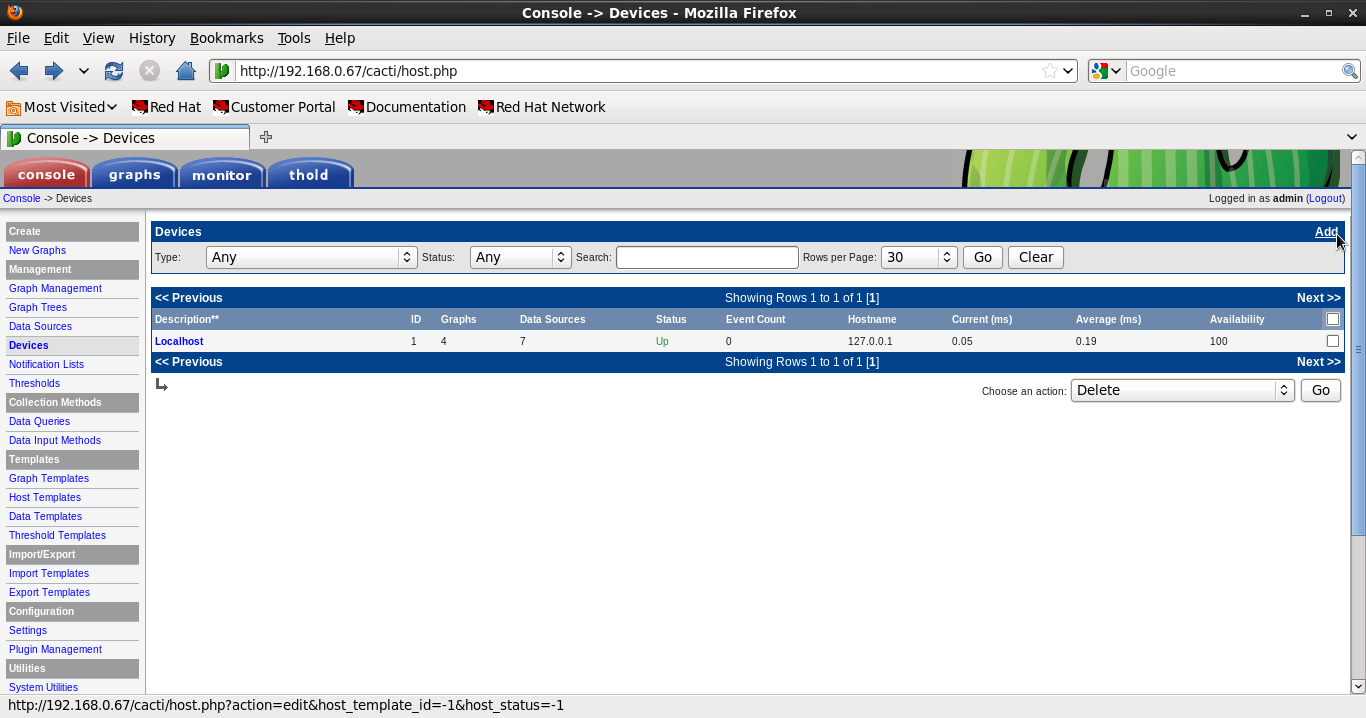
浏览器管理界面—console—Devices,点击右上角Add
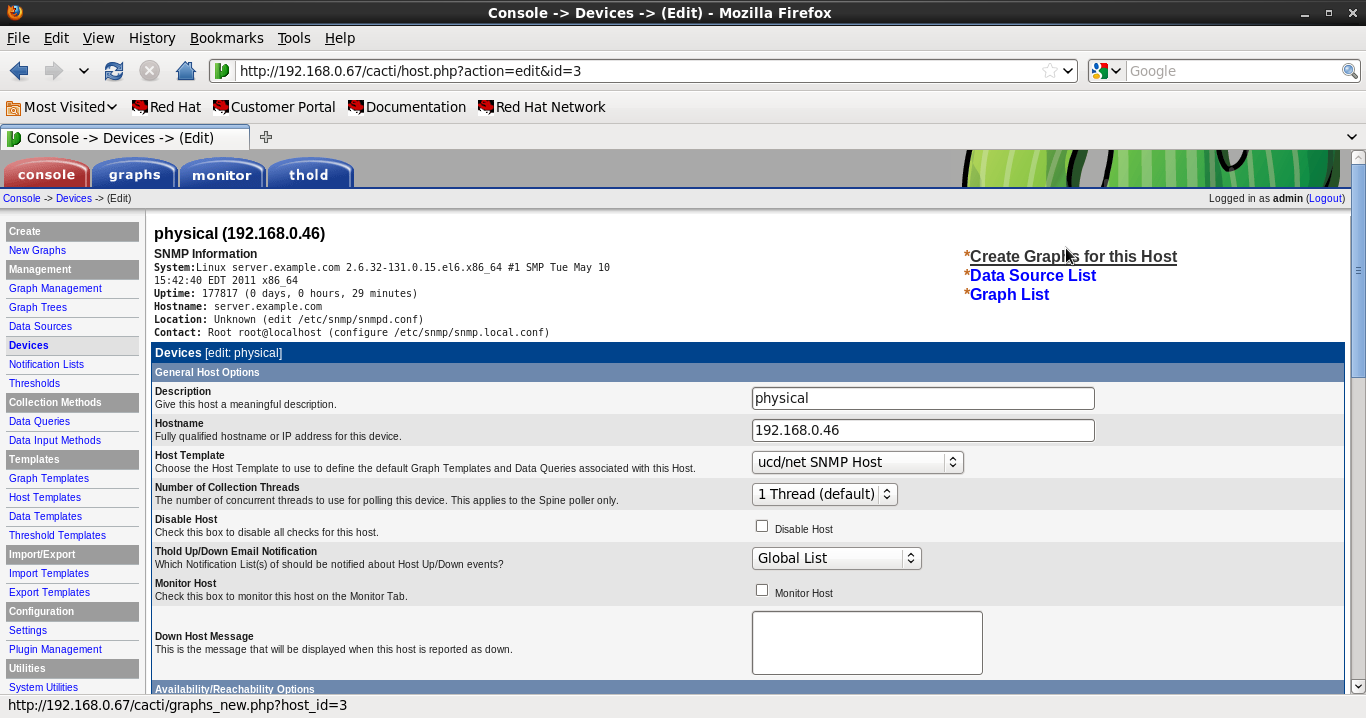
填入Description,Hostname;Host Template选择ucd/net SNMP Host,其余默认
点击create
上部出现 SNMP information则创建成功,点击右边的
Create Graphs for this Host
然后勾选所需要监控的系统信息及网卡,点create。这样就完成了所指定设备统计图的创建。

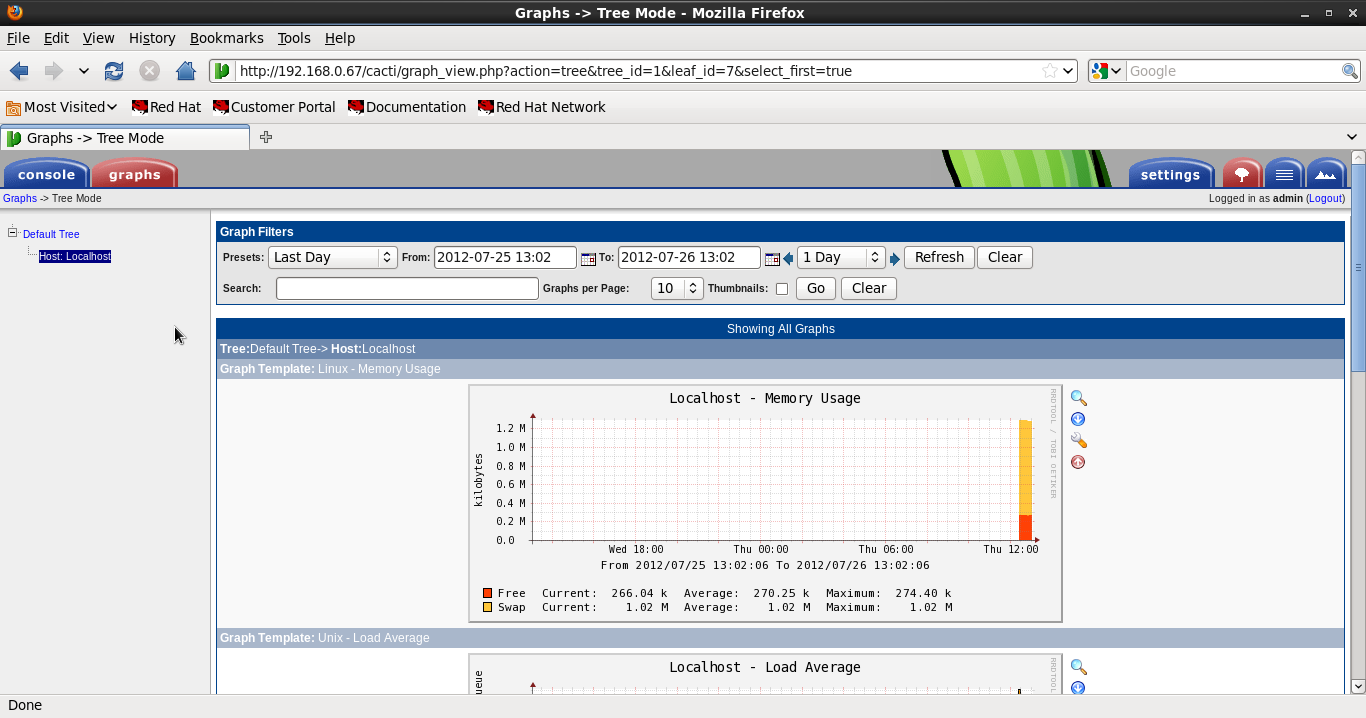
点击左边栏的Graph Management即可浏览刚才所创建的图表。
勾选需要显示graphs的条目,在右下方chose an action:选择
place on a tree(physical host)这样就就能把该图表类似快捷方式的样子粘贴到Graphs,physical(被监控主机的描述)栏目中。


