
1、在被监控主机上安装apache:
[root@localhost ~]# yum install httpd –y
[root@localhost ~]# service httpd start
[root@localhost ~]# chkconfig httpd on
2、配置apache:
[root@localhost ~]# vim /etc/httpd/conf/httpd.conf
确保177行存在:
177行 LoadModule autoindex_module modules/mod_autoindex.so
打开217行:
217行 ExtendedStatus On
3、建立虚拟主机:
<VirtualHost *:80>
<location /server-status>
SetHandler server-status
Order Deny,allow
Deny from all
Allow from all
</location>
</VirtualHost>
4、配置cacti服务器:
解压apache模板:
[root@Eleven ~]# unzip ApacheStats_0.8.2.zip
[root@Eleven ~]# cd ApacheStats_0.8.2
[root@Eleven ApacheStats_0.8.2]# ll
total 116
-rw-r--r-- 1 root root 102879 Oct 5 2009 cacti_host_template_webserver_-_apache.xml
-rw-r--r-- 1 root root 4108 Oct 5 2009 ss_apache_stats.php
[root@Eleven ApacheStats_0.8.2]# mv ss_apache_stats.php /var/www/html/cacti/scripts/
[root@Eleven ApacheStats_0.8.2]# cd /var/www/html/cacti/scripts/
5、通过web方式配置cacti监控apache:
在设备下添加新的设备:
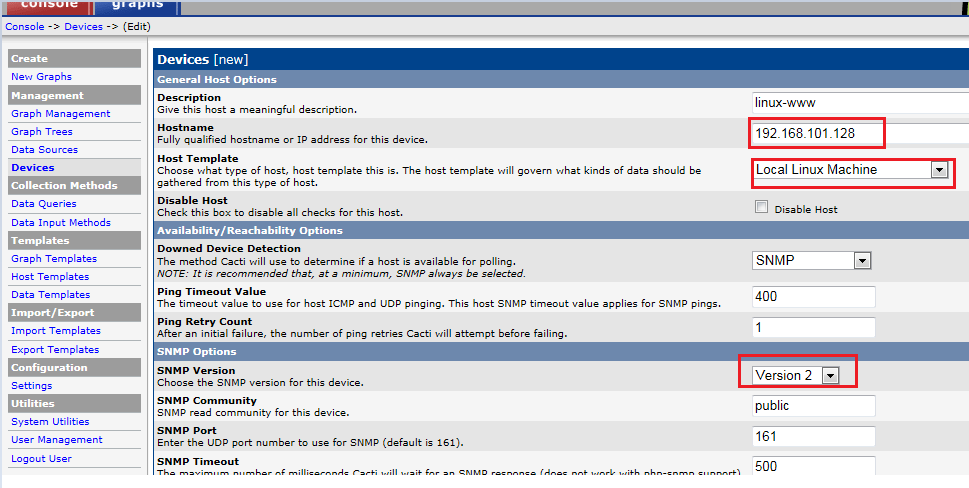
单击“create“。

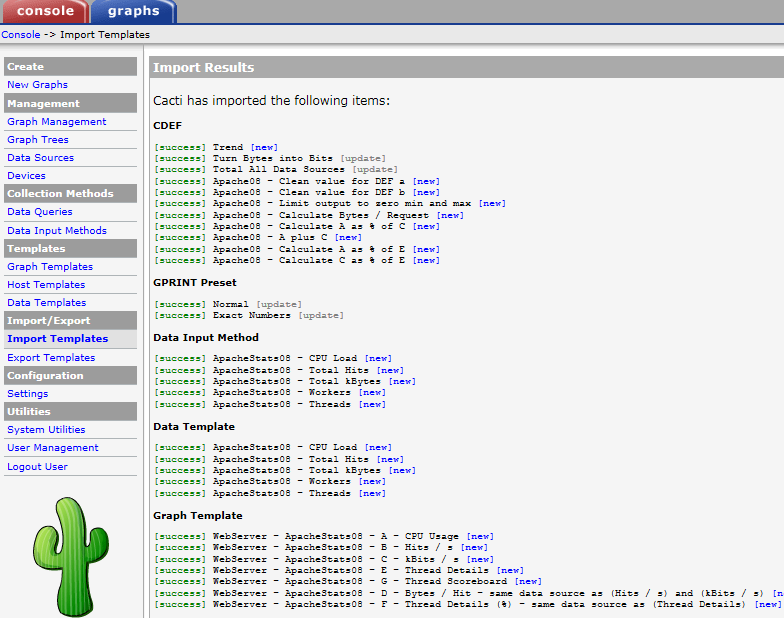
导入apache模板,即cacti_host_template_webserver_-_apache.xml:
单击“console”下的“import template”—选择“浏览”将其导入

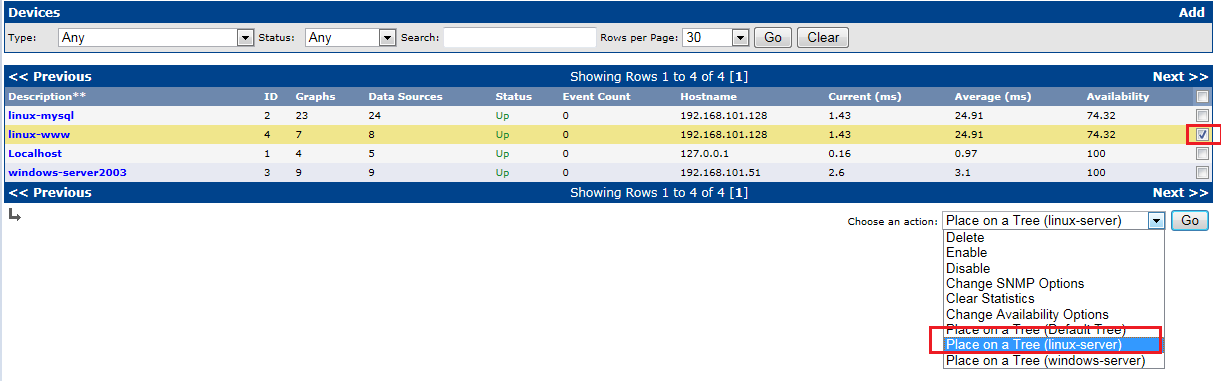
将其linux-www添加都树“linux-server”中:
选择“Devices”
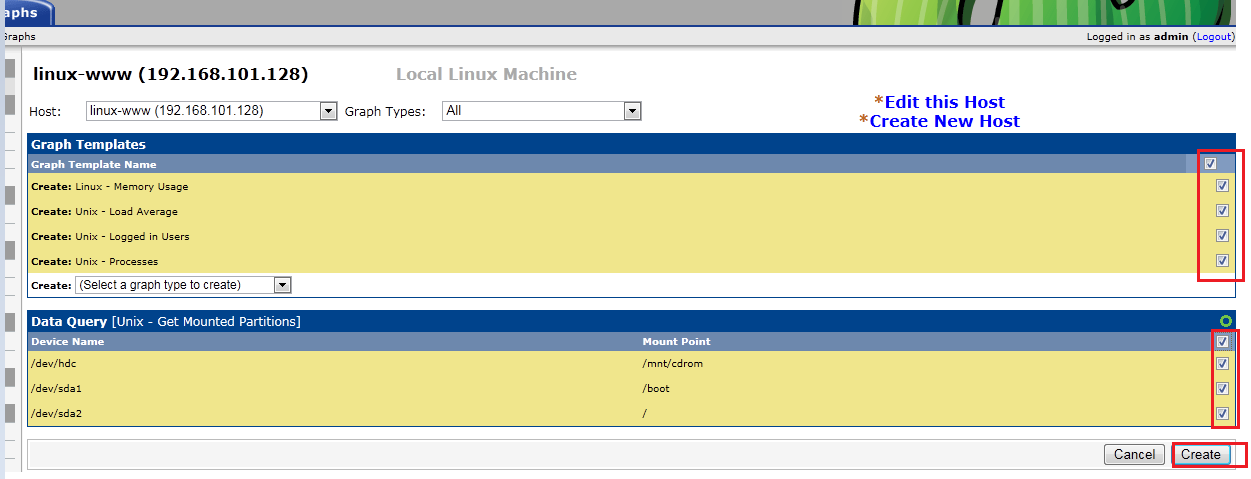
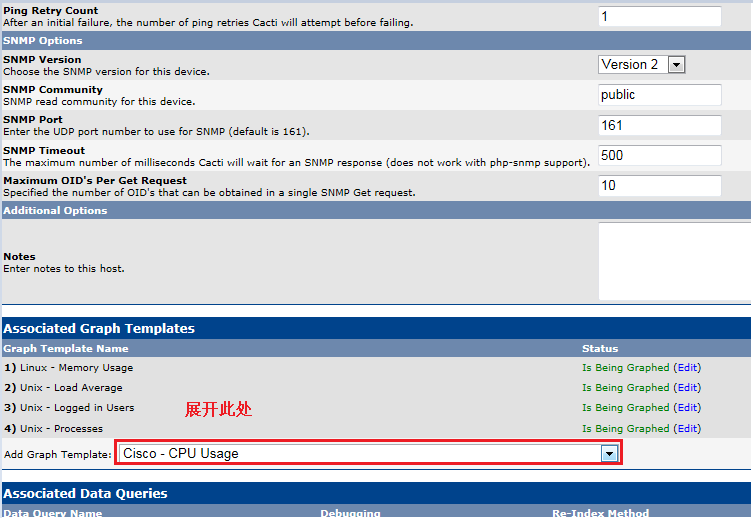
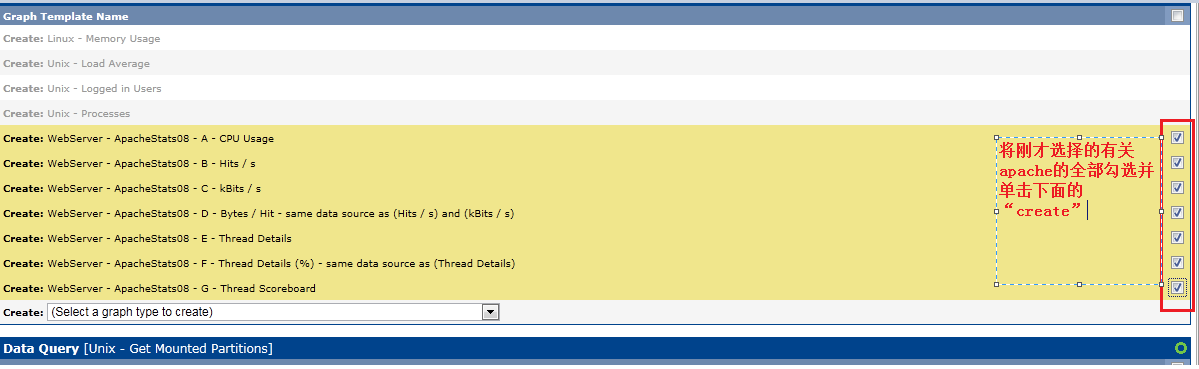
将apache模板添加到linux-www中:
再次单击“linux-www”


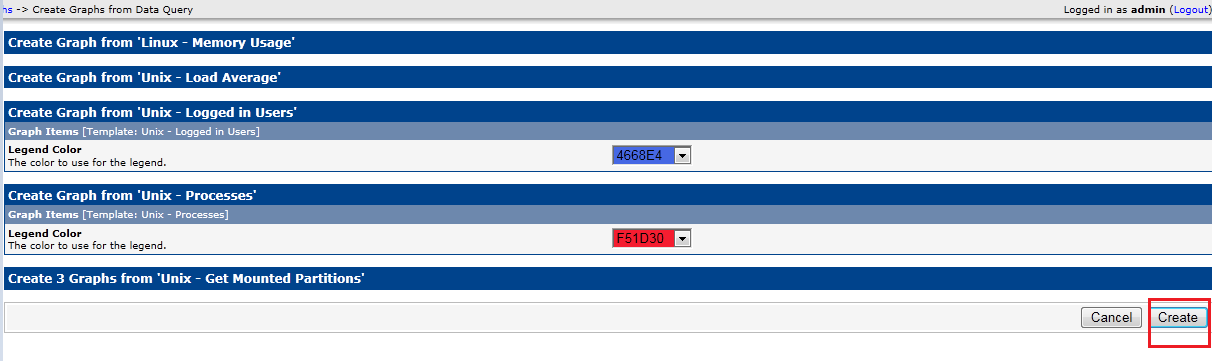
保存;

然后查看“graphs”下的“linux-server”下的“linux-www”:
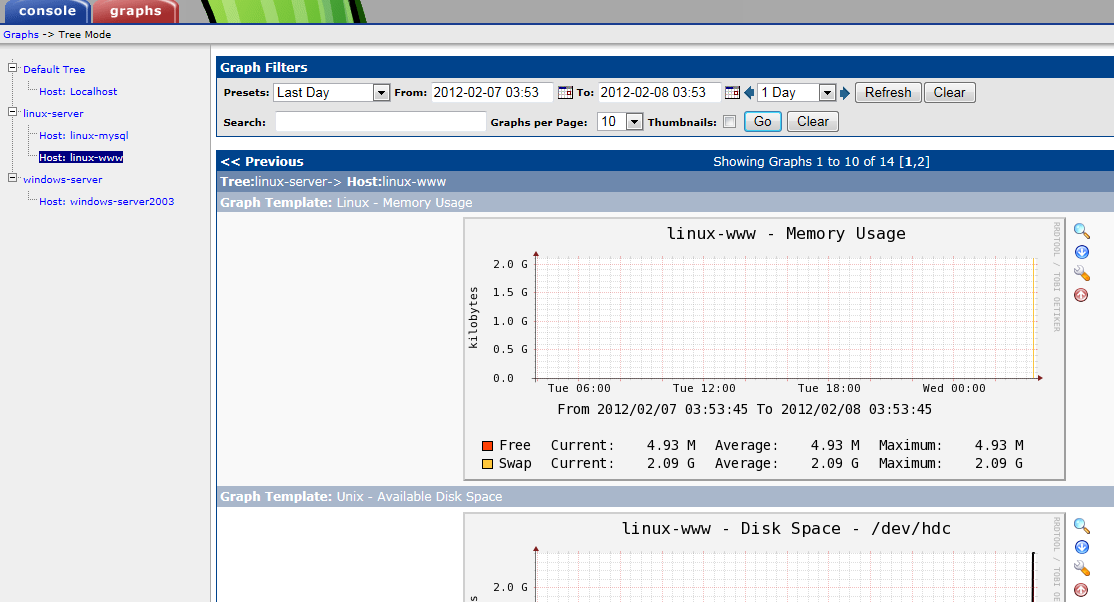
至此我们可以用cacti来监控apache了;
下篇博客介绍安装cacti的三个插件,实验环境续上篇博客


