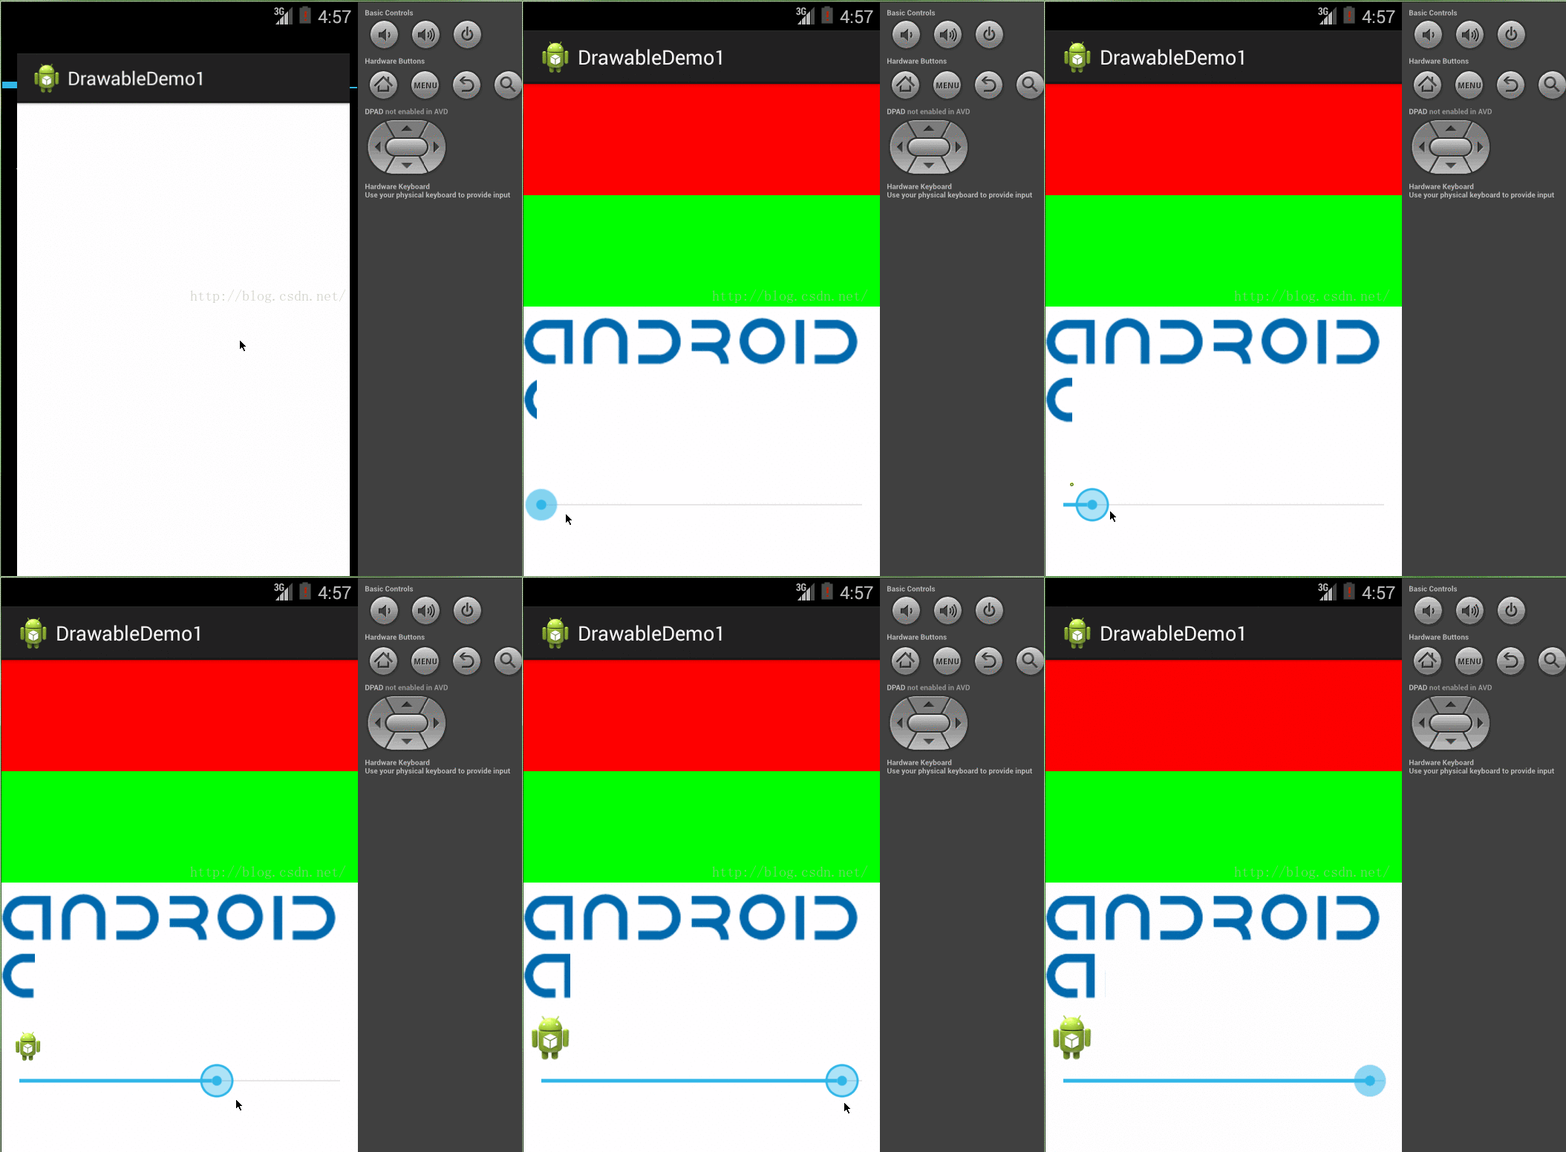
Drawable资源是Android应用中使用最广泛的资源,它不仅可以使用各种格式的图片资源,也可以使用多种xml文件资源。当然直接使用图片资源没什么好说的,我们主要是要研究下Drawable的子类。Android把可绘制的对象抽象成Drawable,并且提供了draw方法,可以在需要的时候直接绘制到画布上,我们看下官方的API

1、有点多,我们就慢慢说吧,先从最简单的一个说起——ColorDrawab,当他被绘制到画布上时会使用一种固定的颜色填充Paint,在画布上绘制出一块单色区域
- 在xml文件使用color作为根节点来创建,如下定义:
<?xml version="1.0" encoding="utf-8"?>

<color
     xmlns:android="http://schemas.android.com/apk/res/android"
     android:color="#ff0000" />
- 使用java代码则是:
ColorDrawable colorDrawable = new ColorDrawable(0xffff0000);
有一点要注意:在代码中一定要指出透明度,如果省略了就代表完全透明了
- 当然上面这些用法,其实用得不多,更多的时候我们是在res/values目录下创建一个color.xml 文件,然后把要用到的颜色值写到里面,需要的时候通过@color获得相应的值,比如:
<?xml version="1.0" encoding="utf-8"?>


<resources>


    <color name="red">#ffff0000</color>


    <color name="green">#ff00ff00</color>


    <color name="blue">#ff0000ff</color>


</resources>
然后如果是在xml文件中话我们可以通过@color/xxx获得对应的color值, 如果是在Java中:
int mycolor = getResources().getColor(R.color.green); imageview.setBackgroundColor(mycolor);
- 此外系统也定义了很多颜色供我们使用,可以直接调用
imageview.setBackgroundColor(Color.BLUE);当然,也可以获得系统颜色再设置
int color= getResources().getColor(android.R.color.holo_blue_light);imageview.setBackgroundColor(color);

     利用静态方法argb来设置颜色,Android使用一个int类型的数据表示颜色值,通常是十六进制,即0x开头,颜色值的定义是由透明度alpha和RGB(红绿蓝)三原色来定义的,以"#"开始,后面依次为: 透明度-红-绿-蓝;eg:#RGB    #ARGB  #RRGGBB  #AARRGGBB 。每个要素都由一个字节(8 bit)来表示,所以取值范围为0~255,在xml中设置颜色可以忽略透明度,但是如果你是在Java代码中的话就需要明确指出透明度的值了,省略的话表示完全透明,这个时候就没有效果了~ 比如:0xFF0000虽然表示红色,但是如果直接这样写,什么的没有,而应该这样写:0xFFFF0000,记Java代码设置颜色值,需要在前面添加上透明度~ 示例:(参数依次为:透明度,红色值,绿色值,蓝色值) txtShow.setBackgroundColor(Color.argb(0xff, 0x00, 0x00, 0x00));
2、现在,再说下BitmapDrawable,BitmapDrawable是对bitmap的一种封装,可以设置他包装的bitmap在BitmapDrawable区域内的绘制方式,例如填充、拉伸等,也可以在BitmapDrawable区域内部使用gravity指定的对齐方式

当然,和其他drawable子类一样,BitmapDrawable也有两种实现方式
- xml布局方式以bitmap作为根节点
<bitmap


    xmlns:android="http://schemas.android.com/apk/res/android"


    android:src="@drawable/ic_launcher"


     android:antialias="true"


    android:tileMode="repeat" />
- 使用java方式也很容易
BitmapDrawable bd = (BitmapDrawable) getResources().getDrawable(R.drawable.ic_launcher);


                bd.setGravity(Gravity.CENTER);


                bd.setAntiAlias(true);
3、ClipDrawabl代表从其他位图上截取的图片片段,它可以对一个Drawable进行剪切操作,可以控制这个Drawable的剪切区域,以及相对于容器的对齐方式。Android中进度条如果看下源码,就会发现他就是利用ClipDrawable实现的,它根据level的属性值决定剪切区域的大小。在xml文件中使用clip作为根节点定义,看下clip的属性

写个例子,clip.xml如下
<clip xmlns:android="http://schemas.android.com/apk/res/android"


    android:drawable="@drawable/android_text"


    android:gravity="left"


    android:orientation="horizontal" />
在xml布局文件中使用android:src属性进行引用(blackground的话可能会报空指针)。在java类中,我使用了个线程让他每隔1秒修改下level,如下使用
ImageView imageview3 = (ImageView) findViewById(R.id.iv_main_clip);


        // 获取图片所显示的ClipDrawable对象


        final ClipDrawable drawable = (ClipDrawable) imageview3.getDrawable();


        final Handler handler = new Handler() {


            @Override


            public void handleMessage(Message msg) {


                // 如果该消息是本程序所发送的


                if (msg.what == 0x1233) {


                    // 修改ClipDrawable的level值,Level的值是0~10000!


                    drawable.setLevel(drawable.getLevel() + 200);


                }


            }


        };


        new Thread() {


            public void run() {


                while (drawable.getLevel() < 10000) {


                    Message msg = new Message();


                    msg.what = 0x1233;


                    // 发送消息,通知应用修改ClipDrawable对象的level值。


                    handler.sendMessage(msg);


                    try {


                        Thread.sleep(1000);


                    } catch (InterruptedException e) {


                        // TODO Auto-generated catch block


                        e.printStackTrace();


                    }


                }


            }


        }.start();


    }
看代码就知道大概意思了,每隔一秒就将level增加200,直到大于10000
4、ScaleDrawable是对一个Drawable进行缩放操作,可以根据level属性控制这个drawable的缩放比率,也可以设置它在容器中的对齐方式。在xml文件中使用scale作为根节点来创建ScaleDrawable。节点属性如下

创建ScaleDrawable的代码如下:
<?xml version="1.0" encoding="UTF-8"?>

<scale

http://schemas.android.com/apk/res/android"

    android:drawable="@drawable/ic_launcher"

    android:scaleHeight="100%"

    android:scaleWidth="100%"

    android:scaleGravity="bottom" />
举个例子,我在java代码中通过一个SeekBar来设置level进行缩放
mDrawable = (ScaleDrawable) getResources()

                .getDrawable(R.drawable.scale);

        findViewById(R.id.iv_main_scale).setBackground(mDrawable);

        SeekBar seekBar = (SeekBar) findViewById(R.id.seekBar);

        seekBar.setMax(10000);

        seekBar.setOnSeekBarChangeListener(new OnSeekBarChangeListener() {


            public void onStopTrackingTouch(SeekBar seekBar) {

            }


            public void onStartTrackingTouch(SeekBar seekBar) {

            }


            public void onProgressChanged(SeekBar seekBar, int progress,

                    boolean fromUser) {

                mDrawable.setLevel(progress);

            }


        });
看下效果:

源代码 参考:
http://www.runoob.com/w3cnote/android-tutorial-drawable1.html


