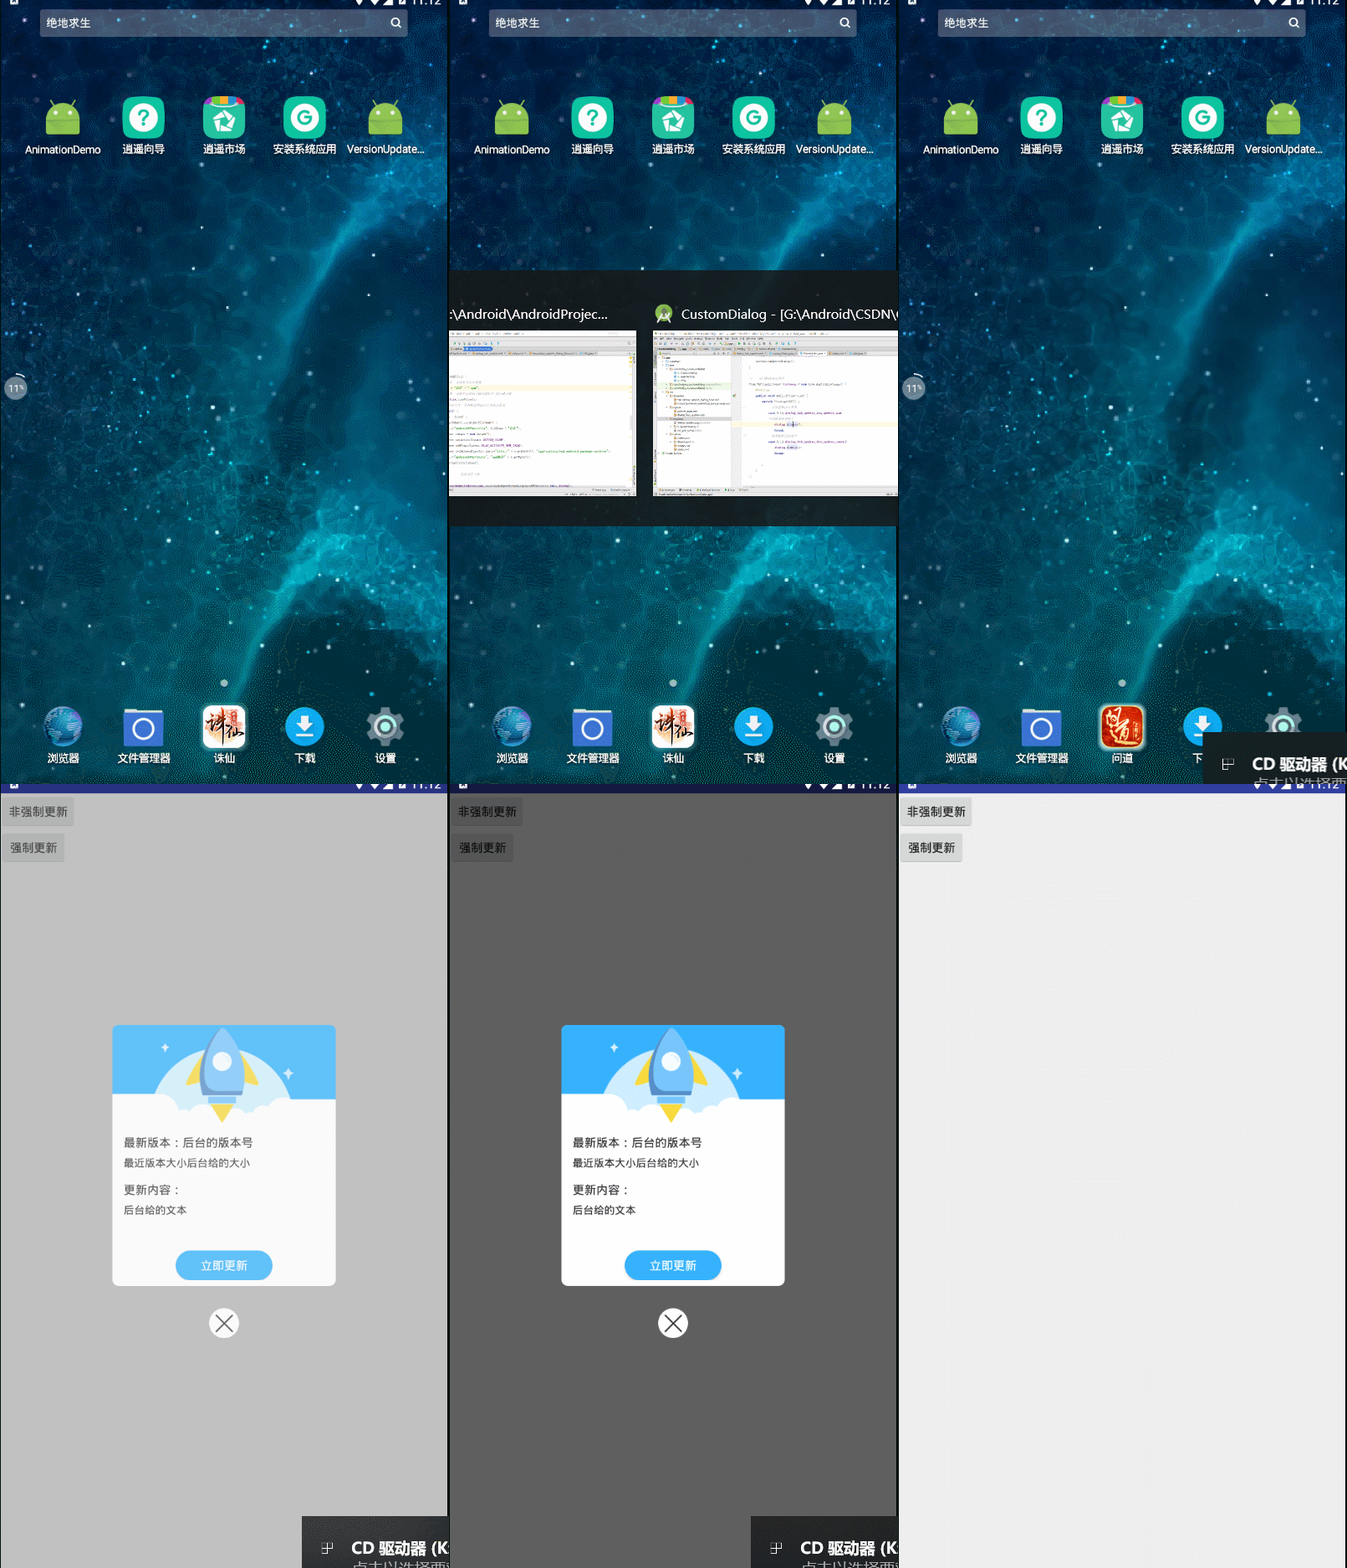
首先我们来看一下整个项目运行的效果图

上图是整个更新模块,当然做了很多处理,这里没有一一展示,有流量提醒,是否存在安装包避免重复下载等
今天我先分享一下自定义对话框,其他功能处理等下次更新
看下今天分享的效果图

就是这个一个自定义对话框,用安卓原生的对话框,着实简单不美观,而且刚好公司有需求,我就自己
定义了一个,分享给大家,希望大家能用的上,同时请各位大佬多多指教。接下来上代码
首先我们在styles文件里自定义一个风格 (在res目录下的values目录,避免新手找不到目录)
<style name="Dialog" parent="android:style/Theme.Dialog">
        <item name="android:background">@android:color/transparent</item>
        <item name="android:windowBackground">@android:color/transparent</item>
        <item name="android:windowNoTitle">true</item>
    </style>
名字可自取,然后我们自己定义一个自己想要的布局,这个布局就是对话框的布局
<?xml version="1.0" encoding="utf-8"?>
<LinearLayout
    xmlns:android="http://schemas.android.com/apk/res/android"
    xmlns:tc="http://schemas.android.com/apk/res-auto"
    android:id="@+id/popup_homework_unfinished"
    android:orientation="vertical"
    android:gravity="center"
    android:layout_width="match_parent"
    android:layout_height="match_parent">

    <LinearLayout
        android:id="@+id/unlockbook_pop_container"
        android:layout_width="300dp"
        android:layout_height="350dp"
        android:orientation="vertical"
        android:background="@drawable/round_homwork_unfinished_background">
        <ImageView
            android:id="@+id/unlockbook_pop_pop_header"
            android:layout_width="match_parent"
            android:layout_height="131dp"
            android:scaleType="fitXY"
            android:src="@mipmap/dialog_update"
            android:layout_alignParentTop="true"
            android:layout_alignParentLeft="true"
            android:layout_alignParentStart="true" />


        <ScrollView
            android:id="@+id/dialog_hxb_update_scrollView"
            android:layout_width="match_parent"
            android:layout_height="160dp">
            <LinearLayout
                android:layout_width="match_parent"
                android:layout_height="160dp"
                android:orientation="vertical">

        <TextView
            android:id="@+id/dialog_hxb_update_TV_new_version"
            android:layout_width="wrap_content"
            android:layout_height="wrap_content"
            android:layout_marginTop="15dp"
            android:layout_marginLeft="15dp"
            android:textSize="14sp"
            android:text="最新版本:V1.1.0"
            android:textColor="#333333"
            />
        <TextView
            android:id="@+id/dialog_hxb_update_TV_new_version_size"
            android:layout_width="wrap_content"
            android:layout_height="wrap_content"
            android:layout_marginTop="7dp"
            android:layout_marginLeft="15dp"
            android:textSize="12sp"
            android:text="新版本大小:17.6M"
            android:textColor="#333333"
            />
                <TextView
                    android:layout_width="wrap_content"
                    android:layout_height="wrap_content"
                    android:layout_marginTop="15dp"
                    android:layout_marginLeft="15dp"
                    android:textSize="14sp"
                    android:text="更新内容:"
                    android:textColor="#333333"
                    />
                <TextView
                    android:id="@+id/dialog_hxb_update_TV_update_content"
                    android:layout_width="match_parent"
                    android:layout_height="wrap_content"
                    android:layout_marginTop="7dp"
                    android:layout_marginLeft="15dp"
                    android:textSize="12sp"
                    android:text="新版本大小:17.6M\r\n新版本大小:17.6M\r\n新版本大小:17.6M
                    新版本大小:17.6M\r\n新版本大小:17.6M\r\n新版本大小:17.6M
                    新版本大小:17.6M\r\n新版本大小:17.6M\r\n新版本大小:17.6M
                    新版本大小:17.6M\r\n新版本大小:17.6M\r\n新版本大小:17.6M"
                    android:textColor="#333333"
                    />
            </LinearLayout>
        </ScrollView>

        <LinearLayout
            android:layout_width="match_parent"
            android:layout_height="wrap_content"
            android:orientation="vertical"
            android:gravity="center">

            <Button
                android:id="@+id/dialog_hxb_update_btn_update_now"
                android:layout_marginTop="12dp"
                android:layout_width="130dp"
                android:layout_height="40dp"
                android:layout_weight="1"
                android:text="立即更新"
                android:textColor="#ffffffff"
                android:background="@drawable/hanxunbao_update_dialog_blue"
                />
        </LinearLayout>

    </LinearLayout>

    <ImageView
        android:id="@+id/dialog_hxb_update_btn_update_cancel"
        android:layout_width="wrap_content"
        android:layout_height="wrap_content"
        android:layout_marginTop="30dp"
        android:src="@mipmap/vip_pro_x"/>
</LinearLayout>
好了布局写好之后(布局里面还用到了两个自定义圆角),我们为了美观一点,把布局和按钮圆角一下下啦
圆角的xml放在drawable下面
现在是按钮圆角
<?xml version="1.0" encoding="utf-8"?>
<shape xmlns:android="http://schemas.android.com/apk/res/android">
    <solid android:color="#ff36b3fe" />
    <corners android:topLeftRadius="20dp"
        android:topRightRadius="20dp"
        android:bottomRightRadius="20dp"
        android:bottomLeftRadius="20dp"/>

</shape>
按钮圆角之后我们开始给整个布局圆角,不然对话框是方形,个人感觉影响美观啦,当然此处代码根据个人需求来
想圆角就要,不想就不要
<?xml version="1.0" encoding="utf-8"?>
<shape xmlns:android="http://schemas.android.com/apk/res/android">
    <solid android:color="#FFFFFF" />
    <corners
        android:bottomLeftRadius="8dp"
        android:bottomRightRadius="8dp"
        android:topLeftRadius="8dp"
        android:topRightRadius="8dp" />
</shape>
布局文件写好之后我们可以开始动手写代码了 首先是一个工具类Utils,具体作用就是改像素啥的啥的,此类是公司同事编写
代码注释有点少,见谅
package com.hnkjxy.z.customdialog;

import android.content.Context;
import android.util.TypedValue;

/**
 * Author: m1Ku
 * Email: howx172@163.com
 * Create Time: 2017/9/11
 * Description:
 */

public class Utils {
    /**
     * dp2px
     */
    public static int dp2px(Context context, float dpValue) {
        return (int) TypedValue.applyDimension(TypedValue.COMPLEX_UNIT_DIP, dpValue,
                context.getResources().getDisplayMetrics());
    }

    public static int sp2px(Context context, float sp) {
        return (int) TypedValue.applyDimension(TypedValue.COMPLEX_UNIT_SP, sp,
                context.getResources().getDisplayMetrics());
    }

    public static int px2dp(Context context, float pxValue) {
        return (int) TypedValue.applyDimension(TypedValue.COMPLEX_UNIT_PX, pxValue,
                context.getResources().getDisplayMetrics());

    }

    public static int getStatusBarHeight(Context context) {
        int statusBarHeight1 = -1;
//获取status_bar_height资源的ID
        int resourceId = context.getResources().getIdentifier("status_bar_height", "dimen", "android");
        if (resourceId > 0) {
            //根据资源ID获取响应的尺寸值
            statusBarHeight1 = context.getResources().getDimensionPixelSize(resourceId);
        }
        return statusBarHeight1;
    }
}
好了 接下来我们就要自定义对话框啦 这里就是一些宽高显示位置的一些属性
package com.hnkjxy.z.customdialog;

import android.app.Dialog;
import android.content.Context;
import android.os.Bundle;
import android.view.Gravity;
import android.view.LayoutInflater;
import android.view.View;
import android.view.Window;
import android.view.WindowManager;

/**
 * Creator :Wen
 * DataTime: 2018/5/26
 * Description:
 */

public class CustomDialog extends Dialog {
    private Context context;
    private int height, width;
    private boolean cancelTouchout;
    private View view;

    public CustomDialog(Builder builder) {
        super(builder.context);
        context = builder.context;
        height = builder.height;
        width = builder.width;
        cancelTouchout = builder.cancelTouchout;
        view = builder.view;
    }


    private CustomDialog(Builder builder, int resStyle) {
        super(builder.context, resStyle);
        context = builder.context;
        height = builder.height;
        width = builder.width;
        cancelTouchout = builder.cancelTouchout;
        view = builder.view;
    }

    @Override
    protected void onCreate(Bundle savedInstanceState) {
        super.onCreate(savedInstanceState);

        setContentView(view);

        setCanceledOnTouchOutside(cancelTouchout);

        Window win = getWindow();
        WindowManager.LayoutParams lp = win.getAttributes();
        lp.gravity = Gravity.CENTER;
        lp.height = height;
        lp.width = width;
        win.setAttributes(lp);
    }

    public static final class Builder {

        private Context context;
        private int height, width;
        private boolean cancelTouchout;
        private View view;
        private int resStyle = -1;


        public Builder(Context context) {
            this.context = context;
        }

        public Builder view(int resView) {
            view = LayoutInflater.from(context).inflate(resView, null);
            return this;
        }

        public Builder heightpx(int val) {
            height = val;
            return this;
        }

        public Builder widthpx(int val) {
            width = val;
            return this;
        }

        public Builder heightdp(int val) {
            height = Utils.dp2px(context, val);
            return this;
        }

        public Builder widthdp(int val) {
            width = Utils.dp2px(context, val);
            return this;
        }

        public Builder heightDimenRes(int dimenRes) {
            height = context.getResources().getDimensionPixelOffset(dimenRes);
            return this;
        }

        public Builder widthDimenRes(int dimenRes) {
            width = context.getResources().getDimensionPixelOffset(dimenRes);
            return this;
        }

        public Builder style(int resStyle) {
            this.resStyle = resStyle;
            return this;
        }

        public Builder cancelTouchout(boolean val) {
            cancelTouchout = val;
            return this;
        }

        public Builder addViewOnclick(int viewRes,View.OnClickListener listener){
            view.findViewById(viewRes).setOnClickListener(listener);
            return this;
        }


        public CustomDialog build() {
            if (resStyle != -1) {
                return new CustomDialog(this, resStyle);
            } else {
                return new CustomDialog(this);
            }
        }

    }
}
然后就进入正题了,开始使用,我们回到Activity 开始调用了
package com.hnkjxy.z.customdialog;

import android.support.v7.app.AppCompatActivity;
import android.os.Bundle;
import android.view.View;
import android.widget.ImageView;
import android.widget.TextView;

public class MainActivity extends AppCompatActivity {
    //    实例化自定义dialog
    CustomDialog dialog;
    //    最近版本号
    TextView dialog_hxb_update_TV_new_version;
    //    最新版本大小
    TextView  dialog_hxb_update_TV_new_version_size;
    //    更新的内容(文本)
    TextView dialog_hxb_update_TV_update_content;
    //    对话框的取消按钮
    ImageView dialog_hxb_update_btn_update_cancel;

    @Override
    protected void onCreate(Bundle savedInstanceState) {
        super.onCreate(savedInstanceState);
        setContentView(R.layout.activity_main);
        initializeUpdateDialog();
    }

    //    对话框的点击事件
    View.OnClickListener listener = new View.OnClickListener() {
        @Override
        public void onClick(View view) {
            switch (view.getId()) {
//                立即更新点击事件
                case R.id.dialog_hxb_update_btn_update_now:
//              可以做其他事情了
                    dialog.dismiss();
                    break;
//                取消按钮点击事件
                case R.id.dialog_hxb_update_btn_update_cancel:
                    dialog.dismiss();
                    break;

            }
        }
    };

    /**
     * 初始化更新的对话框
     */
    private void  initializeUpdateDialog(){
//         注: 这里一定要先show之后再找id,不然会报空指针异常,不信可以试试
        CustomDialog.Builder builder = new CustomDialog.Builder(MainActivity.this);
        dialog = builder
                .style(R.style.Dialog)
                .cancelTouchout(false)
                .widthdp(300)
                .heightdp(430)
                .view(R.layout.dialog_hxb_update)
                //立即更新
                .addViewOnclick(R.id.dialog_hxb_update_btn_update_now, listener)
//                取消键
                .addViewOnclick(R.id.dialog_hxb_update_btn_update_cancel,listener)
                .build();
        //        设置按返回键取消不了对话框
        dialog.setCancelable(false);
        dialog.show();

        //      最近版本号
        dialog_hxb_update_TV_new_version = (TextView) dialog.findViewById(R.id.dialog_hxb_update_TV_new_version);
//        最新版本大小
        dialog_hxb_update_TV_new_version_size= (TextView) dialog.findViewById(R.id.dialog_hxb_update_TV_new_version_size);
//        更新的内容
        dialog_hxb_update_TV_update_content= (TextView) dialog.findViewById(R.id.dialog_hxb_update_TV_update_content);
        //  返回键
        dialog_hxb_update_btn_update_cancel = (ImageView) dialog.findViewById(R.id.dialog_hxb_update_btn_update_cancel);

//          设置最新版本号
        dialog_hxb_update_TV_new_version.setText("最新版本:"+"后台的版本号");
//        设置最新版本大小
        dialog_hxb_update_TV_new_version_size.setText("最近版本大小"+"后台给的大小");
//        设置更新的内容
        dialog_hxb_update_TV_update_content.setText("后台给的文本");
    }

}
好了 到此自定义对话框就结束了


