前言
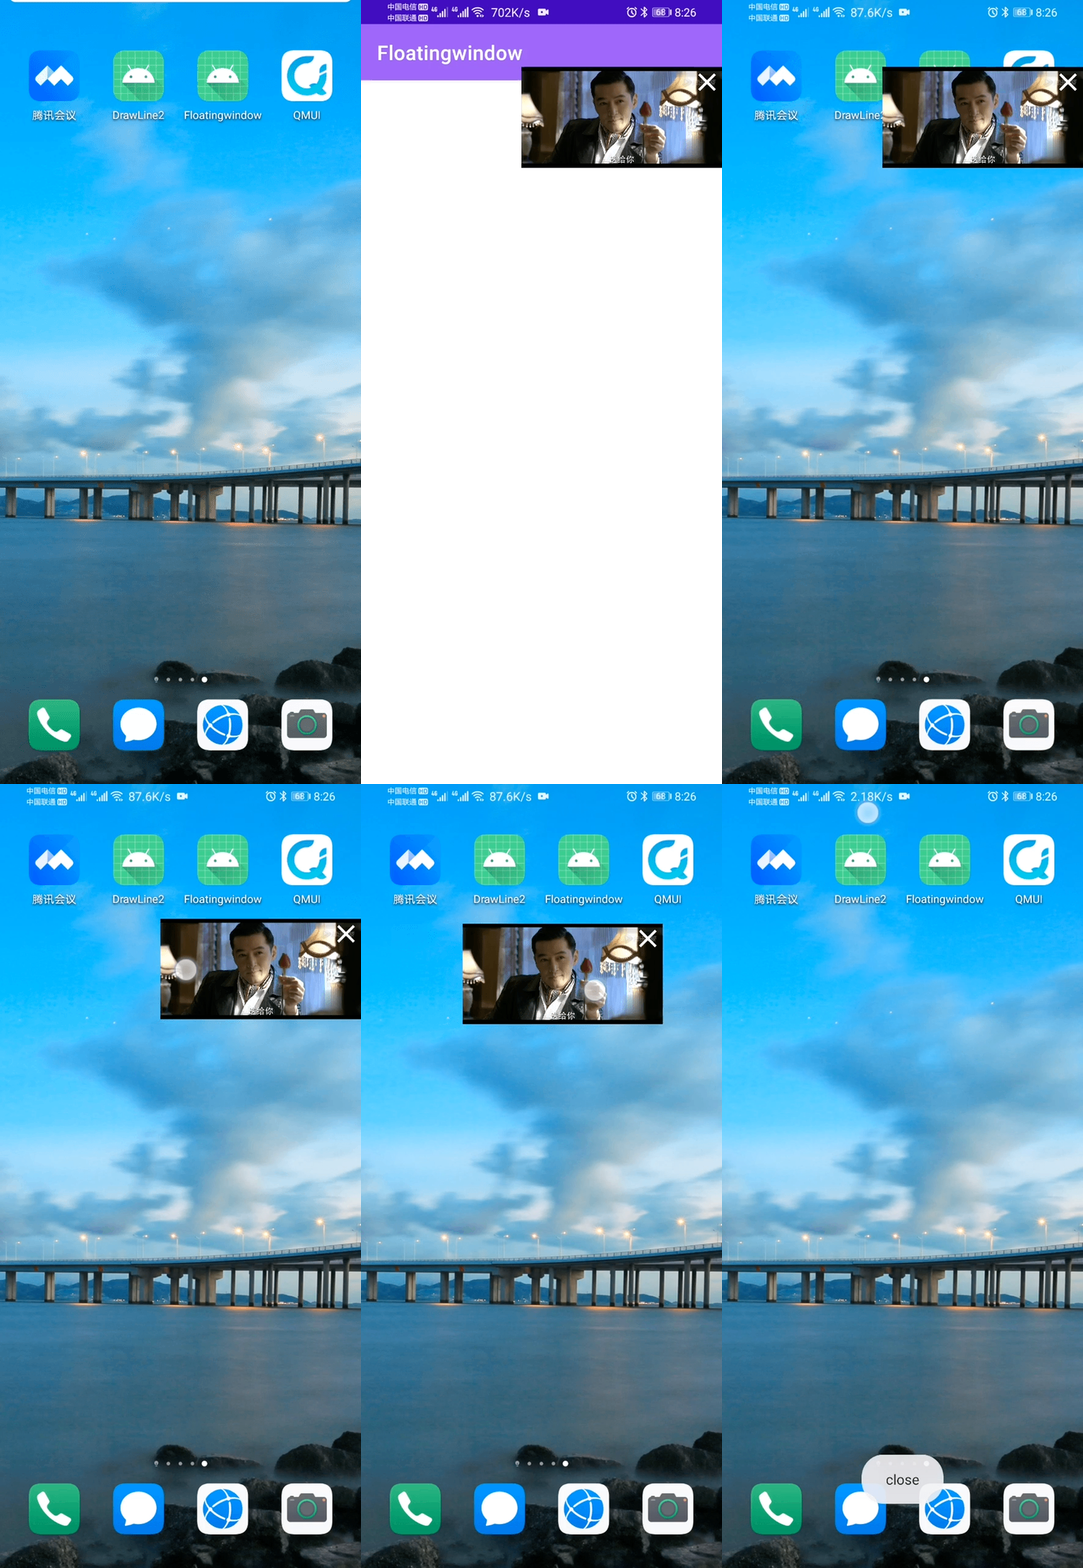
相信大家对Android悬浮窗应该是很熟悉了,比如说腾讯视频、爱奇艺等APP都有悬浮窗功能。在你打游戏的同时还可以看视频,充分利用屏幕空间。还有微信,360手机卫士等APP也有悬浮窗功能。那么Android悬浮窗是怎么实现的呢?
项目源码:Android仿腾讯视频悬浮窗的实现
其实并不难,核心代码就只有一行:
windowManager.addView(view, layoutParams)效果图

对view比较熟悉的同学们应该发现了,其实悬浮窗就是一个view,我们只需要把view添加到windowManager上就可以了。那么,开始讲细节了:
权限一定要记得加:
<uses-permission android:name="android.permission.SYSTEM_ALERT_WINDOW" />因为我们的悬浮窗要在Launcher上或者在其他APP上面运行,所以这里就用到了service,因为service可以默默地在后台运行。
实现大致步骤:
1.检查权限(如果没有权限跳转到授权界面)
2.在service中用inflate方法获取我们需要的view,设置位置参数等,加入到windowManager里面
3.启动悬浮窗服务
view布局
<?xml version="1.0" encoding="utf-8"?>
<FrameLayout
    xmlns:android="http://schemas.android.com/apk/res/android"
    android:layout_width="wrap_content"
    android:layout_height="wrap_content">

    <ImageView
        android:layout_width="200dp"
        android:layout_height="100dp"
        android:src="@drawable/huge"></ImageView>

    <ImageView
        android:id="@+id/close"
        android:src="@drawable/close"
        android:layout_width="30dp"
        android:layout_height="30dp"
        android:layout_marginLeft="170dp">

    </ImageView>

</FrameLayout>
对应的界面:

FloatingWindowService
package com.example.floatingwindow

import android.annotation.SuppressLint
import android.app.Service
import android.content.Context
import android.content.Intent
import android.os.Build
import android.os.IBinder
import android.view.*
import android.widget.ImageView
import android.widget.Toast


class FloatingWindowService : Service(){

    private lateinit var layoutParams: WindowManager.LayoutParams
    private lateinit var windowManager: WindowManager

    override fun onBind(intent: Intent): IBinder? {
        // TODO: Return the communication channel to the service.
        throw UnsupportedOperationException("Not yet implemented")
    }

    override fun onStartCommand(intent: Intent, flags: Int, startId: Int): Int {
        showFloatingWindow()
        return super.onStartCommand(intent, flags, startId)
    }

    @SuppressLint("ClickableViewAccessibility")
    private fun showFloatingWindow() {
        // 获取WindowManager服务
        windowManager = getSystemService(Context.WINDOW_SERVICE) as WindowManager

        // 新建悬浮窗控件
        val view = LayoutInflater.from(this).inflate(R.layout.window, null)

        // 设置LayoutParam
        layoutParams = WindowManager.LayoutParams()

        if (Build.VERSION.SDK_INT >= Build.VERSION_CODES.O) {
            layoutParams.type = WindowManager.LayoutParams.TYPE_APPLICATION_OVERLAY
        } else {
            layoutParams.type = WindowManager.LayoutParams.TYPE_PHONE
        }

        //设置位置
        layoutParams.gravity = Gravity.LEFT or Gravity.TOP

        layoutParams.x = windowManager.defaultDisplay.width
        layoutParams.y = 200

        //设置flag
        layoutParams.flags =
            WindowManager.LayoutParams.FLAG_NOT_FOCUSABLE or WindowManager.LayoutParams.FLAG_NOT_TOUCH_MODAL or
                    WindowManager.LayoutParams.FLAG_LAYOUT_IN_SCREEN or WindowManager.LayoutParams.FLAG_LAYOUT_INSET_DECOR or
                    WindowManager.LayoutParams.FLAG_WATCH_OUTSIDE_TOUCH
        //设置view的宽高
        layoutParams.width = WindowManager.LayoutParams.WRAP_CONTENT
        layoutParams.height = WindowManager.LayoutParams.WRAP_CONTENT

        //添加拖拽事件
        view.setOnTouchListener(FloatingOnTouchListener())

        val close = view.findViewById<ImageView>(R.id.close)

        close.setOnClickListener {
            stopSelf()
            windowManager.removeView(view)
            Toast.makeText(this,"close",Toast.LENGTH_SHORT).show()
        }

        // 将悬浮窗控件添加到WindowManager
        windowManager.addView(view, layoutParams)
    }

    override fun onDestroy() {
        super.onDestroy()
        Toast.makeText(this,"onDestroy",Toast.LENGTH_SHORT).show()
    }

    inner class FloatingOnTouchListener : View.OnTouchListener {

        private var x = 0f
        private var y = 0f

        @SuppressLint("ClickableViewAccessibility")
        override fun onTouch(v: View?, event: MotionEvent?): Boolean {
            when(event?.action){

                MotionEvent.ACTION_DOWN ->{
                    x = event.rawX
                    y = event.rawY
                }

                MotionEvent.ACTION_MOVE ->{
                    val nowX = event.rawX
                    val nowY = event.rawY
                    val movedX = nowX - x
                    val movedY = nowY - y
                    x = nowX
                    y = nowY
                    layoutParams.x = (layoutParams.x + movedX).toInt()
                    layoutParams.y = (layoutParams.y + movedY).toInt()
                    windowManager.updateViewLayout(v, layoutParams)
                }

                MotionEvent.ACTION_UP ->{

                }

            }
            return false
        }
    }
}
先获取windowManager,加载我们的悬浮窗view,这里的TYPE_APPLICATION_OVERLAY的作用是把我们的view设置成系统顶层窗口,显示在其他一切内容之上。TYPE_SYSTEM_OVERLAY的作用也是一样的,只不过现在被遗弃调了。
设置初始位置:
初始位置,这里可以看一下Android坐标系相关知识,Android 零坐标在屏幕左上方。这里设置一下xy坐标的位置就可以。
设置flag:
设置flag的作用是让view不获取焦点。如果不做处理,view会遮住屏幕其他控件的点击事件。
拖拽功能:
FloatingOnTouchListener是一个内部类,它可以使用FloatingWindowService类中的变量。实现OnTouchListener接口,当屏幕点击时记录下当前位置,屏幕滑动时计算出划过的距离,修改layoutParams的xy坐标,调用windowManager.updateViewLayout(v, layoutParams)方法就可以更新view当前位置。
MainActivity
package com.example.floatingwindow

import android.content.Intent
import android.net.Uri
import android.os.Build
import android.os.Bundle
import android.provider.Settings
import android.widget.Toast
import androidx.appcompat.app.AppCompatActivity


class MainActivity : AppCompatActivity() {
    override fun onCreate(savedInstanceState: Bundle?) {
        super.onCreate(savedInstanceState)
        startFloatingService()
    }

    private fun startFloatingService() {
        if (Build.VERSION.SDK_INT >= Build.VERSION_CODES.M) {
            if (!Settings.canDrawOverlays(this)) {
                startActivityForResult(Intent(Settings.ACTION_MANAGE_OVERLAY_PERMISSION, Uri.parse("package:$packageName")), 0)
            } else {
                startService(Intent(this@MainActivity, FloatingWindowService::class.java))
            }
        }
    }

    override fun onActivityResult(requestCode: Int, resultCode: Int, data: Intent?) {
        super.onActivityResult(requestCode, resultCode, data)
        if (requestCode == 0) {
            if (Build.VERSION.SDK_INT >= Build.VERSION_CODES.M) {
                if (!Settings.canDrawOverlays(this)) {
                    Toast.makeText(this, "授权失败", Toast.LENGTH_SHORT).show()
                } else {
                    Toast.makeText(this, "授权成功", Toast.LENGTH_SHORT).show()
                    startService(Intent(this@MainActivity, FloatingWindowService::class.java))
                }
            }
        }
    }
}
到这里悬浮窗的实现基本就结束了。


