这个程序,应该是相当复杂的。读完它需要一些耐心,不过我会力求突显程序的结构,删除无关的代码。
1. 回顾旧程序
旧版本程序的结构如下:
while(1) {
  rfds = {stdin, sockfd};
  select(rfds);
  if (stdin in rfds) {
    read(stdin);
    // 风险代码,可能产生阻塞
    writen(sockfd);
  }

  if (sockfd in rfds) {
    read(sockfd);
    writen(stdout);
  }
}
之前分析过,它的弱点在于 writen(sockfd) 会导致阻塞。为了解决这个问题,就不能使用 writen 函数,而应该改为 write,但是如果改成了 write,我们就不能保证 write 能一次将数据全部写入发送缓冲区。这导致的另一个麻烦就是我们不得不设置应用层缓冲区(不使用多进程多线程)。
那么新的写法看起来像是这样:
char to[4096];
int start = 0;
int end = 0;

while(1) {
  // ...
  // 往发送缓冲区添加数据
  nr = read(stdin, &to[end], 4096 - end);
  end += nr;
  // 将发送缓冲区的数据发送出去
  nw = write(sockfd, &to[start], end - start);
  start += nw;
  // ...
下面我们正式一点说。
2. 程序设计
2.1 思路

图1 数据流动过程
观察图 1,客户端设置了两个缓冲区:
- to:存放从标准输入读取到的数据
- from:保存从服务器发来的数据
to 中的灰色部分,表示已经发给服务了,而绿色部分,表示尚未发送的。 from 的灰色部分,表示已经写到标准输出了,绿色部分,表示还尚未写入到标准输出的。空白部分表示空闲。
使用指针 tostart, toend, fromstart, fromend, 就可以得到这三个区域的任何一个位置。
2.2 程序伪代码
while(1) {
  rfds = {stdin, sockfd};
  wfds = {stdout, sockfd};

  select(&rfds, &wfds);
  // 1. 读标准输入到缓冲区 to
  if (stdin in rfds) {
    read(stdin, toend);
    wfds.insert(sockfd);
  }

  // 2. 读套接字到缓冲区 from
  if (sockfd in rfds) {
    read(sockfd, fromend);
    wfds.insert(stdout);
  }

  // 3. 写数据到标准输出
  if (stdout in wfds) {
    write(stdout, fromstart);
  }

  // 4. 写数据到套接字
  if (sockfd in
当你在阅读详细版本的时候,请参考精简版本的 4 个步骤来搞清逻辑。
char *to = malloc(length);
char *from = malloc(length);
tostart = toend = to;
fromstart = fromend = from;

fd_set rfds, wfds;
int stdinclosed = 0; // 标准输入是否关闭
int servclosed = 0; // 服务器是否关闭

// 重要!设置描述符为非阻塞 IO
setNonblock(sockfd);
setNonblock(stdin);
setNonblock(stdout);

while(1) {
  // 这一部分,表示将能够监听的 I/O 加入到对应的监听集合中去。
  // 如果缓冲区没有空闲,就没有监听的意义了。
  rfds.clear();
  // 查看收发缓冲区有没有空闲,有空闲就监听。
  if (stdinclosed == 0 && toend < to + length) rfds.insert(stdin);
  if (servclosed == 0 && fromend < from + length) rfds.insert(sockfd);

  // 查看收发缓冲区有没有数据,有数据就监听
  if (tostart < toend) wfds.insert(sockfd);
  if (fromstart < fromend) wfds.insert(stdout);

  // 有事件再往下执行
  select(&rfds, &wfds);

  // 1. 标准输入有数据则读入发送缓冲区
  if (stdin in rfds) {
     n = to + length - toend; // 白色部分空闲区大小
     nr = read(stdin, toend, n);
     if (nr < 0) {
       // 尽管 select 通知有数据可读,但是我们还是得预防 EWOUDLBLOCK 发生的可能性。
       // 如果使用阻塞 IO,结果就是程序在 read 上阻塞,这是不应该发生的情况。
       if (errno != EWOULDBLOCK) exit(1);
     }
     else if (nr == 0) {
        stdinclosed = 1; // 标准输入关闭,标志位置位
        if (tostart == toend) {
          // 发送缓冲区没有数据要发送了(没有绿色部分),半关闭。
          shutdown(sockfd, SHUT_WR);
        }
     }
     else {
       toend += nr; // 扩大绿色部分大小
       wfds.insert(sockfd); // 提前通知有写事件,你完全可以不写这一行
     }
  }

  // 2. 套接字有数据可读则读入 from 缓冲区
  if (sockfd in rfds) {
    n = from + length - fromend;
    nr = read(sockfd, fromend, n);  // 将数据读取到白色区域
    if (nr < 0) {
       if (errno != EWOULDBLOCK) exit(1);
    }
    else if (nr == 0) {
      servclosed = 1; // 服务器关闭标志位置位,此时不能直接退出,因为接收缓冲区可能还有绿色部分。
      if (fromstart == fromend) {
        // 接收缓冲区空闲,可以安全退出。如果标准输出速度非常慢,这个 if 很可能执行不到。
        LOG("1:finished\n");
        break;
      }
    }
    else {
      fromend += nr; // 绿色部分变长
      wfds.insert(stdout);
    }
  }

  // 3. 处理接收缓冲区(from 有绿色部分,将其写入标准输出)
  if (stdout in wfds && fromend - fromstart > 0) {
    n = fromend - fromstart;
    nw = write(stdout, fromstart, n);
    if (nw < 0) {
      if (errno != EWOULDBLOCK) exit(1); // 不是 EWOULDBLOCK 则出错
    }
    else {
      fromstart += nw; // 灰色部分变长,绿色减少
      if (fromstart == fromend) {
        fromstart = fromend = from; // 重置
        // 全部处理完成
        if (servclosed) { // 如果服务器已经关闭,说明数据全部处理完毕
          LOG("2:finished\n");
          break;
        }
      }
    }
  }


  // 4. 发送缓冲区有数据可发送(to 中有绿色部分,发送到服务器)
  if (sockfd in wfds && toend - tostart > 0) {
    n = toend - tostart;
    nw = write(sockfd, tostart, n);
    if (nw < 0) {
      if (errno != EWOULDBLOCK) exit(1); // 不是 EWOULDBLOCK 则出错
    }
    else {
      tostart += nw; // 灰色变长,绿色变短
      if (tostart == toend) { // 全部处理完毕
        tostart = toend = to; // 重置
        if (stdinclosed) {
          // 只有标准输入已经关闭的情况下才能关闭
2.3 项目代码
这一段程序确实很长,需要考虑的东西太多。更加详细的代码请参考 gitos 托管的代码。
如果你已经 clone 过这个代码了,请使用 git pull 更新一下。本节程序所使用的程序路径是 unp/program/nonblockio/nbio.
3. 实验
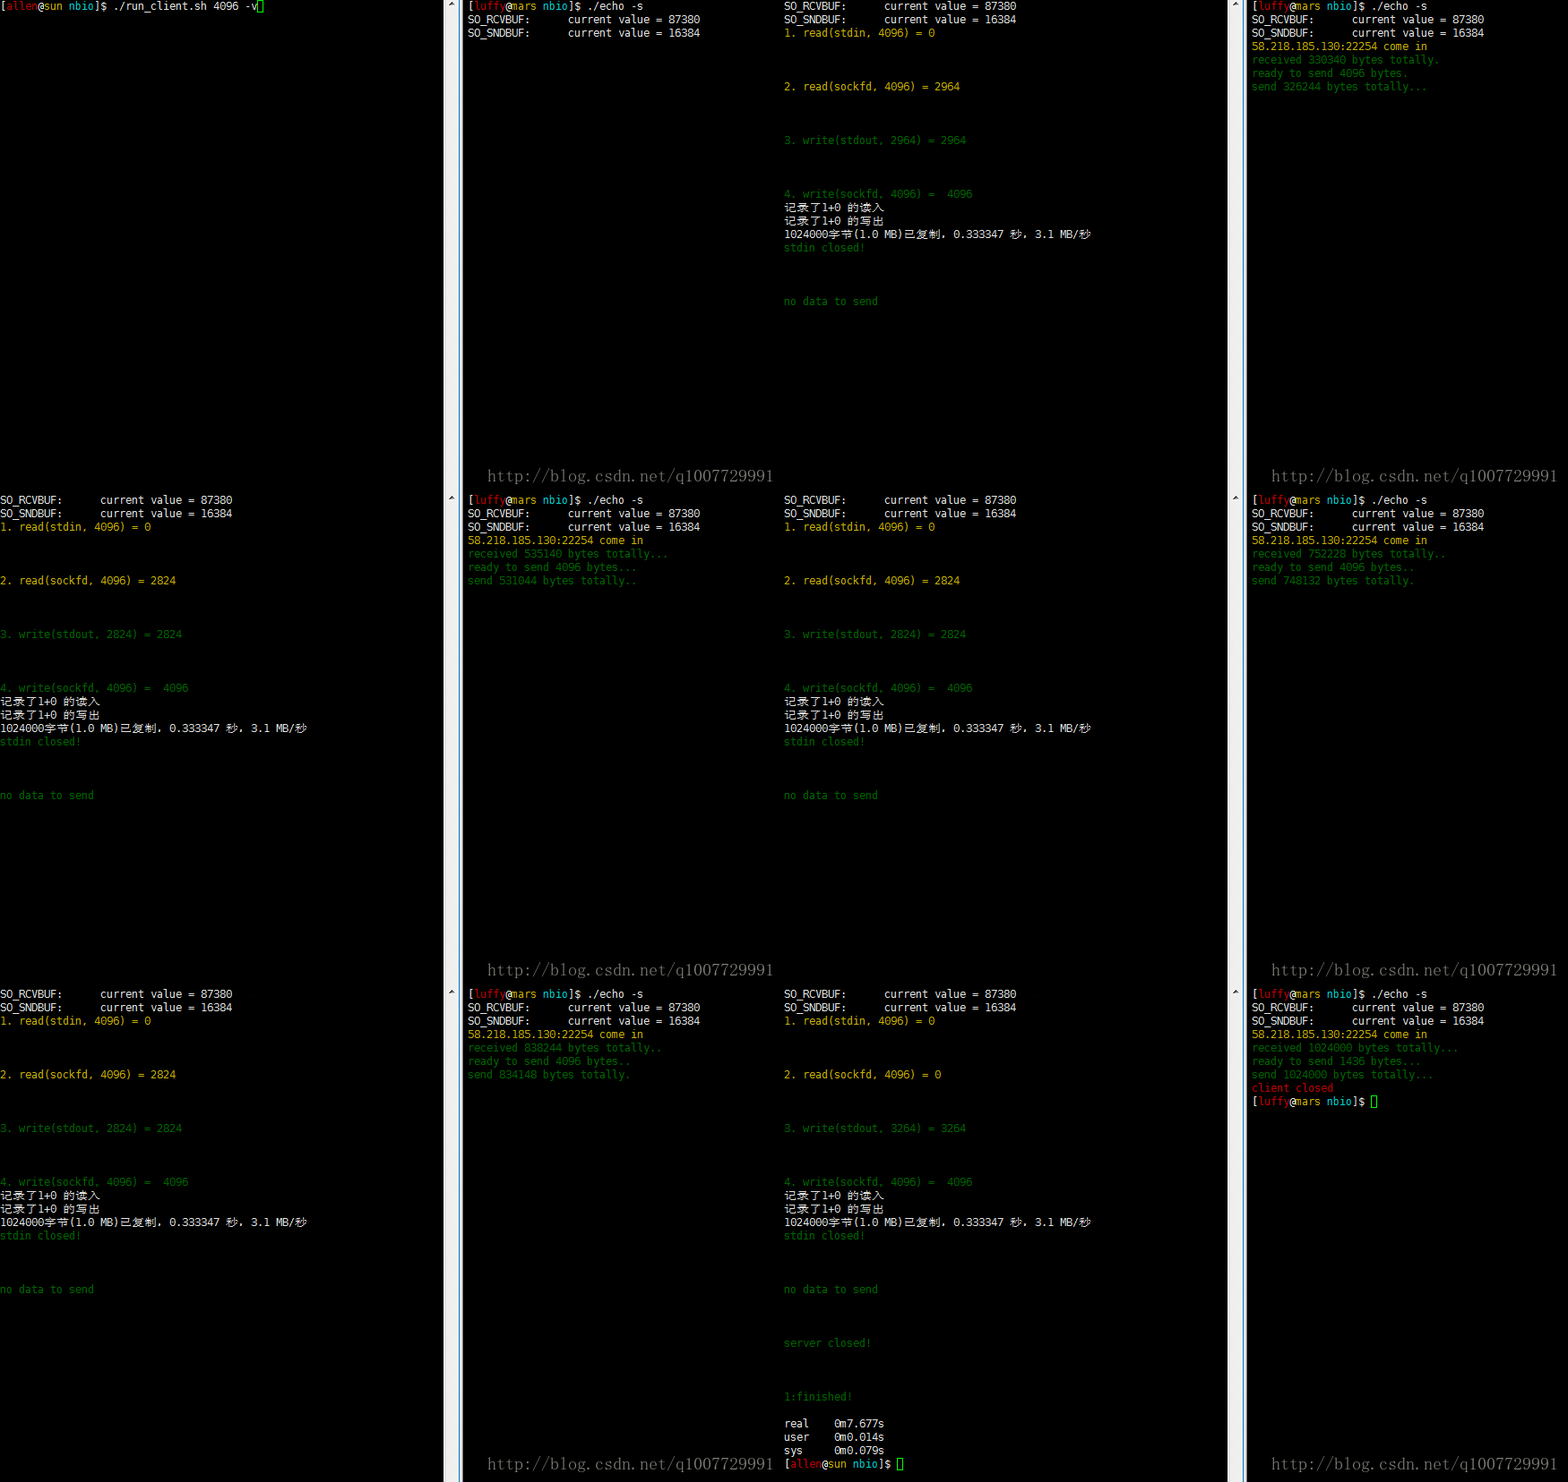
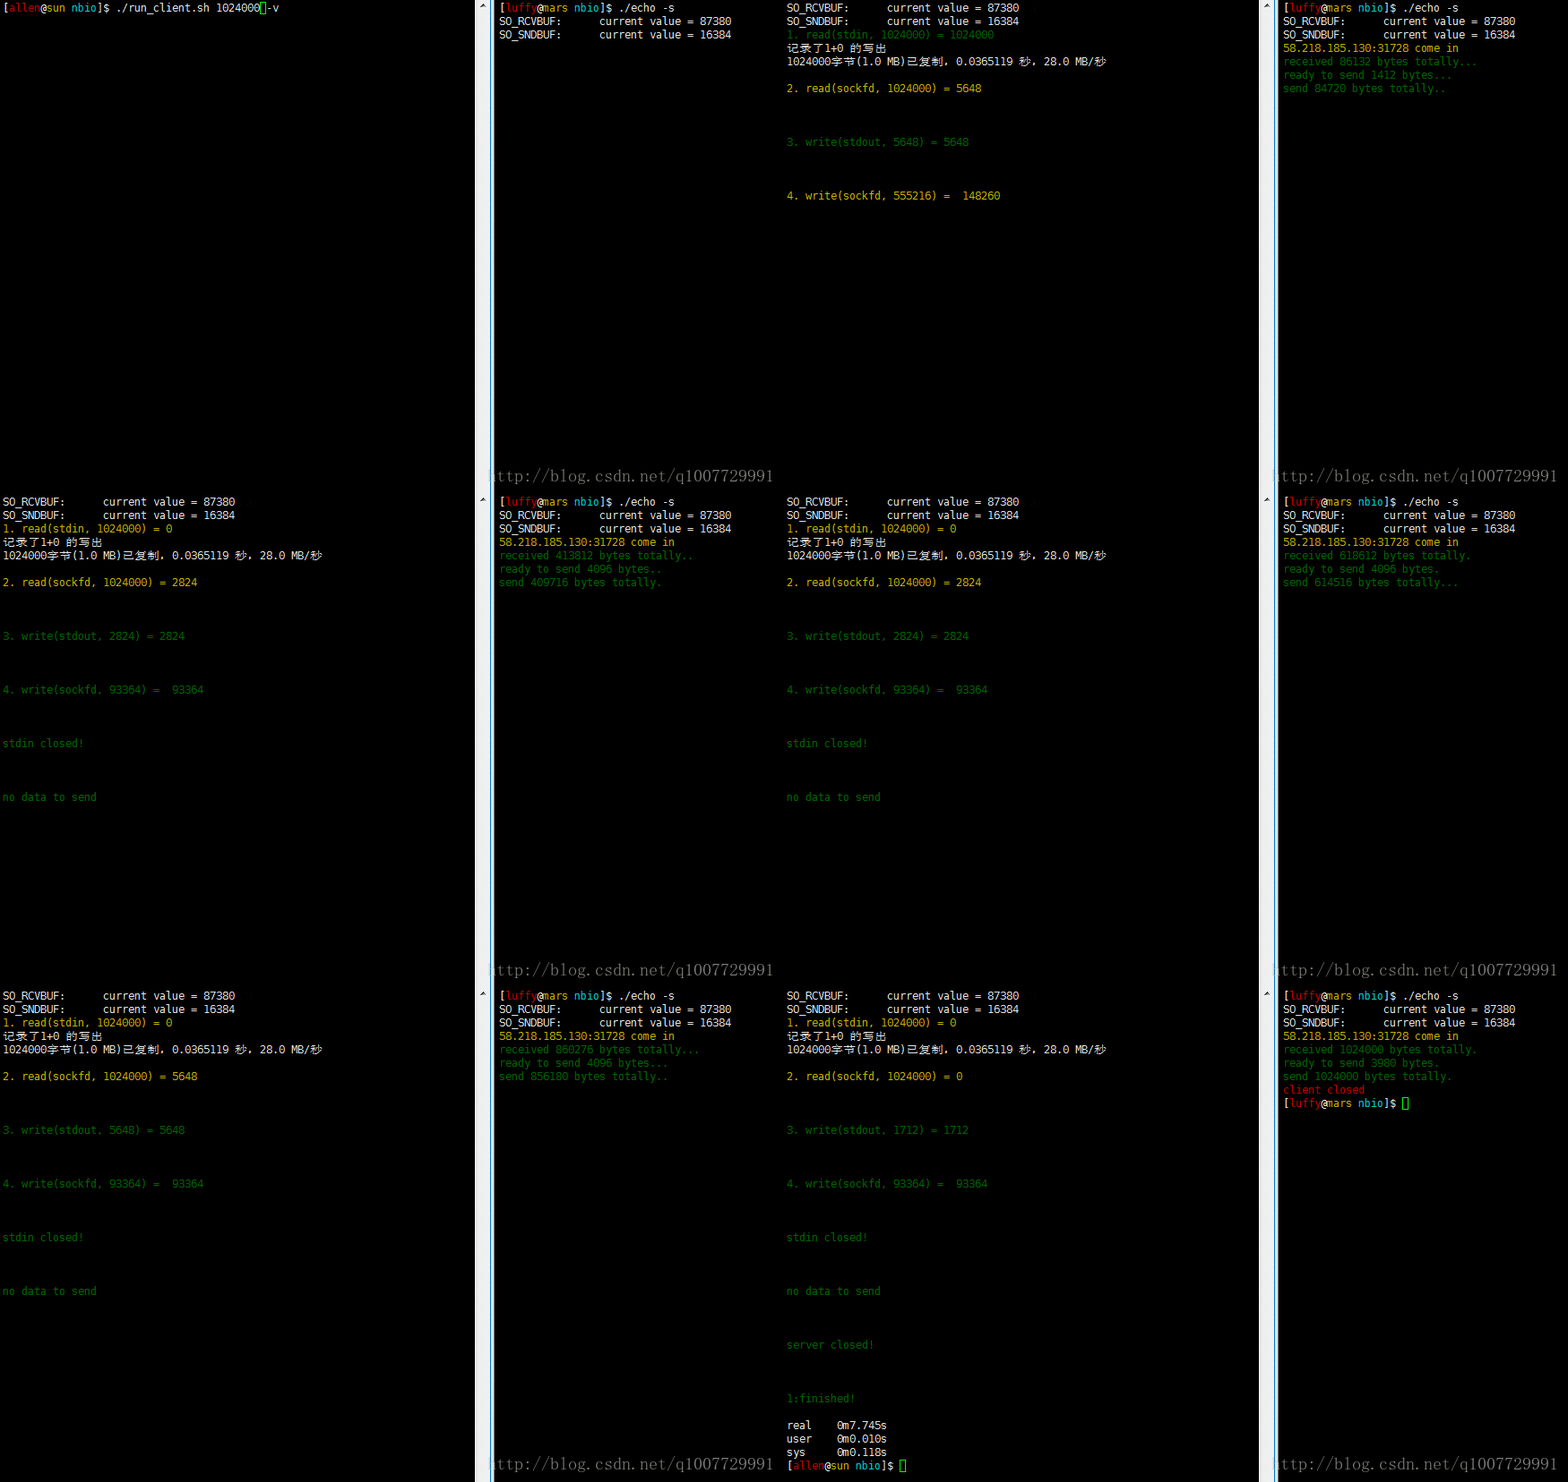
本次实验仍然分成两个部分,即缓冲区大小分别设置为 4096 和 1024000.
3.1 4096 字节

图1 缓冲区大小为 4096 字节
3.2 1024000 字节
$ ./run_client.sh 1024000

图2 缓冲区大小为 1024000 字节
3.3 结果分析
很幸运的是,大缓冲区下,客户端也没有阻塞。从图 1 和图 2 中的结果看,客户端与服务器的数据传输和处理的瓶颈在于步骤 2 和步骤 3.
注意到步骤 1 和步骤 4(将数据全部发到服务器)早已完成,而步骤 2 和步骤 3 的速度却很滞后。原因在于服务器端的 read 函数缓冲区太小,只有 4096 字节。可以通过适当的增大服务器端缓冲大小,图 3 显示的结果是将服务器 read 函数缓冲大小更改为 65536 后的结果。

图3 服务器缓冲大小更改为 65536
4. 标准输出比网络 IO 慢
注意观察图 1、2、3 中,客户端最后一行是 "1:finished!" 结束,如果标准输出的速度比网络 IO 还要慢,则下面这个步骤 2 中的这个 if 是不成立的:
if (服务器关闭) {
  // ...
  servclosed = 1;
  if (fromstart == fromend) {
    // 接收缓冲区空闲,可以安全退出。如果标准输出速度非常慢,这个 if 很可能执行不到。
    LOG("1:finished\n");
    break;
  }
}
此时应该执行到步骤 3 中的 if:
if (fromstart == fromend) {
  fromstart = fromend = from; // 重置
  // 全部处理完成
  if (servclosed) { // 如果服务器已经关闭,说明数据全部处理完毕
    LOG("2:finished\n");
    break;
  }
}
通过在客户端开启 --slow 选项,可以让标准输出速度慢下来。

图4 标准输出 IO 慢于网络 IO,最后一行输出
"2:finished!"
5. 总结
思考:有些同学并没有将 stdin, stdout, sockfd 设置成非阻塞 IO,程序也能正常工作,这样做可以吗?如果有问题,问题在哪里?
最后,要提的是非阻塞 I/O 处理起来确实很麻烦,有时候代码的复杂程度可能会让你得不偿失。使用多线程 + 阻塞 I/O 其实是更为推荐的方法,而且程序的效率也不会比非阻塞 I/O 差多少(unp 一书中对不同的设计进行了测试对比)。


