
环境:RHEL5.4 x32
公司架构:Lvs+Nginx+Php(fastcgi)+Mysql
分布:
server1: lvs+nginx+php(fastcgi)
server2: lvs+nginx+php(fastcgi)
server3: Mysql
server4: Nagios+Cacti+日志分析软件(暂未确定)
具体实施的情况如下:
1、解决mail邮件的问题。
2、安装nagios
3、安装cacti
4、安装日志分析
5、验收
备注:事先请yum install gd gd-devel freetype freetype-devel libpng libpng-devel libjpeg-devel libjpeg
否则安装完后,发现map页面无法打开!
=======================================================
Nagios安装完后map不显示这个问题,我看大家有人问到,那我上网搜了下资料,供大家参考!
初学nagios的时候,安装完nagios,各方面都正常但是就是在点击map的时候,显示无法连接端口,奇怪了,其他地方都正常显示的啊,为什么独独map不显示呢。查了下资料,说map需要statusmap.cgi文件的支持。然后在sbin目录中找。果然找不到这个配置文件。外事找google,找到说这个文件需要gd库的支持,一查系统果然没装这个找到光盘安装gd,gd-devel。再次./configure ; make ; mv statusmap.cgi /path/to/nagios/sbin 刷新,哈。出来了
通过文章的介绍,想必大家都找到Nagios安装完后map不显示问题的所在,就用我教大家的方法来操作。
=======================================================
一、解决mail邮件的问题:
a、申请专用的邮箱(postfixlinux_admin@163.com)
b、手机接收邮箱 (139237106xx@139.com) 并配置手机邮箱送达通知,速度非常快。
c、使用msmtp来替代系统自带的mail,以达到未来系统出现故障时,shell脚本可以通过mail发报警给管理员。
[root@svr4 ~]# wget http://nchc.dl.sourceforge.net/sourceforge/msmtp/msmtp-1.4.17.tar.bz2
[root@svr4 ~]# tar -xjf msmtp-1.4.17.tar.bz2
[root@svr4 ~]# cd msmtp-1.4.17
[root@svr4 msmtp-1.4.17]# ./configure --prefix=/usr/local/msmtp
Install prefix ......... : /usr/local/msmtp
TLS/SSL support ........ : yes (Library: OpenSSL)
GNU SASL support ....... : no
GNU Libidn support ..... : yes
NLS support ............ : yes
GNOME Keyring support .. : no
MacOS X Keychain support : no
[root@svr4 msmtp-1.4.17]# make && make install
[root@svr4 msmtp]# mkdir etc
[root@svr4 msmtp]# vim etc/msmtprc
account default
host smtp.163.com
port 25
from postfixlinux_admin@163.com
auth login
tls off
user postfixlinux_admin@163.com
password youpassword
logfile /var/log/msmtp_log
#设置默认的mail程序
[root@svr4 msmtp]# vim /etc/mail.rc
set sendmail="/usr/local/msmtp/bin/msmtp"
#发一封邮件给自己
[root@svr4 msmtp]# echo "this is a test mail " | mail -s "test mail" baoch8@163.com
经过本人确认,本人收到了这封测试邮件!第一步终于解决了!
二、安装nagios
我在www.nagios.org官网下载了nagios-3.2.3.tar与nagios-plugins-1.4.15.tar,目前 这个版本是需要使用php的,不像以前仅使用apache即可。
1、安装apache+php(为了方便起见,使用yum来安装)
[root@svr4 ~]# yum install httpd php php-devel httpd-devel -y
2、安装nagios
[root@svr4 html]# useradd -m nagios -s /sbin/nologin
[root@svr4 html]# passwd nagios
Changing password for user nagios.
New UNIX password:
Retype new UNIX password:
passwd: all authentication tokens updated successfully.
#建立nagcmd用于从web接口执行外部命令,将apache,nagios加到这个组
[root@svr4 html]# groupadd nagcmd
[root@svr4 html]# usermod -G nagcmd apache
[root@svr4 html]# usermod -G nagcmd nagios
[root@svr4 nagios-3.2.3]# ./configure --prefix=/usr/local/nagios \
> --with-nagios-user=nagios --with-nagios-group=nagios \
> --with-command-group=nagcmd
General Options:
-------------------------
Nagios executable: nagios
Nagios user/group: nagios,nagios
Command user/group: nagios,nagcmd
Embedded Perl: no
Event Broker: yes
Install ${prefix}: /usr/local/nagios
Lock file: ${prefix}/var/nagios.lock
Check result directory: ${prefix}/var/spool/checkresults
Init directory: /etc/rc.d/init.d
Apache conf.d directory: /etc/httpd/conf.d
Mail program: /bin/mail
Host OS: linux-gnu
Web Interface Options:
------------------------
HTML URL: http://localhost/nagios/
CGI URL: http://localhost/nagios/cgi-bin/
Traceroute (used by WAP): /bin/traceroute
[root@svr4 nagios-3.2.3]# make all
[root@svr4 nagios-3.2.3]# make install
[root@svr4 nagios-3.2.3]# make install-init
[root@svr4 nagios-3.2.3]# make install-commandmode
[root@svr4 nagios-3.2.3]# make install-config
#编辑相应联系文件
[root@svr4 objects]# vim /usr/local/nagios/etc/objects/contacts.cfg
email postfixlinux_admin@163.com ; <<***** CHANGE THIS TO
YOUR EMAIL ADDRESS ******
#配置web接口
[root@svr4 nagios-3.2.3]# make install-webconf
/usr/bin/install -c -m 644 sample-config/httpd.conf /etc/httpd/conf.d/nagios.conf
*** Nagios/Apache conf file installed ***
这一步很重要,它把nagios的httpd.conf配置文件复制到了apache下,这样我们就可以直接使用http://ip/nagios进行登录查看了!
#添加web接口的管理用户
[root@svr4 nagios-3.2.3]# htpasswd -c /usr/local/nagios/etc/htpasswd.users nagiosadmin
New password:
Re-type new password:
Adding password for user nagiosadmin
#安装nagios-plug
[root@svr4 ~]# tar -xzf nagios-plugins-1.4.15.tar.gz
[root@svr4 ~]# cd nagios-plugins-1.4.15
[root@svr4 nagios-plugins-1.4.15]# ./configure --prefix=/usr/local/nagios/
[root@svr4 nagios-plugins-1.4.15]# make && make install
#设置自动启动服务
[root@svr4 nagios-3.2.3]# chkconfig --add nagios
[root@svr4 nagios-3.2.3]# chkconfig nagios on
#检查下配置文件(这个文件是默认的,我没有修改)
[root@svr4 nagios-3.2.3]# /usr/local/nagios/bin/nagios -v /usr/local/nagios/etc/nagios.cfg
Total Warnings: 0
Total Errors: 0
#上面的文件检查没有问题,就可以重启服务了
[root@svr4 nagios-3.2.3]# service nagios start
Starting nagios:This account is currently not available.
done.
#Starting nagios:This account is currently not available.
解决方法:把/etc/passwd中nagios的shell设置成/bin/bash
#再重启没有发现错误
[root@svr4 nagios-3.2.3]# service nagios restart
Running configuration check...done.
Stopping nagios: done.
Starting nagios: done.
#关于SELINUX,为什么要设置这两条?
[root@svr4 nagios-3.2.3]# chcon -R -t httpd_sys_content_t /usr/local/nagios/sbin
[root@svr4 nagios-3.2.3]# chcon -R -t httpd_sys_content_t /usr/local/nagios/share/
原因:这个是
[root@svr4 nagios-3.2.3]# cat /etc/httpd/conf.d/nagios.conf
中定义了CGI的路径,不得将其标签进行修改!当然你也可以使用setenforce 0
# SAMPLE CONFIG SNIPPETS FOR APACHE WEB SERVER
# Last Modified: 11-26-2005
#
# This file contains examples of entries that need
# to be incorporated into your Apache web server
# configuration file. Customize the paths, etc. as
# needed to fit your system.
ScriptAlias /nagios/cgi-bin "/usr/local/nagios/sbin"
<Directory "/usr/local/nagios/sbin">
# SSLRequireSSL
Options ExecCGI
AllowOverride None
Order allow,deny
Allow from all
# Order deny,allow
# Deny from all
# Allow from 127.0.0.1
AuthName "Nagios Access"
AuthType Basic
AuthUserFile /usr/local/nagios/etc/htpasswd.users
Require valid-user
</Directory>
Alias /nagios "/usr/local/nagios/share"
<Directory "/usr/local/nagios/share">
# SSLRequireSSL
Options None
AllowOverride None
Order allow,deny
Allow from all
# Order deny,allow
# Deny from all
# Allow from 127.0.0.1
AuthName "Nagios Access"
AuthType Basic
AuthUserFile /usr/local/nagios/etc/htpasswd.users
Require valid-user
</Directory>
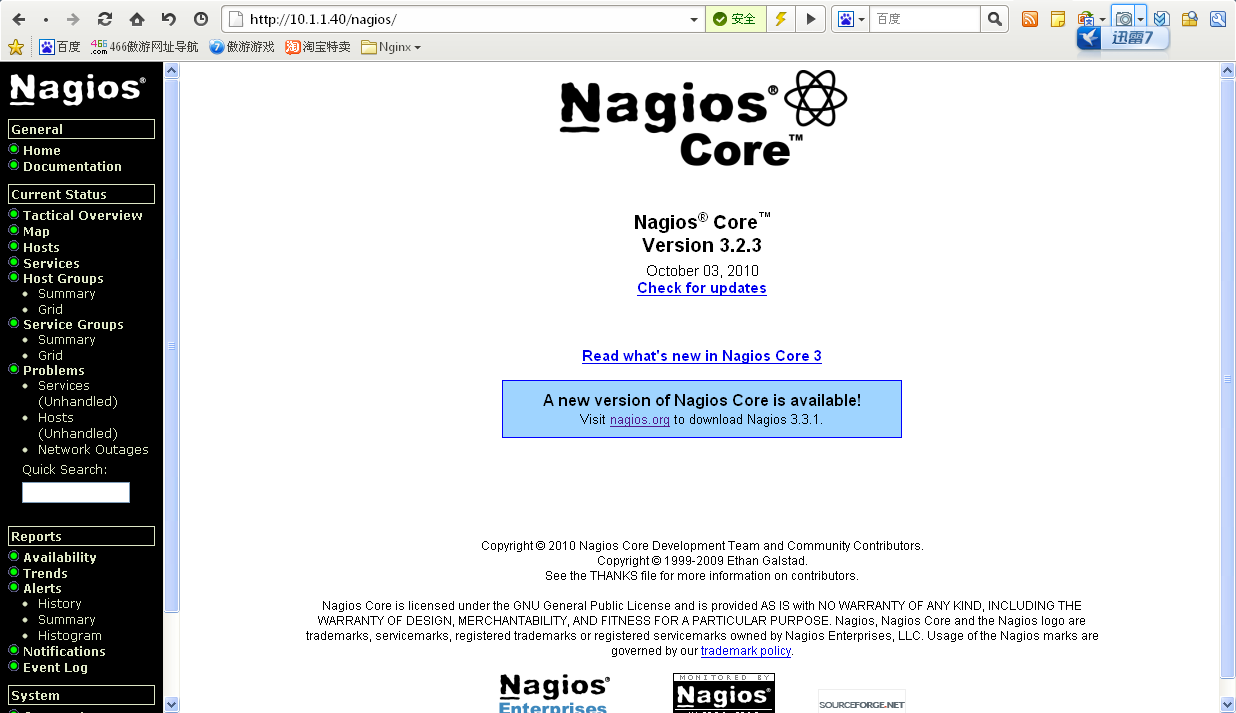
现在可以登录nagios进行设置了。
实施中经历了:
2、Nagios的个人配置思路


