
1.设置会话超时(600代表十分钟)
vim /etc/profile

生效命令:source /etc/profile
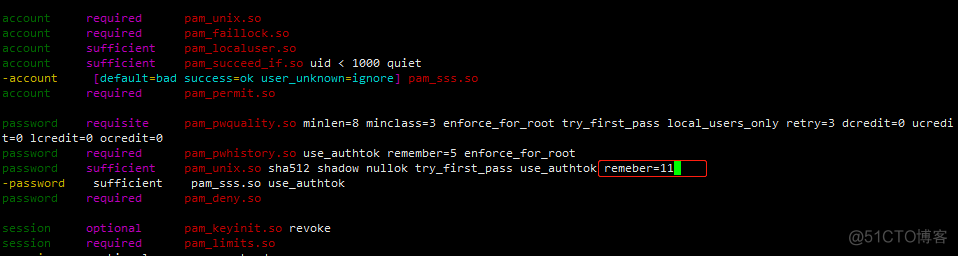
2.新密码不能与最近10个使用密码相同
vim /etc/pam.d/system-auth
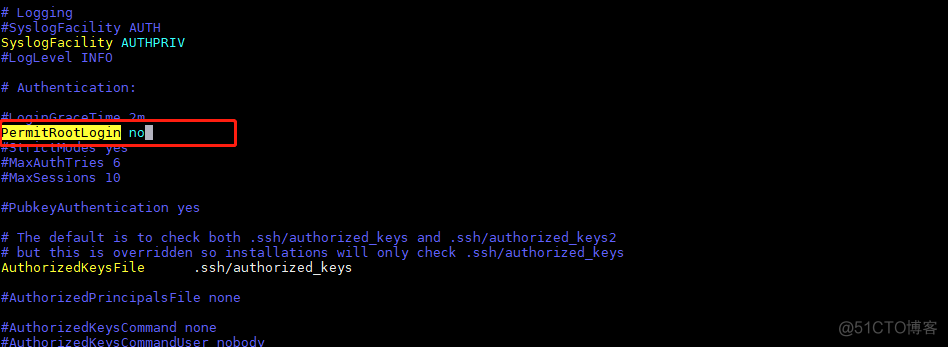
3.设置禁止root通过ssh远程登录
vim /etc/ssh/sshd_config,把#PermitRootLogin yes改为PermitRootLogin no
4.密码复杂度
默认配置:
cat /etc/pam.d/system-auth | grep  "pam_pwquality.so try_first_pass local_users_only retry=3 authtok_type="
password    requisite     pam_pwquality.so try_first_pass local_users_only retry=3 authtok_type=
加固方案:
1.备份配置文件:
# cp -a /etc/pam.d/system-auth /etc/pam.d/system-auth.default
2.编辑配置文件
# vi /etc/pam.d/system-auth
将password    requisite     pam_pwquality.so try_first_pass local_users_only retry=3 authtok_type=
注释并在其下面新增1行 password requisite pam_cracklib.so try_first_pass minlen=8 difok=5 dcredit=-1 lcredit=-1 ocredit=-1 retry=1 type=
备注:
try_first_pass而当pam_unix验证模块与password验证类型一起使用时,该选项主要用来防止用户新设定的密码与以前的旧密码相同。
minlen=8:最小长度8位
difok=5:新、旧密码最少5个字符不同
dcredit=-1:最少1个数字
lcredit=-1:最少1个小写字符,(ucredit=-1:最少1个大写字符)
ocredit=-1:最少1个特殊字符
retry=1:1次错误后返回错误信息
type=xxx:此选项用来修改缺省的密码提示文本
5.设置history密码时间戳
vim /etc/profile
最底部添加
export HISTTIMEFORMAT="%F %T `whoami` "
效果图:

6.设置用户登录失败锁定
# vi /etc/pam.d/system-auth
在# User changes will be destroyed the next time authconfig is run.行的下面,添加
auth       required     pam_tally2.so deny=5 unlock_time=1800 even_deny_root root_unlock_time=1800

7.ssh配置增强
#vi /etc/ssh/sshd_config

(1)禁止空密码登录
将#PermitEmptyPasswords no参数的注释符号去掉,改成
PermitEmptyPasswords no

(2)关闭ssh的tcp转发
将#AllowTcpForwarding yes参数改成
AllowTcpForwarding no

(3)关闭S/KEY(质疑-应答)认证方式
将#ChallengeResponseAuthentication yes参数,改成
ChallengeResponseAuthentication no


(4)关闭基于GSSAPI 的用户认证
将GSSAPIAuthentication yes参数,改成
GSSAPIAuthentication no
重启ssh服务
systemctl restart sshd
8.新增连接声明
#vi /etc/ssh/sshd_config
找到#Banner none参数,在其下一行,增加
Banner /etc/ssh/alert

新增告警信息文件
 #vi /etc/ssh/alert
文件内容,设置成
*******************************************************
这里的内容自己定义,可以提示一下登录的用户引起运维人员重视
Warning!!!Any Access Without Permission Is Forbidden!!!
*******************************************************

注:ssh设置的可能不支持中文
vim /etc/motd

本人声明,如果您以非法方式登录本服务器,您将承担法律责任!!!

I declare that if you log on this server by illegal means, you will be held legally responsible!!!
效果图:

9.关闭selinux,清空iptables
关闭selinux防火墙
默认云服务器都是关着的
cat /etc/selinux/config
setenforce 0 设置不启动
getenforce   查看
清空iptables
# iptables –F     #清理防火墙规则
# iptables –L     #查看防火墙规则
Chain INPUT (policy ACCEPT)
target     prot opt source               destination
Chain FORWARD (policy ACCEPT)
target     prot opt source               destination
Chain OUTPUT (policy ACCEPT)
target     prot opt source               destination
#/etc/init.d/iptables save   #保存防火墙配置信息
针对centos7防火墙配置
修改防火墙
CentOS切换为iptables防火墙
firewall-cmd --state 查看防火墙状态

切换到iptables首先应该关掉默认的firewalld,然后安装iptables服务。
1、关闭firewall:
systemctl stop firewalld.service
systemctl disable firewalld.service #禁止firewall开机启动

2、安装iptables防火墙
yum install iptables-services #安装
service iptables save

3、编辑iptables防火墙配置
vi /etc/sysconfig/iptables #编辑防火墙配置文件
下边是一个完整的配置文件:
在你运行完save中间插入下面的规则
-A INPUT -m state --state ESTABLISHED,RELATED -j ACCEPT
-A INPUT -p icmp -j ACCEPT
-A INPUT -i lo -j ACCEPT
-A INPUT -m state --state NEW -m tcp -p tcp --dport 22 -j ACCEPT
-A INPUT -m state --state NEW -m tcp -p tcp --dport 80 -j ACCEPT
-A INPUT -m state --state NEW -m tcp -p tcp --dport 3306 -j ACCEPT
-A INPUT -j REJECT --reject-with icmp-host-prohibited
-A FORWARD -j REJECT --reject-with icmp-host-prohibited
:wq! #保存退出

systemctl start iptables.service  #开启
systemctl enable iptables.service #设置防火墙开机启动
附赠防火墙脚本,前提你已经切换至iptables
#!/bin/bash

IPT=`which iptables`
$IPT -F
$IPT -X
$IPT -P INPUT DROP
$IPT -P FORWARD ACCEPT
$IPT -P OUTPUT ACCEPT
$IPT -N syn-flood
##本地回环 内网允许任何
$IPT -A INPUT -i lo -j ACCEPT
$IPT -A INPUT -m state --state ESTABLISHED,RELATED -j ACCEPT
$IPT -A INPUT -m state --state NEW -s 10.0.0.0/8 -j ACCEPT
# ssh 端口开放 任何IP
$IPT -A INPUT -m state --state NEW -p tcp --dport 22 -j ACCEPT
# 根据需求填写相应的端口
$IPT -A INPUT -p tcp -m multiport --dports 80,8087,89 -j ACCEPT
# zabbix监控地址
$IPT -A INPUT -p tcp -s zabbix.ip -m state --state NEW -m tcp --dport 10050 -j ACCEPT
# ICMP 规则控制
$IPT -A INPUT -p icmp -m limit --limit 100/sec --limit-burst 100 -j ACCEPT
$IPT -A INPUT -p icmp -m limit --limit 1/s --limit-burst 10 -j ACCEPT
# DOS防护
$IPT -A INPUT -p tcp -m tcp --tcp-flags FIN,SYN,RST,ACK SYN -j syn-flood
$IPT -A INPUT -j REJECT --reject-with icmp-host-prohibited
$IPT -A syn-flood -p tcp -m limit --limit 3/sec --limit-burst 6 -j RETURN
$IPT -A syn-flood -j REJECT --reject-with icmp-port-unreachable
10.锁定关键文件系统
加锁,不可修改加锁文件
chattr +i /etc/passwd
lsattr /etc/passwd
----i--------e-- /etc/passwd
去锁,可以修改文件
chattr -i /etc/passwd
lsattr /etc/passwd
-------------e-- /etc/passwd
使用chattr命令后,为了安全我们需要将其改名
mv /usr/bin/chattr /usr/bin/任意名称
如果有帮助,请帮忙点个赞吧,谢谢
----------------------致敬每一个正在努力的人


