
虚拟域和虚拟用户的认证过程
准备工作:
1、安装一些必要的rpm包
- # yum install perl-DBD-MySQL -y #必须安装,因为mysql是编译安装的,这个不会自动安装
- # yum install mysql-devel -y #因为前面安装dovecot时,由于依赖关系系统自动安装了
- 一个mysql客户端为了不出错误,所以devel包也装了
- # yum install pcre-devel -y # 编译安装apache用到
2、由于后面的Extmail需要用到web服务,所以要安装web服务,详细过程请见博客-手动搭建LAMP
下面正式开始配置过程:
一、编译安装courier-authlib-0.64.0
- 1、安装要用到的rpm包
- [root@mail courier-authlib-0.64.0]# yum install mysql-devel
- [root@mail courier-authlib-0.64.0]# yum install expect #使用expect实现主机间通信的
- 查看和ldtl相关的包是否安装:
- [root@mail courier-authlib-0.64.0]# yum list | grep ltdl
- Unable to read consumer identity
- libtool-ltdl.i386 1.5.22-7.el5_4 Base
- libtool-ltdl-devel.i386 1.5.22-7.el5_4 Base
- [root@mail courier-authlib-0.64.0]# yum install libtool-ltdl libtool-ltdl-devel -y
- ltdl: 动态模块加载器,courier-authlib需要用到,所以安装相关的包
- 2、编译安装courier-authlib-0.64.0
- 备注:在RHEL5上要使用0.64.0及之前的版本,否则,可能会由于sqlite版本过低问题导致configure检查无法通过
- 或编译无法进行。
- [root@mail ~]# date 0505145813.00 # 同步一下时间
- Sun May 5 14:58:00 CST 2013
- [root@mail ~]# date
- Sun May 5 14:58:13 CST 2013
- [root@mail ~]# tar xf courier-authlib-0.64.0.tar.bz2
- [root@mail ~]# cd courier-authlib-0.64.0
- [root@mail courier-authlib-0.64.0]#./configure \
- --prefix=/usr/local/courier-authlib \
- --sysconfdir=/etc \
- --without-authpam \
- --without-authshadow \
- --without-authvchkpw \
- --without-authpgsql \
- --with-authmysql \
- --with-sqlite-libs=/usr/lib
- --with-sqlite-include=/usr/include
- --with-mysql-libs=/usr/local/mysql/lib \
- --with-mysql-includes=/usr/local/mysal/include \
- --with-redhat \
- --with-authmysqlrc=/etc/authmysqlrc \
- --with-authdaemonrc=/etc/authdaemonrc \
- --with-mailuser=postfix \
- --with-mailgroup=postfix \
- --with-ltdl-lib=/usr/lib \
- --with-ltdl-include=/usr/include
- [root@mail courier-authlib-0.64.0]# make
- [root@mail courier-authlib-0.64.0]# make install
- 安装完成后会在/usr/local/courier-authlib/目录下生成一个var/spool/authdaemon套接字文件,系统会
- 通过这个套接字文件和进程建立联系,所以权限要改为755
- 备注:可以使用--with-authdaemonvar=/var/spool/authdaemon选项来指定进程套按字目录路径。
- [root@mail courier-authlib-0.64.0]# cd /usr/local/courier-authlib/var/
- [root@mail spool]# ll
- total 8
- drwxr-x--- 2 postfix postfix 4096 Mar 31 04:41 authdaemon
- [root@mail spool]# chmod 755 /usr/local/courier-authlib/var/spool/authdaemon
- [root@mail spool]# ll
- total 8
- drwxr-xr-x 2 postfix postfix 4096 Mar 31 04:41 authdaemon
- 在编译路径下复制几个配置文件
- [root@mail ~]# cd courier-authlib-0.64.0
- [root@mail courier-authlib-0.64.0]# cp /etc/authdaemonrc.dist /etc/authdaemonrc
- [root@mail courier-authlib-0.64.0]# cp /etc/authmysqlrc.dist /etc/authmysqlrc
- 修改/etc/authdaemonrc 文件
- [root@mail courier-authlib-0.64.0]# vim /etc/authdaemonrc
- authmodulelist="authmysql" #认证模块类型
- authmodulelistorig="authmysql" #支持认证的原始模块类型
- daemons=10 #进程数,这个自己随意指定
- 3、配置其通过mysql进行邮件帐号认证
- 编辑/etc/authmysqlrc 为以下内容,其中2525,2525 为postfix 用户的UID和GID。
- MYSQL_SERVER localhost
- MYSQL_PORT 3306 #指定你的mysql监听的端口,这里使用默认的3306
- MYSQL_USERNAME extmail #这时为后文要用的数据库的所有者的用户名
- MYSQL_PASSWORD extmail #密码
- MYSQL_SOCKET /tmp/mysql.sock #mysql的套接字文件,如果是rpm包装的在/var/lib/mysql/mysql.lock
- MYSQL_DATABASE extmail #虚拟用户放在哪个库中,这个库有extman自动创建
- MYSQL_USER_TABLE mailbox #mysql的用户账号放在哪个表中,这个也是由extman生成
- MYSQL_CRYPT_PWFIELD password
- MYSQL_UID_FIELD '2525'
- MYSQL_GID_FIELD '2525'
- MYSQL_LOGIN_FIELD username
- MYSQL_HOME_FIELD concat('/var/mailbox/',homedir) #定义用户邮箱地址 concat是一个内置函数
- MYSQL_NAME_FIELD name 能将两个字符串连接起来当做一个来使用
MYSQL_MAILDIR_FIELD concat('/var/mailbox/',maildir)- 给courier-authlib提供SysV风格的服务脚本,并启动服务
- [root@mail courier-authlib-0.64.0]# cp courier-authlib.sysvinit /etc/init.d/courier-authlib
- [root@mail courier-authlib-0.64.0]# chmod +x /etc/init.d/courier-authlib
- [root@mail courier-authlib-0.64.0]# chkconfig --add courier-authlib
- [root@mail courier-authlib-0.64.0]# chkconfig --level 2345 courier-authlib on
- [root@mail courier-authlib-0.64.0]# service courier-authlib start
- Starting Courier authentication services: authdaemond
- 4、新建虚拟用户邮箱所在的目录,并将其权限赋予postfix用户:
- [root@mail ~]# mkdir -p /var/mailbox
- [root@mail ~]# chown -R postfix /var/mailbox
- 接下来重新配置SMTP 认证,编辑 /usr/lib/sasl2/smtpd.conf ,确保其为以下内容:
- [root@mail ~]# vim /usr/lib/sasl2/smtpd.conf
- pwcheck_method: authdaemond
- mech_list: PLAIN LOGIN
- authdaemond_path:/usr/local/courier-authlib/var/spool/authdaemon/socket #套接字文件路径
- 由于要用到sasl,所以重启一下saslauthd服务;
- [root@mail ~]# service saslauthd restart
- Stopping saslauthd: [ OK ]
- Starting saslauthd: [ OK ]
二、让postfix支持虚拟域和虚拟用户
- 1、编辑/etc/postfix/main.cf,添加如下内容:
- [root@mail ~]# vim /etc/postfix/main.cf
- ########################Virtual Mailbox Settings########################
- virtual_mailbox_base = /var/mailbox
- virtual_mailbox_maps = mysql:/etc/postfix/mysql_virtual_mailbox_maps.cf
- virtual_mailbox_domains = mysql:/etc/postfix/mysql_virtual_domains_maps.cf
- virtual_alias_domains =
- virtual_alias_maps = mysql:/etc/postfix/mysql_virtual_alias_maps.cf
- virtual_uid_maps = static:2525
- virtual_gid_maps = static:2525
- virtual_transport = virtual
- maildrop_destination_recipient_limit = 1
- maildrop_destination_concurrency_limit = 1
- ##########################QUOTA Settings########################
- message_size_limit = 14336000
- virtual_mailbox_limit = 20971520
- virtual_create_maildirsize = yes
- virtual_mailbox_extended = yes
- virtual_mailbox_limit_maps = mysql:/etc/postfix/mysql_virtual_mailbox_limit_maps.cf
- virtual_mailbox_limit_override = yes
- virtual_maildir_limit_message = Sorry, the user's maildir has overdrawn his diskspace quota, please Tidy your mailbox and try again later.
- virtual_overquota_bounce = yes
- 2、使用extman源码目录下docs目录中的extmail.sql和init.sql建立数据库:
- exman需要用到apache服务,所以请先安装httpd,这里是源码编译安装的http-2.4.4,编译过程
- 请参考博客LAMP的搭建过程
- [root@mail ~]# tar xf extman-1.1.tar.gz
- [root@mail ~]# cd extman-1.1
- [root@mail extman-1.1]# ls
- addon cgi contrib docs INSTALL libs README.fcgi Version
- AUTHORS ChangeLog daemon html lang README tools webman.cf.default
- [root@mail extman-1.1]# cd docs/
- [root@mail docs]# ls
- backport init.sql ldap_virtual_mailbox_maps.cf mysql_virtual_limit_maps.cf
- extmail.schema ldap_virtual_alias_maps.cf ldap_virtual_sender_maps.cf mysql_virtual_mailbox_maps.cf
- extmail.sql ldap_virtual_domains_maps.cf mysql_virtual_alias_maps.cf mysql_virtual_sender_maps.cf
- init.ldif ldap_virtual_limit_maps.cf mysql_virtual_domains_maps.cf README.postfix
- [root@mail docs]# sed -i 's@TYPE=MyISAM@ENGINE=InnoDB@g' extmail.sql #改一下里面的引擎类型
- [root@mail docs]# mysql -uroot -p < extmail.sql
- Warning: mysql: ignoring option '--named-commands' due to invalid value 'root'
- Enter password: #我这里的mysql有密码,你们的就没有了
- [root@mail docs]# mysql -uroot -p < init.sql
- Warning: mysql: ignoring option '--named-commands' due to invalid value 'root'
- Enter password:
- 3、授予用户extmail访问extmail数据库的权限
- [root@mail docs]# mysql -uroot -p
- Warning: mysql: ignoring option '--named-commands' due to invalid value 'root'
- Enter password:
- Welcome to the MySQL monitor. Commands end with ; or \g.
- Your MySQL connection id is 20
- Server version: 5.5.28-log Source distribution
- Type 'help;' or '\h' for help. Type '\c' to clear the buffer.
- mysql> GRANT all privileges on extmail.* TO extmail@localhost IDENTIFIED BY 'extmail';
- Query OK, 0 rows affected (0.00 sec)
- mysql> GRANT all privileges on extmail.* TO extmail@127.0.0.1 IDENTIFIED BY 'extmail';
- Query OK, 0 rows affected (0.00 sec)
- 4、提供配置文件
- [root@mail docs]# ls
- backport init.sql ldap_virtual_mailbox_maps.cf mysql_virtual_limit_maps.cf
- extmail.schema ldap_virtual_alias_maps.cf ldap_virtual_sender_maps.
- mysql_virtual_mailbox_maps.cf
- extmail.sql ldap_virtual_domains_maps.cf mysql_virtual_alias_maps.cf mysql_virtual_sender_maps.cf
- init.ldif ldap_virtual_limit_maps.cf mysql_virtual_domains_maps.cf README.postfix
- [root@mail docs]# cp mysql_virtual_* /etc/postfix/
- [root@mail docs]# cd /etc/postfix/
- [root@mail postfix]# ls
- access generic main.cf.default mysql_virtual_domains_maps.cf relocated
- aliases header_checks makedefs.out mysql_virtual_limit_maps.cf TLS_LICENSE
- bounce.cf.default LICENSE master.cf mysql_virtual_mailbox_maps.cf transport
- canonical main.cf mysql_virtual_alias_maps.cf mysql_virtual_sender_maps.cf virtual
- 5、连接数据库查看
- [root@mail postfix]# mysql -uroot
- Warning: mysql: ignoring option '--named-commands' due to invalid value 'root'
- Welcome to the MySQL monitor. Commands end with ; or \g.
- Your MySQL connection id is 23
- Server version: 5.5.28-log Source distribution
- Type 'help;' or '\h' for help. Type '\c' to clear the buffer.
- mysql> show databases;
- +--------------------+
- | Database |
- +--------------------+
- | information_schema |
- | extmail |
- | mysql |
- | performance_schema |
- | test |
- | wpdb |
- +--------------------+
- 6 rows in set (0.00 sec)
- mysql> use extmail
- Database changed
- mysql> show tables;
- +-------------------+
- | Tables_in_extmail |
- +-------------------+
- | alias |
- | domain |
- | domain_manager |
- | mailbox |
- | manager |
- +-------------------+
- 5 rows in set (0.04 sec)
- mysql> select * from domain\G #让查询的内容纵向显示
- *************************** 1. row ***************************
- domain: extmail.org #如果我们在domain这个表中添加lsq.com,他就给我们中
- 继邮件了,此时只给这个域中继邮件,这个域是sql脚本生成的
- description: virtualDomain for extmail.org
- hashdirpath: A0/B0
- maxalias: 50
- maxusers: 50
- maxquota: 1073741824
- maxnetdiskquota: 1073741824
- transport: NULL
- can_signup: 1
- default_quota: 5242880
- default_netdiskquota: 5242880
- default_expire: 1y
- disablesmtpd: 0
- disablesmtp: 0
- disablewebmail: 0
- disablenetdisk: 0
- disableimap: 1
- disablepop3: 0
- createdate: 2007-02-14 15:10:04
- expiredate: 2010-11-08
- active: 1
- 1 row in set (0.03 sec)

三、配置dovecot,是dovecot也支持虚拟域和虚拟用户
- 1、修改postfix的配置文件
- [root@mail postfix]# vim /etc/dovecot.conf
- mail_location = maildir:/var/mailbox/%d/%n/Maildir #表示在/var/mailbox下有每一个域,
- 在每个域下又有每一个用户名命名的文件,而用户的邮件则在maildir目录中保存
- %d: dovecot所支持的宏,表示域名
- %n:dovecot所支持的宏,表示用户名
- 2、修改下面的内容,并启用相关选项:
- auth default {
- mechanisms = plain
- passdb sql {
- args = /etc/dovecot-mysql.conf
- }
- userdb sql {
- args = /etc/dovecot-mysql.conf
- }
- 禁用如下选项:
- userdb passwd {
- }
- passwdb pam {
- }
- 注意:禁用时,前后括弧都禁用才能禁用此选项
- 3、编辑/etc/dovecot-mysql.conf
- [root@mail postfix]# vim /etc/dovecot-mysql.conf
- driver = mysql
- connect = host=/tmp/mysql.sock dbname=extmail user=extmail password=extmail
- default_pass_scheme = CRYPT
- password_query = SELECT username AS user,password AS password FROM mailbox WHERE username = '%u'
- user_query = SELECT maildir, uidnumber AS uid, gidnumber AS gid FROM mailbox WHERE username = '%u'
- [root@mail postfix]# service dovecot restart
- Stopping Dovecot Imap: [ OK ]
- Starting Dovecot Imap: [ OK ]
- 上述表示dovecot认证用户的时候基于哪个账号密码去连接数据库并且到数据库的哪个库中的哪张表中去查找用户和密码
- 从而验证账号和密码是否匹配
- 说明:如果mysql服务器是本地主机,即host=localhost时,如果mysql.sock文件不是默认的/var/lib/mysql/mysql.sock
- 可以使用host=“sock文件的路径”来指定新位置;例如,使用通用二进制格式或源码安装的MySQL,其sock文件位置为/tmp/mysql.sock,
- 相应地,connect应按如下方式定义:
- connect = host=/tmp/mysql.sock dbname=extmail user=extmail password=extmail
- 如果使用rpm包安装的mysql,其connect按如下方式定义:
- connect = host=localhost dbname=extmail user=extmail password=extmail
四、安装Extmail-1.2
- 1、解压缩extmail至网页所在目录下,并提供配置文件
- [root@mail ~]# tar xf extmail-1.2.tar.gz
- [root@mail ~]# mkdir -p /web/vhosts/extsuite
- [root@mail ~]# mv extmail-1.2 /web/vhosts/extsuite/extmail
- [root@mail ~]# cp /web/vhosts/
- extsuite/ www1/ www2/
- [root@mail ~]# cp /web/vhosts/extsuite/extmail/webmail.cf.default /web/vhosts/extsuite/extmail/webmail.cf
- 我们这里的网页路径是/web/vhosts/ 与默认的不一致,所以修改配置文件
- 2、修改主配置文件
- 把SYS_CONFIG = /var/www/extsuite/extmail/ 改为 SYS_CONFIG = /web/vhosts/extsuite/extmail/
- 把SYS_LANGDIR = /var/www/extsuite/extmail/lang 改为 SYS_LANGDIR = /web/vhosts/extsuite/extmail/lang
- 把SYS_TEMPLDIR = /var/www/extsuite/extmail/html 改为 SYS_TEMPLDIR = /web/vhosts/extsuite/extmail/html
- 部分修改选项的说明:
- SYS_MESSAGE_SIZE_LIMIT = 5242880 #用户可以发送的最大邮件
- SYS_USER_LANG = en_US 语言选项,可改作:SYS_USER_LANG = zh_CN
- SYS_MAILDIR_BASE = /home/domains 此处即为您在前文所设置的用户邮件的存放目录
- 可改作:
- SYS_MAILDIR_BASE = /var/mailbox
- SYS_MYSQL_USER = db_user
- SYS_MYSQL_PASS = db_pass
- 以上两句句用来设置连接数据库服务器所使用用户名、密码和邮件服务器用到的数据库,这里修改为:
- SYS_MYSQL_SOCKET = /var/lib/mysql/mysql.sock rpm包安装的不用改了
- 由于我们这里的源码编译安装的mysql所以的改为:
- SYS_MYSQL_SOCKET = /tmp/mysql.sock
- SYS_MYSQL_USER = extmail
- SYS_MYSQL_PASS = extmail
- SYS_MYSQL_HOST = localhost #指明数据库服务器主机名,这里默认即可
- SYS_MYSQL_TABLE = mailbox
- SYS_MYSQL_ATTR_USERNAME = username
- SYS_MYSQL_ATTR_DOMAIN = domain
- SYS_MYSQL_ATTR_PASSWD = password
- 以上用来指定验正用户登录里所用到的表,以及用户名、域名和用户密码分别对应的表中列的名称;这里默认即可
- SYS_AUTHLIB_SOCKET = /var/spool/authdaemon/socket
- 此句用来指明authdaemo socket文件的位置,这里修改为:
- SYS_AUTHLIB_SOCKET = /usr/local/courier-authlib/var/spool/authdaemon/socket
五、配置apache
- 由于extmail要进行本地邮件的投递操作,故必须将运行apache服务器用户的身份修改为您的邮件投递代理的用户
- 本例中打开了apache服务器的suexec功能,故使用以下方法来实现虚拟主机运行身份的指定。此例中的MDA为
- postfix自带,因此将指定为postfix用户:
- [root@mail ~]# vim /etc/httpd/httpd.conf
- 1、定位至:DocumentRoot 禁用中心主机
- 2、在配置文件尾部添加如下内容:
- <VirtualHost *:80>
- ServerName mail.magedu.com
- DocumentRoot /web/vhosts/extsuite/extmail/html/
- ScriptAlias /extmail/cgi /web/vhosts/extsuite/extmail/cgi
- Alias /extmail /web/vhosts/extsuite/extmail/html
- SuexecUserGroup postfix postfix #Suexec就表示运行某些服务时,不以系统指定的身份运行,而以suexec指定的身份运行
- </VirtualHost>
- 修改 cgi执行文件属主为apache运行身份用户:
- [root@mail ~]# cd /web/vhosts/extsuite/extmail/
- [root@mail extmail]# ls
- AUTHORS CREDITS dispatch_lig.sh html libs README.filter Version
- cgi dispatch.fcgi FAQ INSTALL README README.vpopmail webmail.cf
- ChangeLog dispatch-init globabook.cf lang README.fcgi tools webmail.cf.default
- [root@mail extmail]# chown -R postfix.postfix cgi/ /var/www/extsuite/extmail/cgi/
- [root@mail extmail]# httpd -t #检查配置文件语法问题
- 注意:如果您没有打开apache服务器的suexec功能,也可以使用以下方法解决:
- [root@mail ~]# vim /etc/httpd/httpd.conf
- 修改apache服务的运行者为postfix
- User postfix
- Group postfix
- <VirtualHost *:80>
- ServerName mail.magedu.com
- DocumentRoot /web/vhosts/extsuite/extmail/html/
- ScriptAlias /extmail/cgi /web/vhosts/extsuite/extmail/cgi #执行cgi脚本的目录
- Alias /extmail /web/vhosts/extsuite/extmail/html #别名路径
- </VirtualHost>
- 3、依赖关系的解决
- extmail将会用到perl的Unix::syslogd功能,您可以去http://search.cpan.org搜索下载原码包进行安装。
- [root@mail ~]# tar xf Unix-Syslog-1.1.tar.gz
- [root@mail ~]# cd Unix-Syslog-1.1
- [root@mail Unix-Syslog-1.1]# perl Makefile.PL
- [root@mail Unix-Syslog-1.1]# make
- [root@mail Unix-Syslog-1.1]# make install
- 4、启动apache服务
- # service httpd start
六、安装extman-1.1
- 1、安装及基本配置
- 由于前面用到了extman,已经解压过了,所以这了我们直接使用
- [root@mail ~]# mv extman-1.1 /web/vhosts/extsuite/extman
- 提供配置文件并修改配置文件以符合本例的需要:
- [root@mail ~]# cd /web/vhosts/extsuite/extman/
- [root@mail extman]# ls
- addon cgi contrib docs INSTALL libs README.fcgi Version
- AUTHORS ChangeLog daemon html lang README tools webman.cf.default
- [root@mail extman]# cp webman.cf.default webman.cf
- [root@mail extman]# vim webman.cf
- 2、修改主配置文件
- 我们这里的网页路径是/web/vhosts/ 与默认的不一致,所以修改配置文件
- 把SYS_CONFIG = /var/www/extsuite/extmail/ 改为 SYS_CONFIG = /web/vhosts/extsuite/extman/
- 把SYS_LANGDIR = /var/www/extsuite/extmail/lang 改为 SYS_LANGDIR = /web/vhosts/extsuite/extman/lang
- 把SYS_TEMPLDIR = /var/www/extsuite/extmail/html 改为 SYS_TEMPLDIR = /web/vhosts/extsuite/extman/html
- SYS_MAILDIR_BASE = /home/domains 此处即为您在前文所设置的用户邮件的存放目录,可改作:
- SYS_MAILDIR_BASE = /var/mailbox
- 修改 SYS_CAPTCHA_ON = 1 为 SYS_CAPTCHA_ON = 0
- SYS_CAPTCHA_ON = # 是否开启验证码功能,我们这里不开启
- SYS_DEFAULT_UID = 1000
- SYS_DEFAULT_GID = 1000
- 此两处后面设定的ID号需更改为前而创建的postfix用户和postfix组的id号,本文使用的是2525
- 因此,上述两项需要修改为:
- SYS_DEFAULT_UID = 2525
- SYS_DEFAULT_GID = 2525
- SYS_MYSQL_SOCKET = /var/lib/mysql/mysql.sock # 这个选项如果使用rpm包安装的mysql就不用改了
- 我们这里是源码编译安装的,改为:
- SYS_MYSQL_SOCKET = /tmp/mysql.sock
- 3、连上mysql,创建extman用户,并赋予extman用户extmail库上对表的所有权限
- [root@mail extman]# mysql -uroot -p
- Warning: mysql: ignoring option '--named-commands' due to invalid value 'root'
- Enter password:
- Welcome to the MySQL monitor. Commands end with ; or \g.
- Your MySQL connection id is 28
- Server version: 5.5.28-log Source distribution
- Type 'help;' or '\h' for help. Type '\c' to clear the buffer.
- mysql> grant all privileges on extmail.* to webman@localost identified by 'webman';
- Query OK, 0 rows affected (0.43 sec)
- mysql> grant all privileges on extmail.* to webman@127.0.0.1 identified by 'webman';
- Query OK, 0 rows affected (0.00 sec)
- mysql> flush privileges; #让mysql刷新授权表,重读授权表
- Query OK, 0 rows affected (0.20 sec)
- mysql>
- 而后修改cgi目录的属主和数组为postfix:
- [root@mail extman]# pwd
- /web/vhosts/extsuite/extman
- [root@mail extman]# chown -R postfix.postfix /web/vhosts/extsuite/extman/cgi
- 在apache的主配置文件中Extmail的虚拟主机部分,添加如下两行:
- ScriptAlias /extman/cgi /web/vhosts/extsuite/extman/cgi
- Alias /extman /web/vhosts/extsuite/extman/html
- 完后重启服务,让之生效:
- [root@mail extman]# service httpd restart
- Stopping httpd: [ OK ]
- Starting httpd: [ OK ]
- 创建其运行时所需的临时目录,并修改其相应的权限:
- [root@mail extman]# mkdir -pv /tmp/extman
- mkdir: created directory `/tmp/extman'
- [root@mail extman]# chown -R postfix.postfix /tmp/extman
好了,这是我们的邮件服务给予虚拟域、虚拟用户认证过程已经完工了,下面我们来试一下吧!

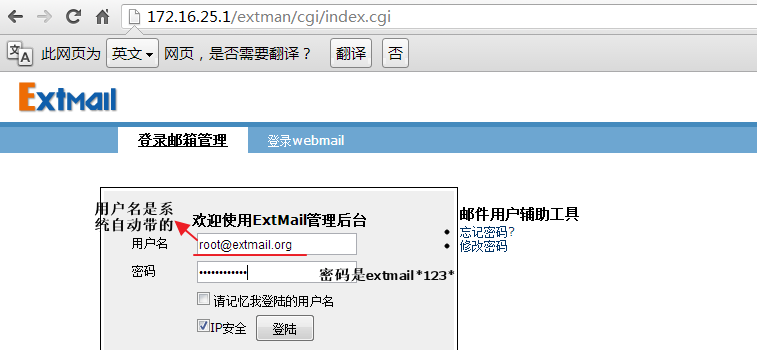
点击那个添加域,我们可以添加一个域,然后在这个域里申请两个用户,就可以用这两个用户,互相发送和接收邮件,大家都来试一试吧!

下面就是怎样实现pops和imaps来实现邮件加密了,未完待续!


