一、安装所需要程序
- 1、事先安装好开发环境和mysql数据库;
- # yum -y install mysql-server mysql-devel
- # yum -y groupinstall "Development Tools" "Development Libraries"
- 2.安装pam_mysql-0.7RC1
- [root@localhost ~]# tar xf pam_mysql-0.7RC1.tar.gz
- [root@localhost ~]# cd pam_mysql-0.7RC1
- [root@localhost pam_mysql-0.7RC1]# ./configure --with-mysql=/usr --with-openssl
- [root@localhost pam_mysql-0.7RC1]# make
- [root@localhost pam_mysql-0.7RC1]# make install
- 编译选项解释:
- --with-mysql=/usr #mysql的安装路径
- --with-openssl #表示连接mysql数据库时,可以实现加密的方式通信(可用可不用)
- 3.安装vsftpd
- # yum -y install vsftpd
二、创建虚拟用户账号
1.准备数据库及相关表
首先请确保mysql服务已经正常启动。而后,按需要建立存储虚拟用户的数据库即可,这里将其创建为vsftpd数据库。
mysql> create database vsftpd;
mysql> grant select on vsftpd.* to vsftpd@localhost identified by 'vsftpd';
mysql> grant select on vsftpd.* to vsftpd@127.0.0.1 identified by 'vsftpd';
mysql> flush privileges;
mysql> use vsftpd;
mysql> create table users (
-> id int AUTO_INCREMENT NOT NULL,
-> name char(20) binary NOT NULL,
-> password char(48) binary NOT NULL,
-> primary key(id)
-> );
2、添加测试的虚拟用户
根据需要添加所需要的用户,需要说明的是,这里将其密码采用明文格式存储,原因是pam_mysql的password()函数与MySQL的password()函数可能会有所不同。
mysql> insert into users(name,password) values('tom','redhat');
mysql> insert into users(name,password) values('jerry','redhat');
详细操作过程:
- [root@localhost pam_mysql-0.7RC1]# mysql
- Welcome to the MySQL monitor. Commands end with ; or \g.
- Your MySQL connection id is 4
- Server version: 5.0.77 Source distribution
- Type 'help;' or '\h' for help. Type '\c' to clear the buffer.
- mysql> create database vsftpd;
- Query OK, 1 row affected (0.12 sec)
- mysql> use vsftpd;
- Database changed
- mysql> create table users (id int AUTO_INCREMENT NOT NULL,name char(20) binary NOT NULL,password char(48) binary NOT NULL,primary key(id));
- Query OK, 0 rows affected (0.08 sec)
- mysql> desc users;
- +----------+----------+------+-----+---------+----------------+
- | Field | Type | Null | Key | Default | Extra |
- +----------+----------+------+-----+---------+----------------+
- | id | int(11) | NO | PRI | NULL | auto_increment |
- | name | char(20) | NO | | NULL | |
- | password | char(48) | NO | | NULL | |
- +----------+----------+------+-----+---------+----------------+
- 3 rows in set (0.03 sec)
- mysql> grant select on vsftpd.* to vsftpd@localhost identified by 'vsftpd';
- Query OK, 0 rows affected (0.04 sec)
- mysql> grant select on vsftpd.* to vsftpd@127.0.0.1 identified by 'vsftpd';
- Query OK, 0 rows affected (0.00 sec)
- mysql> flush privileges;
- Query OK, 0 rows affected (0.00 sec)
- mysql> insert into users(name,password) values('tom','redhat'),('jerry','redhat')
- -> ;
- Query OK, 2 rows affected (0.01 sec)
- Records: 2 Duplicates: 0 Warnings: 0
- mysql> select * from users;
- +----+-------+----------+
- | id | name | password |
- +----+-------+----------+
- | 1 | tom | redhat |
- | 2 | jerry | redhat |
- +----+-------+----------+
- 2 rows in set (0.00 sec)
- mysql> \q
- Bye
- [root@localhost pam_mysql-0.7RC1]#
三、配置vsftpd
- 1.建立pam认证所需文件
- #vi /etc/pam.d/vsftpd.mysql
- 添加如下两行
- auth required /lib/security/pam_mysql.so user=vsftpd passwd=www.magedu.com host=localhost db=vsftpd table=users usercolumn=name passwdcolumn=password crypt=0
- account required /lib/security/pam_mysql.so user=vsftpd passwd=www.magedu.com host=localhost db=vsftpd table=users usercolumn=name passwdcolumn=password crypt=0
- 2.修改vsftpd的配置文件,使其适应mysql认证
- 建立虚拟用户映射的系统用户及对应的目录
- #useradd -s /sbin/nologin -d /var/ftproot vuser
- #chmod go+rx /var/ftproot
- 请确保/etc/vsftpd/vsftpd.conf中已经启用了以下选项
- anonymous_enable=YES
- local_enable=YES
- write_enable=YES
- anon_upload_enable=NO
- anon_mkdir_write_enable=NO
- chroot_local_user=YES
- 而后添加以下选项
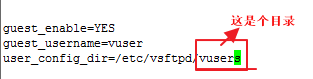
- guest_enable=YES #是否允许来宾账号访问
- guest_username=vuser #把来宾账号映射为vuser
- 并确保pam_service_name选项的值如下所示
- pam_service_name=vsftpd.mysql
虚拟用户登录成功
四、启动vsftpd服务
# service vsftpd start
# chkconfig vsftpd on
五、配置虚拟用户具有不同的访问权限
- vsftpd可以在配置文件目录中为每个用户提供单独的配置文件以定义其ftp服务访问权限,每个虚拟用户的配置文件名同虚拟用户的用户名。配置文件目录可以是任意未使用目录,只需要在vsftpd.conf指定其路径及名称即可。
- 1、配置vsftpd为虚拟用户使用配置文件目录
- # vim /etc/vsftpd/vsftpd.conf
- 添加如下选项
- user_config_dir=/etc/vsftpd/vusers
- 2、创建所需要目录,并为虚拟用户提供配置文件
- # mkdir /etc/vsftpd/vusers/
- # cd /etc/vsftpd/vusers/
- # touch tom jerry
- 3、配置虚拟用户的访问权限
- 虚拟用户对vsftpd服务的访问权限是通过匿名用户的相关指令进行的。比如,如果需要让tom用户具有上传文件的权限,可以修改/etc/vsftpd/vusers/tom文件,在里面添加如下选项即可。
- anon_upload_enable=YES
- anon_mkdir_write_enable=YES
- anon_other_write_enable=YES
在tom问件里配置如下内容,可以使tom用户上传下载和删除文件,jerry用户没配置
tom用户可以上传和删除等权限
jerry用户没有权限:
- [root@localhost vusers]# ftp 172.16.25.11
- Connected to 172.16.25.11.
- 220 (vsFTPd 2.0.5)
- 530 Please login with USER and PASS.
- 530 Please login with USER and PASS.
- KERBEROS_V4 rejected as an authentication type
- Name (172.16.25.11:root): tom
- 331 Please specify the password.
- Password:
- 230 Login successful.
- Remote system type is UNIX.
- Using binary mode to transfer files.
- ftp> ls
- 227 Entering Passive Mode (172,16,25,11,78,168)
- 150 Here comes the directory listing.
- 226 Directory send OK.
- ftp> lcd /etc
- Local directory now /etc
- ftp> put inittab
- local: inittab remote: inittab
- 227 Entering Passive Mode (172,16,25,11,96,175)
- 150 Ok to send data.
- 226 File receive OK.
- 1666 bytes sent in 0.00068 seconds (2.4e+03 Kbytes/s)
- ftp> ls
- 227 Entering Passive Mode (172,16,25,11,193,191)
- 150 Here comes the directory listing.
- -rw------- 1 502 502 1666 Apr 14 11:00 inittab
- 226 Directory send OK.
- ftp> delete inittab
- 250 Delete operation successful.
- ftp> ls
- 227 Entering Passive Mode (172,16,25,11,113,4)
- 150 Here comes the directory listing.
- 226 Directory send OK.
这就是基于pam的虚拟用户认证,大家都来试试吧!
- [root@localhost vusers]# ftp 172.16.25.11
- Connected to 172.16.25.11.
- 220 (vsFTPd 2.0.5)
- 530 Please login with USER and PASS.
- 530 Please login with USER and PASS.
- KERBEROS_V4 rejected as an authentication type
- Name (172.16.25.11:root): jerry
- 331 Please specify the password.
- Password:
- 230 Login successful.
- Remote system type is UNIX.
- Using binary mode to transfer files.
- ftp> lcd /etc
- Local directory now /etc
- ftp> put inittab
- local: inittab remote: inittab
- 227 Entering Passive Mode (172,16,25,11,78,3)
- 550 Permission denied.
- ftp>