
1,linux下安装vnc服务器
yum install vnc-server
[root@localhost ~]# yum install vnc-server
Loaded plugins: fastestmirror, refresh-packagekit, security
Loading mirror speeds from cached hostfile
* base: mirror.bit.edu.cn
* extras: mirror.bit.edu.cn
* updates: mirror.bit.edu.cn
Setting up Install Process
Resolving Dependencies
--> Running transaction check
---> Package tigervnc-server.x86_64 0:1.1.0-8.el6_5 will be installed
--> Finished Dependency Resolution
Dependencies Resolved
==========================================================================================
Package Arch Version Repository Size
==========================================================================================
Installing:
tigervnc-server x86_64 1.1.0-8.el6_5 updates 1.1 M
Transaction Summary
==========================================================================================
Install 1 Package(s)
Total download size: 1.1 M
Installed size: 2.9 M
Is this ok [y/N]: y
Downloading Packages:
tigervnc-server-1.1.0-8.el6_5.x86_64.rpm | 1.1 MB 02:03
Running rpm_check_debug
Running Transaction Test
Transaction Test Succeeded
Running Transaction
Installing : tigervnc-server-1.1.0-8.el6_5.x86_64 1/1
Verifying : tigervnc-server-1.1.0-8.el6_5.x86_64 1/1
Installed:
tigervnc-server.x86_64 0:1.1.0-8.el6_5
Complete!
2,配置VNC服务参数文件
vi /etc/sysconfig/vncservers
编辑vncservers文件追加如下
#vi /etc/sysconfig/vncsevers
VNCSERVERS="1:root 2:ivvr 3:abcd "
VNCSERVERARGS[1]="-name root -geometry 1280x720"
VNCSERVERARGS[2]="-name ivvr -geometry 800x600"
VNCSERVERARGS[3]="-name abcd -geometry 1280x720"
为VNC服务配置了3个用户root、ivvr和abcd,他们使用的端口号分别为5901、5902和5903,分辨率分别为1280x720、800x600和1280x720。
为使用VNC服务的用户设置密码
这一步需要切换到各自的账户下使用vncpasswd来生成访问VNC服务的密码
#su – ivvr
$vncpasswd
Password:
Verify:
这样在各自家目录下会生成一个.vnc的隐藏目录,其下面会生成一个名为passwd的存储用户密码的文件。
启动VNC服务
#service vncserver start
或者
#/etc/init.d/vncserver start
修改各用户桌面环境
启动VNC服务后在相应的用户的家目录下就会生成一个隐藏的vnc目录和下属xstartup文件
$vi /home/ivvr/.vnc/xstartup
#!/bin/sh
# Uncomment the following two lines for normal desktop:
# unset SESSION_MANAGER
# exec /etc/X11/xinit/xinitrc
[ -x /etc/vnc/xstartup ] && exec /etc/vnc/xstartup
[ -r $HOME/.Xresources ] && xrdb $HOME/.Xresources
xsetroot -solid grey
vncconfig -iconic &
xterm -geometry 80x24+10+10 -ls -title "$VNCDESKTOP Desktop" &
gnome-session &
#twm &
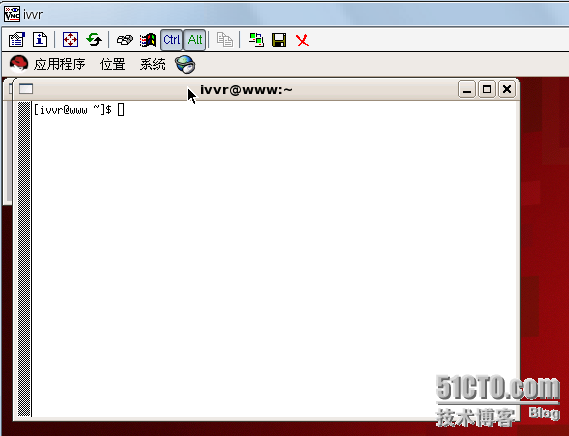
我们通过注释twm &且添加gnome-session &来使通过vnc-viewer登陆的用户使用gnome桌面环境。
重新启动VNC服务
#service vncserver restart
配置防火墙
在防火墙上为VNC server开启端口,服务的默认端口是TCP 5900,加上/etc/sysconfig/vncservers文件里配置的号,结果就是我们需要开启的端口,本例子为5901、5902和5903.2.Widows上的配置
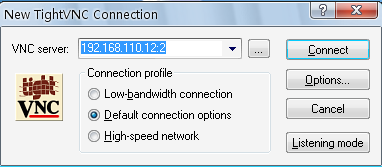
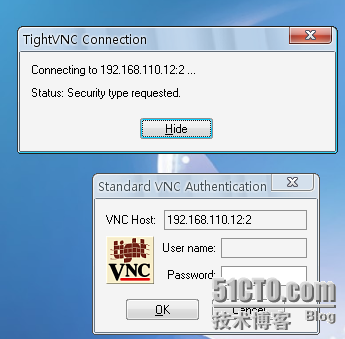
从http://www.tightvnc.com/download.html下载TightVNC。打开输入VNC服务地址和端口即可
备注:
1. [root@localhost ~]# vncserver
You will require a password to access your desktops.
Password:
Verify:
xauth: creating new authority file /root/.Xauthority
New 'localhost.localdomain:1 (root)' desktop is localhost.localdomain:1
Creating default startup script /root/.vnc/xstartup
Starting applications specified in /root/.vnc/xstartup
Log file is /root/.vnc/localhost.localdomain:1.log
2. 启动VNC服务。
#vncserver (启动vnc服务器)
关闭VNC服务。
#vncserver -kill :1 (关闭VNC服务器)
注意:kill和:1之间有一个空格。
启动 停止 重启
#service vncserver start/stop/restart
3. 运行vnc viewer,输入ip+连接号
例如:192.168.2.98:1


