
lnmp源码安装
Red hat linux 系统 二进制源码mysql-5.5.15-linux2.6-i686.tar.gz包 nginx-1.0.11.tar.gz
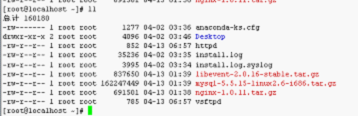
第一步开始安装mysql
解压包
tar -zxvf mysql-5.5.15-linux2.6-i686.tar.gz -C /usr/local/
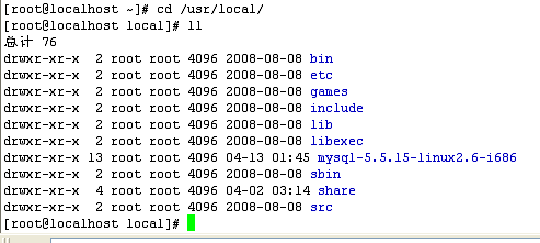
由于mysql名字较长,我创建一个链接
# ln -s mysql-5.5.15-linux2.6-i686 mysql
创建一个mysql组和添加一个用户
# groupadd -r mysql useradd -r -g mysql mysql -M
改变所属组的对象和实现递归
# chown -R mysql .
]# chgrp -R mysql .
初始化脚本
# scripts/mysql_install_db --user=mysql
改变权限
# chown -R root .
保存数据储存目录为mysql
]# chown -R mysql data
拷贝mysql的配置文件到/etc目录下
# cp support-files/mysql.server /etc/init.d/mysqld
# cp support-files/my-medium.cnf /etc/my.cnf
改变权限mysqld
]# chmod a+x /etc/init.d/mysqld
增加管理的mysql
# chkconfig --add mysqld
启动服务
# service mysqld start
查看mysql端口

连接mysql发现没有连接工具
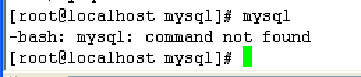
在/usr/local/mysql/bin/下执行mysql
# ./mysql
为了直接进入mysql,编辑/etc/profile,在第44行添加
PATH=$PATH:/usr/local/mysql/bin
执行# . /etc/profile
配置用户和口令
# mysqladmin -u root -p password '123456'
编辑[root@localhost mysql]# vim /etc/ld.so.conf.d/mysql.conf并在其中
写入库文件路径/usr/local/mysql/lib
执行ldconfig刷新缓存文件
查看缓存的更新

并创建一个链接
#ln -s include /usr/include/mysql
第二步安装nginx
nginx 的安装和配置
首先安装pcre(兼容的正则表达式库) 和livevent (显示其他软件的性能){源码安装 }
libevent.org 版本是2.0.18
其次安装nginx
安装libevent步骤:
先挂载光盘
# mkdir /mnt/cdrom
# mount /dev/cdrom /mnt/cdrom/
解压包
#cd /mnt/cdrom/Server/
# rpm -ivh pcre-devel-6.6-2.el5_1.7.i386.rpm
再在根目录下解压
# tar -zxvf libevent-2.0.16-stable.tar.gz -C /usr/local/src/
安装
[root@localhost libevent-2.0.16-stable]# ./configure --prefix=/usr/local/libevent
执行编译
[root@localhost libevent-2.0.16-stable]# make && makeinstall
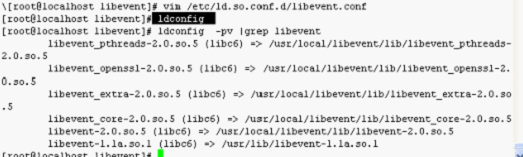
编辑库文件
# vim /etc/ld.so.conf.d/libevent.conf
并在其中写入库路径/usr/local/libevent/lib
执行ldconfig刷新缓存文件
并创建一个头文件目录链接并存放在 /usr/local/libevent
[root@localhost libevent]# ln -s /usr/local/libevent/include /usr/local/libevent
安装nginx步骤:
解压包# tar -zxvf nginx-1.0.11.tar.gz -C /usr/local/src/
切换到该目录下创建组和用户
[root@localhost ~]# cd /usr/local/src/nginx-1.0.11/
建立组 groupadd -r nginx
建立用户useradd -r -g nginx -s /bin/false -M nginx
nginx 的安装配置
[root@localhost nginx-1.0.11]# ./configure \
--conf-path=/src/nginx/nginx.conf \ 配置文件的路径
--error-log-path=/var/log/nginx/error.log \ 错误日志存放位置
--http-log-path=/var/log/nginx/access.log \ 成功日志存放位置
--pid-path=/var/run/nginx/nginx.pid \ 进程id号存放位置
--lock-path=/var/lock/nginx.lock \
--user=nginx \
--group=nginx \
--with-http_ssl_module \
--with-http_flv_module \
--with-http_stub_status_module \ 本机的虚拟输出
--with-http_gzip_static_module \
--http-client-body-temp-path=/var/tmp/nginx/client/ \
--http-proxy-temp-path=/var/tmp/nginx/proxy/ \
--http-fastcgi-temp-path=/var/tmp/nginx/fcgi/ \
--with-pcre
之后运行# make && make install
查看配置文件
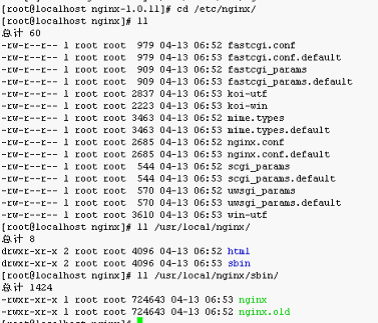
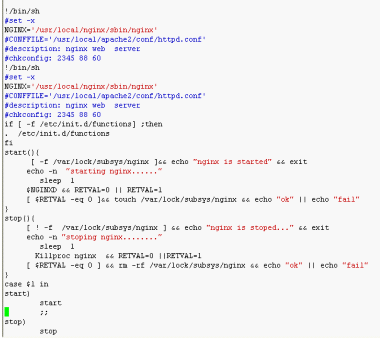
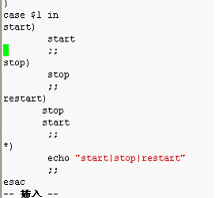
新建并编辑/etc/init.d/目录下的nginxd
#vim /etc/init.d/nginxd
赋予 nginx权限
#chmod a+x /etc/init.d/nginx
增加管理权限
# chkconfig --add nginx
启动服务
#service nginx start
#netstat -tupln |grep 80
发现缺少文件或目录,则创建文件和目录之后再启动服务,并查看停止和启动两种情况下端口状态。
第三步,php的安装

1. 先解压包
# tar -jxvf php-5.4.13.tar.bz2 -C /usr/local/src/
#./configure \
--prefix=/usr/local/php \ 安装目录
--enable-fpm \ 表明支持fastcgi
--enable-sockets \ 支持的服务和端口
--with-mysql=/usr/local/mysql \ 数据的安装目录
--with-mysqli=/usr/local/mysql/bin/mysql_config \ 接口文件
--enable-mbstring \
--enable-xml \
--with-png-dir \
--with-png \
--with-jpeg-dir \
--with-zlib \
--with-freetype-dir \
--with-config-file-path=/etc/php \ 存放php的配置文件
--with-config-file-scan-dir=/etc/php5.d 存放额外的配置文件
之后执行 make && make install(时间有点长)
2.php.ini 文件
进入源码目录
首先创建目录
# mkdir /etc/php /etc/php5.d
#cp php.ini-production /etc/php/php.ini
3. php-fpm的控制脚本
#cp sapi/fpm/init.d.php-fpm /etc/init.d/php-fpm
改变权限
#chmod a+x /etc/init.d/php-fpm
4.产生php-fpm的配置文件
进入php的安装目录,下的etc
#cp php-fpm.conf.default php-fpm.conf
4.启动php-fpm
#service php-fpm start
#chkconfig --add php-fpm
查看端口状态
# netstat -tupln |grep fpm
查看进程状态
# ps aux |grep fpm
第四步 安装完成接下来测试
1.nginx +php
编辑nginx的配置文件

进入# cd /usr/local/nginx/html/编辑index.html
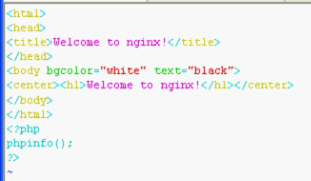
之后重启php服务
在浏览器输入http:\\(服务器ip)看到以下界面则成功
之后再测试mysql,编辑index.html

再刷新浏览器,启动mysql服务出现ok,停止出现not,则成功。
php的加速
xcache的使用
拆解压缩包 xcache-2.0.0.tar.gz

#/usr/local/phpnginx/bin/phpize
#./configure --enable-xcache --with-php-config=/usr/local/php/bin/php-config
也可以{#/usr/local/phpnginx/bin/phpize --clean && phpize
#./configure --enable-xcache --with-php-config=/usr/local/php/bin/php-config}
之后再执行
make && && make instal
编辑php,整合php和xcache
cp xcache.ini /etc/php5.d
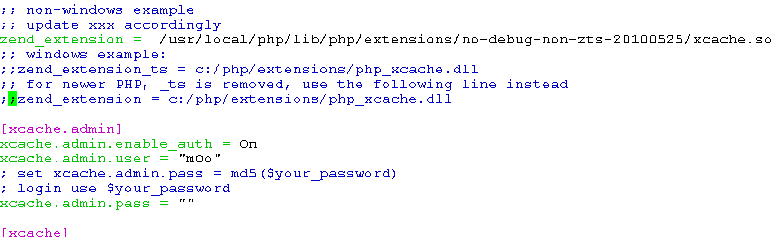
编辑 xache.ini
zend_extension=/usr/local/phpnginx/lib/php/exten/nodebug/xcache.so {具体路径}
重启服务
# service php-fpm restart
xcache的管理
拷贝admin目录到nginx的站点目录
# cp -r admin/ /usr/local/nginx/html/
改变目录和文件的权限
[root@localhost xcache-2.0.1]# chmod a+rx admin/
[root@localhost admin]# chmod a+r index.php
配置xcache.ini 输入帐号信息
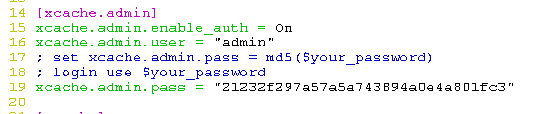
[root@localhost Server]# echo -n "admin" |md5sum 输入的密码用md5的方式加密

将出来的数字和字母放在下面的第19行如下图
[root@localhost php5.d]# vim xcache.ini
第15行默认的管理功能是开启的
第16行赋予一个账号
第17行是加密方式
第19行是密码
重启服务
# service php-fpm restart
在浏览器输入http:\\(服务器ip)看到以下界面则成功


