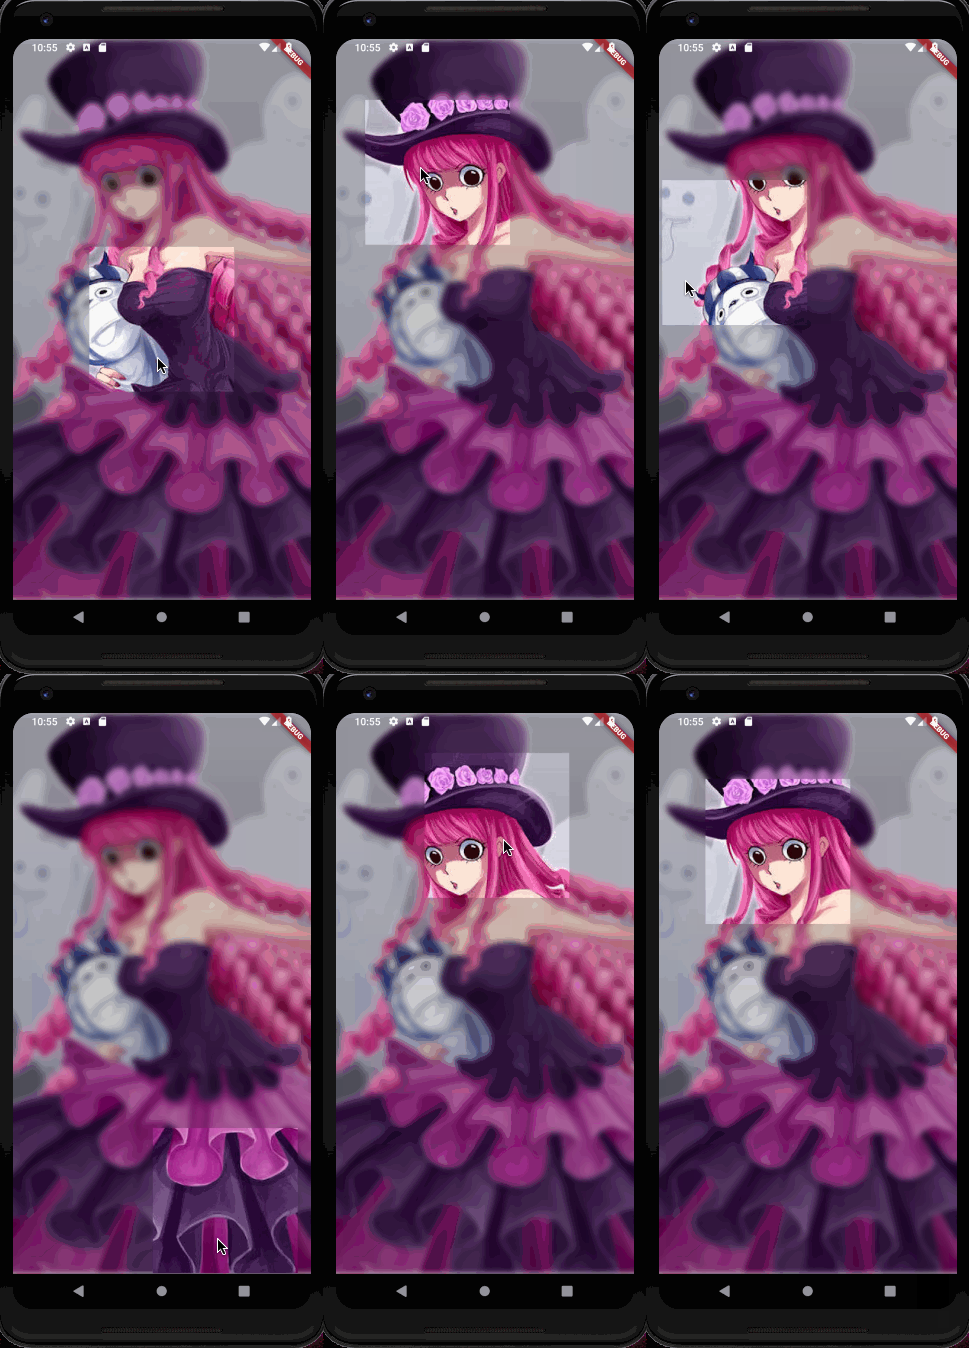
小菜在学习时想要做一点类似毛玻璃的效果,首先想到的是高斯模糊,对于原生 Android 需要话费很多精力,而 Flutter 提供了 BackdropFilter 高斯模糊的 Widget,真的很方便;

源码分析
const BackdropFilter({
    Key key,
    @required this.filter,
    Widget child
})
分析源码,必须要传递 filter 参数,用来构建模糊层效果;小菜理解只是通过 BackdropFilter 构建一个模糊图层,借助 Stack 等设置图层是在上层或下层,官方也推荐了 DecoratedBox 设置图层上下;
模糊图层通常借用 ImageFilter.blur 设置模糊度,一般是在 0.0-10.0 之间,数值越大模糊度越高,超过 10.0 时完全不可见;
小菜在设置模糊颜色时尝试了 withOpacity 方法,一般是在 0.0-1.0 之间,用来设置颜色值的透明度;也可以采用 withAlpha 方法,效果相同,一般是在 0-255 之间;同时还可以采用 withRed / withGreen / withBlue 直接设置三原色的基础值实现不同效果;
Widget _imageBackWid() {
  return Center(
      child: Column(mainAxisSize: MainAxisSize.min, children: <Widget>[
    Row(children: <Widget>[
      _itemWid(Colors.red.withOpacity(0.1), 4.0),
      _itemWid(Colors.white.withOpacity(0.1), 8.0),
    ]),
    Row(children: <Widget>[
      _itemWid(Colors.white.withOpacity(0.1), 4.0),
      Container(
          width: MediaQuery.of(context).size.width * 0.5,
          height: MediaQuery.of(context).size.width * 0.5,
          child: BackdropFilter(
              filter: ImageFilter.blur(sigmaX: 4.0, sigmaY: 4.0),
              child: Container(
                  color: Colors.white.withOpacity(0.1),
                  child: Padding(
                      padding: EdgeInsets.all(14.0),
                      child: Image.asset('images/icon_hzw01.jpg')))))
    ])
  ]));
}

Widget _itemWid(color, blur) {
  return Container(
      width: MediaQuery.of(context).size.width * 0.5,
      height: MediaQuery.of(context).size.width * 0.5,
      child: Stack(children: <Widget>[
        Padding(
            padding: EdgeInsets.all(14.0),
            child: Image.asset('images/icon_hzw01.jpg')),
        BackdropFilter(
            filter: ImageFilter.blur(sigmaX: blur, sigmaY: blur),
            child: Container(color: color))
      ]));
}
 小菜尝试了一个很不完善的小案例,类似于查看截图的小窗口,遮罩层是模糊图层;小菜用了很蠢的方式来处理,底部是一个设置了高斯模糊的背景图,上层通过 Canvas 展示一张完全相同的图片,借用 drawImage 实现小窗口,再通过手指坐标控制窗口位置;未对机型适配,仅作为一个不完善的小测试案例;
小菜附上核心代码仅供参考,若有更好的方法请多多指导!
class BackDropCanvas extends CustomPainter {
  ui.Image background;
  BuildContext context;
  var dx = 0.0, dy = 0.0;
  static const double smallScan = 200.0;
  BackDropCanvas(this.context, this.background, this.dx, this.dy);

  @override
  void paint(Canvas canvas, Size size) {
    canvas.clipPath(Path()
      ..moveTo((Screen.width - smallScan) * 0.5 + dx,
          (Screen.height - smallScan) * 0.5 + dy)
      ..lineTo((Screen.width + smallScan) * 0.5 + dx,
          (Screen.height - smallScan) * 0.5 + dy)
      ..lineTo((Screen.width + smallScan) * 0.5 + dx,
          (Screen.height + smallScan) * 0.5 + dy)
      ..lineTo((Screen.width - smallScan) * 0.5 + dx,
          (Screen.height + smallScan) * 0.5 + dy));
    canvas.drawImage(this.background, ui.Offset.zero, Paint());
  }

  @override
  bool shouldRepaint(CustomPainter oldDelegate) {
    return true;
  }
}

class _BackedDropPage extends State<BackedDropPage> {
  ui.Image _background;
  bool _prepDone;
  var dx = 0.0, dy = 0.0;
  static const double smallScan = 200.0;

  @override
  void initState() {
    _prepDone = false;
    super.initState();
    _prepare();
  }

  @override
  Widget build(BuildContext context) {
    return Scaffold(
        body: Stack(children: <Widget>[
      Container(
          width: Screen.width,
          height: Screen.height,
          child: Stack(children: <Widget>[
            Center(child: Image.asset('images/icon_hzw04_1.jpg')),
            BackdropFilter(
                filter: ImageFilter.blur(sigmaX: 4.0, sigmaY: 4.0),
                child: Container(color: Colors.black.withOpacity(0.2)))
          ])),
      _prepDone
          ? Container(
              width: MediaQuery.of(context).size.width,
              height: MediaQuery.of(context).size.height,
              child: CustomPaint(
                  painter: BackDropCanvas(context, _background, dx, dy)))
          : Container(color: Colors.grey),
      GestureDetector(onPanUpdate: (d) {
        if (d.globalPosition.dx >= smallScan * 0.5 &&
            d.globalPosition.dx <= Screen.width - smallScan * 0.5) {
          dx = d.globalPosition.dx - Screen.width * 0.5;
        }
        if (d.globalPosition.dy >= smallScan * 0.5 &&
            d.globalPosition.dy <= Screen.height - smallScan * 0.5) {
          dy = d.globalPosition.dy - Screen.height * 0.5;
        }
        setState(() {});
      })
    ]));
  }

  _prepare() {
    loadImage('images/icon_hzw04_1.jpg').then((image) {
      _background = image;
    }).whenComplete(() {
      _prepDone = true;
      setState(() {});
    });
  }
}

BackdropFilter 高斯模糊是一个实用且方便的 Widget,可灵活应用在项目中;小菜对此研究还不够深入,有问题的话请多多指导!
来源:阿策小和尚


