测试web 服务
一 、配置dns
1、安装
- #yum -y install bind97 bind97-devel bind97-libs bind97-utils
2、配置主配置文件
- #vim /etc/named.conf
- options {
- directory "/var/named";
- };
- zone "." IN {
- type hint;
- file "named.ca";
- };
- zone "localhost.localdomain" IN {
- type master;
- file "named.localhost";
- allow-update { none; };
- };
- zone "localhost" IN {
- type master;
- file "named.localhost";
- allow-update { none; };
- };
- zone "test.net." IN {
- type master;
- file "test.net.zone";
- allow-update { none; };
- };
- zone "example.org" IN {
- type master;
- file "example.org.zone";
- allow-update { none; };
- };
zone "magedu.com" IN {
type master;
file "magedu.com.zone";
allow-update { none; };
}; -
3、配置区域文件
- # vim magedu.com.zone
- $TTL 600
- @ IN SOA ns.magedu.com. admin.magedu.com. (
- 0 ; serial
- 1D ; refresh
- 1H ; retry
- 1W ; expire
- 3H ) ; minimum
- IN NS ns.magedu.com.
- ns IN A 172.16.2.1
- www IN A 172.16.2.1
另外两个和这个同样
- #cd /var/named/
- #ll
- total 88
- drwxr-x--- 4 root named 4096 Jul 4 20:38 chroot
- drwxrwx--- 2 named named 4096 Jul 4 20:53 data
- drwxrwx--- 2 named named 4096 Jul 4 21:03 dynamic
- -rw-r----- 1 root named 208 Jul 4 21:37 example.org.zone 1
- -rw-r----- 1 root named 203 Jul 4 20:53 magedu.com.zone 2
- -rw-r----- 1 root named 1892 Jul 4 20:42 named.ca
- -rw-r----- 1 root named 152 Dec 15 2009 named.empty
- -rw-r----- 1 root named 152 Jul 4 20:44 named.localhost
- -rw-r----- 1 root named 168 Dec 15 2009 named.loopback
- drwxrwx--- 2 named named 4096 Nov 17 2011 slaves
- -rw-r----- 1 root named 199 Jul 4 21:36 test.net.zone 3
-
- 三个配置文件 记得修改数组 为named
4、开机自动启动
- # chkconfig --list named
- named 0:off 1:off 2:off 3:off 4:off 5:off 6:off
- #chkconfig named on 在2345级别默认启动
- # chkconfig --list named
- named 0:off 1:off 2:on 3:on 4:on 5:on 6:off
5、启动服务
- #service named start
- # netstat -tnlp 查看端口
6、测试
- # vim /etc/resolv.conf
- nameserver 172.16.2.1 dns 指向自己的IP
- search localdomain
-
- dig host nslookup 三个命令都可以测试
- # dig -t A www.magedu.com
- ; <<>> DiG 9.7.0-P2-RedHat-9.7.0-6.P2.el5_7.4 <<>> -t A www.magedu.com
- ;; global options: +cmd
- ;; Got answer:
- ;; ->>HEADER<<- opcode: QUERY, status: NOERROR, id: 43869
- ;; flags: qr aa rd ra; QUERY: 1, ANSWER: 1, AUTHORITY: 1, ADDITIONAL: 1
- ;; QUESTION SECTION:
- ;www.magedu.com. IN A
-
- ;; ANSWER SECTION:
- www.magedu.com. 600 IN A 172.16.2.1
-
- ;; AUTHORITY SECTION:
- magedu.com. 600 IN NS ns.magedu.com.
-
- ;; ADDITIONAL SECTION:
- ns.magedu.com. 600 IN A 172.16.2.1
-
- ;; Query time: 32 msec
- ;; SERVER: 172.16.2.1#53(172.16.2.1)
- ;; WHEN: Wed Jul 4 22:02:46 2012
- ;; MSG SIZE rcvd: 81
-
- # host -t A www.magedu.com
- www.magedu.com has address 172.16.2.1
- #nslookup 是个交互式的命令
dig host nslookup 三个命令都可以测试 有兴趣可以自己摸索
测试web时我们就可以把测试机的dns指向上面dns的IP dns与web 结合
二、配置web服务
1、安装
#yum -y install httpd
2、配置虚拟主机
- # vim /etc/httpd/conf/httpd.conf
- NameVirtualHost *:80
- <VirtualHost *:80>
- DocumentRoot /www/vhosts/magedu
- ServerName www.magedu.com
- ErrorLog /var/log/httpd/magedu.error_log 不同的访问日志
- CustomLog /var/log/httpd/magedu.access_log common
- </VirtualHost>
- <VirtualHost *:80>
- DocumentRoot /www/vhosts/test
- ServerName www.test.net
- ErrorLog /var/log/httpd/test.error_log
- CustomLog /var/log/httpd/test.access_log common
- </VirtualHost>
- <VirtualHost *:80>
- DocumentRoot /www/vhosts/example
- ServerName www.example.org
- ErrorLog /var/log/httpd/example.error_log
- CustomLog /var/log/httpd/example.access_log common
- </VirtualHost>
3、修该,定义访问权限
- <VirtualHost *:80>
- DocumentRoot /www/vhosts/magedu
- ServerName www.magedu.com
- ErrorLog /var/log/httpd/magedu.error_log
- CustomLog /var/log/httpd/magedu.access_log common
- <Directory "/www/vhosts/magedu">
- Options none
- AllowOverride none
- Order deny,allow
- Deny from 192.168.0.142
- </Directory>
- </VirtualHost>
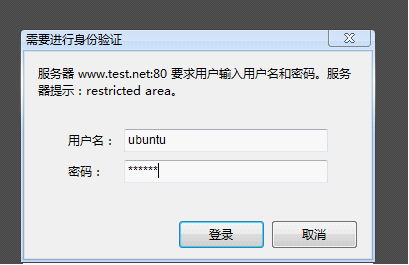
4、修改,基于密码访问
- <VirtualHost *:80>
- DocumentRoot /www/vhosts/test
- ServerName www.test.net
- ErrorLog /var/log/httpd/test.error_log
- CustomLog /var/log/httpd/test.access_log common
- <Directory "/www/vhosts/test">
- Options none
- AllowOverride AuthConfig 允许覆盖 以密码认证
- AuthType Basic 认证方式 (basic 认证和 摘要认证 MD5)
- AuthName "restricted area" 名字
- AuthUserFile "/etc/httpd/conf/.htpasswd" 存放位置
- Require valid-user 允许上个文件中的所有用户
- </Directory>
- </VirtualHost>
5、创建密码文件 和允许访问的用户
- # htpasswd -c -m /etc/httpd/conf/.htpasswd gentoo 创建密码 文件 gentoo 用户可以访问
- New password:
- Re-type new password:
- Adding password for user gentoo
- #htpasswd -b -m /etc/httpd/conf/.htpasswd ubuntu redhat 创建ubuntu 用户 密码 redhat

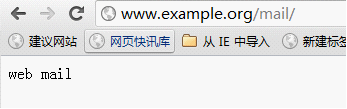
6、添加别名
- <VirtualHost *:80>
- DocumentRoot /www/vhosts/example
- ServerName www.example.org
- ErrorLog /var/log/httpd/example.error_log
- CustomLog /var/log/httpd/example.access_log common
- Alias /mail/ "/web/mail/" 别名
- </VirtualHost>

dns 与web 结合 基本就如此 ,我们要学会使用,学是为了用,用时为了跟好的学