前言
在移动设备上进行自动化测试最困难的部分是测试金字塔的顶端——E2E。E2E 测试的核心问题是片状性——测试通常不是确定性的。我们相信,要想迎面解决这个问题,唯一的方法就是从黑盒测试转移到灰盒测试。
Detox 是移动应用程序的灰盒端到端测试和自动化框架。当你的手机应用程序在真实设备/模拟器上运行时,使用 Detox 测试它,就像一个真实的用户一样,这大降低了我们对手工 QA 的依赖。
Detox 有以下特点:
- 跨平台:用 JavaScript 编写跨平台测试。目前支持 IOS, Android 已接近完成
- 在真机上运行:像真正的用户一样在设备/模拟器上测试你的应用程序,目前 IOS 尚不支持真机
- 自动同步:通过监控应用程序中的异步操作,在核心处停止
- 为 CI 而生:在像 Travis 这样的 CI 平台上执行 E2E 测试,Jenkins
- 独立测试运行器:使用 Mocha、AVA 或任何其他您喜欢的 JavaScript 测试运行器
- 可调试:Modern async-await API 允许异步测试中的断点 按预期工作
环境
在 IOS 上运行 Detox 需要以下支持:
- Mac 系统,要求至少 macOS EI Captian 10.11 版本
- 安装 Xcode,版本至少是 8.3 或以上
- 安装
Xcode command line tool,可以在终端执行gcc -v查看是否安装 - 用于测试的 ReactNative 应用
安装依赖
Homebrew
Homebrew是 macOS 的包管理器,我们需要它来安装其他命令行工具,请安装最新的Homebrew,安装命令如下:
/usr/bin/ruby -e "$(curl -fsSL https://raw.githubusercontent.com/Homebrew/install/master/install)"Node.js
Detox运行在 Node 上,需要安装 Node 8.3.0 或更高的版本,安装命令如下:
brew update && brew instsall nodeapplesimutils
applesimutils用于Apple模拟器的utils集合,Detox使用它与模拟器进行通信,安装命令如下
brew tap wix/brew
brew install applesimutils
detox-cli
detox-cli是Detox命令行工具,它能够在npm环境之外的使用命令行,应该全局安装,安装命令如下:
yarn add -g detox-cli集成到项目
安装 detox
工程根目录下,在终端执行以下安装命令:
yarn add --dev detox安装测试运行器
Detox支持 Jest 和 Mocha 两种测试运行器开箱即用,这里使用 Jest
yarn add --dev jest配置 Detox
IOS 端
Detox 对 IOS 十分友好,只要添加 Detox 就行了,不需要做额外配置
Android 端
1.在android/settings/gradle添加:
include ':detox'
project(':detox').projectDir = new File(rootProject.projectDir, '../node_modules/detox/android/detox')2.在android/app/build.gradle添加以下代码至defaultConfig:
testBuildType System.getProperty('testBuildType', 'debug')  //this will later be used to control the test apk build type
      missingDimensionStrategy "minReactNative", "minReactNative46" //read note
testInstrumentationRunner "android.support.test.runner.AndroidJUnitRunner"3.在android/app/build.gradle添加以下代码至dependencies
androidTestImplementation(project(path: ":detox"))
  androidTestImplementation 'junit:junit:4.12'
  androidTestImplementation 'com.android.support.test:runner:1.0.2'
androidTestImplementation 'com.android.support.test:rules:1.0.2'4.在android/build.gralde添加以下代码至allprojects > repositories:
buildscript {
    repositories {
	    // ...
        google()
    }
}5.如果项目还没有使用Kotlin,请将Kotlin gradle插件添加到 android/build.gradle中,代码如下:
buildscript {
    // ...
    ext.kotlinVersion = '1.3.0' // Your app's version
    ext.detoxKotlinVersion = ext.kotlinVersion // Detox' version: should be 1.1.0 or higher!

    dependencies: {
        // ...
        classpath "org.jetbrains.kotlin:kotlin-gradle-plugin:$kotlinVersion"
    }
}6.添加文件android/app/src/androidTest/java/com/rndiy/DetoxTest.java,编写如下代码:
package com.rndiy;
import android.support.test.filters.LargeTest;
import android.support.test.rule.ActivityTestRule;
import android.support.test.runner.AndroidJUnit4;

import com.wix.detox.Detox;

import org.junit.Rule;
import org.junit.Test;
import org.junit.runner.RunWith;

@RunWith(AndroidJUnit4.class)
@LargeTest
public class DetoxTest {

    @Rule
    public ActivityTestRule<MainActivity> mActivityRule = new ActivityTestRule<>(MainActivity.class, false, false);

    @Test
    public void runDetoxTests() {
        Detox.runTests(mActivityRule);
    }
}
7.需要特别注意的问题:
- Detox 要求
minSdkVersion版本不低于 18 - minReactNative44: 支持 React Native 0.44-0.45
- minReactNative46: 支持 React Native 0.46+
- Problem: Duplicate files copied in …
在android/app/build.gradle添加以下代码到android节点
packagingOptions {
    exclude 'META-INF/LICENSE'
}- Could not resolve com.android.support:support-annotations:27.1.1.
Could not resolve com.squareup.okhttp3:okhttp:3.4.1.
Detox 9.x.x 以后 升级gradle的版本, 在android/build.gradle作以下修改:
com.android.tools.build:gradle:3.0.1
to
com.android.tools.build:gradle:3.2.1- Program type already present: android.support.test.rule.ActivityTestRule$LifecycleCallback
Detox 9.x.x 以后升级com.android.support.test的版本, 在android/app/build.gradle作以下修改:
androidTestImplementation 'com.android.support.test:runner:1.0.1'
androidTestImplementation 'com.android.support.test:rules:1.0.1'
to
androidTestImplementation 'com.android.support.test:runner:1.0.2'
androidTestImplementation 'com.android.support.test:rules:1.0.2'
JS 端
1.执行detox init -r jest,自动生成以下测试相关文件:
- 工程根目录下自动创建
e2e文件夹,包括config.json、firstTest.spec.js和init.js三个文件 -
package.json里的detox属性下自动添加"test-runner": "jest"代码
如图所示:

2.这里 Detox 是基于 Jest 测试运行器,为了避免二者冲突,需要修改jest.config.js文件,具体修改如下:
use

testPathIgnorePatterns: ['\\.snap$', '<rootDir>/node_modules/'],

replace

testPathIgnorePatterns: ['\\.snap$', '<rootDir>/node_modules/', '<rootDir>/e2e'], // ignore e2e folder3.在package.json中的detox下写入配置信息, 参考如下:
"detox": {
  "configurations": {
    "ios.sim.debug": {
      "binaryPath": "ios/build/Build/Products/Debug-iphonesimulator/rndiy.app",
      "build": "xcodebuild -workspace ios/rndiy.xcworkspace -UseNewBuildSystem=NO -scheme rndiy -configuration Debug -sdk iphonesimulator -derivedDataPath ios/build",
      "type": "ios.simulator",
      "name": "iPhone X"
    },
    "ios.sim.release": {
      "binaryPath": "ios/build/Build/Products/Release-iphonesimulator/rndiy.app",
      "build": "export RCT_NO_LAUNCH_PACKAGER=true && xcodebuild -workspace ios/rndiy.xcworkspace -UseNewBuildSystem=NO -scheme rndiy -configuration Release -sdk iphonesimulator -derivedDataPath ios/build -quiet",
      "type": "ios.none",
      "name": "iPhone X"
    },
    "android.emu.debug": {
      "binaryPath": "android/app/build/outputs/apk/debug/app-debug.apk",
      "build": "pushd android && ./gradlew assembleDebug assembleAndroidTest -DtestBuildType=debug && popd",
      "type": "android.emulator",
      "name": "Pixel_XL_API_28"
    },
    "android.emu.release": {
      "binaryPath": "android/app/build/outputs/apk/release/app-release.apk",
      "build": "pushd android && ./gradlew assembleRelease assembleAndroidTest -DtestBuildType=release && popd",
      "type": "android.attached",
      "name": "2df6e6e4"
    }
  },
  "specs": "e2e",
  "test-runner": "jest"
}
详细 Detox 配置说明,请参考文档
4.在package.json中的scripts下写入命令, 参考如下:
"scripts": {
  "start-detox": "detox run-server -p 8099 -l verbose",
    "detox-build-ios": "detox build --configuration ios.sim.debug",
    "detox-build-android": "detox build --configuration android.emu.debug",
    "detox-test-ios": "detox test --loglevel verbose --configuration ios.sim.debug --debug-synchronization 1000",
    "detox-test-android": "detox test --loglevel verbose --configuration android.emu.debug --debug-synchronization 1000",
    "detox-ios-debug": "detox build --configuration ios.sim.debug && detox test --loglevel verbose --configuration ios.sim.debug --debug-synchronization 1000",
    "detox-android-debug": "detox build --configuration android.emu.debug && detox test --loglevel verbose --configuration android.emu.debug",
    "detox-ios-release": "detox build --configuration ios.sim.release && detox test --loglevel verbose --configuration ios.sim.release",
    "detox-android-release": "detox build --configuration android.emu.release && detox test --loglevel verbose --configuration android.emu.release"
}
详细 Detox-Cli 配置说明,请参考文档
特别注意,踩坑
当升级到 Android API 28 时,需要配置 networkSecurityConfig 才能访问服务器。RN 从 0.58 版本开始在 Android API 28 环境下编译,在android/app/src/debug/res/xml-v28/react_native_config.xml文件中已经配置了相关信息,如图

开始我是想着配置 detox 服务的 ip 地址和端口的,如下代码所示:
"session": {
    "sessionId": "rndiy",
    "server": "ws://192.168.192.247:8099"
  },
但是在 Android 工程里react_native_config.xml没有指定192.168.192.247的domain,所以我死活都连接不 Android 设备,后来经过 android 断点调试才发现问题,也是不容易。
解决这个问题,有两种方式:
- 我直接把
session的配置去掉,使用 detox 默认的配置 - 直接把
"server": "ws://192.168.192.247:8099"修改为"server": "ws://localhost:8099"
后来我仔细研究了下,觉得在detox配置session的意义不是很大。首先 detox 服务都是在本地的,也就是 localhost,所以不需要指定具体的 IP 地址;如果指定端口的话,意味着你启动 detox 服务的时候必须和配置的端口号一致,不然还是连接不上;看来也就是sessionId有点作用了,可以区别并行下的自动化测试。所以,我这里把session配置去掉了。当然,这只是我的个人观点,也希望大家不要遇到这样的问题
开始测试
自动化测试大概分为启动 detox 服务、构建应用、执行测试用例三步,下面就来具体讲讲
启动 detox 服务
启动独立的 detox 服务detox run-server [可选]
选项 | 描述 |
-p, --port | 端口号,默认 8099 |
-l, --loglevel | 日志等级:fatal, error, warn, info, verbose, trace 可选 |
在package.json文件中的scripts下配置命令,start-detox: detox run-server -p 8099 -l verbose,直接执行yarn start-detox即可启动 detox 服务
构建应用
运行定义在configuration.build的命令
detox build -c [选项],这里的选项是指detox.configurations配置的命令,我一共配置了 4 条命令,分别是ios.sim.debug、ios.sim.release、android.emu.debug和android.emu.release
在package.json文件中的scripts下配置命令,"detox-build-ios": "detox build --configuration ios.sim.debug"和"detox-build-android": "detox build --configuration android.emu.debug",执行yarn detox-build-ios即可构建 IOS 应用,执行yarn detox-build-android即可构建 Android 应用
执行测试用例
detox test -c [选项],开启执行测试用例
在package.json文件中的scripts下配置命令,"detox-test-ios": "detox test --loglevel verbose --configuration ios.sim.debug --debug-synchronization 1000",和"detox-test-android": "detox test --loglevel verbose --configuration android.emu.debug --debug-synchronization 1000",,执行yarn detox-test-ios即可启动 IOS 自动化测试,执行yarn detox-test-android即可启动 Android 自动化测试
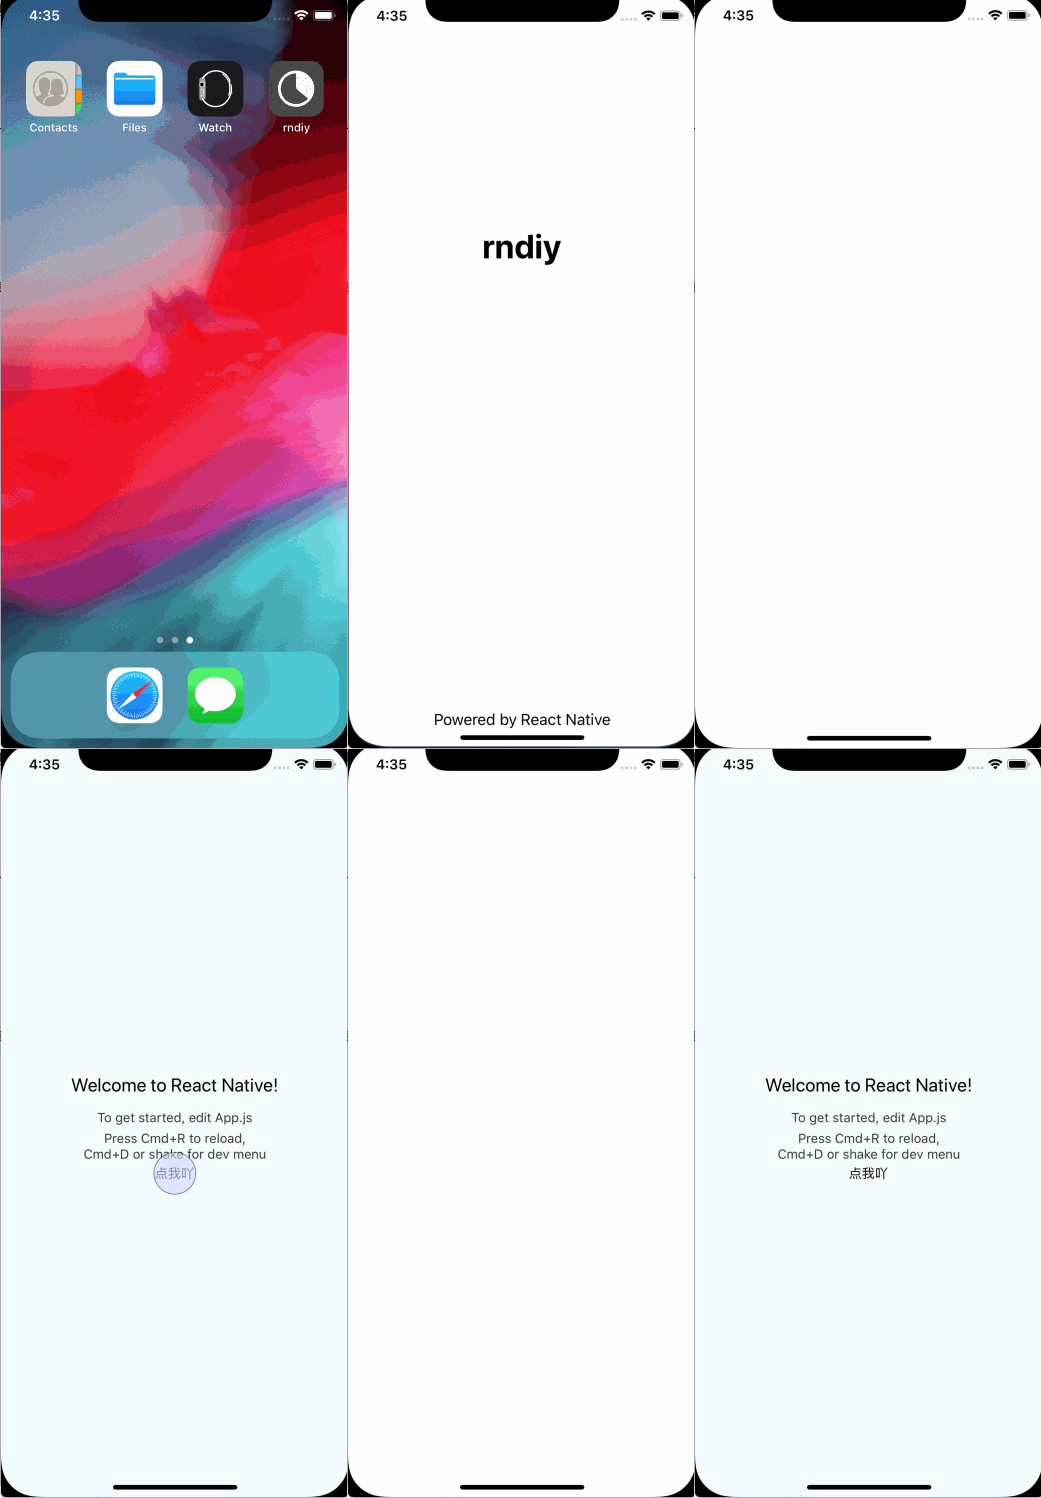
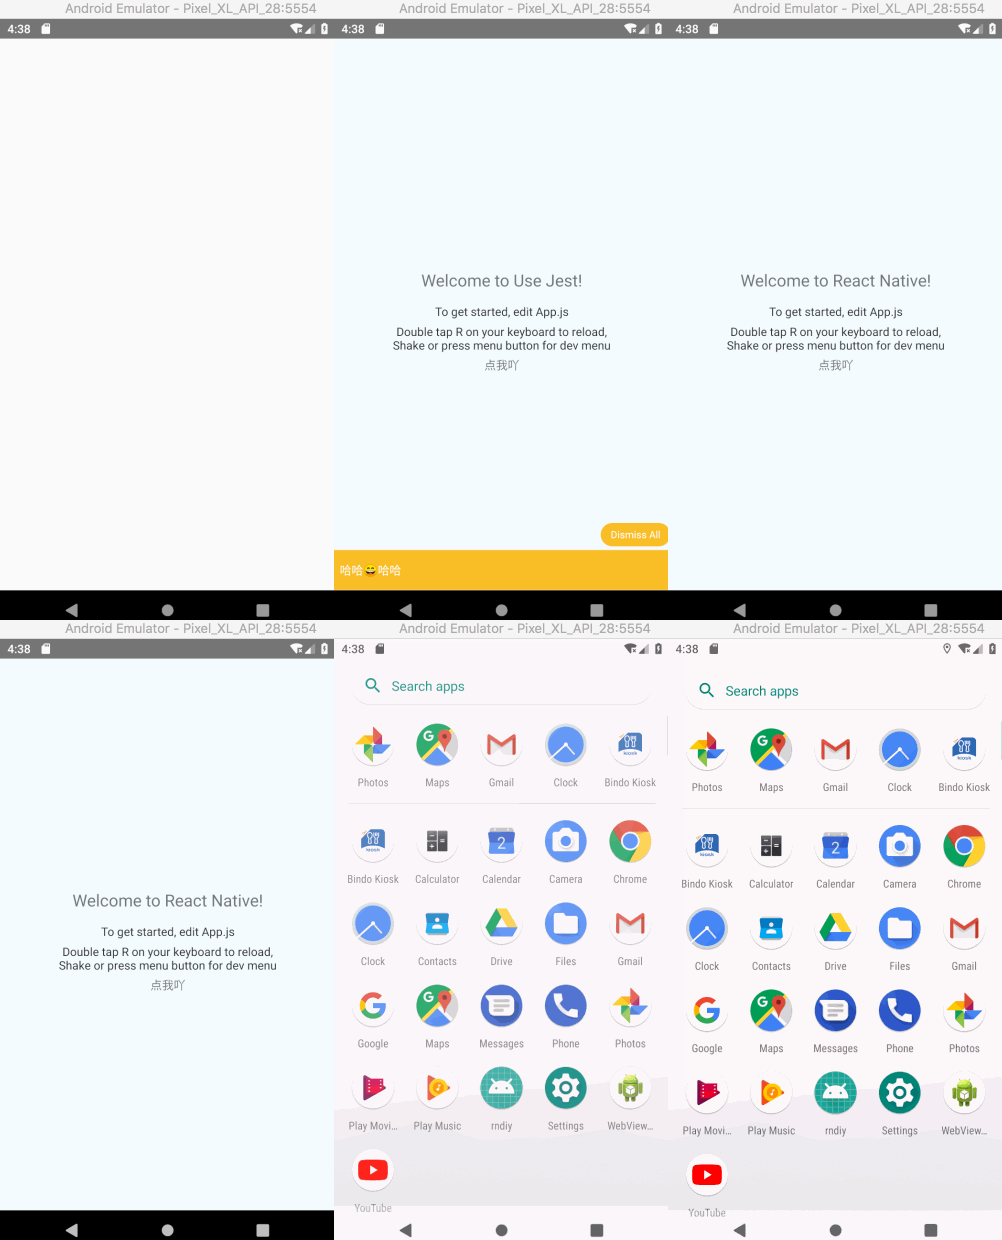
如图所示:


总结
集成 Detox 自动化测试暂时就讲这么多,虽然遇到了挺多的问题,但是还是有很多收获的。作为一个有追求的程序员,不怕遇到问题,解决问题我们才能成长的更快,就是要折腾。相信只要我们使用好自动化测试,一定能给我们提供很多的帮助。哈哈,就这样了。


