RecyclerView
- RecyclerView
- 0添加依赖基本使用
- 1recycler
- 2组成
- 1局部刷新
- 2添加分割线
- 1paddingmargin
- 2DividerItemDecoration
- 3ItemDecoration
- 3item增删动画
- 4列表滑动动画
- 5缓存机制
- 6item布局
- 1item布局-LinearGrid瀑布流
- 2头
- 7自定义点击事件
- 8常用api
- 9源码解读
- 10封装
0、添加依赖、基本使用
compile 'com.android.support:recyclerview-v7:24.2.1'版本就跟着你的
compile 'com.android.support:appcompat-v7:24.2.1'版本走
0.1、recycler
本意是recycler,回收的意思,RecyclerView就是回收复用View
0.2、组成
主要由以下几部分组成:
RecyclerView.Adapter:处理数据绑定视图
ViewHolder:持有所有的用于绑定数据或者需要操作的View
LayoutManager:负责摆放视图等相关操作
ItemDecoration:分割线
ItemAnimator:增删动画
1、局部刷新
2、添加分割线
2.1、padding/margin
最简单的就是在单个item中添加padding或者margin,只是这样不友好;就像别人想要一栋新房子,但是你把自己的破房子刷一遍漆然后说是新房子,说不新吧,但看起来确实是新的,说新房子吧,又觉得恶心。
2.2、DividerItemDecoration
这个可以简单使用
RecyclerView添加分割线的简便方法
我参考的这个(题外话,本来我是想把源码翻一遍的,但是又觉得可能气候不到,那就再熟练运用一下,然后去翻源码,或许效果会好一点)
简单来说:
//添加Android自带的分割线
        recyclerView.addItemDecoration(new DividerItemDecoration(this,DividerItemDecoration.VERTICAL));
这个呈现的效果就是普通的效果,但是我这边呈现的不太一样,分割线特别粗,颜色好像是系统中的某个资源颜色,这种方式也就适合简单的看一下,并不适合直接使用,可以细化一下:
DividerItemDecoration divider = new DividerItemDecoration(this, DividerItemDecoration.VERTICAL);
divider.setDrawable(ContextCompat.getDrawable(this, R.drawable.item_divider));
recyclerView.addItemDecoration(divider);
这里是自己定义一个资源文件,然后直接使用
item_divider.xml
<?xml version="1.0" encoding="utf-8"?>
<shape xmlns:android="http://schemas.android.com/apk/res/android"
    android:shape="rectangle">

    <gradient
        android:centerColor="#ff00ff00"
        android:endColor="#ff0000ff"
        android:startColor="#ffff0000"
        android:type="linear" />
    <size android:height="3dip" />

</shape>
效果还可以,但是有两个问题,一就是最后一行也添加了分割线,不太好;二就是他只能适用于LinearLayoutManager这个原始ListView列表的呈现方式,想Grid或者StaggerGrid就不行了。
2.3、ItemDecoration
这就到了第三种方式了,实现RecyclerView的内部抽象动画类(抽象类里面为什么不放抽象方法呢?因为如果定义为普通类则实例化后没用,但是方法体已经定义好了,只能继承重写,所以定义为没有抽象方法的抽象类):
public abstract static class ItemDecoration {
        /**
         * Draw any appropriate decorations into the Canvas supplied to the RecyclerView.
         * Any content drawn by this method will be drawn before the item views are drawn,
         * and will thus appear underneath the views.
         *
         * @param c Canvas to draw into
         * @param parent RecyclerView this ItemDecoration is drawing into
         * @param state The current state of RecyclerView
         */
        public void onDraw(Canvas c, RecyclerView parent, State state) {
            onDraw(c, parent);
        }

        /**
         * @deprecated
         * Override {@link #onDraw(Canvas, RecyclerView, RecyclerView.State)}
         */
        @Deprecated
        public void onDraw(Canvas c, RecyclerView parent) {
        }

        /**
         * Draw any appropriate decorations into the Canvas supplied to the RecyclerView.
         * Any content drawn by this method will be drawn after the item views are drawn
         * and will thus appear over the views.
         *
         * @param c Canvas to draw into
         * @param parent RecyclerView this ItemDecoration is drawing into
         * @param state The current state of RecyclerView.
         */
        public void onDrawOver(Canvas c, RecyclerView parent, State state) {
            onDrawOver(c, parent);
        }

        /**
         * @deprecated
         * Override {@link #onDrawOver(Canvas, RecyclerView, RecyclerView.State)}
         */
        @Deprecated
        public void onDrawOver(Canvas c, RecyclerView parent) {
        }


        /**
         * @deprecated
         * Use {@link #getItemOffsets(Rect, View, RecyclerView, State)}
         */
        @Deprecated
        public void getItemOffsets(Rect outRect, int itemPosition, RecyclerView parent) {
            outRect.set(0, 0, 0, 0);
        }

        /**
         * Retrieve any offsets for the given item. Each field of <code>outRect</code> specifies
         * the number of pixels that the item view should be inset by, similar to padding or margin.
         * The default implementation sets the bounds of outRect to 0 and returns.
         *
         * <p>
         * If this ItemDecoration does not affect the positioning of item views, it should set
         * all four fields of <code>outRect</code> (left, top, right, bottom) to zero
         * before returning.
         *
         * <p>
         * If you need to access Adapter for additional data, you can call
         * {@link RecyclerView#getChildAdapterPosition(View)} to get the adapter position of the
         * View.
         *
         * @param outRect Rect to receive the output.
         * @param view    The child view to decorate
         * @param parent  RecyclerView this ItemDecoration is decorating
         * @param state   The current state of RecyclerView.
         */
        public void getItemOffsets(Rect outRect, View view, RecyclerView parent, State state) {
            getItemOffsets(outRect, ((LayoutParams) view.getLayoutParams()).getViewLayoutPosition(),
                    parent);
        }
    }
精简出来:
public abstract static class ItemDecoration {

        public void onDraw(Canvas c, RecyclerView parent, State state) {
            onDraw(c, parent);
        }

        public void onDrawOver(Canvas c, RecyclerView parent, State state) {
            onDrawOver(c, parent);
        }

        public void getItemOffsets(Rect outRect, View view, RecyclerView parent, State state) {
            getItemOffsets(outRect, ((LayoutParams) view.getLayoutParams()).getViewLayoutPosition(),
                    parent);
        }
    }
去掉过期方法就剩这三个方法了,这三个方法可就大有来头了:
RecyclerView之ItemDecoration由浅入深
(谁不是踩着大神的脚印往前走呢?)
onDraw:绘制内容背景,内容在上面;
onDrawOver:覆盖在内容上;
getItemOffsets:类似padding的效果;
public class DividerDecoration extends RecyclerView.ItemDecoration {

    private int dividerHeight;

    public DividerDecoration(int dividerHeight) {
        this.dividerHeight = dividerHeight;
    }

    @Override
    public void getItemOffsets(Rect outRect, View view, RecyclerView parent, RecyclerView.State state) {
        super.getItemOffsets(outRect, view, parent, state);
        outRect.set(0, 0, 0, dividerHeight);
    }
}
使用:
recyclerView.addItemDecoration(new DividerDecoration(20));但是这样分割线的颜色就是背景颜色了,不能够定制成自己需要的,或者就是要指定RecyclerView的背景色才行,这感觉又是个破房子刷漆的做法;
这次用getItemOffsets和onDraw结合的方法:
public class DividerDecoration extends RecyclerView.ItemDecoration {

    private int dividerHeight;
    private Paint mPaint;

    public DividerDecoration(int dividerHeight) {
        this.dividerHeight = dividerHeight;
        mPaint = new Paint(Paint.ANTI_ALIAS_FLAG);
        mPaint.setColor(Color.parseColor("#6500ff"));
    }

    @Override
    public void getItemOffsets(Rect outRect, View view, RecyclerView parent, RecyclerView.State state) {
        super.getItemOffsets(outRect, view, parent, state);
        outRect.set(0, 0, 0, dividerHeight);
    }

    @Override
    public void onDraw(Canvas c, RecyclerView parent, RecyclerView.State state) {
        super.onDraw(c, parent, state);
        int childCount = parent.getChildCount();
        int left = parent.getPaddingLeft();
        int right = parent.getWidth() - parent.getPaddingRight();

        for (int i = 0; i < childCount - 1; i++) {
            View view = parent.getChildAt(i);
            float top = view.getBottom();
            float bottom = view.getBottom() + dividerHeight;
            c.drawRect(left, top, right, bottom, mPaint);
        }
    }
}
这样的话就能简单实现分割线了,还能定制宽度和颜色,而且也去掉了最后一个item的分割线。

那还有一个onDrawOver,这个能干什么呢?
我看到的博客上是可以做标签:我也想试一下
首先做一个item左边侵占一部分:
public class LeftDevider extends RecyclerView.ItemDecoration {
    private int leftWidth;
    private Paint leftPaint;

    public LeftDevider(int leftWidth) {
        this.leftWidth = leftWidth;
        leftPaint = new Paint(Paint.ANTI_ALIAS_FLAG);
        leftPaint.setColor(Color.parseColor("#662d17"));
    }

    @Override
    public void onDrawOver(Canvas c, RecyclerView parent, RecyclerView.State state) {
        super.onDrawOver(c, parent, state);
        int childCount = parent.getChildCount();
        for (int i = 0; i < childCount; i++) {
            View child = parent.getChildAt(i);
            float left = child.getLeft();
            float right = left + leftWidth;
            float top = child.getTop();
            float bottom = child.getBottom();
            c.drawRect(left, top, right, bottom, leftPaint);
        }
    }
}
这个发现没有分割线,但是很神奇的是他可以叠加使用,而不用去一个自定义类里面堆砌逻辑。
recyclerView.addItemDecoration(new DividerDecoration(5));
recyclerView.addItemDecoration(new LeftDevider(100));
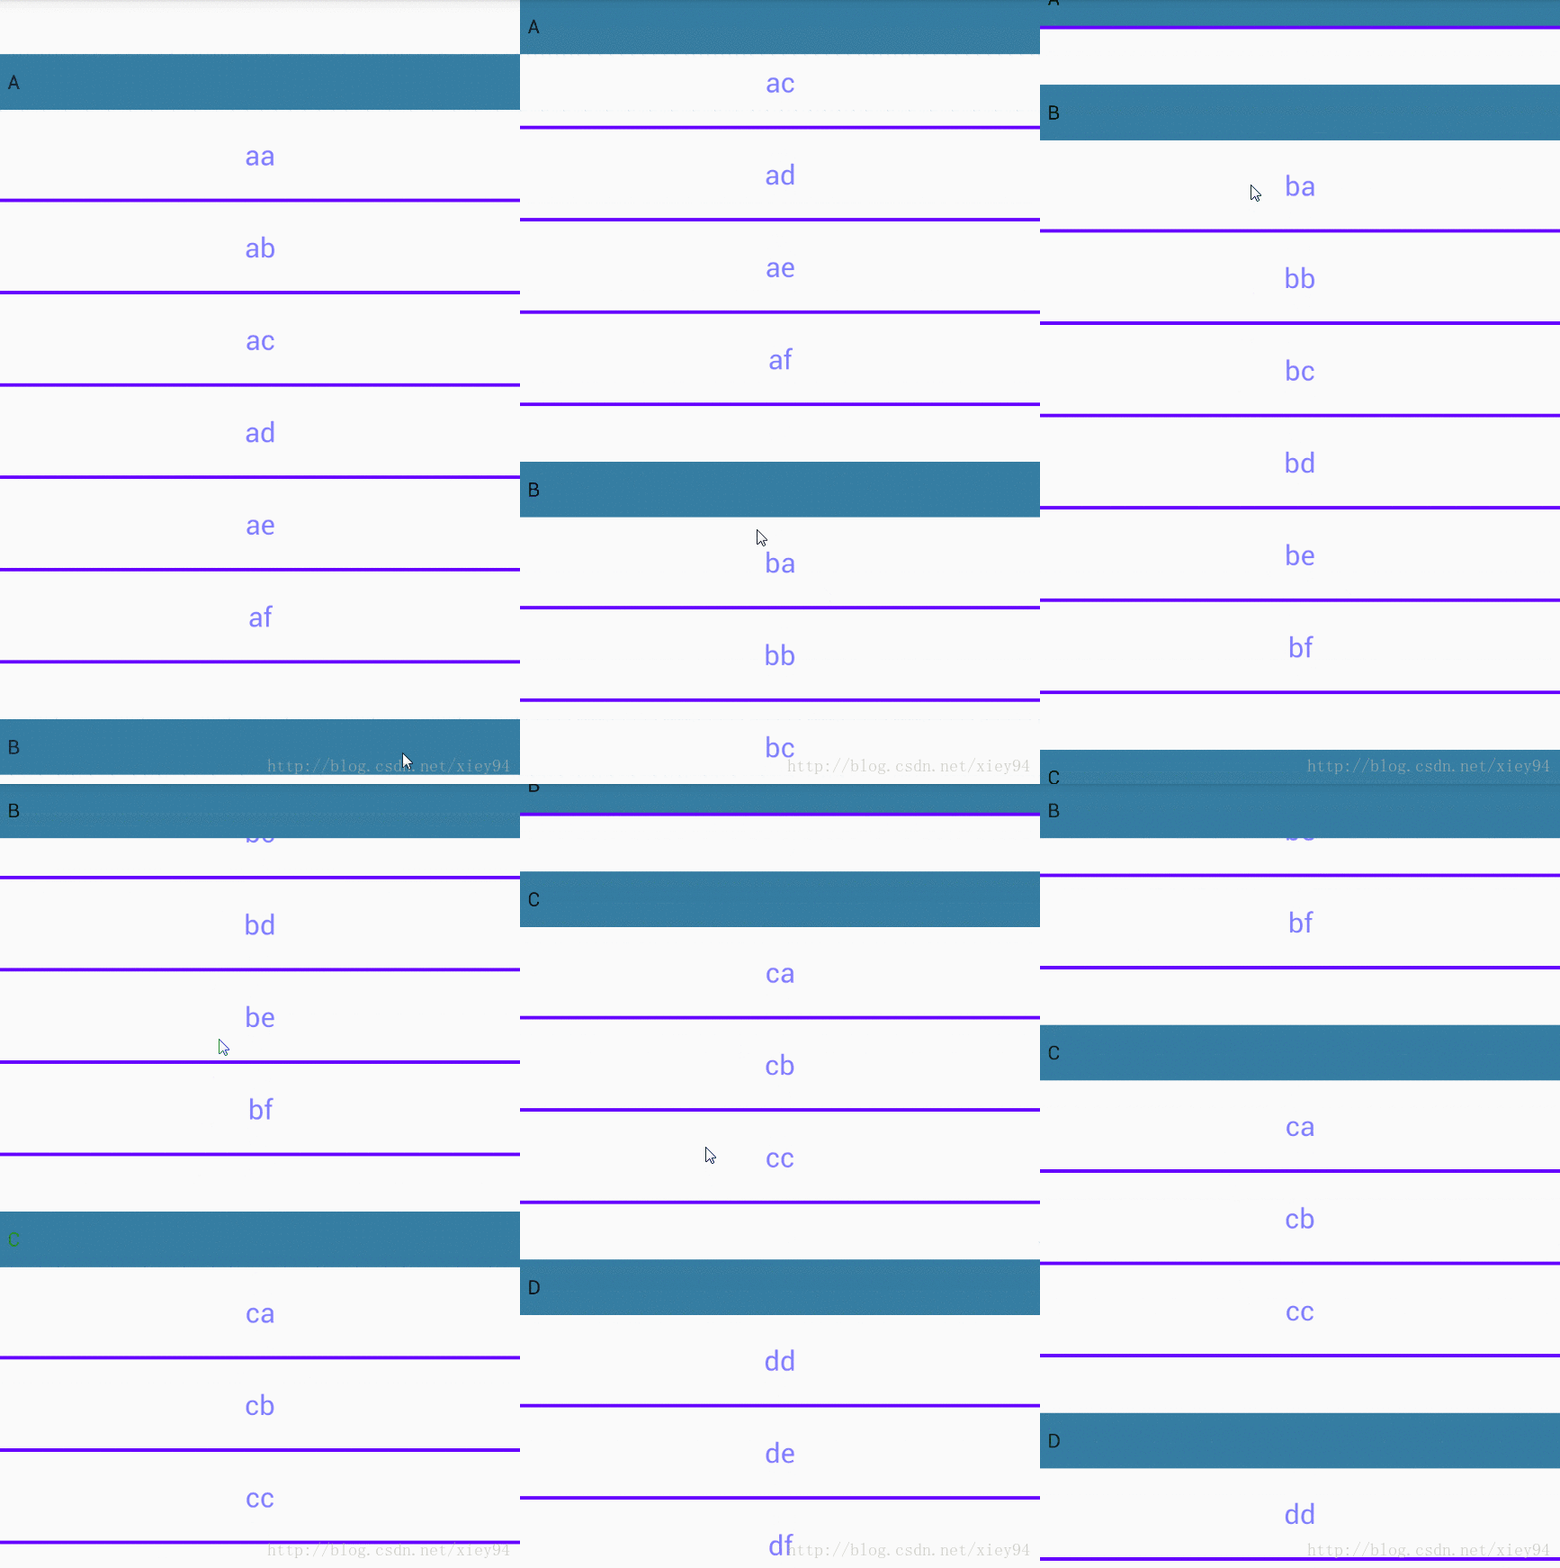
这个就很吊了嘛!自己完全可以定义一堆,但是同时也引发一个问题:当页面销毁后重新加载时又叠加了,比如你用ViewPager组合Fragment,将列表应用于Fragment中,当间隔好像是两个的时候,就视图销毁重建了,但是这个状态信息还保留着,然后就再一次叠加了。
我在下面再模拟一下
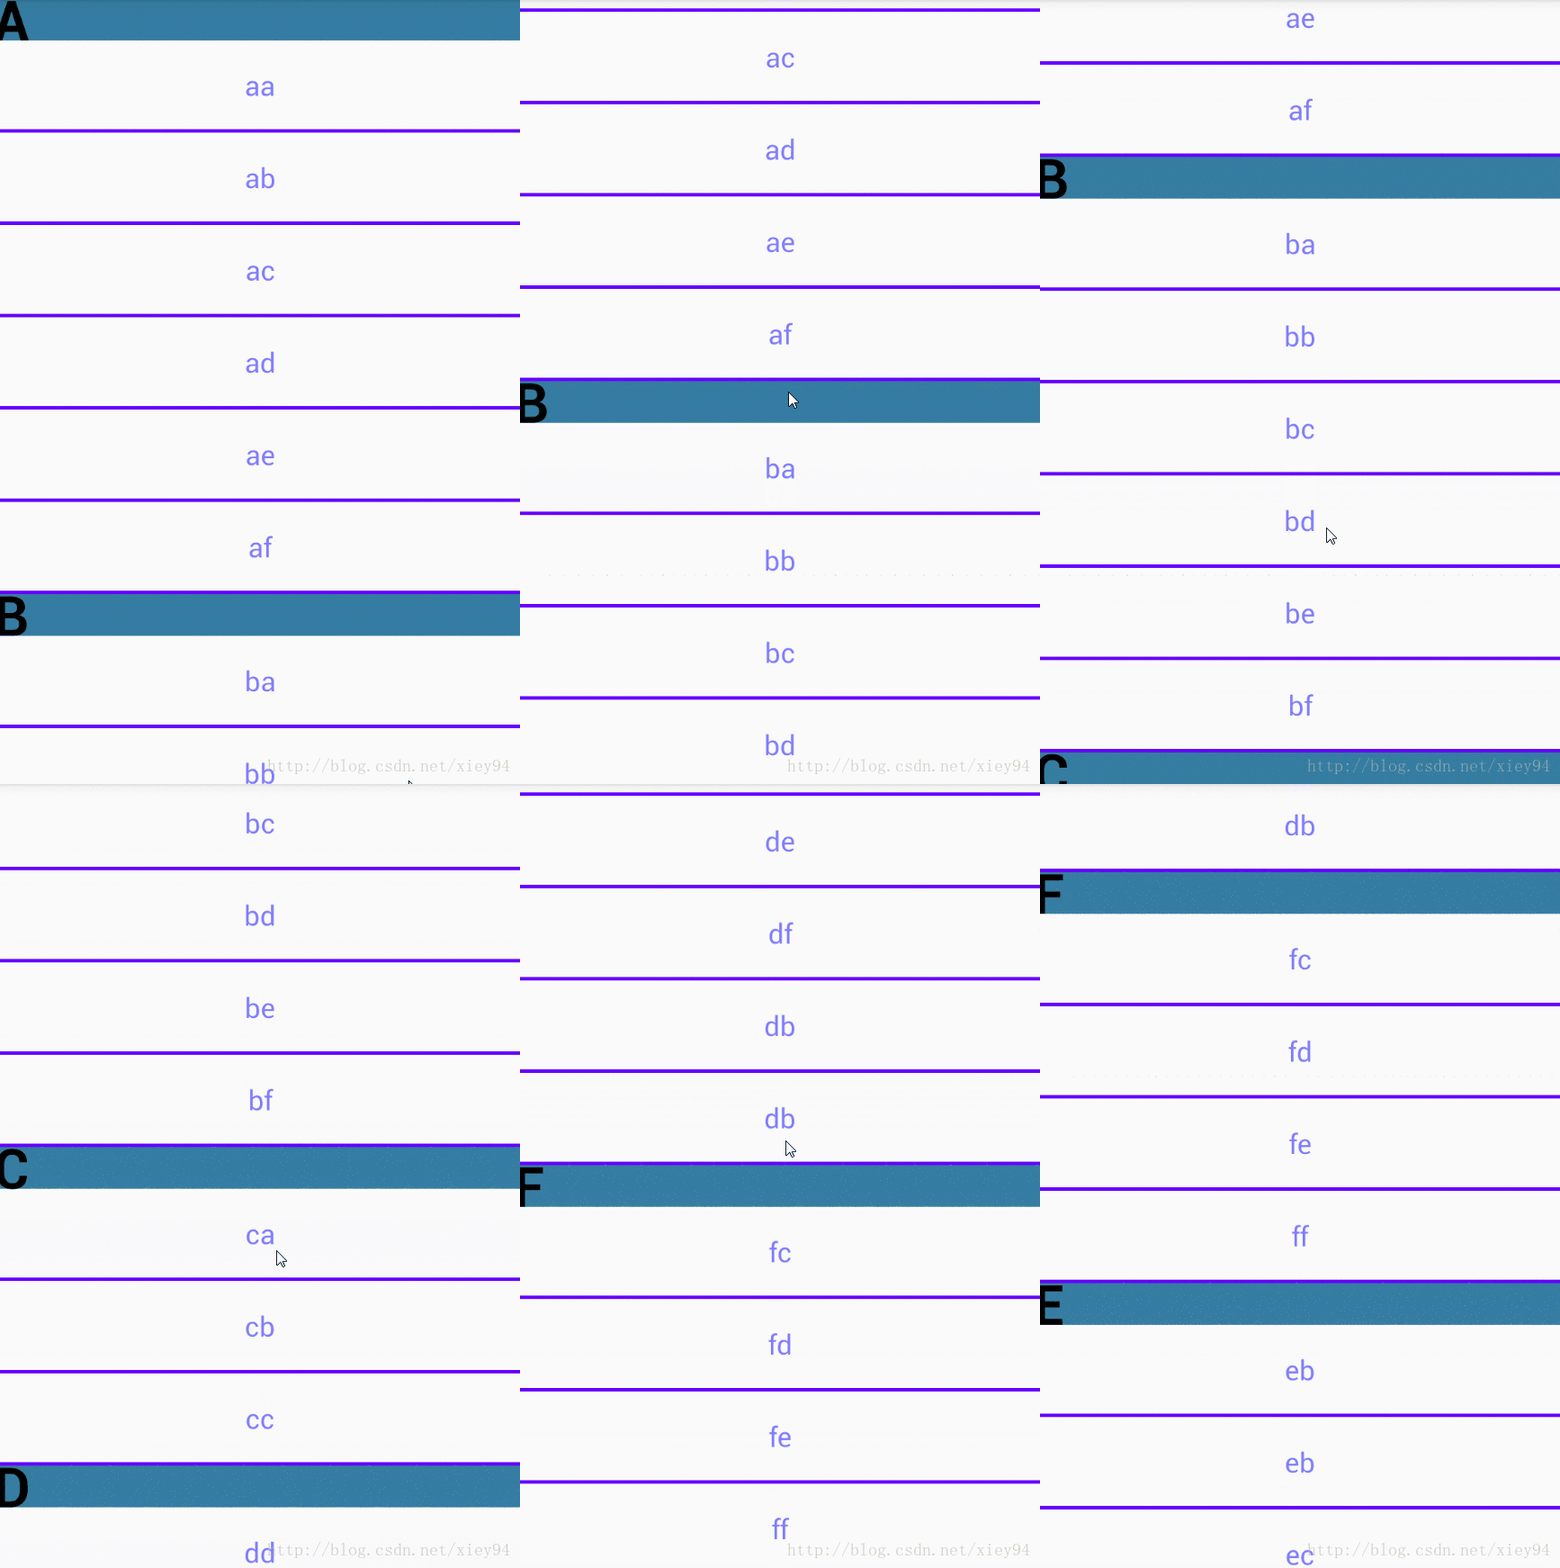
粘性头部,这个是让我很激动的事情,我一直觉得这是一个很牛逼的东西,但是我不会,大部分又看不懂,或者没信心看下去,实在是头疼病,其实早前这个博客我就看过,但是看到一大堆代码,作者注解写得少,我就放弃了,这次我是专门学习RecyclerView偶然翻到的这个博客,再着重看了一下,RecyclerView果然吊
public class SectionDecoration1 extends RecyclerView.ItemDecoration {
    private DecorationCallBack callBack;
    private TextPaint textPaint;
    private Paint paint;
    private int topGap;

    public SectionDecoration1(Context mContext, DecorationCallBack callBack) {
        this.callBack = callBack;
        paint = new Paint();
        paint.setColor(Color.parseColor("#357da2"));

        textPaint = new TextPaint();
        textPaint.setTypeface(Typeface.DEFAULT_BOLD);
        textPaint.setAntiAlias(true);
        textPaint.setTextSize(80);
        textPaint.setColor(Color.BLACK);
        textPaint.setTextAlign(Paint.Align.LEFT);
        topGap = 60;
    }


    @Override
    public void getItemOffsets(Rect outRect, View view, RecyclerView parent, RecyclerView.State state) {
        super.getItemOffsets(outRect, view, parent, state);
        int pos = parent.getChildAdapterPosition(view);
        long groupId = callBack.getGroupId(pos);
        if (groupId < 0) return;
        if (pos == 0 || isFirstInGroup(pos)) {
            outRect.top = topGap;
        } else {
            outRect.top = 0;
        }
    }

    @Override
    public void onDraw(Canvas c, RecyclerView parent, RecyclerView.State state) {
        super.onDraw(c, parent, state);
        int left = parent.getPaddingLeft();
        int right = parent.getWidth() - parent.getPaddingRight();
        int childCount = parent.getChildCount();
        for (int i = 0; i < childCount; i++) {
            View view = parent.getChildAt(i);
            int position = parent.getChildAdapterPosition(view);
            long groupId = callBack.getGroupId(position);
            if (groupId < 0) return;
            String textLine = callBack.getGroupFirstLine(position).toUpperCase();
            if (position == 0 || isFirstInGroup(position)) {
                float top = view.getTop() - topGap;
                float bottom = view.getTop();
                c.drawRect(left, top, right, bottom, paint);
                c.drawText(textLine, left, bottom, textPaint);
            }
        }
    }

    private boolean isFirstInGroup(int pos) {
        if (pos == 0) {
            return true;
        } else {
            long prevGroupId = callBack.getGroupId(pos - 1);
            long groupId = callBack.getGroupId(pos);
            return prevGroupId != groupId;
        }
    }

    public interface DecorationCallBack {
        long getGroupId(int position);

        String getGroupFirstLine(int position);
    }
}
这不到一百行代码,其实真看起来也没什么,前面的初始化都是常识,主要就是4个方法:
接口方法:一个是获取首字母,用于比较;另一个是获取首字母用于显示;
isFirstInGroup:前提是大家都清楚,这个列表肯定是以组为单位的,如果是第一个item,不用说肯定要显示的,然后是前后比较,相同则什么都不处理,不同则添加一个头部;
getItemOffsets:根据是否添加头部的条件添加一个padding高度
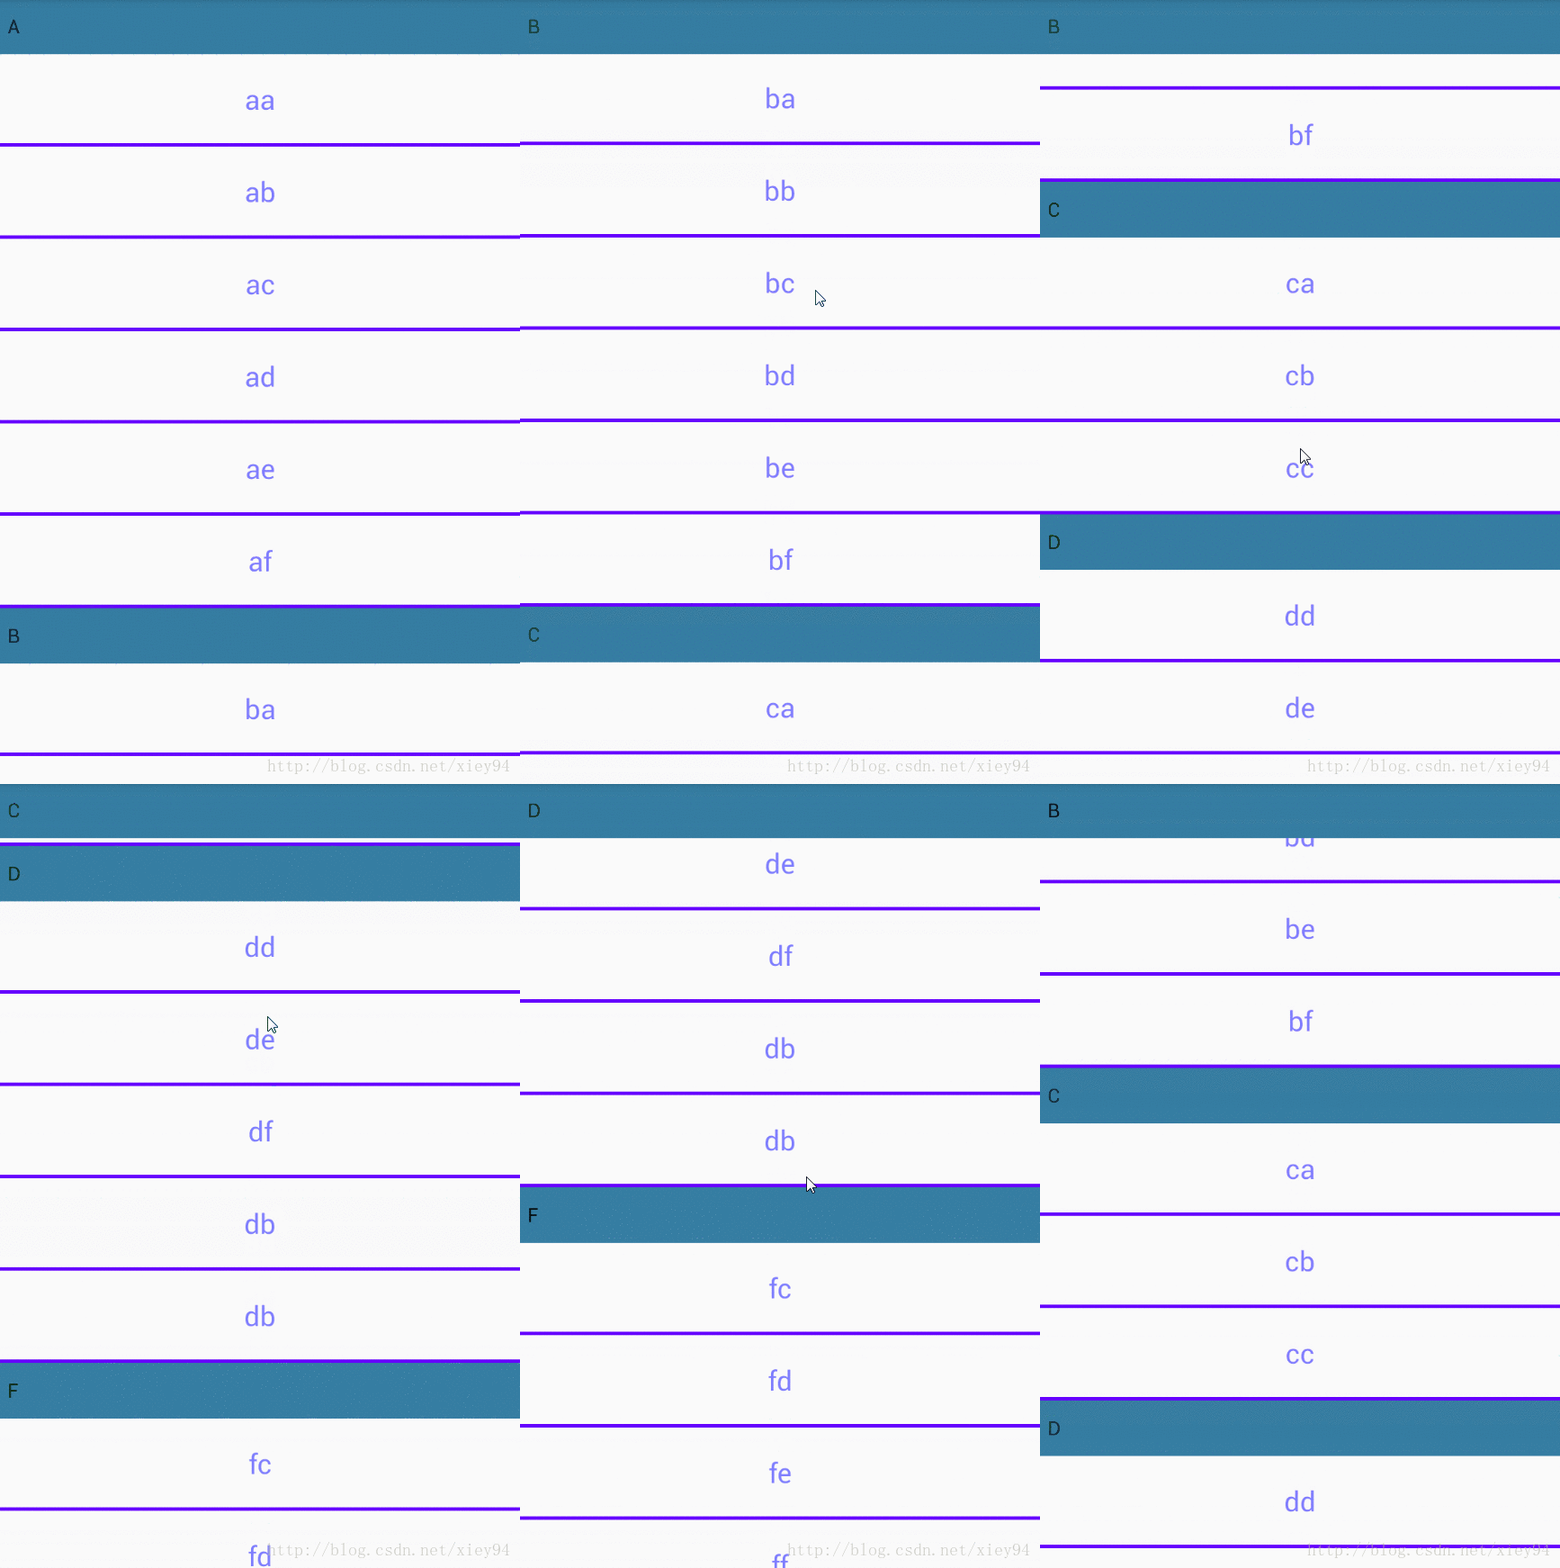
onDraw:这个就是根据条件绘制头部了,条件也很简单,看一眼就能明白;主要是这是个不带粘性头部的,下面来一个带粘性头部的;
public class SectionDecoration2 extends RecyclerView.ItemDecoration {
    private DecorationCallBack callBack;
    private TextPaint textPaint;
    private Paint paint;
    private int topGap;

    public SectionDecoration2(Context mContext, DecorationCallBack callBack) {
        this.callBack = callBack;
        paint = new Paint();
        paint.setColor(Color.parseColor("#357da2"));

        textPaint = new TextPaint(Paint.ANTI_ALIAS_FLAG);
        textPaint.setTextSize(Common.dip2px(mContext, 14));
        textPaint.setColor(Color.BLACK);
        textPaint.setTextAlign(Paint.Align.LEFT);
        topGap = Common.dip2px(mContext, 40);
    }

    @Override
    public void getItemOffsets(Rect outRect, View view, RecyclerView parent, RecyclerView.State state) {
        super.getItemOffsets(outRect, view, parent, state);
        int pos = parent.getChildAdapterPosition(view);
        long groupId = callBack.getGroupId(pos);
        if (groupId < 0) return;
        if (pos == 0 || isFirstInGroup(pos)) {
            outRect.top = topGap;
        } else {
            outRect.top = 0;
        }
    }

    @Override
    public void onDrawOver(Canvas c, RecyclerView parent, RecyclerView.State state) {
        super.onDrawOver(c, parent, state);
        int itemCount = state.getItemCount();
        int childCount = parent.getChildCount();
        int left = parent.getPaddingLeft();
        int right = parent.getWidth() - parent.getPaddingRight();

        long preGroupId, groupId = -1;
        for (int i = 0; i < childCount; i++) {
            View view = parent.getChildAt(i);
            int position = parent.getChildAdapterPosition(view);
            preGroupId = groupId;
            groupId = callBack.getGroupId(position);

            if (groupId < 0 || groupId == preGroupId) continue;

            String textLine = callBack.getGroupFirstLine(position).toUpperCase();
            if (TextUtils.isEmpty(textLine)) continue;

            int viewBottom = view.getBottom();

            float textY = Math.max(topGap, view.getTop());
            if (position + 1 < itemCount) {
                long nextGroupId = callBack.getGroupId(position + 1);
                if (nextGroupId != groupId && viewBottom < textY) {
                    textY = viewBottom;
                }
            }

            int baseline = (int) (topGap / 2 + (textPaint.ascent() + textPaint.descent()) / 2);

            c.drawRect(left, textY - topGap, right, textY, paint);
            c.drawText(textLine, left + 20, textY - baseline, textPaint);
        }
    }

    private boolean isFirstInGroup(int pos) {
        if (pos == 0) {
            return true;
        } else {
            long prevGroupId = callBack.getGroupId(pos - 1);
            long groupId = callBack.getGroupId(pos);
            return prevGroupId != groupId;
        }
    }

    public interface DecorationCallBack {
        long getGroupId(int position);

        String getGroupFirstLine(int position);
    }
和上面比起来唯一的区别就是onDraw换成了onDrawOver,毕竟根据需求是要显示在View之上的;
这个前面的都差不多,主要就是
int viewBottom = view.getBottom();

            float textY = Math.max(topGap, view.getTop());
            if (position + 1 < itemCount) {
                long nextGroupId = callBack.getGroupId(position + 1);
                if (nextGroupId != groupId && viewBottom < textY) {
                    textY = viewBottom;
                }
            }
主要思想就是当没有下一组到来时,始终死守着topGap这个高度,显示在顶部,当下一组到来时头部则跟着View往上走,就是这么个逻辑,需要自己琢磨一下。
怎么使用:
recyclerView.addItemDecoration(new SectionDecoration2(this, new SectionDecoration2.DecorationCallBack() {
            @Override
            public long getGroupId(int position) {
                return Character.toUpperCase(datas.get(position).getName().charAt(0));
            }

            @Override
            public String getGroupFirstLine(int position) {
                return datas.get(position).getName().substring(0, 1).toUpperCase();
            }
        }));
再说一下上面提到的那个叠加使用的问题,我模拟一下,那就是上面的添加两边:
recyclerView.addItemDecoration(new SectionDecoration2(this, new SectionDecoration2.DecorationCallBack() {
@Override
public long getGroupId(int position) {
return Character.toUpperCase(datas.get(position).getName().charAt(0));
}
@Override
public String getGroupFirstLine(int position) {
return datas.get(position).getName().substring(0, 1).toUpperCase();
}
}));
这里要慎重使用,需要考虑清楚
这里面每个方法都有一个过期方法,主要的区别就是多了一个状态信息State
RecyclerView机制分析: State
因为RecyclerView将功能进行了子模块化,还需要传递某些信息到特定子模块来完成功能/通信,RecyclerView把这部分职责集中到了State模块中。State内部聚合了所需的各项状态信息,扮演了状态上下文角色
3、item增删动画
这个我来来回回看了半天,但还是没有看懂,只能拖延了,应该是功底不够,那就等功底够得时候再来研究。
先发现一个可以直接用的库,先用着。
https://github.com/wasabeef/recyclerview-animators/
4、列表滑动动画
5、缓存机制
6、item布局
6.1、item布局-Linear、Grid、瀑布流
LinearLayoutManager 线性管理器,支持横向、纵向。
GridLayoutManager 网格布局管理器
StaggeredGridLayoutManager 瀑布式布局管理器
这几个布局是常见的,尤其是LinearLayoutManager,是用来替换ListView的根本,其实这几个使用起来还是比较简单的,傻瓜式的装填就可以,基本上都不出三行代码。
//layoutManager-LinearLayoutManager
LinearLayoutManager manager = new LinearLayoutManager(this);
manager.setOrientation(LinearLayoutManager.VERTICAL);
recyclerView.setLayoutManager(manager);
//layoutManager-GridLayoutManager
GridLayoutManager manager = new GridLayoutManager(this, 3);
manager.setOrientation(GridLayoutManager.VERTICAL);
recyclerView.setLayoutManager(manager);
//layoutManager-StaggeredGridLayoutManager
StaggeredGridLayoutManager manager = new StaggeredGridLayoutManager(3, StaggeredGridLayoutManager.VERTICAL);
recyclerView.setLayoutManager(manager);
怎么样?用起来还是超级简单的吧!
前面两个或许还比较好用,第三个就要设置不同的高度了,这个我开始是在onBindViewHolder中获取控件的LayoutManager,然后生成一个随机高度给他,但是当手势往下滑的时候,会出现item的跳动,找了半天没找到原因,后来打印才发现是滑动时不停的调用onBindViewHolder这个方法,每次又重新生成随机高度,所以会跳动(主要是因为了解的不多,不然怎么会犯这种错误)。所以要提前生成随机数然后传参进去,这样在复用View的时候就不会改变随机高度了。
6.2、头
有的稍微讲究的布局会添加一个头部,以前我接触到的是ListView,他本身是有添加头部这个方法的,简单易用,但是到了RecyclerView就没了,什么都得自己来。
之前也接触过,无非就是在RecyclerView上嵌套一个ViewGroup,用来在顶部填充一个头部,这个是可以的,到了这里我们可以用另一种方法,虽然这个方法是我非常抵制的,我很不喜欢,那就是将第一个item识别出来然后将它作为头部,剩下的item的角标依次-1,这样就可以了,然后在布局上,可以设置一个VIEWTYPE,当position=1的时候就采用头布局,剩下的就采用普通内容布局。
RecyclerView添加Header的正确方式
Linearlayoutmanager:

GridLayoutManager:

这里用到了一个方法来控制第一个position占据两列
@Override
    public void onAttachedToRecyclerView(RecyclerView recyclerView) {
        super.onAttachedToRecyclerView(recyclerView);
        RecyclerView.LayoutManager manager = recyclerView.getLayoutManager();
        if (manager instanceof GridLayoutManager) {
            final GridLayoutManager gridManager = ((GridLayoutManager) manager);
            gridManager.setSpanSizeLookup(new GridLayoutManager.SpanSizeLookup() {
                @Override
                public int getSpanSize(int position) {
                    return getItemViewType(position) == HEAD ? gridManager.getSpanCount() : 1;
                }
            });
        }
    }
这里的GridLayoutManager要注意,之前我使用怎么都成功不了,然后debug之后发现这里的manager==null,怎么都想不明白,怎么会是null,我明明设置了的,后来看了一下函数名,才发现应该把setAdapter放到最后,起码放到设置manager之后,不然捕获到的manager就是null
StaggerGridLayoutManager:
这里也用到了一个方法setFullSpan
@Override
    public void onViewAttachedToWindow(LayoutManagerViewHolder holder) {
        super.onViewAttachedToWindow(holder);
        ViewGroup.LayoutParams lp = holder.itemView.getLayoutParams();
        if (lp != null && lp instanceof StaggeredGridLayoutManager.LayoutParams) {
            StaggeredGridLayoutManager.LayoutParams p = (StaggeredGridLayoutManager.LayoutParams) lp;
            p.setFullSpan(holder.getLayoutPosition() == 0);
        }
    }
7、自定义点击事件
这个比较简单,网上普遍的做法就是自定义接口然后逻辑调用
private OnClickListener onClickListener;

    public void setOnClickListener(OnClickListener onClickListener) {
        this.onClickListener = onClickListener;
    }

    public interface OnClickListener {
        void onClick(View v, int position);

        void onLongClick(View v, int position);
    }
在onBindViewHolder中设置
if (onClickListener != null) {
            holder.imageView.setOnClickListener(v -> {
                int pos = holder.getLayoutPosition();
                onClickListener.onClick(v, pos);
            });
            holder.imageView.setOnLongClickListener((v) -> {
                int pos = holder.getLayoutPosition();
                onClickListener.onLongClick(v, pos);
                return false;
            });
        }
然后就可以简单使用了。像普通点击事件一样使用,记住这个长按事件要返回false,不然根据触摸机制,当返回true的时候,点击事件就没有了,所以要返回false。
adapter.setOnClickListener(new LayoutManagerAdapter.OnClickListener() {
            @Override
            public void onClick(View v, int position) {
                Toast.makeText(LayoutManagerAty.this, "点击:" + position, Toast.LENGTH_SHORT).show();
            }

            @Override
            public void onLongClick(View v, int position) {
                Toast.makeText(LayoutManagerAty.this, "长按:" + position, Toast.LENGTH_SHORT).show();
            }
        });
8、常用api
findFirstVisibleItemPosition() 返回当前第一个可见Item的position
findFirstCompletelyVisibleItemPosition() 返回当前第一个完全可见Item的position
findLastVisibleItemPosition() 返回当前最后一个可见Item的position
findLastCompletelyVisibleItemPosition() 返回当前最后一个完全可见Item的position
9、源码解读
10、封装
参考:
深入理解 RecyclerView 系列之一:ItemDecoration
自定义RecyclerView.ItemDecoration,实现Item的等间距分割以及分割线效果


