之前我们已经学习过WPF布局了,这节我们开始简单介绍下控件。熟悉Winform的应该对控件并不陌生。WPF和Winform的渲染也是不一样的一个是基于DirectX一个是基于GDI+。
在WPF中,打交道最多的控件无非就那么几种。
1)布局控件。之前介绍过的,可以容纳多个控件或嵌套其他布局控件,用于在UI上组织和排列控件。比如StackPanel、Grid等控件都属于此类控件,他们都拥有共同父类---Panel。
2)内容控件。只能容纳一个其他控件或布局控件作为它的内容。Window、Button等控件属于此类,他们共同父类是ContentControl。
3)带标题内容控件。相当于一个内容控件不一样的是可以加一个标题。
4)文本控件。控件比较少,允许用户输入文本。支持普通文本、密码、以及格式化文本
5)列表控件。显示项的集合的控件,比如ComboBox、ListBox等
6)范围控件。比如之前我们用到过的Slider和进度条等。
1 - 控件类
WPF窗口中充满各种元素,这些元素中只有一部分是控件。控件其实就是与用户交互的元素。比如文本框、按钮。所有控件都继承自System.Windows.Control类。
Control类添加了一小部分基础结构:
1)设置控件内容对其方式的能力
2)设置Tab键顺序的能力
3)支持绘制背景、前景、边框
4)支持格式化文本内容的尺寸和字体等。
1.1.1 - 背景画刷和前景画刷
在WPF中背景和前景的属性分别是Background和Foreground。在之前我们看到赋值的时候直接赋值的是字符串类型,实际上使用的是Brush。可使用多种画刷进行填充。这里介绍下简单的SolidColorBrush。特殊的画刷等到之后我们专门去介绍。
1)使用代码设置颜色
<Button
    x:Name="btn"
    Width="120"
    Height="30"
    Content="Button 按钮" />
btn.Background = new SolidColorBrush(Colors.Orange);同时SolidColorBrush中需要传递Color类型,在Color中有FromRGB、FromARGB等函数,能够通过设置颜色的RGB值来进行颜色设置。
比如
btn.Background = new SolidColorBrush(Color.FromRgb(255,255,0));
btn.Background = new SolidColorBrush(Color.FromArgb(20,255,255,0));
2)在Xaml中设置颜色
在xaml中设置前景色和背景色可快捷设置对应属性值。不是定义Brush对象而是直接设置颜色名或者颜色值。WPF解析器将使用指定颜色自动创建SolidColorBrush对象。
<!--第一种设置方式-->
<Button
        Width="120"
        Height="30"
        Margin="30"
        Background="Red"
        Content="Button 按钮1" />
<!--第二种设置方式-->
<Button
        Width="120"
        Height="30"
        Content="Button 按钮2">
  <Button.Background>
    <SolidColorBrush Color="Red" />
  </Button.Background>
</Button>
如果再xaml中使用颜色代码设置颜色可使用#rrggbb或者#aarrggbb两种方式设置,使用的为十六进制。如下所示

1.1.2 - 字体
Control类定义了一部分与字体相关的属性。这些属性确定文本在控件中的显示方式。
属 性 名 称 | 属 性 说 明 |
FontSize | 字体大小;WPF中字体尺寸与传统尺寸有所不同,传统38号字体等同于WPF中48单位的尺寸; |
FontStyle | 文本样式;如斜体、粗体等; |
FontWeight | 表示文本粗细; |
FontFamily | 字体样式名称; |
FontStretch | 字体的拉伸或压缩程度; |
同样和前者一样可以后台设置同时可以在xaml代码中设置。
其中代码部分就不一一举例了,可以自行设置查看每个属性分别什么效果。
1.1.3 - 鼠标光标
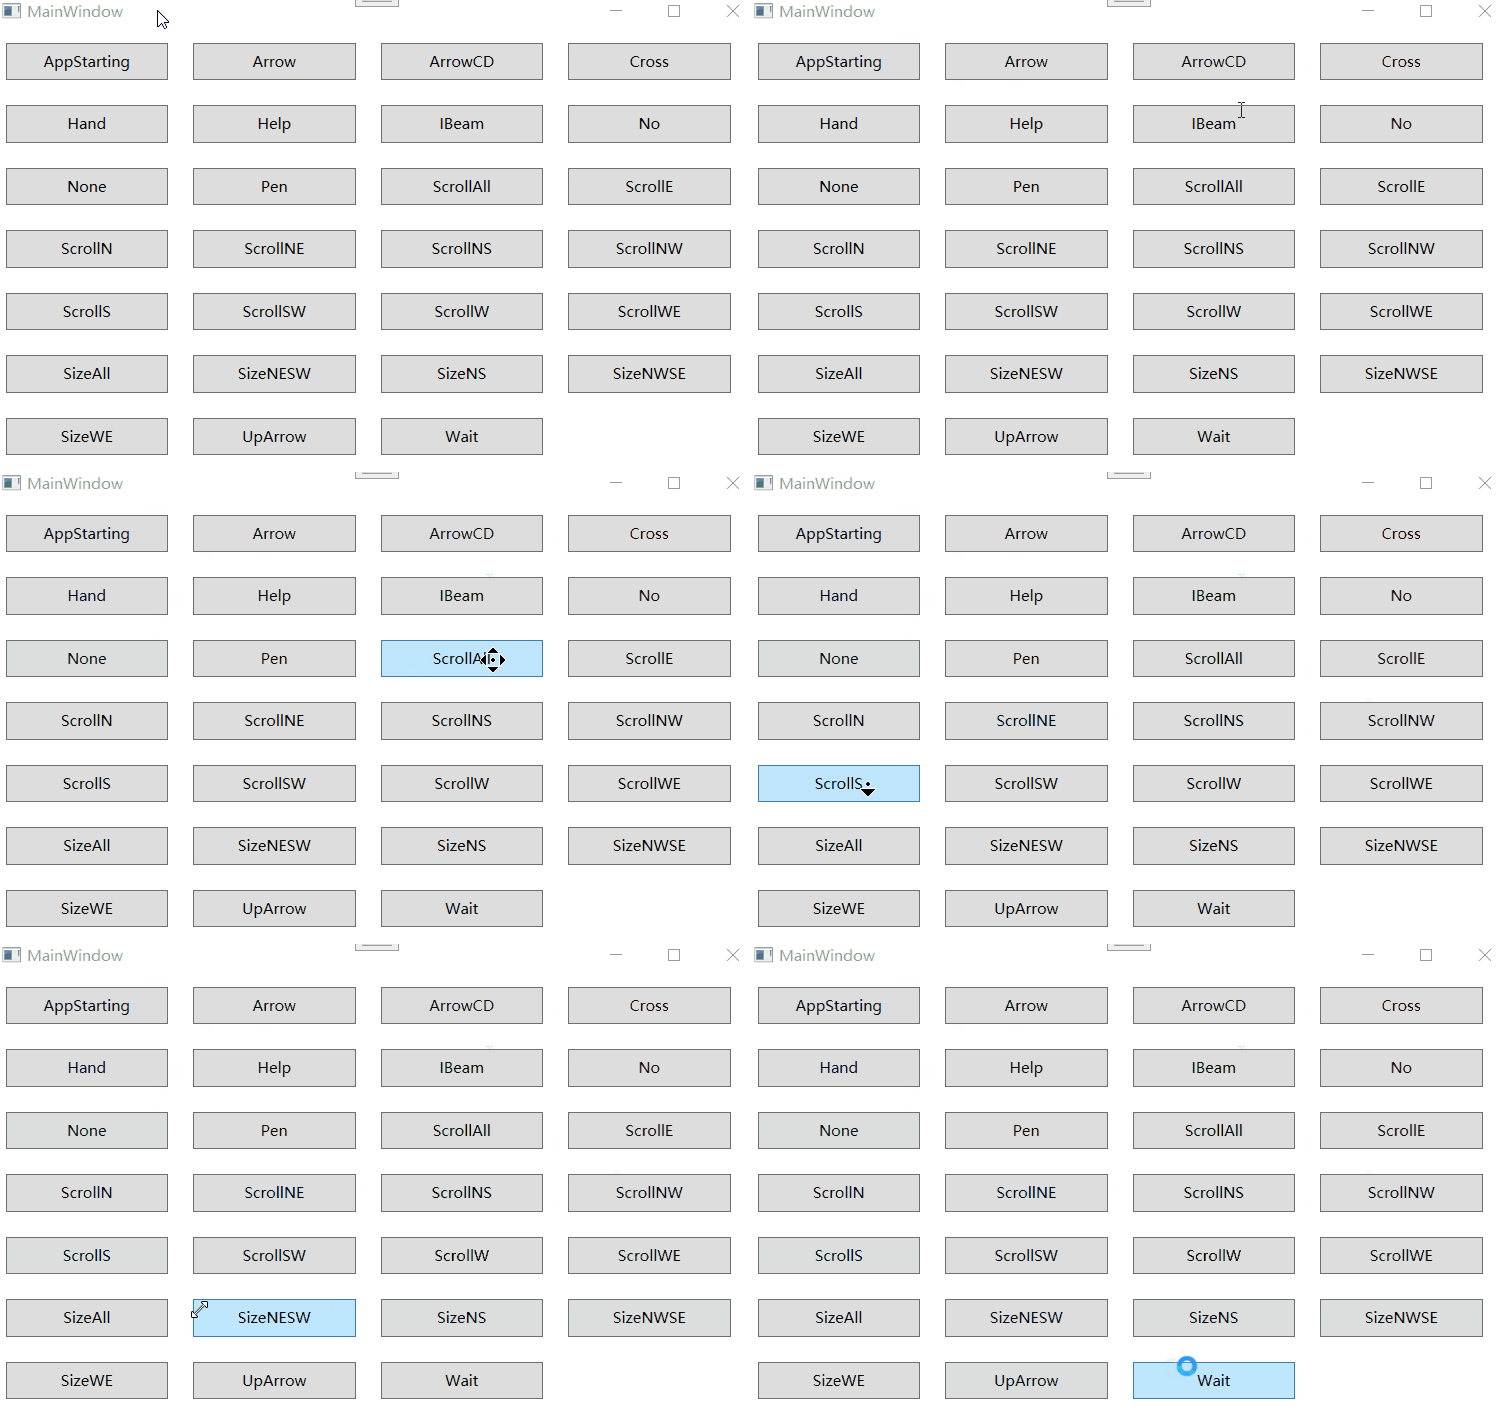
在Windows操作系统中,我们常见的鼠标也分为很多种,比如手型、笔型等等。
具体设置为
<Button
  Width="130"
  Height="30"
  Margin="10"
  Content="Arrow"
  Cursor="Arrow" />
其中共设置27种光标;效果分别如下

2 - 内容控件
内容控件是比较特殊的控件类型。可以包含单个嵌套元素的控件,但是只能包含一个子元素。
2.1 - Content属性
Content属性只接受单一对象,当我们赋值时最简单的就是直接赋值字符串类型的值,比如<Button Content="Click Me" />这种形式。其实Content不仅仅能够存放字符串类型还能写入继承自UIElement类的对象。
最简单的赋值文本
<Button
    Width="300"
    Height="100"
    Content="Click Me"
    FontSize="20" />
	赋值对象
<Button
    Width="300"
    Height="100"
    FontSize="20">
    <Button.Content>
        <Image
            Width="30"
            Height="30"
            Source="Images/1.png" />
    </Button.Content>
</Button>
当我们还想加入一行文本时会提示多次设置Content属性

这是因为Content只接受单一对象如果我们想实现这种效果需要使用容器去包裹
<Button
    Width="300"
    Height="100"
    FontSize="20">
    <Button.Content>
        <StackPanel Orientation="Horizontal">
        <Image
            Width="30"
            Height="30"
            Source="Images/1.png" />
            <Label Content="Click Me"/>
        </StackPanel>
    </Button.Content>
</Button>
效果如下

因为只要继承UIElement都可以作为Content属性,所以中间可以设置比较多的东西,但是有且只能有一个对象。
2.2 - 对齐
决定内容控件对齐是通过设置HorizontalContentAlignment和VerticalContentAlignment属性来实现的。这个我们在介绍容器的时候也使用过。
HorizontalAlignment 实现的是水平对齐
VerticalContentAlignment 实现的是垂直对齐
这个对齐方式就不写Demo了,如果对此还是不了解的话下去自己写个Demo设置下水平和垂直对齐的方式观察下分别由四名不同
2.3 - 标签
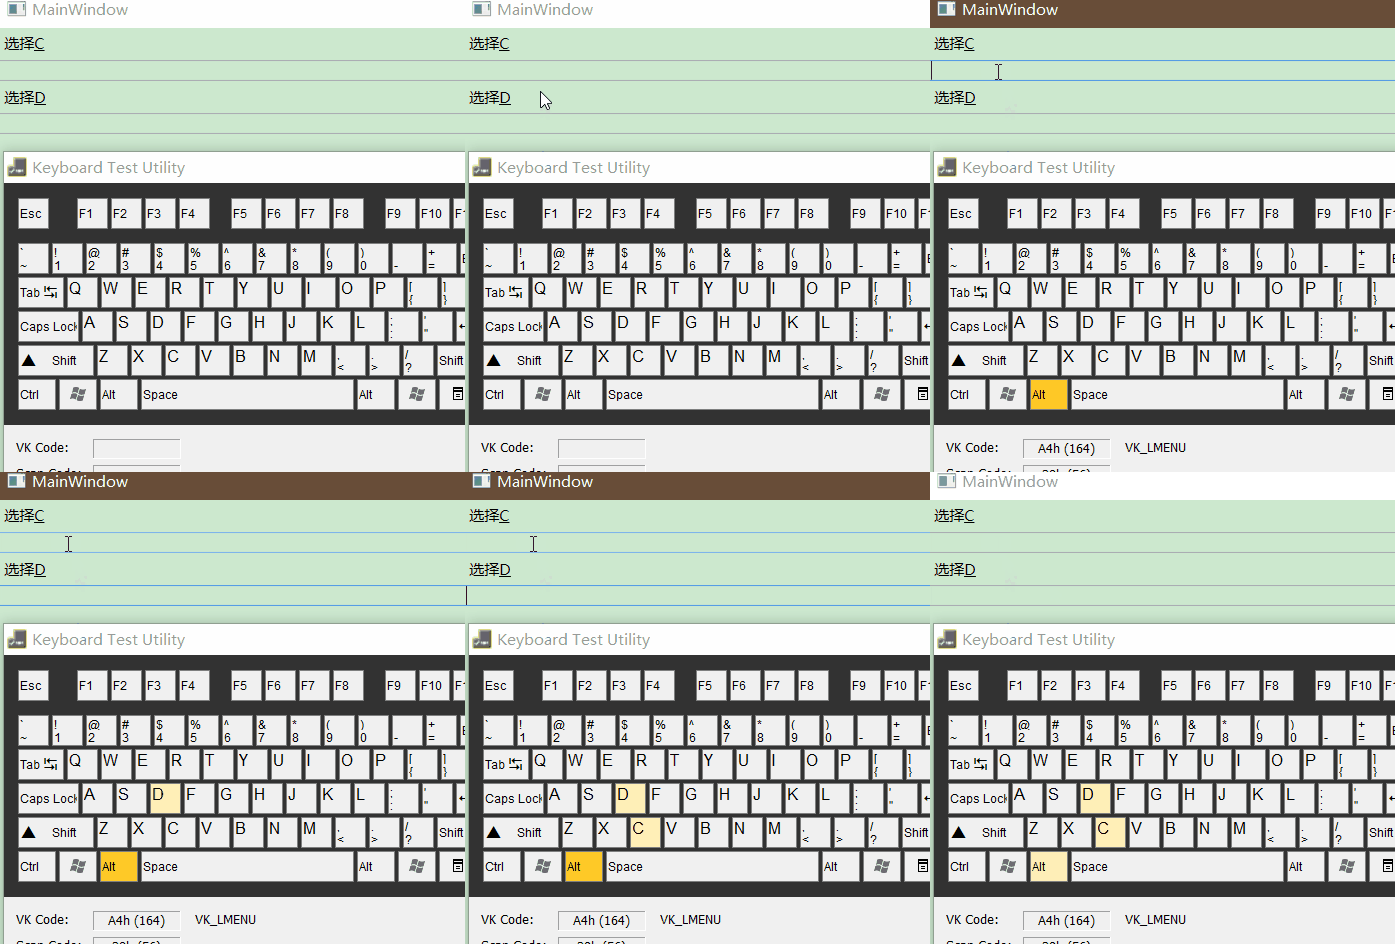
Label 在所有内容控件中应该是最简单的控件了 同样Label的Content也是单一内容。不过Label有个特性就是支持记忆符【记忆符其实就是能够为所连接的控件设置焦点的快捷键】
Label默认的用法和之前说的那种Content能够设置其他内容一样,但是有且只能有一个!
Label支持记忆符添加了Target属性,为了设置target属性需要指定另外一个控件的绑定表达式。如
<Label Content="选择_T1" Target="{Binding ElementName=t1}" />
<TextBox x:Name="t1" />
<Label Content="选择_T2" Target="{Binding ElementName=t2}" />
<TextBox x:Name="t2" />

2.4 - 按钮
这应该是所有应用程序中使用频率最高的控件了。在WPF中提供了三种按钮控件:Button、CheckBox和RadioButton。他们都是继承自ButtonBase类的内容控件。
对于按钮的一些其他特性就不一一赘述了,比如设置内容,宽度高度这些。直说对于WPF中一些按钮的特性吧。
1)普通Button按钮
Button添加了两个可写属性:IsCancel和IsDefault
IsCancel:如果设置为True时,在当前窗口的任何位置按下Esc都会出发该按钮
IsDefault:设置为True时按钮就成为了默认按钮,则当前按钮聚焦状态。
2)ToggleButton和RepeatButton
除了Button类之外还有三个类是继承于ButtonBase的包括
GridViewColumnHeader类 RepeatButton类 和ToggleButton类【后续介绍】
3)CheckBox控件

我们首先看到IsChecked状态有三个空、否、是,在Winform中我们知道有空白 填充 和选中三个对于此同样也是

这个就是x:Null的状态也就是不确定状态。默认是只有两种状态True或False。当我们需要第三种状态时需要设置IsThreeState=“True”。
对于事件而言同样也是会触发三个事件 Checked、Unchecked和Indeterminate三个。
<CheckBox
    Checked="CheckBox_Checked"
    Indeterminate="CheckBox_Indeterminate"
    IsChecked="{x:Null}"
    IsThreeState="True"
    Unchecked="CheckBox_Unchecked">
    是否启用
</CheckBox>
private void CheckBox_Checked(object sender, RoutedEventArgs e)
{
MessageBox.Show("Checked");
}
private void CheckBox_Unchecked(object sender, RoutedEventArgs e)
{
MessageBox.Show("UnChecked");
}
private void CheckBox_Indeterminate(object sender, RoutedEventArgs e)
{
MessageBox.Show("Indeterminate");
}4) RadioButton
同样,RadioButton也继承ToggleButton和CheckBox一样拥有三个状态三个事件处理。此外还增加了GroupName。熟悉Winform的应该不陌生当给多个RadioButton赋值为同一个GroupName时是可以进行分组的。【默认在一个控件下边为一组】
<StackPanel Margin="0,20">
  <Label Content="性别选择" />
  <RadioButton Content="男" />
  <RadioButton Content="女" />
  <RadioButton Content="未知" />
  <Label Content="职业选择" />
  <RadioButton Content="工人" />
  <RadioButton Content="医生" />
  <RadioButton Content="自由职业者" />
</StackPanel>
对于这种情况发现虽然属于两个模块选择却只能选择一个,这时候就体现出来GroupName的重要性了
<StackPanel Margin="0,20">
    <Label Content="性别选择" />
    <RadioButton Content="男" GroupName="Gender" />
    <RadioButton Content="女" GroupName="Gender" />
    <RadioButton Content="未知" GroupName="Gender" />
    <Label Content="职业选择" />
    <RadioButton Content="工人" GroupName="Job" />
    <RadioButton Content="医生" GroupName="Job" />
    <RadioButton Content="自由职业者" GroupName="Job" />
</StackPanel>
2.5 - 提示
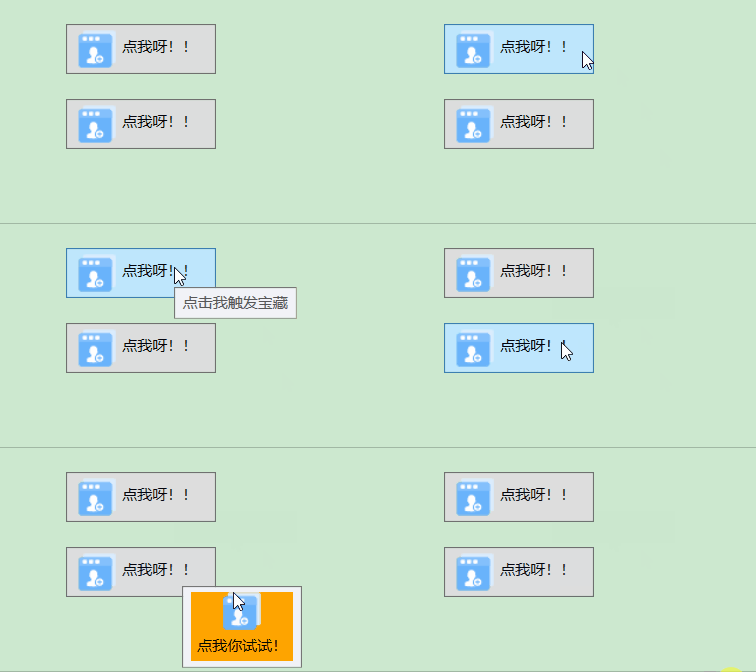
ToolTip是提示工具是在FrameworkElement类中定义的。当我们需要对控件进行设置提示时,我们能够用到这玩意儿。同时也是和Content一样可以设置比较复杂的提示,我们直接使用Demo来说明ToolTip的用法。
<Button
    Width="120"
    Height="40"
    ToolTip="点击我触发宝藏">
    <Button.Content>
        <StackPanel Orientation="Horizontal">
            <Image
                Width="30"
                Height="30"
                HorizontalAlignment="Center"
                VerticalAlignment="Center"
                Source="Images/1.png" />
            <Label Content="点我呀!!" />
        </StackPanel>
    </Button.Content>
</Button>
 <Button>
    <Button.ToolTip>
        <StackPanel Background="Orange">
            <Image
                Width="30"
                Height="30"
                HorizontalAlignment="Center"
                VerticalAlignment="Center"
                Source="Images/1.png" />
            <Label Content="点我你试试!" />
        </StackPanel>
    </Button.ToolTip>
    <Button.Content>
        <StackPanel Orientation="Horizontal">
            <Image
                Width="30"
                Height="30"
                HorizontalAlignment="Center"
                VerticalAlignment="Center"
                Source="Images/1.png" />
            <Label Content="点我呀!!" />
        </StackPanel>
    </Button.Content>
</Button>

其中ToolTip实质上是个内容控件,所以可以调节很多标准属性,比如内容、背景颜色、然后其中比较有用的属性如下:
名称 | 说明 |
HasDropShadow | 是否允许有黑影 |
Placement | 使用Mode枚举值、默认是Mouse跟随鼠标但是能够设置左右上下等等属性值 |
HorizontalOffset VerticalOffset | 调整到希望所调整到的位置【精确值】以当前坐标 |
PlacementTarget | 允许相对于另外一个元素定位 |
CustomPopupPlacementCallback | 用于偏移工具提示得位置 |
StaysOpen | 创建一直打开的提示 |
Isenable IsOpen | 禁用 启用 |
Popup控件
和ToolTip在很多方面使用都一样。不过一个是存在Child中一个是Content中
区别不一样的地方
1)Popup不会自动显示 需要设置IsOpen
2)默认StaysOpen是True会一直显示,知道某个事件出发IsOpen为False的时候才会消失。
3)PopupAnimation属性。进入视野的方式,默认None可以设置为Fade Scroll等
4)可接受焦点 所以可以放置其他交互控件,比如按钮等
5)Popup不会集成背景设置,弹出时就是个大黑方块
3 - 特殊容器
特殊容器可用于构造用户界面中比较大的部分区域。
本节我们介绍几种特殊容器
3.1 - ScrollViewer
滚动条,大家应该不陌生。在WPF中一般通常用来封装布局容器。比如我们设置的区域容纳不下对应控件时需要用ScrollViewer包裹。
比如
<StackPanel Margin="0,20">
    <Button
        Width="200"
        Height="60"
        Margin="0,20"
        Content="ClickMe"
        FontSize="20" />
    <Button
        Width="200"
        Height="60"
        Margin="0,20"
        Content="ClickMe"
        FontSize="20" />
    <Button
        Width="200"
        Height="60"
        Margin="0,20"
        Content="ClickMe"
        FontSize="20" />
    <Button
        Width="200"
        Height="60"
        Margin="0,20"
        Content="ClickMe"
        FontSize="20" />
    <Button
        Width="200"
        Height="60"
        Margin="0,20"
        Content="ClickMe"
        FontSize="20" />
    <Button
        Width="200"
        Height="60"
        Margin="0,20"
        Content="ClickMe"
        FontSize="20" />
    <Button
        Width="200"
        Height="60"
        Margin="0,20"
        Content="ClickMe"
        FontSize="20" />
</StackPanel>
默认空间根本显示不了,如果需要显示还需要拉大界面。这时需要在StackPanel外边包裹一个ScrollViewer此时就满足对应上下滑动需求了。
其中当我们能够容纳的时候发现右边滑动条还是显示这时需要我们设置一下ScrollViewer的VerticalScrollBarVisibility属性
3.2 - GroupBox
同Winform中GroupBox差不多也是继承自HeaderedContentControl类的控件中最简单的一个。
<GroupBox Header="这个是个GroupBox" Margin="20">
    <Button Content="点击"/>
</GroupBox>
同样GroupBox的Header和Content同样可以单独设置
<GroupBox Margin="20">
    <GroupBox.Header>
        <StackPanel Orientation="Horizontal">
            <Image
                Width="30"
                Height="30"
                HorizontalAlignment="Center"
                VerticalAlignment="Center"
                Source="Images/1.png" />
            <Label Content="点我呀!!" />
        </StackPanel>
    </GroupBox.Header>
    <Button Content="点击"/>
</GroupBox>
3.3 - TabControl
等同于Winform中的TabControl。同样需要设置选项卡TabItem
简单示例
<TabControl>
    <TabItem>
        <TabItem.Header>
            第一页
        </TabItem.Header>
        <StackPanel>
            <Button Content="点我" />
            <Button Content="点我" />
            <Button Content="点我" />
        </StackPanel>
    </TabItem>
    <TabItem>
        <TabItem.Header>
            第二页
        </TabItem.Header>
        <UniformGrid>
            <Button Content="点我" />
            <Button Content="点我" />
            <Button Content="点我" />
        </UniformGrid>
    </TabItem>
</TabControl>
当需要设置选中项时需要在TabItem中设置IsSelected属性,同样Header可以像其他一样使用多种元素结合不过还是一样只能支持单元素。
3.4 Expander
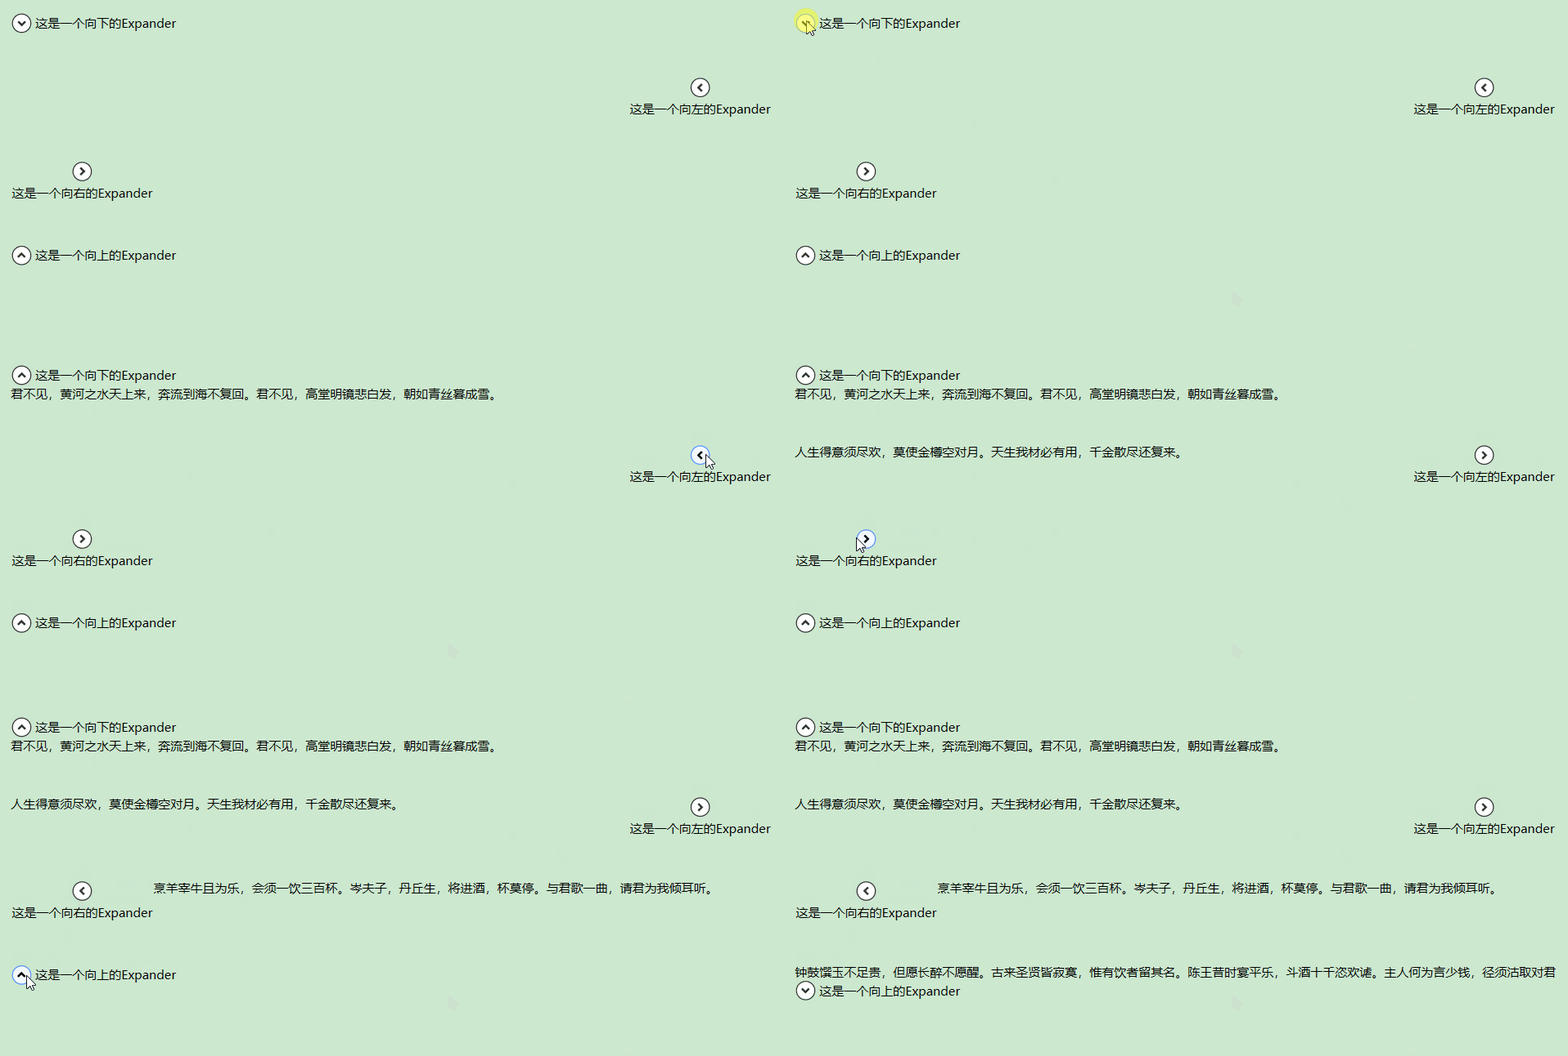
Winform中没有的带标题的内容控件,也是我们能够经常看到的效果,通过单击小箭头的方式显示隐藏内容。同时可以设置展开方向 ExpandDirection属性。有上左右。直接上个示例应该能看出来基本用法了。
<Expander
    Margin="20"
    ExpandDirection="Down"
    Header="这是一个向下的Expander">
    君不见,黄河之水天上来,奔流到海不复回。君不见,高堂明镜悲白发,朝如青丝暮成雪。
</Expander>

<Expander
    Margin="20"
    ExpandDirection="Left"
    Header="这是一个向左的Expander">
    人生得意须尽欢,莫使金樽空对月。天生我材必有用,千金散尽还复来。
</Expander>

<Expander
    Margin="20"
    ExpandDirection="Right"
    Header="这是一个向右的Expander">
    烹羊宰牛且为乐,会须一饮三百杯。岑夫子,丹丘生,将进酒,杯莫停。与君歌一曲,请君为我倾耳听。
</Expander>

<Expander
    Margin="20"
    ExpandDirection="Up"
    Header="这是一个向上的Expander">
钟鼓馔玉不足贵,但愿长醉不愿醒。古来圣贤皆寂寞,惟有饮者留其名。陈王昔时宴平乐,斗酒十千恣欢谑。主人何为言少钱,径须沽取对君酌。五花马,千金裘,呼儿将出换美酒,与尔同销万古愁。
</Expander>

说明:其中内容包括Header都是可以设置为之前介绍的那种方式的内容包括带图片等。【单独设置】即可。后边我们说到控件模板的时候会改造对应样式和风格之类的。


