源码地址:https://github.com/springsecuritydemo/microservice-auth-center02
在上一章入门案例 中,我们实现了入门程序,本篇我们在上一章的基础上完成自动登录功能。
一、修改登录页面:login.html
在登录页面中添加自动登录复选框,自动登录字段名必须为:remember-me
<!DOCTYPE html>
<html lang="en">
<head>
    <meta charset="UTF-8">
    <title>登陆</title>
</head>
<body>
<h1>登陆</h1>
<form method="post" action="/login">
    <div>
        用户名:<input type="text" name="username">
    </div>
    <div>
        密 码:<input type="password" name="password">
    </div>
    <div>
        <label><input type="checkbox" name="remember-me"/>自动登录</label>
    </div>
    <div>
        <button type="submit">立即登陆</button>
    </div>
</form>
</body>
</html>
二、自动登录两种实现方式
2.1 Cookie 存储
这种方式十分简单,只需要在 WebSecurityConfig 中的 configure() 方法中添加一个 rememberMe() 即可,代码如下:
@Configuration
@EnableWebSecurity
@EnableGlobalMethodSecurity(prePostEnabled = true)
public class WebSecurityConfig extends WebSecurityConfigurerAdapter {

    @Autowired
    private CustomUserDetailsService userDetailsService;

    @Override
    protected void configure(AuthenticationManagerBuilder auth) throws Exception {
        auth.userDetailsService(userDetailsService).passwordEncoder(new BCryptPasswordEncoder());
    }

    @Override
    protected void configure(HttpSecurity http) throws Exception {
        http.authorizeRequests()
                // 如果有允许匿名的url,填在下面
//                .antMatchers().permitAll()
                .anyRequest().authenticated()
                .and()
                // 设置登陆页
                .formLogin().loginPage("/login")
                // 设置登陆成功页
                .defaultSuccessUrl("/").permitAll()
                // 自定义登陆用户名和密码参数,默认为username和password
//                .usernameParameter("username")
//                .passwordParameter("password")
                .and()
                .logout().permitAll()
                // 自动登录
                .and().rememberMe();

        // 关闭CSRF跨域
        http.csrf().disable();
    }

    @Override
    public void configure(WebSecurity web) throws Exception {
        // 设置拦截忽略文件夹,可以对静态资源放行
        web.ignoring().antMatchers("/css/**", "/js/**");
    }
}
当我们登录时勾选【自动登录】时,会自动在 Cookie 中保存一个名为 remember-me 的cookie,默认有效期为2周,其值是一个加密字符串:

当再次访问系统首页时,浏览器会携带这个 cookie 进行访问,SpringSecurity校验Cookie的有效性,完成自动登录。

2.2 数据库存储
使用 Cookie 存储虽然方便,但是大家都知道 Cookie 毕竟是保存在客户端的,而且 Cookie 的值还与用户名、密码这些敏感信息有关,虽然加密了,但是将这些敏感信息存在客户端,毕竟不太保险。(万一遇到黑客给黑了就尴尬了┭┮﹏┭┮)
**SpringSecurity 还提供了另一种相对安全的实现机制: **
- 在客户端的 Cookie中,仅保存一个无意义的加密串(与用户名和密码等敏感信息无关),然后在数据库中保存该加密串 - 用户信息的对应关系,自动登录时,用 Cookie 中的加密串,到数据库验证,如果通过,自动登录才算成功。
2.2.1 基本原理
当浏览器发起表单登录请求时,当通过 UsernamePasswordAuthenticationFilter 认证成功后,会经过 RememberMeService, 在其中有个 TokenRepository , 它会生成一个 token, 首先将 token 写入到浏览器的 Cookie中,然后将 token、认证成功的用户名写入到数据库中。
当浏览器下次请求时,会经过 RememberMeAuthenticationFilter,它会读取 Cookie 中的 token,交给 RememberMeService ,获取用户信息,并将用户信息放入到 SpringSecurity 中,实现自动登录。

RememberMeAuthenticationFilter在整个过滤器链中是比较靠后的位置,也就是说在传统的登录方式都无法登录情况下才会使用自动登录。

2.2.2 代码实现
在 WebSecurityConfig 中注入 dataSource ,创建一个 PersistentTokenRepository 的Bean对象:
@Autowired
    private DataSource dataSource;

    @Bean
    public PersistentTokenRepository persistentTokenRepository() {
        JdbcTokenRepositoryImpl tokenRepository = new JdbcTokenRepositoryImpl();
        tokenRepository.setDataSource(dataSource);
        // 如果token表不存在,使用下面可以自动初始化表结构,如果已经存在,请注释掉,否则会报错
        // tokenRepository.setCreateTableOnStartup(true);
        return tokenRepository;
    }
在 config() 中配置自动登录:
@Override
    protected void configure(HttpSecurity http) throws Exception {
        http.authorizeRequests()
                // 如果有允许匿名的url,填在下面
//                .antMatchers().permitAll()
                .anyRequest().authenticated()
                .and()
                // 设置登陆页
                .formLogin().loginPage("/login")
                // 设置登陆成功页
                .defaultSuccessUrl("/").permitAll()
                // 自定义登陆用户名和密码参数,默认为username和password
//                .usernameParameter("username")
//                .passwordParameter("password")
                .and()
                .logout().permitAll()
                // 自动登录
                .and().rememberMe()
                .tokenRepository(persistentTokenRepository())
                // 有效时间,单位:s
                .tokenValiditySeconds(60)
                .userDetailsService(userDetailsService);

        // 关闭CSRF跨域
        http.csrf().disable();
    }
初次启动,如果配置自动生成token表结构,会默认在数据库中生成:

表结构:
CREATE TABLE `persistent_logins` (
  `username` varchar(64) NOT NULL,
  `series` varchar(64) NOT NULL,
  `token` varchar(64) NOT NULL,
  `last_used` timestamp NOT NULL DEFAULT CURRENT_TIMESTAMP ON UPDATE CURRENT_TIMESTAMP,
  PRIMARY KEY (`series`)
) ENGINE=InnoDB DEFAULT CHARSET=utf8;
生产环境推荐,手动创建表,免得再修改代码配置
三、运行测试
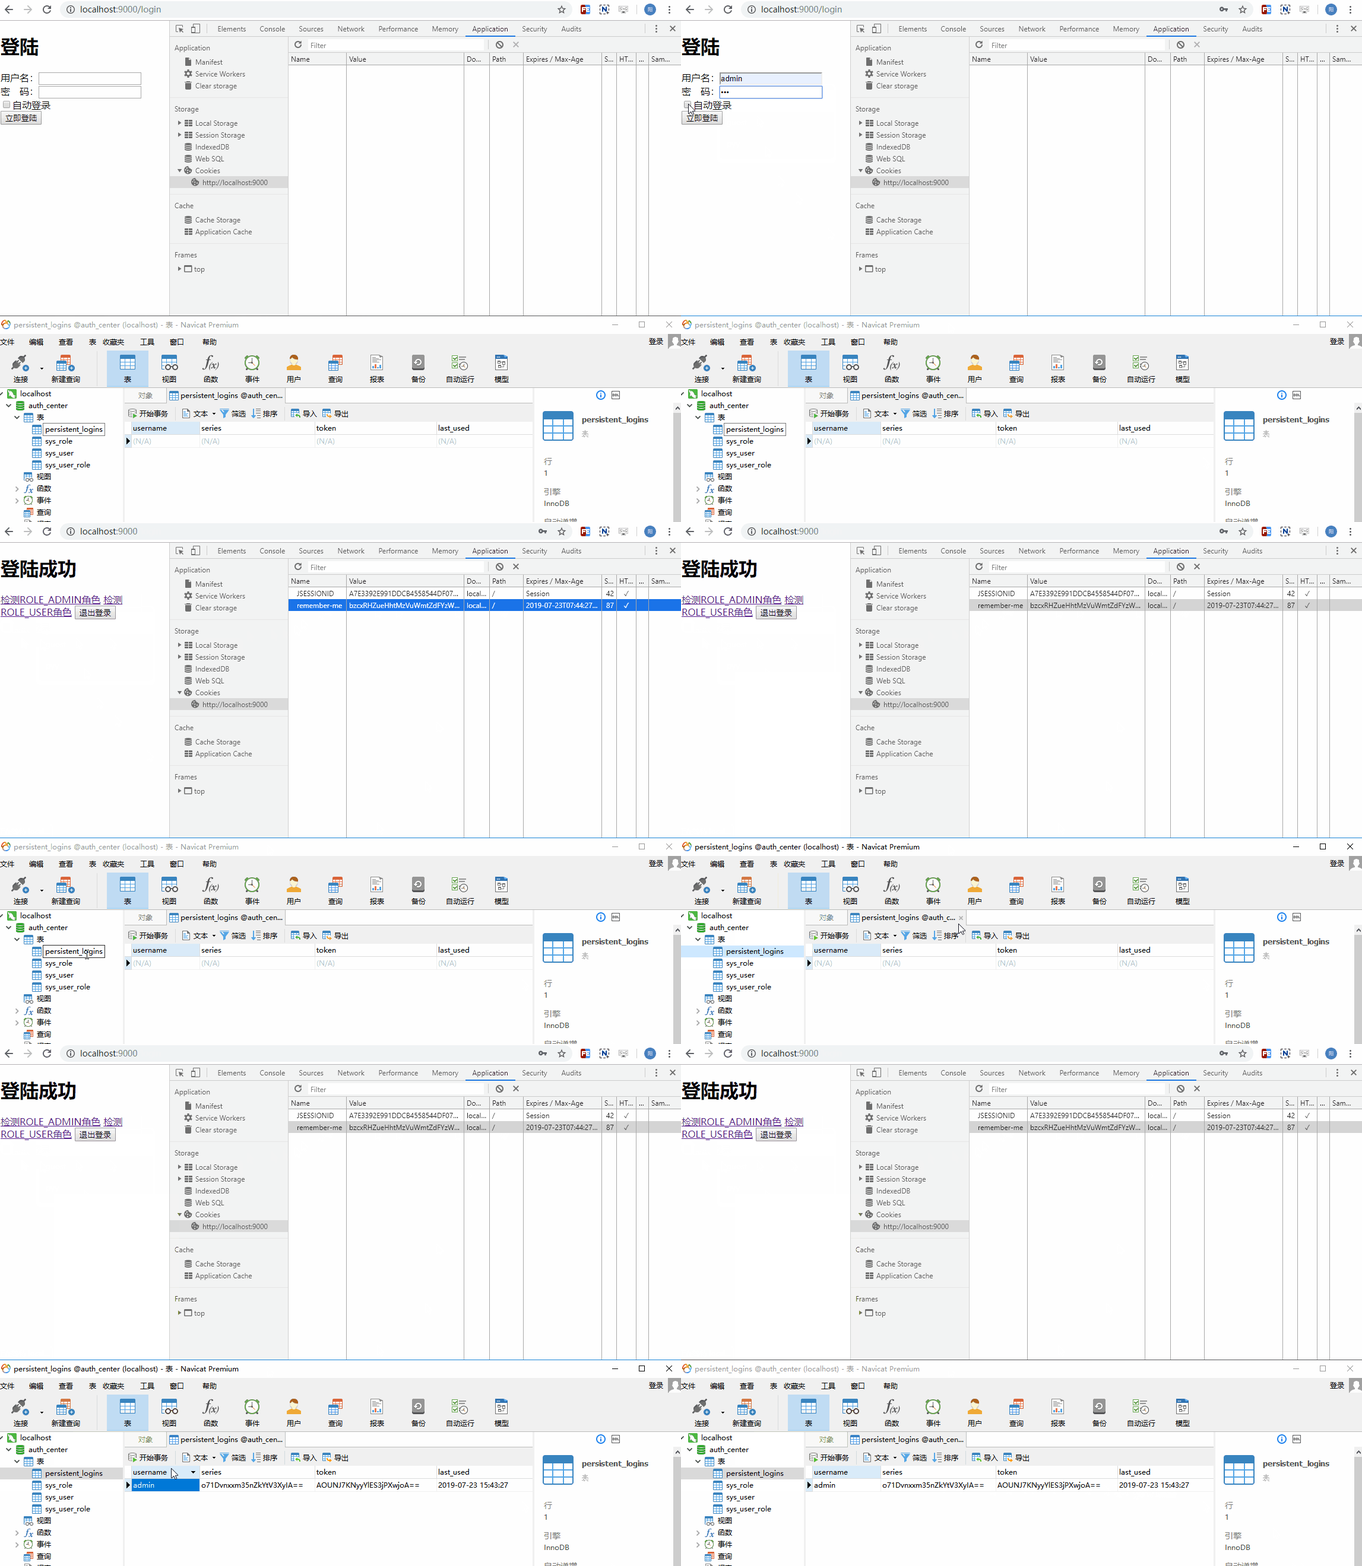
勾选自动登录后,Cookie 和数据库中均存储了 token 信息:

关闭浏览器,在cookie没有过期之前,直接访问 http://localhost:9000/ 系统首页无需登录可直接访问。


