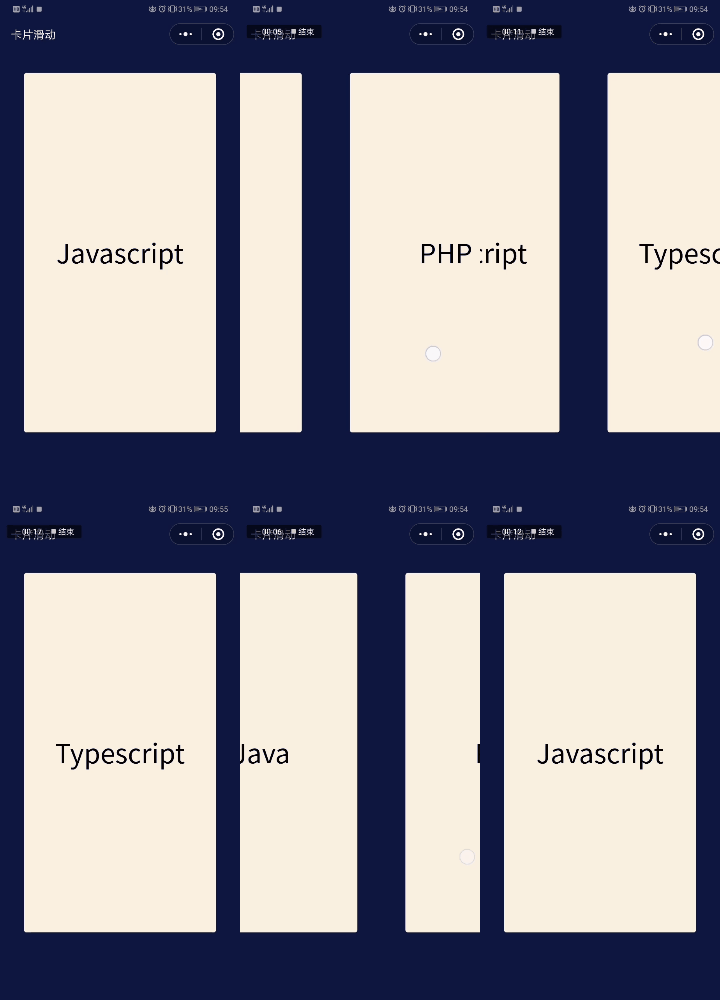
快放假了,人狠话不多,啥也不说了。先看效果图。

思路
从上面的效果图来看,基本的需求包括:
左右滑动到一定的距离,就向相应的方向移动一个卡片的位置。
卡片滑动的时候有一定的加速度。
如果滑动距离太小,则依旧停留在当前卡片,而且有一个回弹的效果。
看到这样的需求,不熟悉小程序的同学,可能感觉有点麻烦。首先需要计算卡片的位置,然后再设置滚动条的位置,使其滚动到指定的位置,而且在滚动的过程中,加上一点加速度...
然而,当你查看了小程序的开发文档之后,就会发现小程序已经帮我们提前写好了,我们只要做相关的设置就行。
实现
滚动视图
左右滑动,其实就是水平方向上的滚动。小程序给我们提供了scroll-view组件,我们可以通过设置scroll-x属性使其横向滚动。
关键属性
在scroll-view组件属性列表中,我们发现了两个关键的属性:
属性
类型
说明
scroll-into-view
string
值应为某子元素id(id不能以数字开头)。设置哪个方向可滚动,则在哪个方向滚动到该元素
scroll-with-animation
boolean
在设置滚动条位置时使用动画过渡
有了以上这两个属性,我们就很好办事了。只要让每个卡片独占一页,同时设置元素的ID,就可以很简单的实现翻页效果了。
左滑右滑判断
这里,我们通过触摸的开始位置和结束位置来决定滑动方向。
微信小程序给我们提供了touchstart以及touchend事件,我们可以通过判断开始和结束的时候的横坐标来判断方向。
代码实现
card.wxml
scroll-into-view="{{toView}}"
bindtouchstart="touchStart"
bindtouchend="touchEnd">
{{item}}
card.wxss
page{
overflow: hidden;
background: #0D1740;
}
.scroll-box{
white-space: nowrap;
height: 105vh;
}
.card-box{
display: inline-block;
}
.card{
display: flex;
justify-content: center;
align-items: center;
box-sizing: border-box;
height: 80vh;
width: 80vw;
margin: 5vh 10vw;
font-size: 40px;
background: #F8F2DC;
border-radius: 4px;
}
card.js
const DEFAULT_PAGE = 0;
Page({
startPageX: 0,
currentView: DEFAULT_PAGE,
data: {
toView: `card_${DEFAULT_PAGE}`,
list: ['Javascript', 'Typescript', 'Java', 'PHP', 'Go']
},
touchStart(e) {
this.startPageX = e.changedTouches[0].pageX;
},
touchEnd(e) {
const moveX = e.changedTouches[0].pageX - this.startPageX;
const maxPage = this.data.list.length - 1;
if (Math.abs(moveX) >= 150){
if (moveX > 0) {
this.currentView = this.currentView !== 0 ? this.currentView - 1 : 0;
} else {
this.currentView = this.currentView !== maxPage ? this.currentView + 1 : maxPage;
}
}
this.setData({
toView: `card_${this.currentView}`
});
}
})
card.json
{
"navigationBarTitleText": "卡片滑动",
"backgroundColor": "#0D1740",
"navigationBarBackgroundColor": "#0D1740",
"navigationBarTextStyle": "white"
}
以上就是本文的全部内容,希望对大家的学习有所帮助


