前言:
fragment是可以嵌入activity当中的UI片段,下面将从
fragment的生命周期
静态加载fragment,
动态加载fragment,
fragment与activity通信,
这4个方面去认识fragment的使用
1>fragment的生命周期

注:fragment的状态会受activity影响,也会受fragment自身一些函数调用的影响;
2>静态加载fragment
I>编写fragment的布局文件,如:
左侧布局:(fragment_left.xml)
<FrameLayout xmlns:android="http://schemas.android.com/apk/res/android"
    xmlns:tools="http://schemas.android.com/tools"
    android:layout_width="match_parent"
    android:layout_height="match_parent"
    android:background="#80ffff"

    tools:context="com.example.administrator.testfragment.LeftFragment">

    <LinearLayout
        android:layout_width="match_parent"
        android:layout_height="match_parent"
        android:orientation="vertical"
        >
        <EditText
            android:layout_width="match_parent"
            android:layout_height="60dp"
            android:hint="left fragment"
            />
        <Button
            android:layout_width="match_parent"
            android:layout_height="60dp"
            android:text="left switch"
            android:layout_gravity="center_horizontal"
            />
    </LinearLayout>

</FrameLayout>
右侧布局:(fragment_right.xml)
<FrameLayout xmlns:android="http://schemas.android.com/apk/res/android"
    xmlns:tools="http://schemas.android.com/tools"
    android:layout_width="match_parent"
    android:layout_height="match_parent"
    android:background="#ff00ff"
    tools:context="com.example.administrator.testfragment.RightFragment">

    <LinearLayout
        android:layout_width="match_parent"
        android:layout_height="match_parent"
        android:orientation="vertical"
        >
        <EditText
            android:layout_width="match_parent"
            android:layout_height="60dp"
            android:hint="right fragment"
            />
        <Button
            android:layout_width="match_parent"
            android:layout_height="60dp"
            android:text="right switch"
            android:layout_gravity="center_horizontal"
            />
    </LinearLayout>

</FrameLayout>
II>创建fragment类
LeftFragment:
package com.example.administrator.testfragment;

import android.os.Bundle;
import android.support.v4.app.Fragment;
import android.view.LayoutInflater;
import android.view.View;
import android.view.ViewGroup;

public class LeftFragment extends Fragment {

    /***
     *
     * 作用;
     * 这个方法是用来返回一个视图用于显示在fragment上
     *
     * inflater:用于将一个XML文件实例化成一个View队形
     *
     * savedInstanceState: 用于保存一些信息之用;
     * ***/
    @Override
    public View onCreateView(LayoutInflater inflater, ViewGroup container,
                             Bundle savedInstanceState) {
        return inflater.inflate(R.layout.fragment_left, container, false);
    }


}
RightFragment:
package com.example.administrator.testfragment;

import android.os.Bundle;
import android.support.v4.app.Fragment;
import android.view.LayoutInflater;
import android.view.View;
import android.view.ViewGroup;


public class RightFragment extends Fragment {

    @Override
    public View onCreateView(LayoutInflater inflater, ViewGroup container,
                             Bundle savedInstanceState) {
        return inflater.inflate(R.layout.fragment_right, container, false);
    }


}
III>在布局文件中使用fragment
activity_main.xml:
<?xml version="1.0" encoding="utf-8"?>
<LinearLayout xmlns:android="http://schemas.android.com/apk/res/android"
    xmlns:tools="http://schemas.android.com/tools"
    android:layout_width="match_parent"
    android:layout_height="match_parent"
    android:orientation="horizontal"
    tools:context="com.example.administrator.testfragment.MainActivity">

    <!--
     fragment必须指定id,与此同时,name是用于指定显示哪个布局文件
     -->

    <fragment
        android:layout_width="0dp"
        android:layout_weight="1"
        android:layout_height="match_parent"
        android:id="@+id/lf"
        android:name="com.example.administrator.testfragment.LeftFragment"
        />

    <fragment
        android:layout_width="0dp"
        android:layout_weight="1"
        android:layout_height="match_parent"
        android:id="@+id/rf"
        android:name="com.example.administrator.testfragment.RightFragment"
        />

</LinearLayout>
MainActivity:
package com.example.administrator.testfragment;

import android.support.v7.app.AppCompatActivity;
import android.os.Bundle;

public class MainActivity extends AppCompatActivity {

    @Override
    protected void onCreate(Bundle savedInstanceState) {
        super.onCreate(savedInstanceState);
        setContentView(R.layout.activity_main);
    }
}
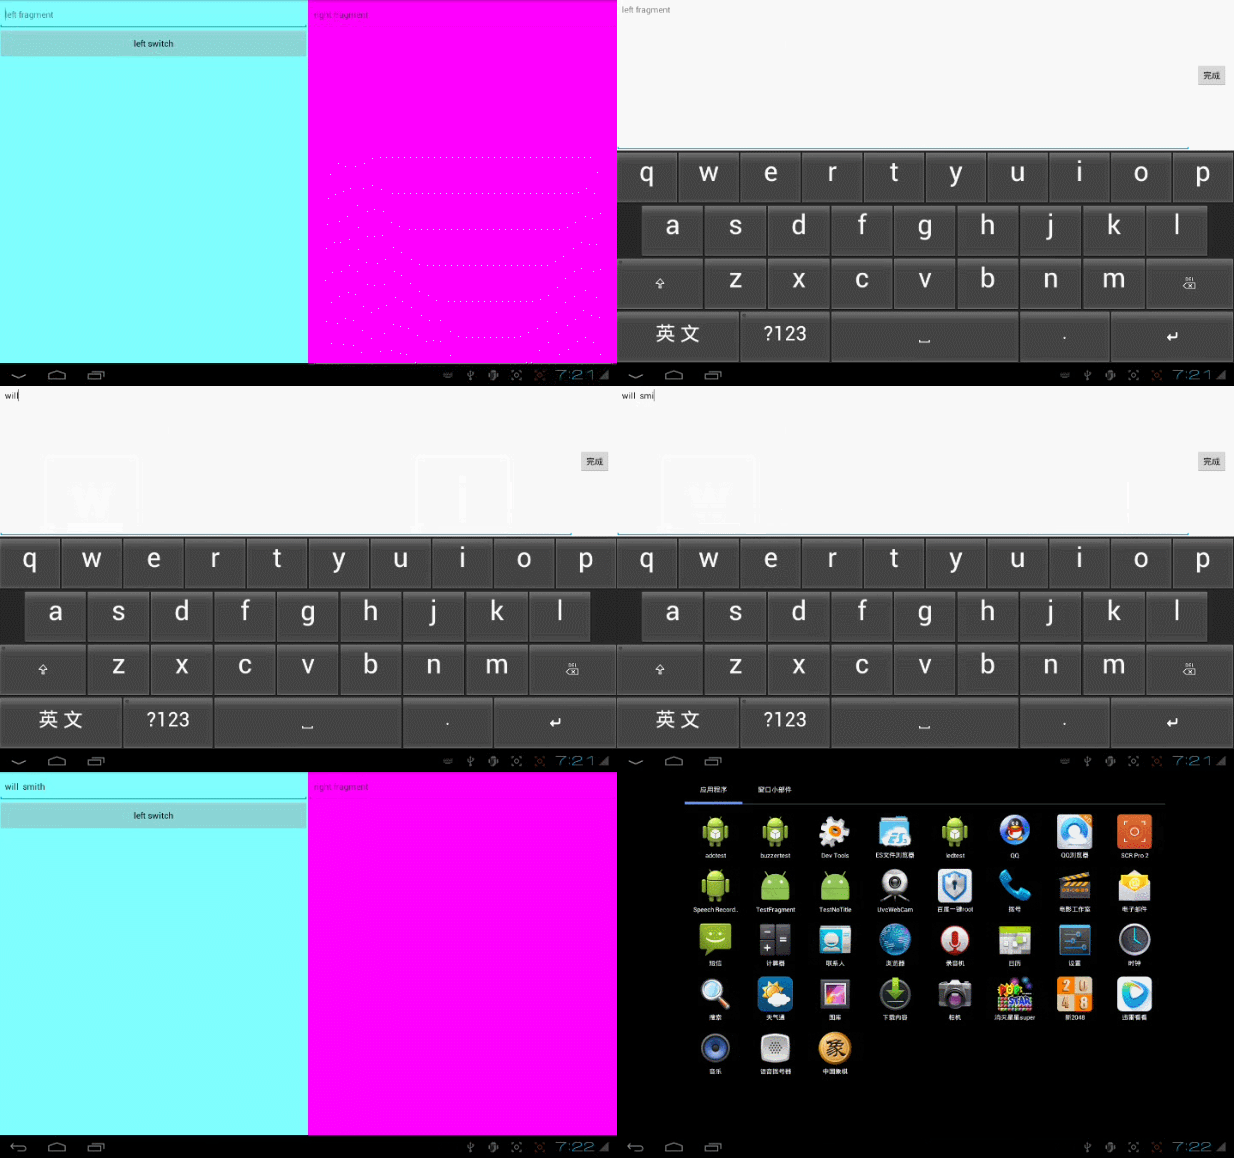
运行结果如下:

3>动态加载fragment
动态加载,重点在于这里:
/***
 * 创建Fragment实例
 * ***/
if(thirdFragment == null){
    thirdFragment = new ThirdFragment();
}

FragmentManager fragmentManager = getFragmentManager();

FragmentTransaction fragmentTransaction = fragmentManager.beginTransaction();
/***
 * 第一个参数:表示被替换的fragment的布局文件id
 * 第二个参数:表示新的fragment
 *
 * replace()就相当于先remove(),然后再add();
 * ***/
fragmentTransaction.replace(R.id.lf,thirdFragment);
/***
 * 当时addToBackStack没有起作用的原因是因为当时的继承的活动为AppCompatActivity,
 * 具体详情可参考:
 *
 * **/
/***
 * 将其添加到返回栈中
 * ***/
fragmentTransaction.addToBackStack(null);
/***
 * 提交事务
 * ***/
fragmentTransaction.commit();
代码示例如下:
MainActivity:
package com.example.administrator.testfragment;

import android.app.Activity;
import android.app.FragmentManager;
import android.app.FragmentTransaction;
import android.os.Bundle;
import android.view.View;

/***
 * 注意:这里使用的是Activity,并非是Android Studio默认的AppCompatActivity;
 * 具体原因,可参考:
 * ***/
public class MainActivity extends Activity {

    private ThirdFragment thirdFragment;

    @Override
    protected void onCreate(Bundle savedInstanceState) {
        super.onCreate(savedInstanceState);
        setContentView(R.layout.activity_main);
    }

    public void leftSwitch(View view){
        /***
         * 创建Fragment实例
         * ***/
        if(thirdFragment == null){
            thirdFragment = new ThirdFragment();
        }

        FragmentManager fragmentManager = getFragmentManager();

        FragmentTransaction fragmentTransaction = fragmentManager.beginTransaction();
        /***
         * 第一个参数:表示被替换的fragment的布局文件id
         * 第二个参数:表示新的fragment
         *
         * replace()就相当于先remove(),然后再add();
         * ***/
        fragmentTransaction.replace(R.id.lf,thirdFragment);
        /***
         * 当时addToBackStack没有起作用的原因是因为当时的继承的活动为AppCompatActivity,
         * 具体详情可参考:
         *
         * **/
        /***
         * 将其添加到返回栈中
         * ***/
        fragmentTransaction.addToBackStack(null);
        /***
         * 提交事务
         * ***/
        fragmentTransaction.commit();
    }

}
LeftFragment:
package com.example.administrator.testfragment;

import android.app.Fragment;
import android.content.Context;
import android.os.Bundle;
import android.util.Log;
import android.view.LayoutInflater;
import android.view.View;
import android.view.ViewGroup;

public class LeftFragment extends Fragment {

    /***
     * 当fragment与activity关联的时候,这个函数就会被调用;
     * ***/
    @Override
    public void onAttach(Context context) {
        super.onAttach(context);
        Log.e("LeftFragment","onAttach");
    }

    /***
     * 创建fragment的时候调用
     * **/
    @Override
    public void onCreate(Bundle savedInstanceState) {
        super.onCreate(savedInstanceState);
        Log.e("LeftFragment","onCreate");
    }

    /***
     *
     * 作用;
     * 这个方法是用来返回一个视图用于显示在fragment上
     *
     * inflater:用于将一个XML文件实例化成一个View队形
     *
     * savedInstanceState: 用于保存一些信息之用;
     * ***/
    @Override
    public View onCreateView(LayoutInflater inflater, ViewGroup container,
                             Bundle savedInstanceState) {
        Log.e("LeftFragment","onCreateView");
        return inflater.inflate(R.layout.fragment_left, container, false);
    }

    /***
     * 当与fragment关联的activity完成了onCreate()方法调用时,这个函数就会被调用
     * ***/
    @Override
    public void onActivityCreated(Bundle savedInstanceState) {
        super.onActivityCreated(savedInstanceState);
        Log.e("LeftFragment","onActivityCreated");
    }

    /***
     * fragment可见时,调用
     * ***/
    @Override
    public void onStart() {
        super.onStart();
        Log.e("LeftFragment","onStart");
    }

    /***
     * 当fragment可以与用户交互时调用
     * ***/
    @Override
    public void onResume() {
        super.onResume();
        Log.e("LeftFragment","onResume");
    }

    /***
     * 当fragment不能与用户交互时调用
     * ***/
    @Override
    public void onPause() {
        super.onPause();
        Log.e("LeftFragment","onPause");
    }

    /***
     * 当fragment不可见时调用
     * **/
    @Override
    public void onStop() {
        super.onStop();
        Log.e("LeftFragment","onStop");
    }

    /***
     * 当fragment上的视图被销毁时调用
     * ***/
    @Override
    public void onDestroyView() {
        super.onDestroyView();
        Log.e("LeftFragment","onDestroyView");
    }

    /***
     *对fragment的状态做最后的清理时被调用
     * ***/
    @Override
    public void onDestroy() {
        super.onDestroy();
        Log.e("LeftFragment","onDestroy");
    }

    /***
     *当fragment与activity分离时调用
     * ***/
    @Override
    public void onDetach() {
        super.onDetach();
        Log.e("LeftFragment","onDetach");
    }

}
RightFragment:
package com.example.administrator.testfragment;

import android.app.Fragment;
import android.os.Bundle;
import android.view.LayoutInflater;
import android.view.View;
import android.view.ViewGroup;


public class RightFragment extends Fragment {

    @Override
    public View onCreateView(LayoutInflater inflater, ViewGroup container,
                             Bundle savedInstanceState) {
        return inflater.inflate(R.layout.fragment_right, container, false);
    }

}
ThirdFragment:
package com.example.administrator.testfragment;


import android.app.Fragment;
import android.os.Bundle;
import android.view.LayoutInflater;
import android.view.View;
import android.view.ViewGroup;


public class ThirdFragment extends Fragment {

    @Override
    public View onCreateView(LayoutInflater inflater, ViewGroup container,
                             Bundle savedInstanceState) {
        // Inflate the layout for this fragment
        return inflater.inflate(R.layout.fragment_third, container, false);
    }

}
activity_main.xml:
<?xml version="1.0" encoding="utf-8"?>
<LinearLayout xmlns:android="http://schemas.android.com/apk/res/android"
    xmlns:tools="http://schemas.android.com/tools"
    android:layout_width="match_parent"
    android:layout_height="match_parent"
    android:orientation="horizontal"
    tools:context="com.example.administrator.testfragment.MainActivity">

    <fragment
        android:layout_width="0dp"
        android:layout_weight="1"
        android:layout_height="match_parent"
        android:id="@+id/lf"
        android:name="com.example.administrator.testfragment.LeftFragment"
        />

    <fragment
        android:layout_width="0dp"
        android:layout_weight="1"
        android:layout_height="match_parent"
        android:id="@+id/rf"
        android:name="com.example.administrator.testfragment.RightFragment"
        />

</LinearLayout>
fragment_left.xml:
<FrameLayout xmlns:android="http://schemas.android.com/apk/res/android"
    xmlns:tools="http://schemas.android.com/tools"
    android:layout_width="match_parent"
    android:layout_height="match_parent"
    android:background="#80ffff"
    tools:context="com.example.administrator.testfragment.LeftFragment">
    <!--
        fragment的根布局记得用FrameLayout,否则在切换时容易出现一些莫名其妙的错误,
        这是经验总结,至于原因,到时需要去翻一下源码
    -->
    <LinearLayout
        android:layout_width="match_parent"
        android:layout_height="match_parent"
        android:orientation="vertical"
        >
        <EditText
            android:layout_width="match_parent"
            android:layout_height="60dp"
            android:hint="left fragment"
            />
        <Button
            android:layout_width="match_parent"
            android:layout_height="60dp"
            android:text="left switch"
            android:layout_gravity="center_horizontal"
            android:onClick="leftSwitch"
            />
    </LinearLayout>

</FrameLayout>
fragment_right.xml:
<FrameLayout xmlns:android="http://schemas.android.com/apk/res/android"
    xmlns:tools="http://schemas.android.com/tools"
    android:layout_width="match_parent"
    android:layout_height="match_parent"
    android:background="#ff00ff"
    android:orientation="vertical"
    tools:context="com.example.administrator.testfragment.RightFragment">

    <!-- TODO: Update blank fragment layout -->
    <EditText
        android:layout_width="match_parent"
        android:layout_height="60dp"
        android:hint="right fragment"
        />
</FrameLayout>
fragment_third.xml:
<FrameLayout xmlns:android="http://schemas.android.com/apk/res/android"
    xmlns:tools="http://schemas.android.com/tools"
    android:layout_width="match_parent"
    android:layout_height="match_parent"
    android:background="#808000"
    tools:context="com.example.administrator.testfragment.ThirdFragment">

    <!-- TODO: Update blank fragment layout -->
    <TextView
        android:layout_width="match_parent"
        android:layout_height="match_parent"
        android:text="This is a third fragment" />

</FrameLayout>
运行结果如下:
1>演示过程

2>生命周期
I>打开应用时

II>替换fragment时

III>第一次按返回键

IV>第二次按返回键退出应用时

总结:
1>
fragment对应的根布局需为FrameLayout,否则在切换fragment时,容易出现一些莫名的现象
2>
对于fragmentTransaction.addToBackStack(null)这条语句没有起作用的原因,具体可参考:
FragmentTransaction addToBackStack 无效问题
4>fragment与activity通信
1>在fragment中去得到activity
getActivity();2>在activity中去得到fragment
getFragmentManager().findFragmentById(R.id.fragmentId);
注:对于fragment与fragment的通信,可通过activity作为中介去沟通;
源码:
1>
静态加载fragment示例源码
2>
动态加载fragment示例源码
参考:
郭霖《第一行代码Android》
FragmentTransaction addToBackStack 无效问题
附加知识点:
fragment的replace和add--->hide---->show的区别
replace:表示销毁当前fragment,然后切换至另一个fragment,当再次切换回来时,
此时fragment需要重新创建,比较消耗资源,所以对于只切换一次性的,可以采用这种方式
add---->hide----->show:这种方式是通过add添加到栈中,然后再次切换fragment时,
则是通过hide和show的方式来达到目的,所以对于切换比较频繁的时候,推荐使用这种方式
关于hide和show,可以参考《解决切换Fragment时布局重新实例化》


