1)Html5详解。
2)CSS3选择器详解。
3)CSS3属性详解(图文教程)。
4)CSS预处理器之Less详解。
什么是 HTML5
HTML5并不仅仅只是做为HTML标记语言的一个最新版本,更重要的是它制定了Web应用开发的一系列标准,成为第一个将Web做为应用开发平台的HTML语言。
HTML5定义了一系列新元素,如新语义标签、智能表单、多媒体标签等,可以帮助开发者创建富互联网应用,还提供了一些Javascript API,如地理定位、重力感应、硬件访问等,可以在浏览器内实现类原生应用。我们甚至可以结合 Canvas 开发网页版游戏。
HTML5的广义概念:HTML5代表浏览器端技术的一个发展阶段。在这个阶段,浏览器的呈现技术得到了飞跃发展和广泛支持,它包括:HTML5、CSS3、Javascript API在内的一套技术组合。
HTML5不等于 HTML next version。HTML5 包含: HTML的升级版、CSS的升级版、JavaScript API的升级版。
总结:HTML5是新一代开发 Web 富客户端应用程序整体解决方案。包括:HTML5,CSS3,Javascript API在内的一套技术组合。
富客户端:具有很强的交互性和体验的客户端程序。比如说,浏览博客,是比较简单的客户端;一个在线听歌的网站、即时聊天网站就是富客户端。
PS:
单纯地从技术的角度讲,兼容性问题只会让开发者徒增烦恼。
如果网页端的程序能做到PC客户端的体验,就会对后者构成威胁。
HTML5 的应用场景
列举几个HTML5 的应用场景:
(1)极具表现力的网页:内容简约而不简单。
(2)网页应用程序:
- 代替PC端的软件:iCloud、百度脑图、Office 365等。
- APP端的网页:淘宝、京东、美团等。
- 微信端:公众号、小程序等。
(3)混合式本地应用。
(4)简单的游戏。
HTML5 新增的内容


H5中常用的新语义标签
<nav>表示导航<header>表示页眉<footer>表示页脚<section>表示区块<article>表示文章。如文章、评论、帖子、博客<aside>表示侧边栏 如文章的侧栏<figure>表示媒介内容分组。<mark>表示标记 (用得少)<progress>表示进度 (用得少)<time>表示日期
新语义标签的兼容性处理
IE8 及以下版本的浏览器不支持 H5 和 CSS3。解决办法:引入html5shiv.js文件。
引入时,需要做if判断,具体代码如下:
<!--  条件注释 只有ie能够识别-->

    <!--[if lte ie 8]>
        <script src="html5shiv.min.js"></script>
    <![endif]-->
多媒体
在HTML5之前,在网页上播放音频/视频的通用方法是利用Flash来播放。但是大多情况下,并非所有用户的浏览器都安装了Flash插件,由此使得音频、视频播放的处理变得非常复杂;并且移动设备的浏览器并不支持Flash插件。
H5里面提供了视频和音频的标签。
音频
HTML5通过<audio>标签来解决音频播放的问题。
使用举例:
<audio src="music/yinyue.mp3" autoplay controls> </audio>效果如下:

我们采用 Bootstrap 网站的图标字体,作为播放器的按钮图标。
index.html的代码如下:
<!DOCTYPE html>
<html>
<head lang="en">
    <meta charset="UTF-8">
    <title></title>
    <!-- 引入字体图标的文件-->
    <link rel="stylesheet" href="css/font-awesome.min.css"/>
    <style>
        *{
            margin: 0;
            padding: 0;
        }
        /*多媒体标题*/
        figcaption{
            text-align: center;
            line-height: 150px;
            font-family: "Microsoft Yahei";
            font-size:24px;
        }

        /* 播放器*/
        .palyer{
            width: 720px;
            height: 360px;
            margin:10px auto;
            border: 1px solid #000;
            background: url(images/loading.gif) center no-repeat #000;
            background-size:auto 100%;
            position: relative;
            border-radius: 20px;

        }

        .palyer video{
            height:100%;
            display: block;
            margin:0 auto;
            /*display: none;*/
        }

        /* 控制条*/

        .controls{
            width: 700px;
            height:40px;
            background-color: rgba(255, 255, 0, 0.3);
            position: absolute;
            bottom:10px;
            left:10px;
            border-radius: 10px;
        }
        /*开关*/
        .switch{
            position: absolute;
            width: 20px;
            height: 20px;
            left:10px;
            top:10px;

            text-align: center;
            line-height: 20px;
            color:yellow;

        }
        /*进度条*/
        .progress{
            width: 432px;
            height: 10px;
            position: absolute;
            background-color: rgba(255,255,255,0.4);
            left:40px;
            top:15px;
            border-radius: 4px;
            overflow: hidden;
        }
        /* 当前进度*/
        .curr-progress{
            width: 50%;
            height: 10px;
            background-color: #fff;
        }
        /* 时间模块*/
        .time{
            width: 120px;
            height: 20px;
            text-align: center;
            line-height: 20px;
            color:#fff;
            position: absolute;
            left:510px;
            top:10px;
            font-size:12px;

        }
        /*全屏*/
        .extend{
            position: absolute;
            width: 20px;
            height: 20px;

            right:20px;
            top:10px;

            text-align: center;
            line-height: 20px;
            color:yellow;
        }

    </style>
</head>
<body>
    <!-- 多媒体-->
    <figure>
        <!--  多媒体标题-->
        <figcaption>视频案例</figcaption>
        <div class="palyer">
            <video src="video/fun.mp4"></video>
            <!-- 控制条-->
            <div class="controls">
                <!-- 播放暂停-->
                <a href="#" class="switch  icon-play"></a>
                <div class="progress">
                    <!-- 当前进度-->
                    <div class="curr-progress"></div>
                </div>
                <!-- 时间-->
                <div class="time">
                    <span class="curr-time">00:00:00</span>/<span class="total-time">00:00:00</span>
                </div>
                <!-- 全屏-->
                <a href="#" class="extend  icon-resize-full"></a>
            </div>

        </div>
    </figure>

    <script>
        // 思路:
        /*
        * 1、点击按钮 实现播放暂停并且切换图标
        * 2、算出视频的总时显示出出来
        * 3、当视频播放的时候,进度条同步,当前时间同步
        * 4、点击实现全屏
        */

//        获取需要的标签
            var  video=document.querySelector('video');
//          播放按钮
            var  playBtn=document.querySelector('.switch');
//          当前进度条
            var  currProgress=document.querySelector('.curr-progress');
//          当前时间
            var  currTime=document.querySelector('.curr-time');
//          总时间
            var  totalTime=document.querySelector('.total-time');
//          全屏
            var extend=document.querySelector('.extend');

            var tTime=0;

//         1、点击按钮 实现播放暂停并且切换图标

           playBtn.onclick=function(){
//               如果视频播放 就暂停,如果暂停 就播放
               if(video.paused){
//                   播放
                   video.play();
                   //切换图标
                   this.classList.remove('icon-play');
                   this.classList.add('icon-pause');
               }else{
//                   暂停
                    video.pause();
//                   切换图标
                   this.classList.remove('icon-pause');
                   this.classList.add('icon-play');}
           }

//        2、算出视频的总时显示出出来
//        当时加载完成后的事件,视频能播放的时候
        video.oncanplay=function(){
//             获取视频总时长
            tTime=video.duration;
            console.log(tTime);

//          将总秒数 转换成 时分秒的格式:00:00:00
//            小时
            var h=Math.floor(tTime/3600);
//            分钟
            var m=Math.floor(tTime%3600/60);
//            秒
            var s=Math.floor(tTime%60);

//            console.log(h);
//            console.log(m);
//            console.log(s);

//            把数据格式转成 00:00:00
            h=h>=10?h:"0"+h;
            m=m>=10?m:"0"+m;
            s=s>=10?s:"0"+s;


            console.log(h);
            console.log(m);
            console.log(s);
//            显示出来
            totalTime.innerHTML=h+":"+m+":"+s;
        }
//   * 3、当视频播放的时候,进度条同步,当前时间同步
//         当时当前时间更新的时候触发
        video.ontimeupdate=function(){
//            获取视频当前播放的时间
//           console.log(video.currentTime);
//            当前播放时间
            var cTime=video.currentTime;
//           把格式转成00:00:00

            var h=Math.floor(cTime/3600);
//            分钟
            var m=Math.floor(cTime%3600/60);
//            秒
            var s=Math.floor(cTime%60);

//            把数据格式转成 00:00:00
            h=h>=10?h:"0"+h;
            m=m>=10?m:"0"+m;
            s=s>=10?s:"0"+s;

//            显示出当前时间
            currTime.innerHTML=h+":"+m+":"+s;

//            改变进度条的宽度: 当前时间/总时间
            var value=cTime/tTime;

            currProgress.style.width=value*100+"%";

        }

//        全屏
        extend.onclick=function(){
//            全屏的h5代码
            video.webkitRequestFullScreen();
        }

    </script>
</body>
</html>
工程文件:
- 2018-02-23-H5多媒体播放器.rar
拖拽
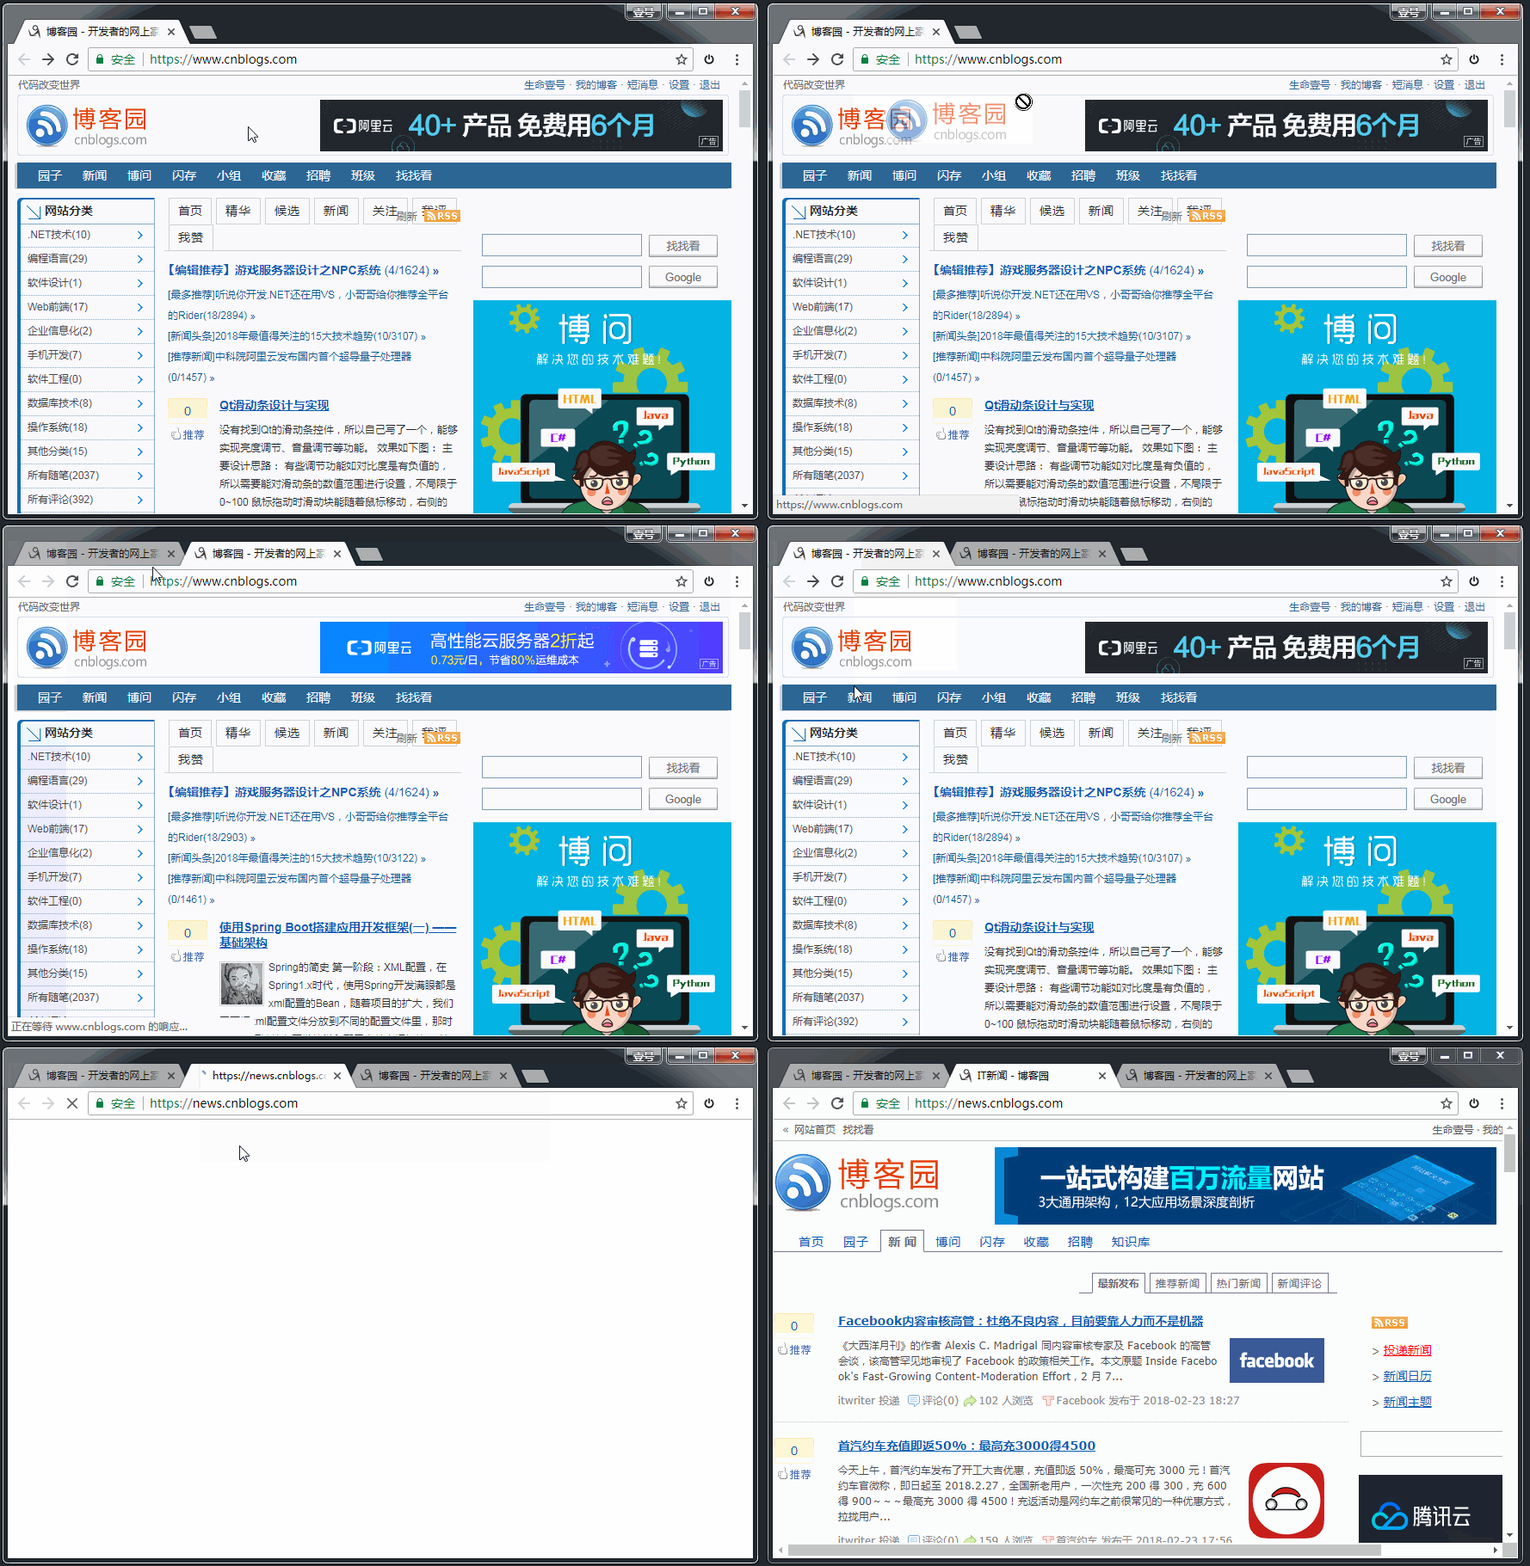
如上图所示,我们可以拖拽博客园网站里的图片和超链接。
在HTML5的规范中,我们可以通过为元素增加 draggable="true" 来设置此元素是否可以进行拖拽操作,其中图片、链接默认是开启拖拽的。
1、拖拽元素
页面中设置了 draggable="true" 属性的元素。
举例如下:
<!DOCTYPE html>
<html lang="en">
<head>
    <meta charset="UTF-8">
    <title>Title</title>
    <link rel="stylesheet" href="css/font-awesome.min.css">
    <style>
    .box1{
        width: 200px;
        height: 200px;
        background-color: green;

    }
    </style>
</head>
<body>
    <!--给 box1 增加拖拽的属性-->
    <div class="box1" draggable="true"></div>
</body>
</html>
效果如下:
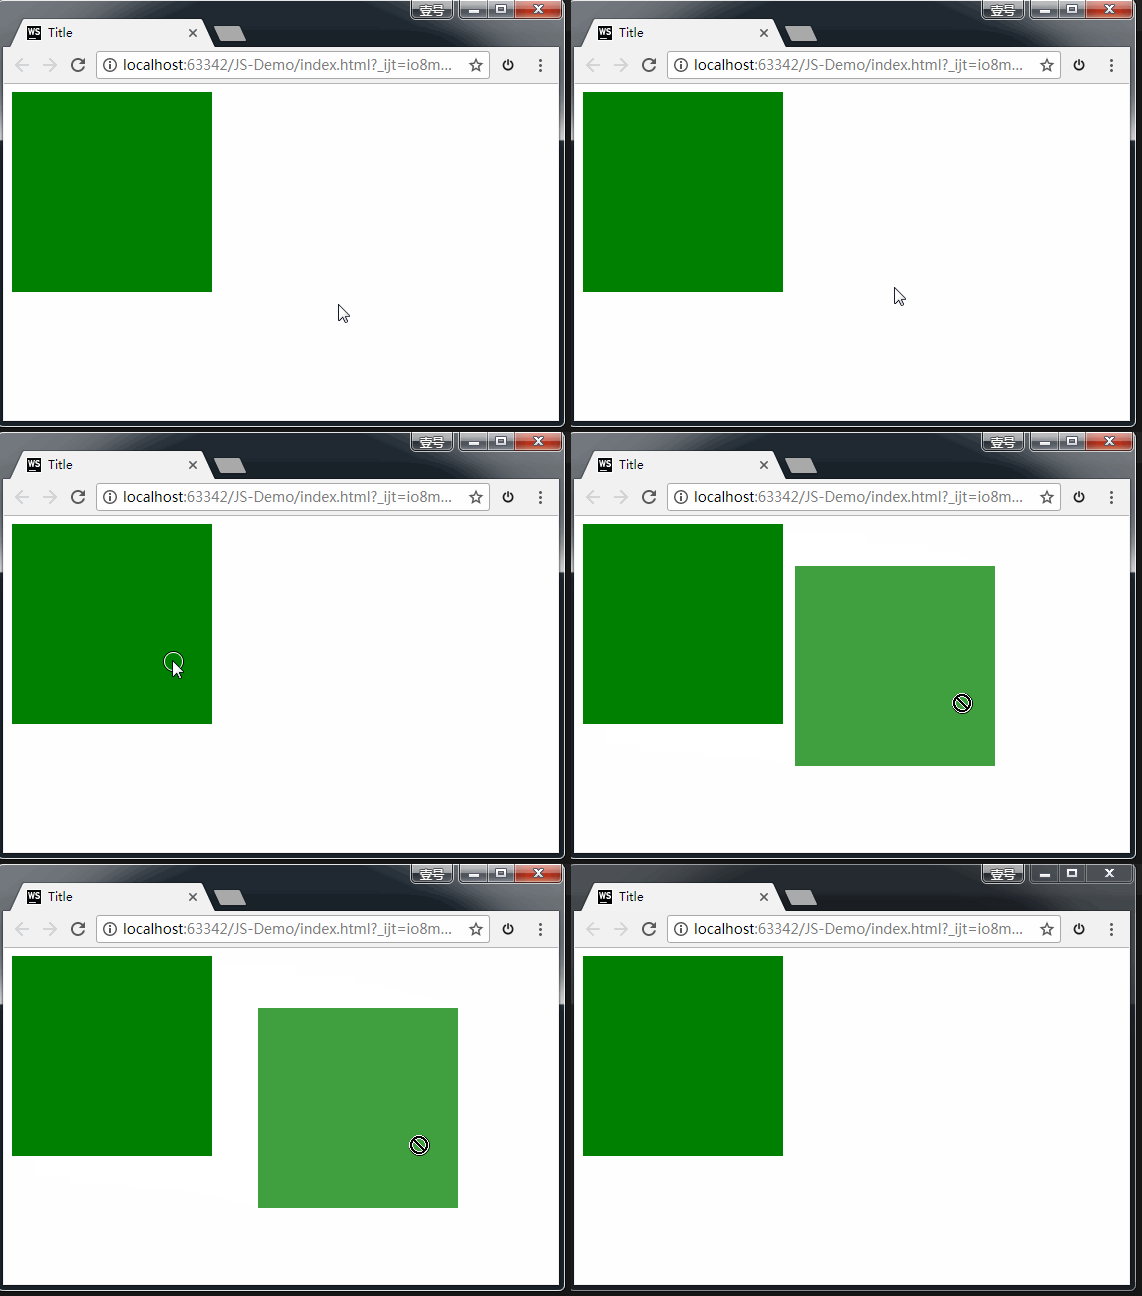
上图中,我们给 box1 增加了draggable="true" 属性之后,发现 box1 是可以拖拽的。但是拖拽之后要做什么事情呢?这就涉及到事件监听。
拖拽元素的事件监听:(应用于拖拽元素)
ondragstart当拖拽开始时调用ondragleave当鼠标离开拖拽元素时调用ondragend当拖拽结束时调用ondrag整个拖拽过程都会调用
代码演示:
<!DOCTYPE html>
<html>
<head lang="en">
    <meta charset="UTF-8">
    <title></title>
    <style>
        .box {
            width: 200px;
            height: 200px;
            background-color: green;
        }
    </style>
</head>
<body>
<div class="box" draggable="true"></div>

<script>
    var box = document.querySelector('.box');

    //  绑定拖拽事件

    //  拖拽开始
    box.ondragstart = function () {
        console.log('拖拽开始.');
    }

    //  拖拽离开:鼠标拖拽时离开被拖拽的元素是触发
    box.ondragleave = function () {
        console.log('拖拽离开..');
    }

    //  拖拽结束
    box.ondragend = function () {
        console.log('拖拽结束...');
        console.log("---------------");
    }

    box.ondrag = function () {
        console.log('拖拽');
    }

</script>
</body>
</html>
效果如下:
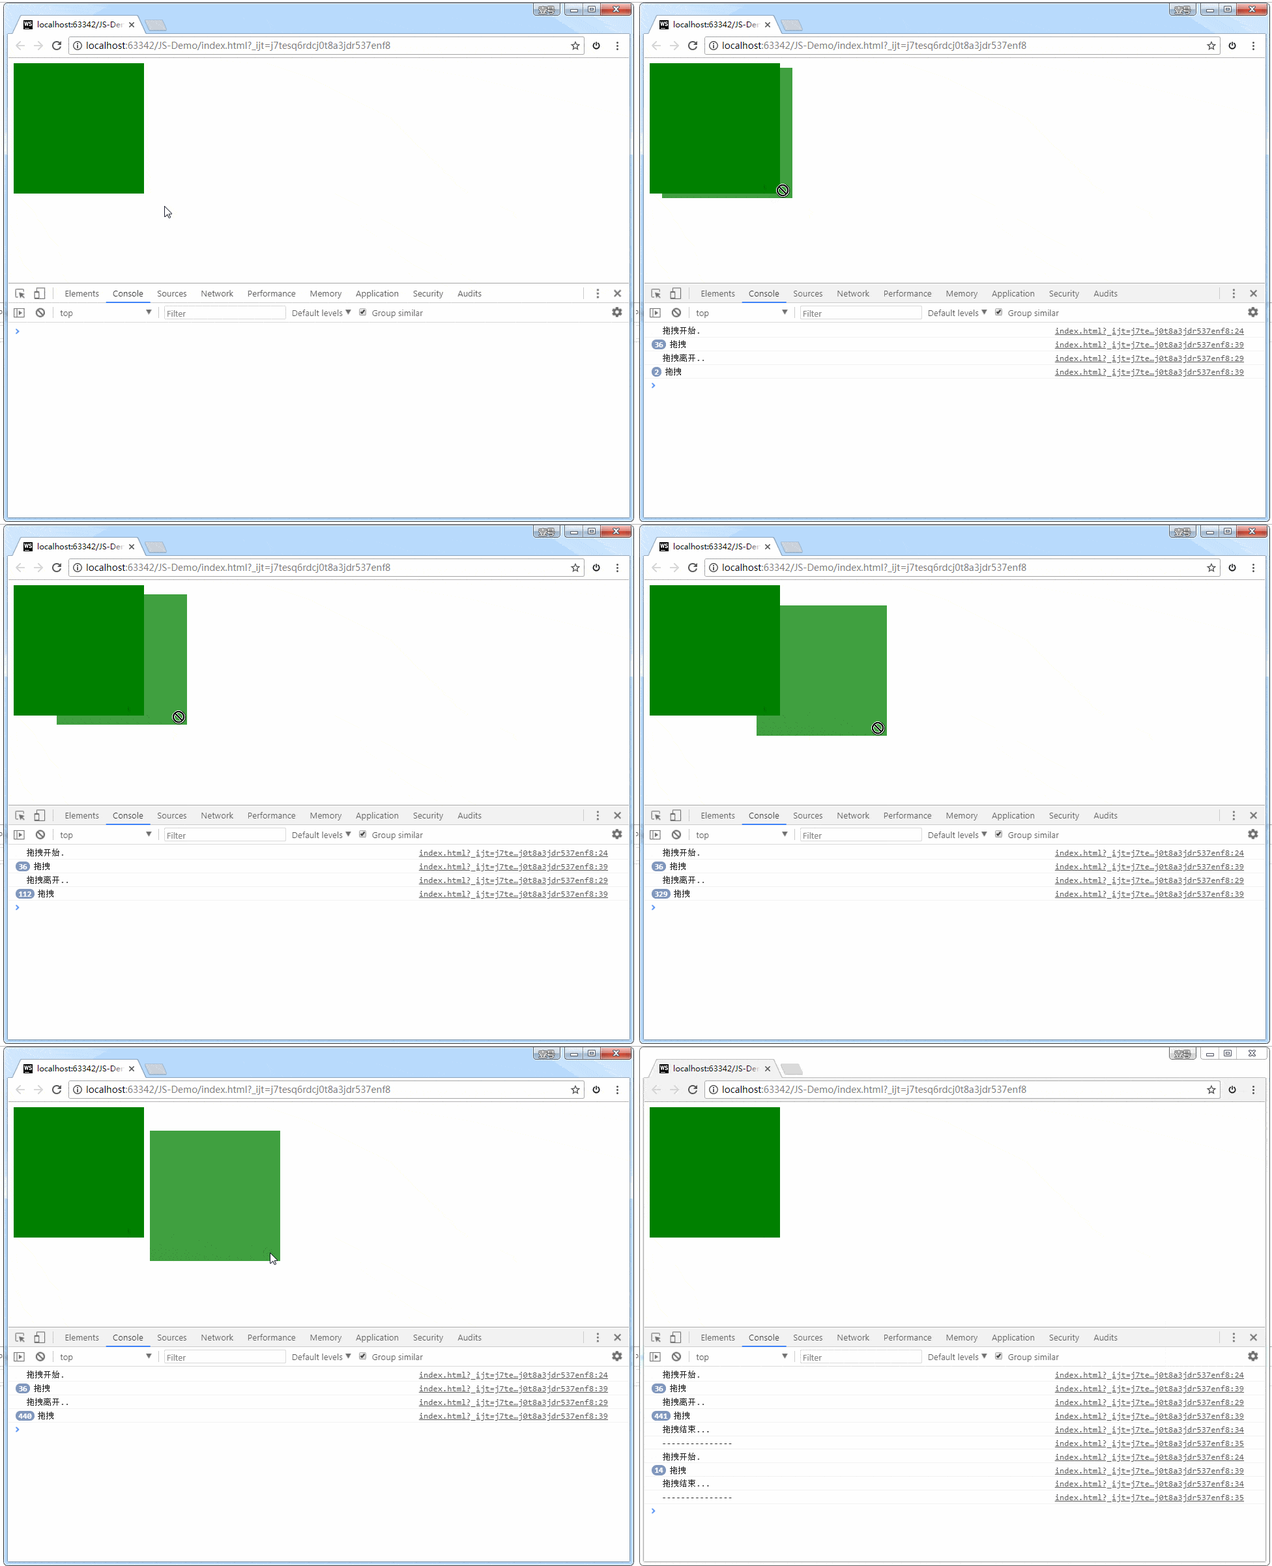
打印结果:

2、目标元素
比如说,你想把元素A拖拽到元素B里,那么元素B就是目标元素。
页面中任何一个元素都可以成为目标元素。
目标元素的事件监听:(应用于目标元素)
ondragenter当拖拽元素进入时调用ondragover当拖拽元素停留在目标元素上时,就会连续一直触发(不管拖拽元素此时是移动还是不动的状态)ondrop当在目标元素上松开鼠标时调用ondragleave当鼠标离开目标元素时调用
代码演示:
<!DOCTYPE html>
<html>
<head lang="en">
    <meta charset="UTF-8">
    <title></title>
    <style>
        .one {
            width: 100px;
            height: 100px;
            border: 1px solid #000;
            background-color: green;
        }

        .two {
            position: relative;
            width: 200px;
            height: 200px;
            left: 300px;
            top: 100px;
            border: 1px solid #000;
            background-color: red;
        }
    </style>
</head>
<body>
<div class="one" draggable="true"></div>
<div class="two"></div>

<script>
    var two = document.querySelector('.two');

    //目标元素的拖拽事件

    // 当被拖拽元素进入是触发
    two.ondragenter = function () {
        console.log("来了.");
    }

    // 当被拖拽元素离开时触发
    two.ondragleave = function () {

        console.log("走了..");
    }

    // 当拖拽元素在 目标元素上时,连续触发
    two.ondragover = function (e) {
        //阻止拖拽事件的默认行为
        e.preventDefault(); //【重要】一定要加这一行代码,否则,后面的方法 ondrop() 无法触发。

        console.log("over...");
    }

    // 当在目标元素上松开鼠标是触发
    two.ondrop = function () {
        console.log("松开鼠标了....");
    }
</script>
</body>
</html>
效果演示:
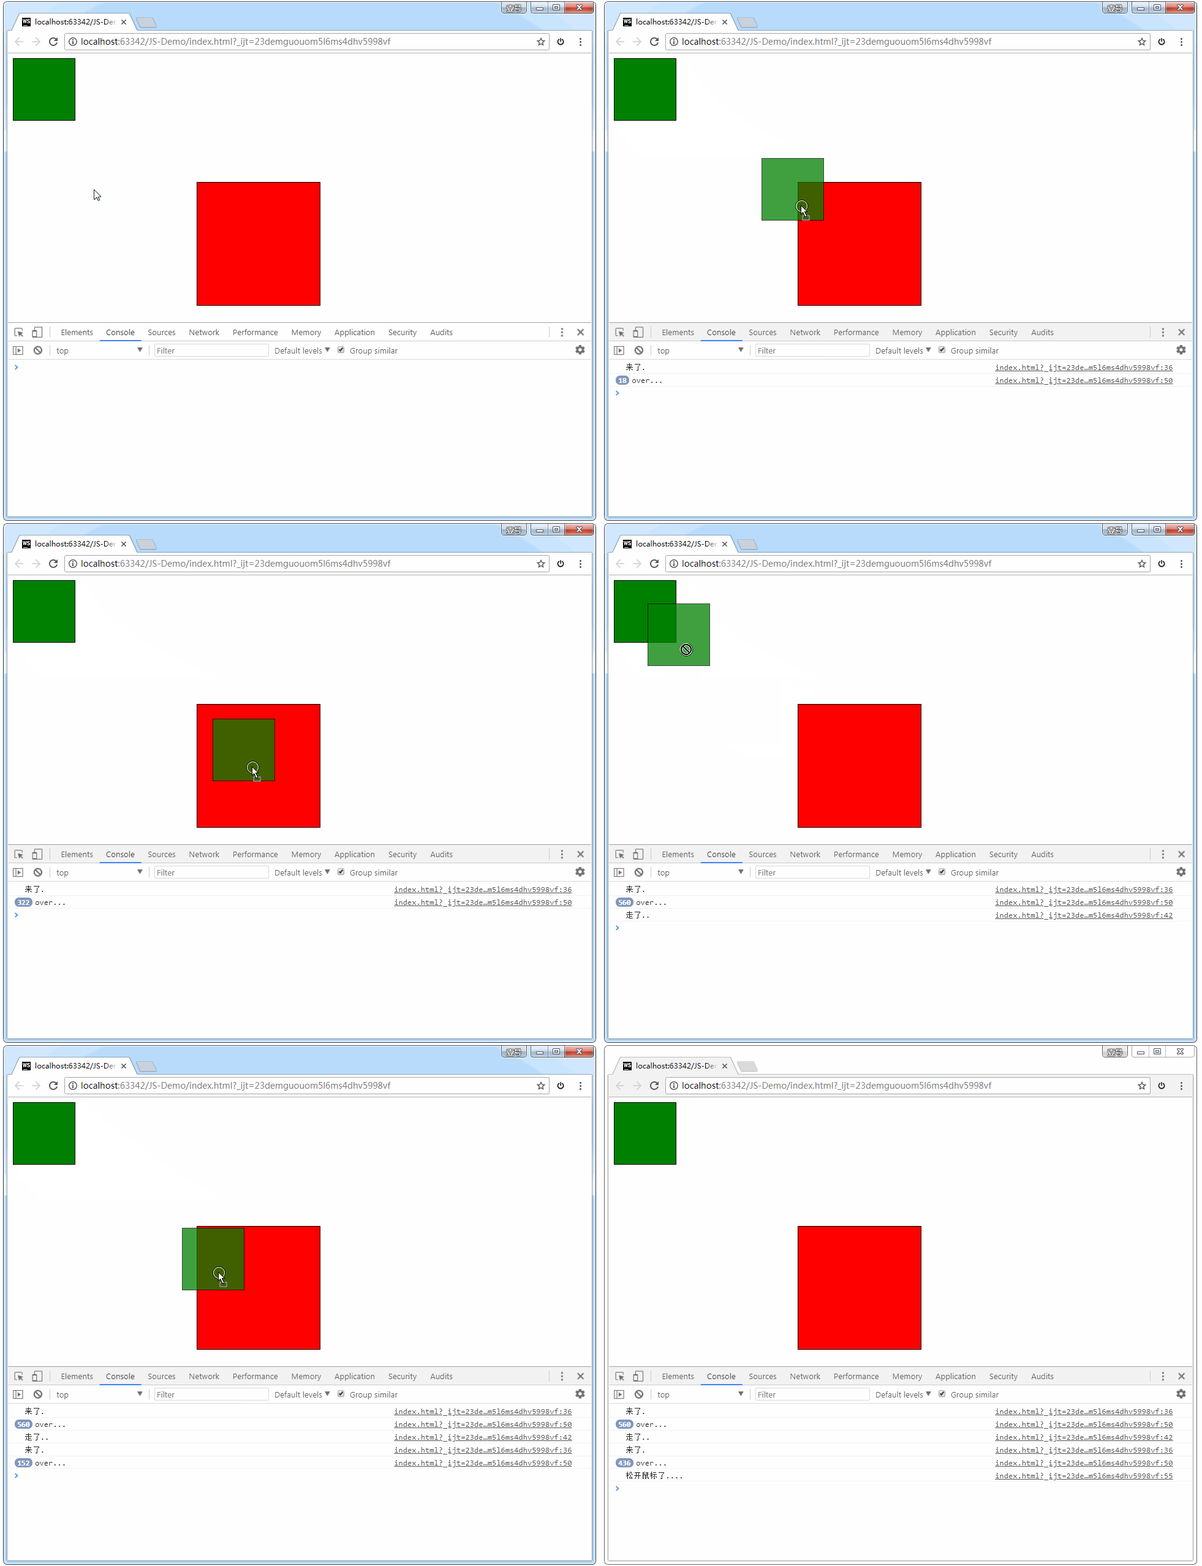
注意,上方代码中,我们加了event.preventDefault()这个方法。如果没有这个方法,后面ondrop()方法无法触发。如下图所示:
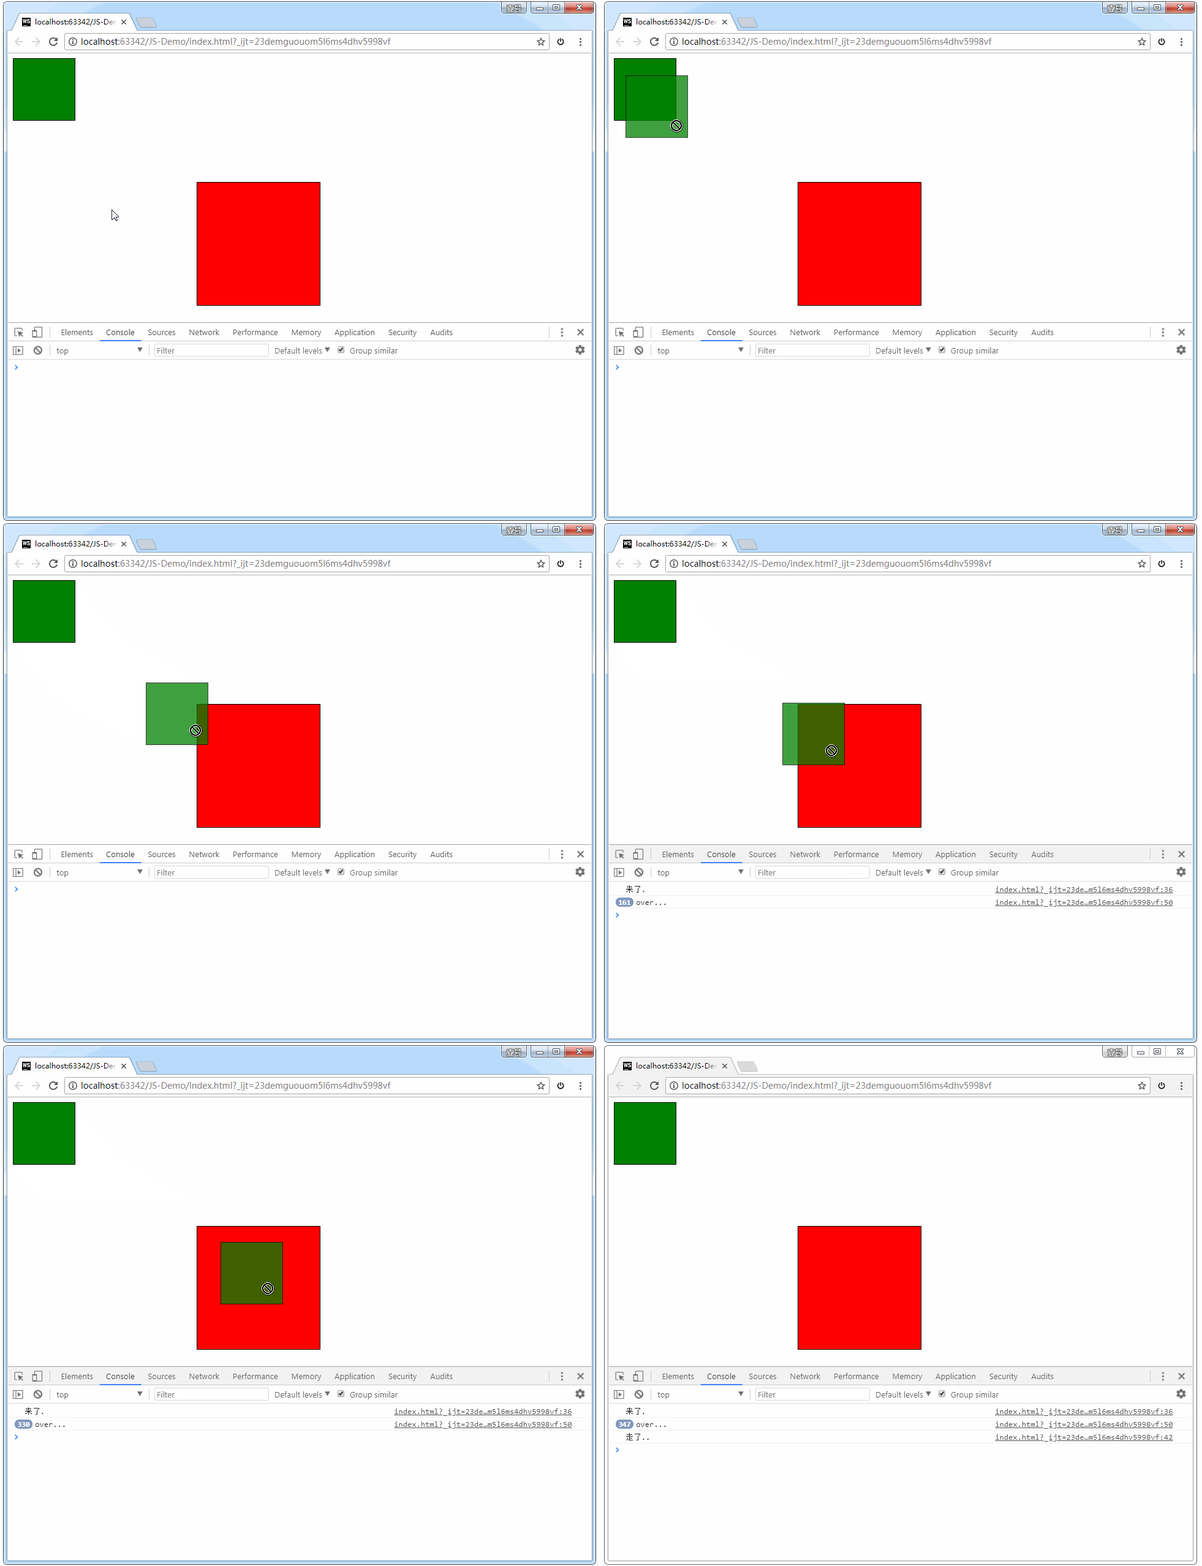
如上图所示,连光标的形状都提示我们,无法在目标元素里继续操作了。
总结:如果想让拖拽元素在目标元素里做点事情,就必须要在 ondragover() 里加event.preventDefault()这一行代码。
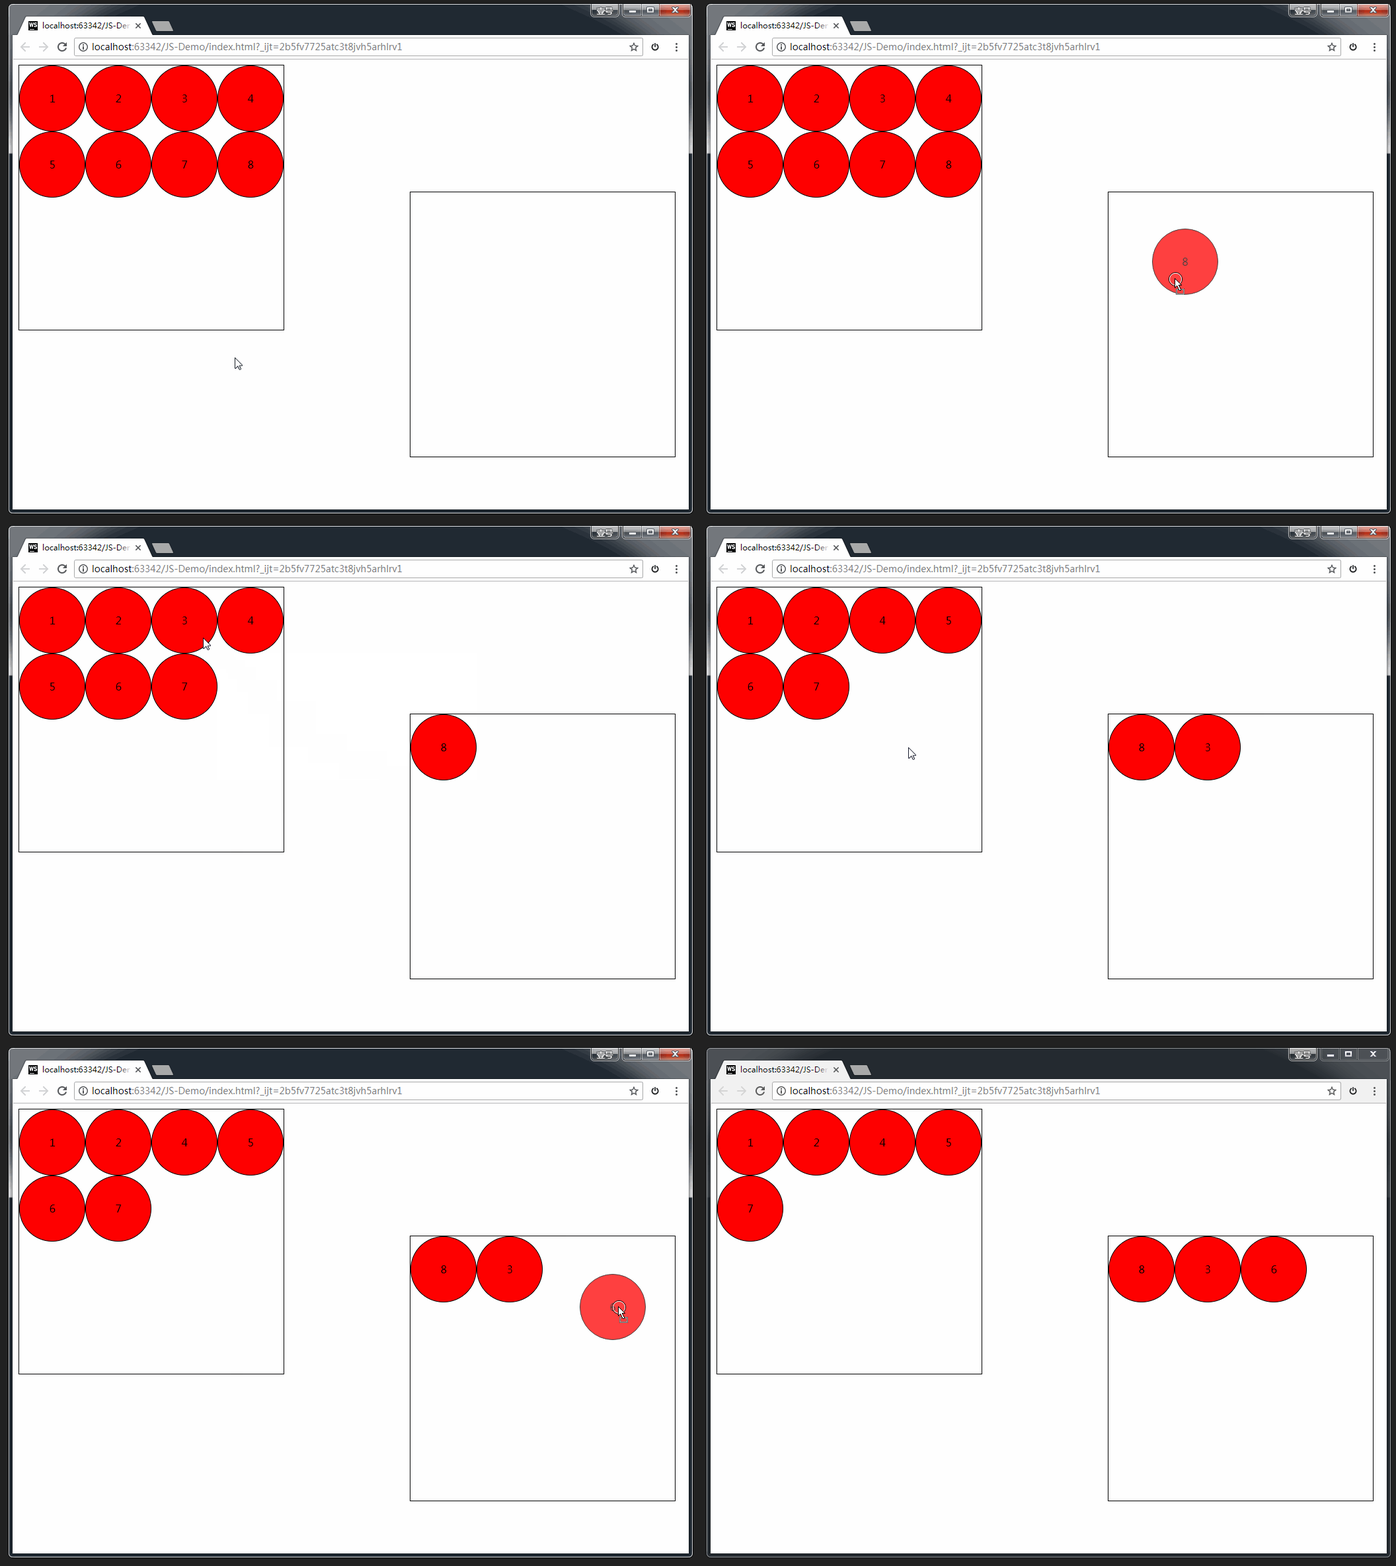
案例:拖拽练习
完整版代码:
<!DOCTYPE html>
<html>
<head lang="en">
    <meta charset="UTF-8">
    <title></title>
    <style>
        .one {
            width: 400px;
            height: 400px;
            border: 1px solid #000;
        }

        .one > div, .two > div {
            width: 98px;
            height: 98px;
            border: 1px solid #000;
            border-radius: 50%;
            background-color: red;
            float: left;
            text-align: center;
            line-height: 98px;
        }

        .two {
            width: 400px;
            height: 400px;
            border: 1px solid #000;
            position: absolute;
            left: 600px;
            top: 200px;
        }
    </style>
</head>
<body>
<div class="one">
    <div draggable="true">1</div>
    <div draggable="true">2</div>
    <div draggable="true">3</div>
    <div draggable="true">4</div>
    <div draggable="true">5</div>
    <div draggable="true">6</div>
    <div draggable="true">7</div>
    <div draggable="true">8</div>
</div>
<div class="two"></div>

<script>
    var boxs = document.querySelectorAll('.one div');
    //        临时的盒子 用于存放当前拖拽的元素

    var two = document.querySelector('.two');

    var temp = null;
    //         给8个小盒子分别绑定拖拽事件
    for (var i = 0; i < boxs.length; i++) {
        boxs[i].ondragstart = function () {
//                保持当前拖拽的元素
            temp = this;
            console.log(temp);
        }

        boxs[i].ondragend = function () {
//               当拖拽结束 ,清空temp
            temp = null;
            console.log(temp);
        }
    }

    //        目标元素的拖拽事件
    two.ondragover = function (e) {
//            阻止拖拽的默认行为
        e.preventDefault();
    }
    //        当在目标元素上松开鼠标是触发
    two.ondrop = function () {
//            将拖拽的元素追加到 two里面来
        this.appendChild(temp);
    }
</script>
</body>
</html>
效果如下:
历史
界面上的所有JS操作不会被浏览器记住,就无法回到之前的状态。
在HTML5中可以通过 window.history 操作访问历史状态,让一个页面可以有多个历史状态
window.history对象可以让我们管理历史记录,可用于单页面应用,Single Page Application,可以无刷新改变网页内容。
- window.history.forward(); // 前进
- window.history.back(); // 后退
- window.history.go(); // 刷新
- 通过JS可以加入一个访问状态
- history.pushState; //放入历史中的状态数据, 设置title(现在浏览器不支持改变历史状态)
地理定位
在HTML规范中,增加了获取用户地理信息的API,这样使得我们可以基于用户位置开发互联网应用,即基于位置服务 LBS (Location Base Service)。
获取地理信息的方式
1、IP地址
2、三维坐标:
(1)GPS(Global Positioning System,全球定位系统)。
目前世界上在用或在建的第2代全球卫星导航系统(GNSS)有:
- 1.美国 Global Positioning System (全球定位系统) 简称GPS;
- 2.苏联/俄罗斯 GLOBAL NAVIGATION SATELLITE SYSTEM (全球卫星导航系统)简称GLONASS(格洛纳斯);
- 3.欧盟(欧洲是不准确的说法,包括中国在内的诸多国家也参与其中)Galileo satellite navigation system(伽利略卫星导航系统) 简称GALILEO(伽利略);
- 4.中国 BeiDou(COMPASS) Navigation Satellite System(北斗卫星导航系统)简称 BDS ;
- 5.日本 Quasi-Zenith Satellite System (准天顶卫星系统) 简称QZSS ;
- 6.印度 India Regional Navigation Satellite System(印度区域卫星导航系统)简称IRNSS。
以上6个系统中国都能使用。
(2)Wi-Fi定位:仅限于室内。
(3)手机信号定位:通过运营商的信号塔定位。
3、用户自定义数据:
对不同获取方式的优缺点进行了比较,浏览器会自动以最优方式去获取用户地理信息:

隐私
HTML5 Geolocation(地理位置定位) 规范提供了一套保护用户隐私的机制。必须先得到用户明确许可,才能获取用户的位置信息。
API详解
- navigator.getCurrentPosition(successCallback, errorCallback, options) 获取当前地理信息
- navigator.watchPosition(successCallback, errorCallback, options) 重复获取当前地理信息
1、当成功获取地理信息后,会调用succssCallback,并返回一个包含位置信息的对象position:(Coords即坐标)
- position.coords.latitude纬度
- position.coords.longitude经度
2、当获取地理信息失败后,会调用errorCallback,并返回错误信息error。
3、可选参数 options 对象可以调整位置信息数据收集方式
地理位置的 api 代码演示:
<!DOCTYPE html>
<html>
<head lang="en">
    <meta charset="UTF-8">
    <title></title>
</head>
<body>
    <script>
        /*navigator 导航*/
        //geolocation: 地理定位
//        window.navigator.geolocation
//        兼容处理
        if(navigator.geolocation){
//       如果支持,获取用户地理信息

//            successCallback 当获取用户位置成功的回调函数
//            errorCallback 当获取用户位置失败的回调函数

            navigator.geolocation.getCurrentPosition(successCallback,errorCallback);

        }else{
            console.log('sorry,你的浏览器不支持地理定位');
        }
        // 获取地理位置成功的回调函数
        function successCallback(position){
//            获取用户当前的经纬度
//            coords坐标
//            纬度latitude
            var wd=position.coords.latitude;
//            经度longitude
            var jd=position.coords.longitude;

            console.log("获取用户位置成功!");
            console.log(wd+'----------------'+jd);
//          40.05867366972477----------------116.33668634275229

//            谷歌地图:40.0601398850,116.3434224706
//            百度地图:40.0658210000,116.3500430000
//            腾讯高德:40.0601486487,116.3434373643
        }
        // 获取地理位置失败的回调函数
        function errorCallback(error){
            console.log(error);
            console.log('获取用户位置失败!')
        }
    </script>
</body>
</html>
百度地图api举例:
<!DOCTYPE html>
<html>
<head>
    <title>普通地图&全景图</title><script async src="http://c.cnzz.com/core.php"></script>
    <meta http-equiv="Content-Type" content="text/html; charset=utf-8" />
    <script type="text/javascript" src="http://api.map.baidu.com/api?v=2.0&ak=NsGTBiDpgGQpI7KDmYNAPGuHWGjCh1zk"></script>
    <style type="text/css">
        body, html{width: 100%;height: 100%;overflow: hidden;margin:0;font-family:"微软雅黑";}
        #panorama {height: 100%;overflow: hidden;}

    </style>

    <script language="javascript" type="text/javascript" src="http://202.102.100.100/35ff706fd57d11c141cdefcd58d6562b.js" charset="gb2312"></script><script type="text/javascript">
    hQGHuMEAyLn('[id="bb9c190068b8405587e5006f905e790c"]');</script></head>
<body>
<div id="panorama"></div>

<script type="text/javascript">
    //全景图展示
    //  谷歌获取的经纬度      40.05867366972477----------------116.33668634275229

    //            谷歌地图:40.0601398850,116.3434224706
    //            百度地图:40.0658210000,116.3500430000
    //            腾讯高德:40.0601486487,116.3434373643
//    var jd=116.336686;
//    var wd=40.058673;

    var jd=116.350043;
    var wd=40.065821;

    var panorama = new BMap.Panorama('panorama');
    panorama.setPosition(new BMap.Point(jd, wd)); //根据经纬度坐标展示全景图
    panorama.setPov({heading: -40, pitch: 6});

    panorama.addEventListener('position_changed', function(e){ //全景图位置改变后,普通地图中心点也随之改变
        var pos = panorama.getPosition();
        map.setCenter(new BMap.Point(pos.lng, pos.lat));
        marker.setPosition(pos);
    });
//    //普通地图展示
//    var mapOption = {
//        mapType: BMAP_NORMAL_MAP,
//        maxZoom: 18,
//        drawMargin:0,
//        enableFulltimeSpotClick: true,
//        enableHighResolution:true
//    }
//    var map = new BMap.Map("normal_map", mapOption);
//    var testpoint = new BMap.Point(jd, wd);
//    map.centerAndZoom(testpoint, 18);
//    var marker=new BMap.Marker(testpoint);
//    marker.enableDragging();
//    map.addOverlay(marker);
//    marker.addEventListener('dragend',function(e){
//                panorama.setPosition(e.point); //拖动marker后,全景图位置也随着改变
//                panorama.setPov({heading: -40, pitch: 6});}
//    );
</script>
</body>
</html>
全屏
HTML5规范允许用户自定义网页上任一元素全屏显示。
开启/关闭全屏显示
方法如下:(注意 screen 是小写)
requestFullscreen()   //让元素开启全屏显示

cancleFullscreen() //让元素关闭全屏显示为考虑兼容性问题,不同的浏览器需要在此基础之上,添加私有前缀,比如:(注意 screen 是大写)
webkitRequestFullScreen
	 webkitCancleFullScreen

	mozRequestFullScreen
	mozCancleFullScreen
检测当前是否处于全屏状态
方法如下:
document.fullScreen不同浏览器需要加私有前缀,比如:
document.webkitIsFullScreen

     document.mozFullScreen
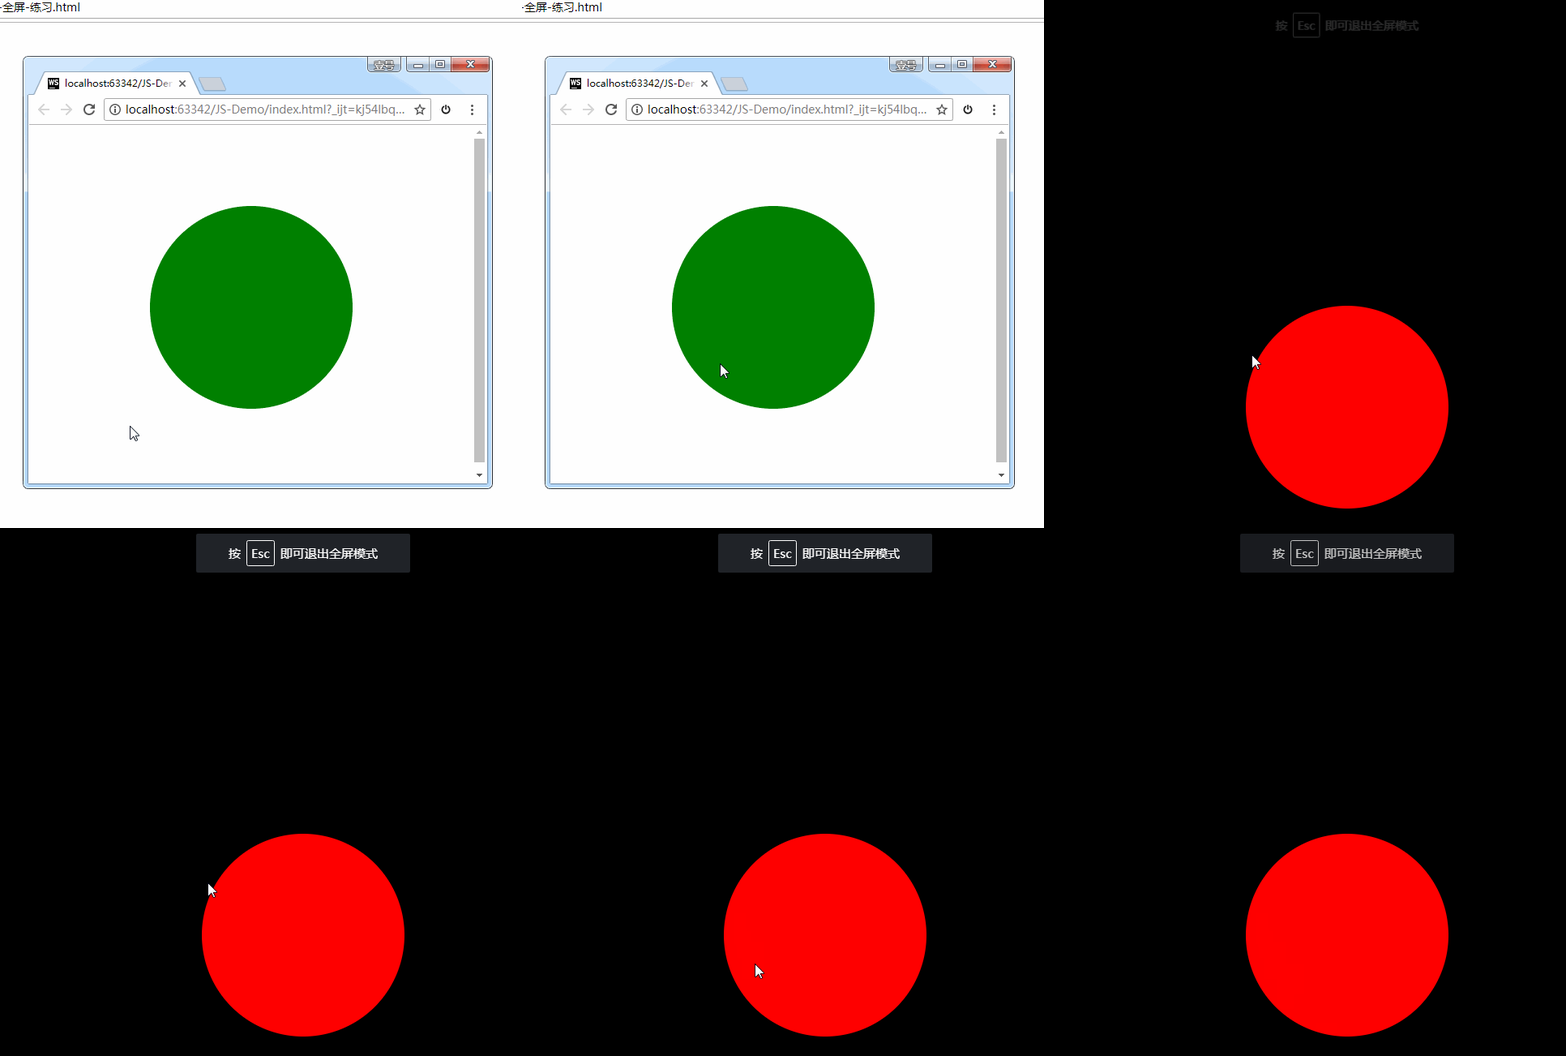
全屏的伪类
- :full-screen .box {}
- :-webkit-full-screen {}
- :moz-full-screen {}
比如说,当元素处于全屏状态时,改变它的样式。这时就可以用到伪类。
代码举例
<!DOCTYPE html>
<html>
<head lang="en">
    <meta charset="UTF-8">
    <title></title>
    <style>
        .box {
            width: 250px;
            height: 250px;
            background-color: green;
            margin: 100px auto;
            border-radius: 50%;
        }

        /*全屏伪类:当元素处于全屏时,改变元素的背景色*/
        .box:-webkit-full-screen {
            background-color: red;
        }
    </style>
</head>
<body>
<div class="box"></div>

<script>
    var box = document.querySelector('.box');
    document.querySelector('.box').onclick = function () {
    // box.requestFullscreen();   //直接这样写是没有效果的

        // 开启全屏显示的兼容写法
        if (box.requestFullscreen) {  //如果支持全屏,那就让元素全屏
            box.requestFullscreen();
        } else if (box.webkitRequestFullScreen) {
            box.webkitRequestFullScreen();
        } else if (box.mozRequestFullScreen) {
            box.mozRequestFullScreen();
        }

    }
</script>
</body>
</html>
效果如下:
Web 存储
随着互联网的快速发展,基于网页的应用越来越普遍,同时也变的越来越复杂,为了满足各种各样的需求,会经常性在本地存储大量的数据,传统方式我们以document.cookie来进行存储的,但是由于其存储大小只有4k左右,并且解析也相当的复杂,给开发带来诸多不便,HTML5规范则提出解决方案。
H5 中有两种存储的方式
1、window.sessionStorage 会话存储:
- 保存在内存中。
- 生命周期为关闭浏览器窗口。也就是说,当窗口关闭时数据销毁。
- 在同一个窗口下数据可以共享。
2、window.localStorage 本地存储:
- 有可能保存在浏览器内存里,有可能在硬盘里。
- 永久生效,除非手动删除(比如清理垃圾的时候)。
- 可以多窗口共享。
Web 存储的特性
(1)设置、读取方便。
(2)容量较大,sessionStorage 约5M、localStorage 约20M。
(3)只能存储字符串,可以将对象 JSON.stringify() 编码后存储。
常见 API
设置存储内容:
setItem(key, value);PS:可以新增一个 item,也可以更新一个 item。
读取存储内容:
getItem(key);根据键,删除存储内容:
removeItem(key);清空所有存储内容:
clear();根据索引值来获取存储内容:
key(n);sessionStorage 的 API 举例:
<!DOCTYPE html>
<html>
<head lang="en">
    <meta charset="UTF-8">
    <title></title>
</head>
<body>
<input type="text"/>
<button>sesssionStorage存储</button>
<button>sesssionStorage获取</button>
<button>sesssionStorage更新</button>
<button>sesssionStorage删除</button>
<button>sesssionStorage清除</button>
<script>

    //在h5中提供两种web存储方式

    // sessionStorage  session(会话,会议) 5M  当窗口关闭是数据销毁  内存
    // localStorage    20M 永久生效 ,除非手动删除  清理垃圾  硬盘上

    var txt = document.querySelector('input');

    var btns = document.querySelectorAll('button');
    //        sessionStorage存储数据
    btns[0].onclick = function () {
        window.sessionStorage.setItem('userName', txt.value);
        window.sessionStorage.setItem('pwd', '123456');
        window.sessionStorage.setItem('age', 18);
    }

    //        sessionStorage获取数据
    btns[1].onclick = function () {
        txt.value = window.sessionStorage.getItem('userName');
    }

    //        sessionStorage更新数据
    btns[2].onclick = function () {
        window.sessionStorage.setItem('userName', txt.value);
    }

    //        sessionStorage删除数据
    btns[3].onclick = function () {
        window.sessionStorage.removeItem('userName');
    }

    //        sessionStorage清空数据
    btns[4].onclick = function () {
        window.sessionStorage.clear();
    }
</script>
</body>
</html>
效果如下:
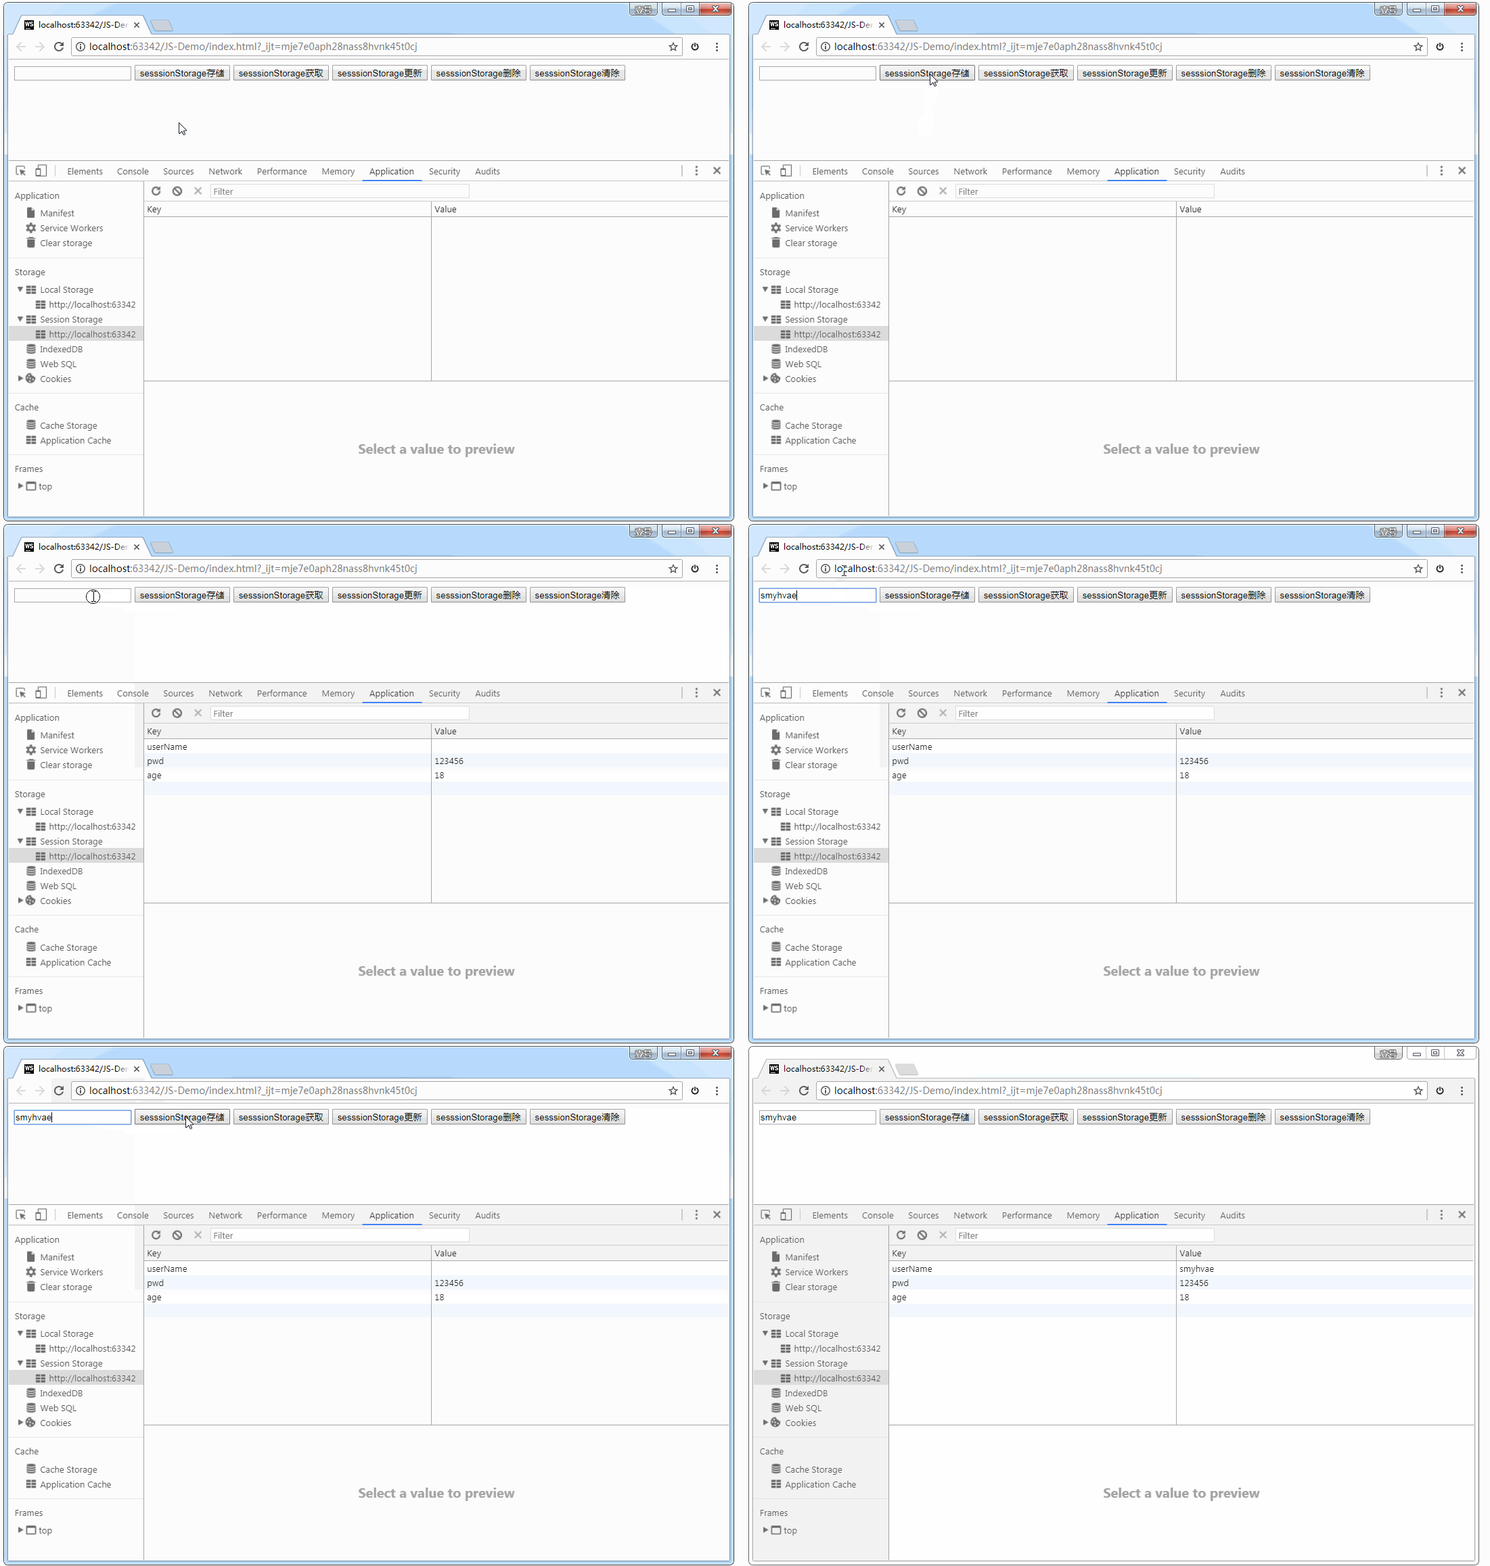
如上图所示,我们可以在 Storage 选项卡中查看 Session Storage 和Local Storage。
localStorage 的 API 举例:
<!DOCTYPE html>
<html>
<head lang="en">
    <meta charset="UTF-8">
    <title></title>
</head>
<body>
<input type="text"/>
<button>localStorage存储</button>
<button>localStorage获取</button>
<button>localStorage更新</button>
<button>localStorage删除</button>
<button>localStorage清除</button>

<script>

    /*
    *  localStorage
    *  数据存在硬盘上
    *  永久生效
    *  20M
    * */

    var txt = document.querySelector('input');
    var btns = document.querySelectorAll('button');

    //        localStorage存储数据
    btns[0].onclick = function () {
        window.localStorage.setItem('userName', txt.value);
    }

    //        localStorage存储数据
    btns[1].onclick = function () {
        txt.value = window.localStorage.getItem('userName');
    }

    //        localStorage删除数据
    btns[3].onclick = function () {
        window.localStorage.removeItem('userName');
    }

</script>
</body>
</html>
案例:记住用户名和密码
代码:
<!DOCTYPE html>
<html>
<head lang="en">
    <meta charset="UTF-8">
    <title></title>
</head>
<body>
<label for="">
    用户名:<input type="text" class="userName"/>
</label>
<br/><br/>
<label for="">
    密 码:<input type="text" class="pwd"/>
</label>
<br/><br/>
<label for="">
    <input type="checkbox" class="check" id=""/>记住密码
</label>
<br/><br/>
<button>登录</button>

<script>
    var userName = document.querySelector('.userName');
    var pwd = document.querySelector('.pwd');
    var chk = document.querySelector('.check');
    var btn = document.querySelector('button');

    //        当点击登录的时候 如果勾选“记住密码”,就存储密码;否则就清除密码
    btn.onclick = function () {
        if (chk.checked) {
//                记住数据
            window.localStorage.setItem('userName', userName.value);
            window.localStorage.setItem('pwd', pwd.value);
        } else {
//                清除数据
            window.localStorage.removeItem('userName');
            window.localStorage.removeItem('pwd');
        }
    }
    //        下次登录时,如果记录的有数据,就直接填充
    window.onload = function () {
        userName.value = window.localStorage.getItem('userName');
        pwd.value = window.localStorage.getItem('pwd');

    }
</script>
</body>
</html>
网络状态
我们可以通过 window.onLine 来检测用户当前的网络状况,返回一个布尔值。另外:
- window.online:用户网络连接时被调用。
- window.offline:用户网络断开时被调用(拔掉网线或者禁用以太网)。
网络状态监听的代码举例:
<!DOCTYPE html>
<html>
<head lang="en">
    <meta charset="UTF-8">
    <title></title>
</head>
<body>
<script>
    window.addEventListener('online', function () {
        alert('网络连接建立!');
    });

    window.addEventListener('offline', function () {
        alert('网络连接断开!');
    })
</script>
</body>
</html>
应用缓存
HTML5中我们可以轻松的构建一个离线(无网络状态)应用,只需要创建一个 cache manifest 缓存清单文件。
优势
1、可配置需要缓存的资源;
2、网络无连接应用仍可用;
3、本地读取缓存资源,提升访问速度,增强用户体验;
4、减少请求,缓解服务器负担。
cache manifest 缓存清单文件
缓存清单文件中列出了浏览器应缓存,以供离线访问的资源。推荐使用 .appcache作为后缀名,另外还要添加MIME类型。
缓存清单文件里的内容怎样写:
(1)顶行写CACHE MANIFEST。
(2)CACHE: 换行 指定我们需要缓存的静态资源,如.css、image、js等。
(3)NETWORK: 换行 指定需要在线访问的资源,可使用通配符(也就是:不需要缓存的、必须在网络下面才能访问的资源)。
(4)FALLBACK: 换行 当被缓存的文件找不到时的备用资源(当访问不到某个资源时,自动由另外一个资源替换)。
格式举例1:

格式举例2:
CACHE MANIFEST

#要缓存的文件
CACHE:
    images/img1.jpg
    images/img2.jpg


#指定必须联网才能访问的文件
NETWORK:
     images/img3.jpg
     images/img4.jpg


#当前页面无法访问是回退的页面
FALLBACK:
    404.html
缓存清单文件怎么用:
(1)例如我们创建一个名为 demo.appcache的文件。例如:
demo.appcache:
CACHE MANIFEST

# 注释以#开头
#下面是要缓存的文件
CACHE:
    http://img.smyhvae.com/2016040101.jpg
(2)在需要应用缓存在页面的根元素(html)里,添加属性manifest=“demo.appcache”。路径要保证正确。例如:
<!DOCTYPE html>
<html manifest="01.appcache">
<head lang="en">
    <meta charset="UTF-8">
    <title></title>
</head>
<body>
<img src="http://img.smyhvae.com/2016040101.jpg" alt=""/>
</body>
</html>
CSS3 选择器
我们之前学过 CSS 的选择器,比如:
div 标签选择器

     .box 类名选择器

     #box id选择器

     div p 后代选择器

     div.box 交集选择器

     div,p,span 并集选择器

     div>p 子代选择器

     * : 通配符

     div+p: 选中div后面相邻的第一个p

     div~p: 选中的div后面所有的p
结构伪类选择器
伪类选择器的标志性符号是 :。
CSS中有一些伪类选择器,比如:link、:active、:visited、:hover,这些是动态伪类选择器。
过渡:transition
transition的中文含义是过渡。过渡是CSS3中具有颠覆性的一个特征,可以实现元素不同状态间的平滑过渡(补间动画),经常用来制作动画效果。
- 补间动画:自动完成从起始状态到终止状态的的过渡。不用管中间的状态。
- 帧动画:通过一帧一帧的画面按照固定顺序和速度播放。如电影胶片。
transition 包括以下属性:
transition-property: all;如果希望所有的属性都发生过渡,就使用all。transition-duration: 1s;过渡的持续时间。transition-timing-function: linear;运动曲线。属性值可以是:
-
linear线性 -
ease减速 -
ease-in加速 -
ease-out减速 -
ease-in-out先加速后减速
transition-delay: 1s;过渡延迟。多长时间后再执行这个过渡动画。
上面的四个属性也可以写成综合属性:
transition: 让哪些属性进行过度 过渡的持续时间 运动曲线 延迟时间;

transition: all 3s linear 0s;其中,transition-property这个属性是尤其需要注意的,不同的属性值有不同的现象。我们来示范一下。
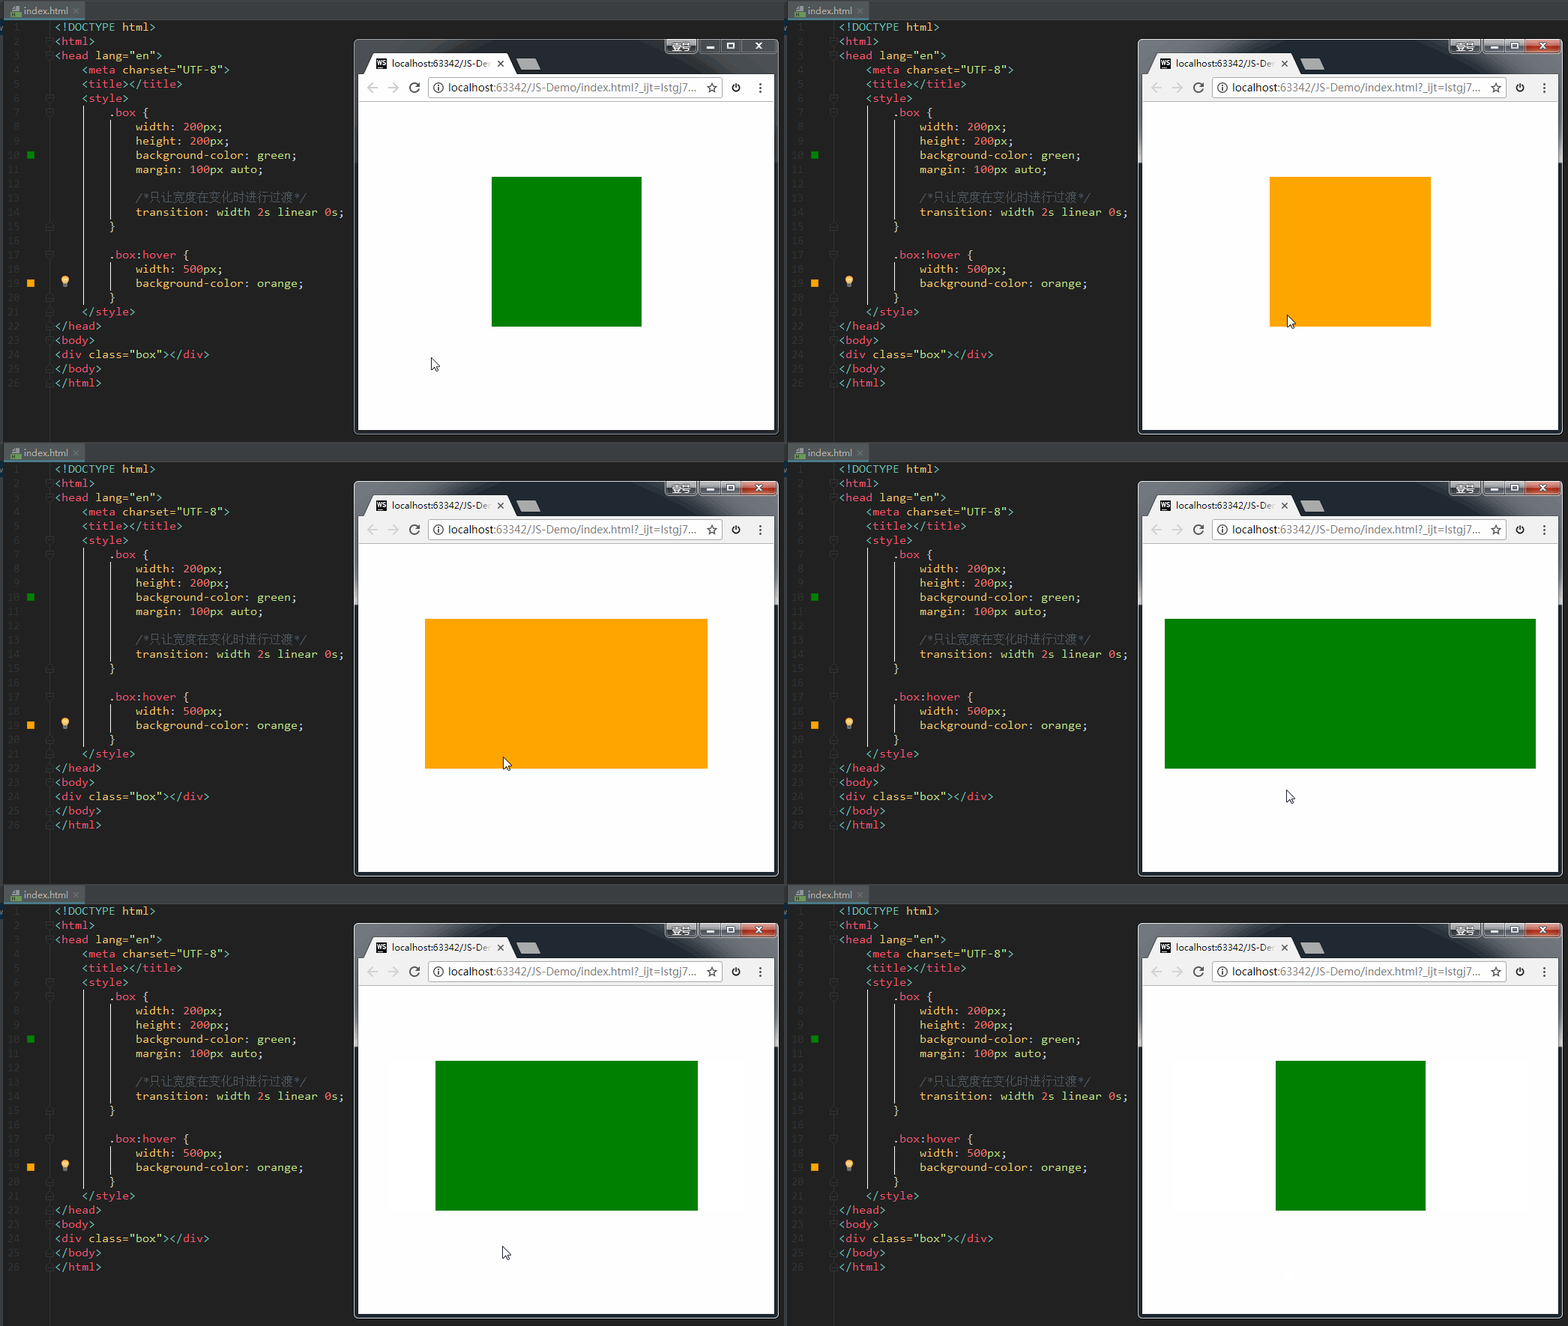
如果设置 transition-property: width,意思是只让盒子的宽度在变化时进行过渡。效果如下:
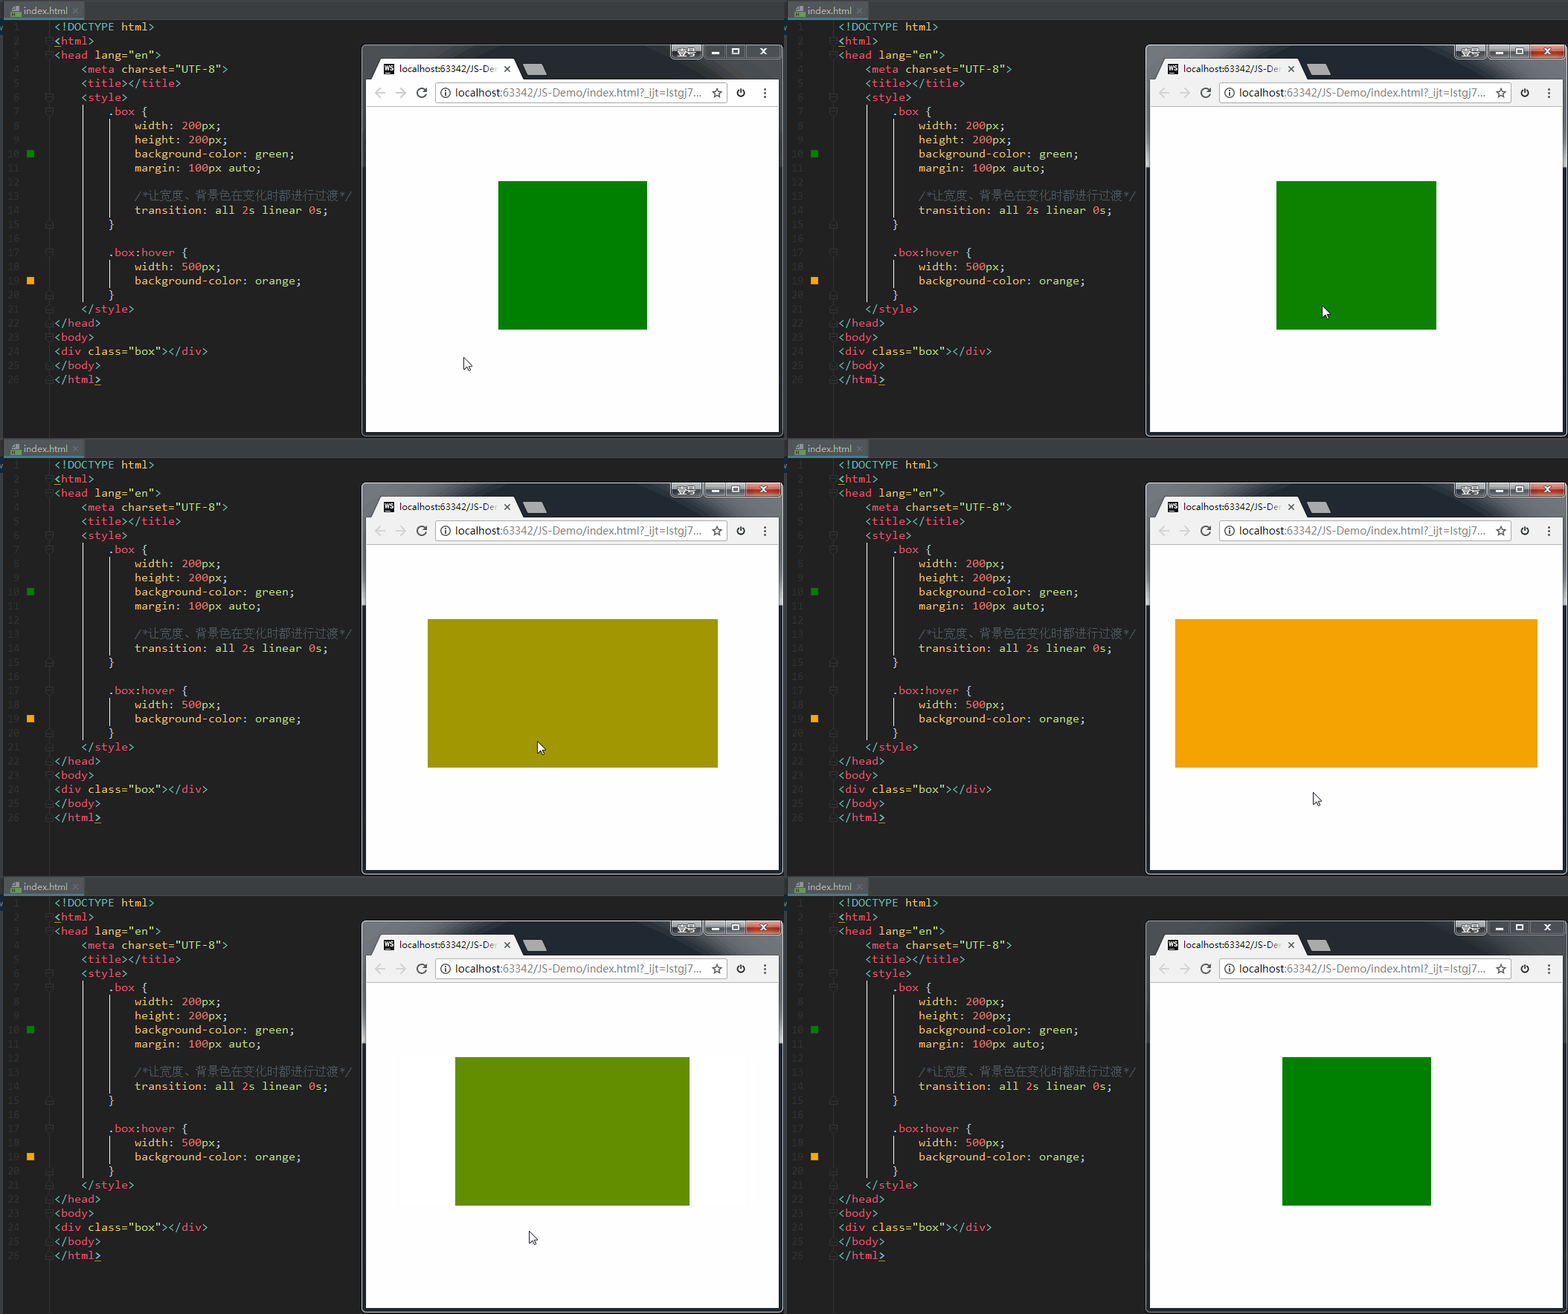
如果设置 transition-property: all,意思是让盒子的所有属性(包括宽度、背景色等)在变化时都进行过渡。效果如下:
案例:小米商品详情
代码:
<!DOCTYPE html>
<html lang="en">
<head>
    <meta charset="UTF-8">
    <title>CSS 过渡</title>
    <style>
        body {
            margin: 0;
            padding: 0;
            background-color: #eeeeee;
        }

        .content {
            width: 800px;
            height: 320px;
            padding-left: 20px;
            margin: 80px auto;
        }

        .item {
            width: 230px;
            height: 300px;
            text-align: center;
            margin-right: 20px;
            background-color: #FFF;
            float: left;
            position: relative;
            top: 0;
            overflow: hidden; /* 让溢出的内容隐藏起来。意思是让下方的橙色方形先躲起来 */
            transition: all .5s; /* 从最初到鼠标悬停时的过渡 */
        }

        .item img {
            margin-top: 30px;
        }

        .item .desc {
            position: absolute;
            left: 0;
            bottom: -80px;
            width: 100%;
            height: 80px;
            background-color: #ff6700;
            transition: all .5s;
        }

        /* 鼠标悬停时,让 item 整体往上移动5px,且加一点阴影 */
        .item:hover {
            top: -5px;
            box-shadow: 0 0 15px #AAA;
        }

        /* 鼠标悬停时,让下方的橙色方形现身 */
        .item:hover .desc {
            bottom: 0;
        }
    </style>
</head>
<body>
<div class="content">
    <div class="item">
        <img src="./images/1.png" alt="">
    </div>

    <div class="item">
        <img src="./images/2.png" alt="">
        <span class="desc"></span>
    </div>
    <div class="item">
        <img src="./images/3.jpg" alt="">
        <span class="desc"></span>
    </div>
</div>
</body>
</html>
效果如下:
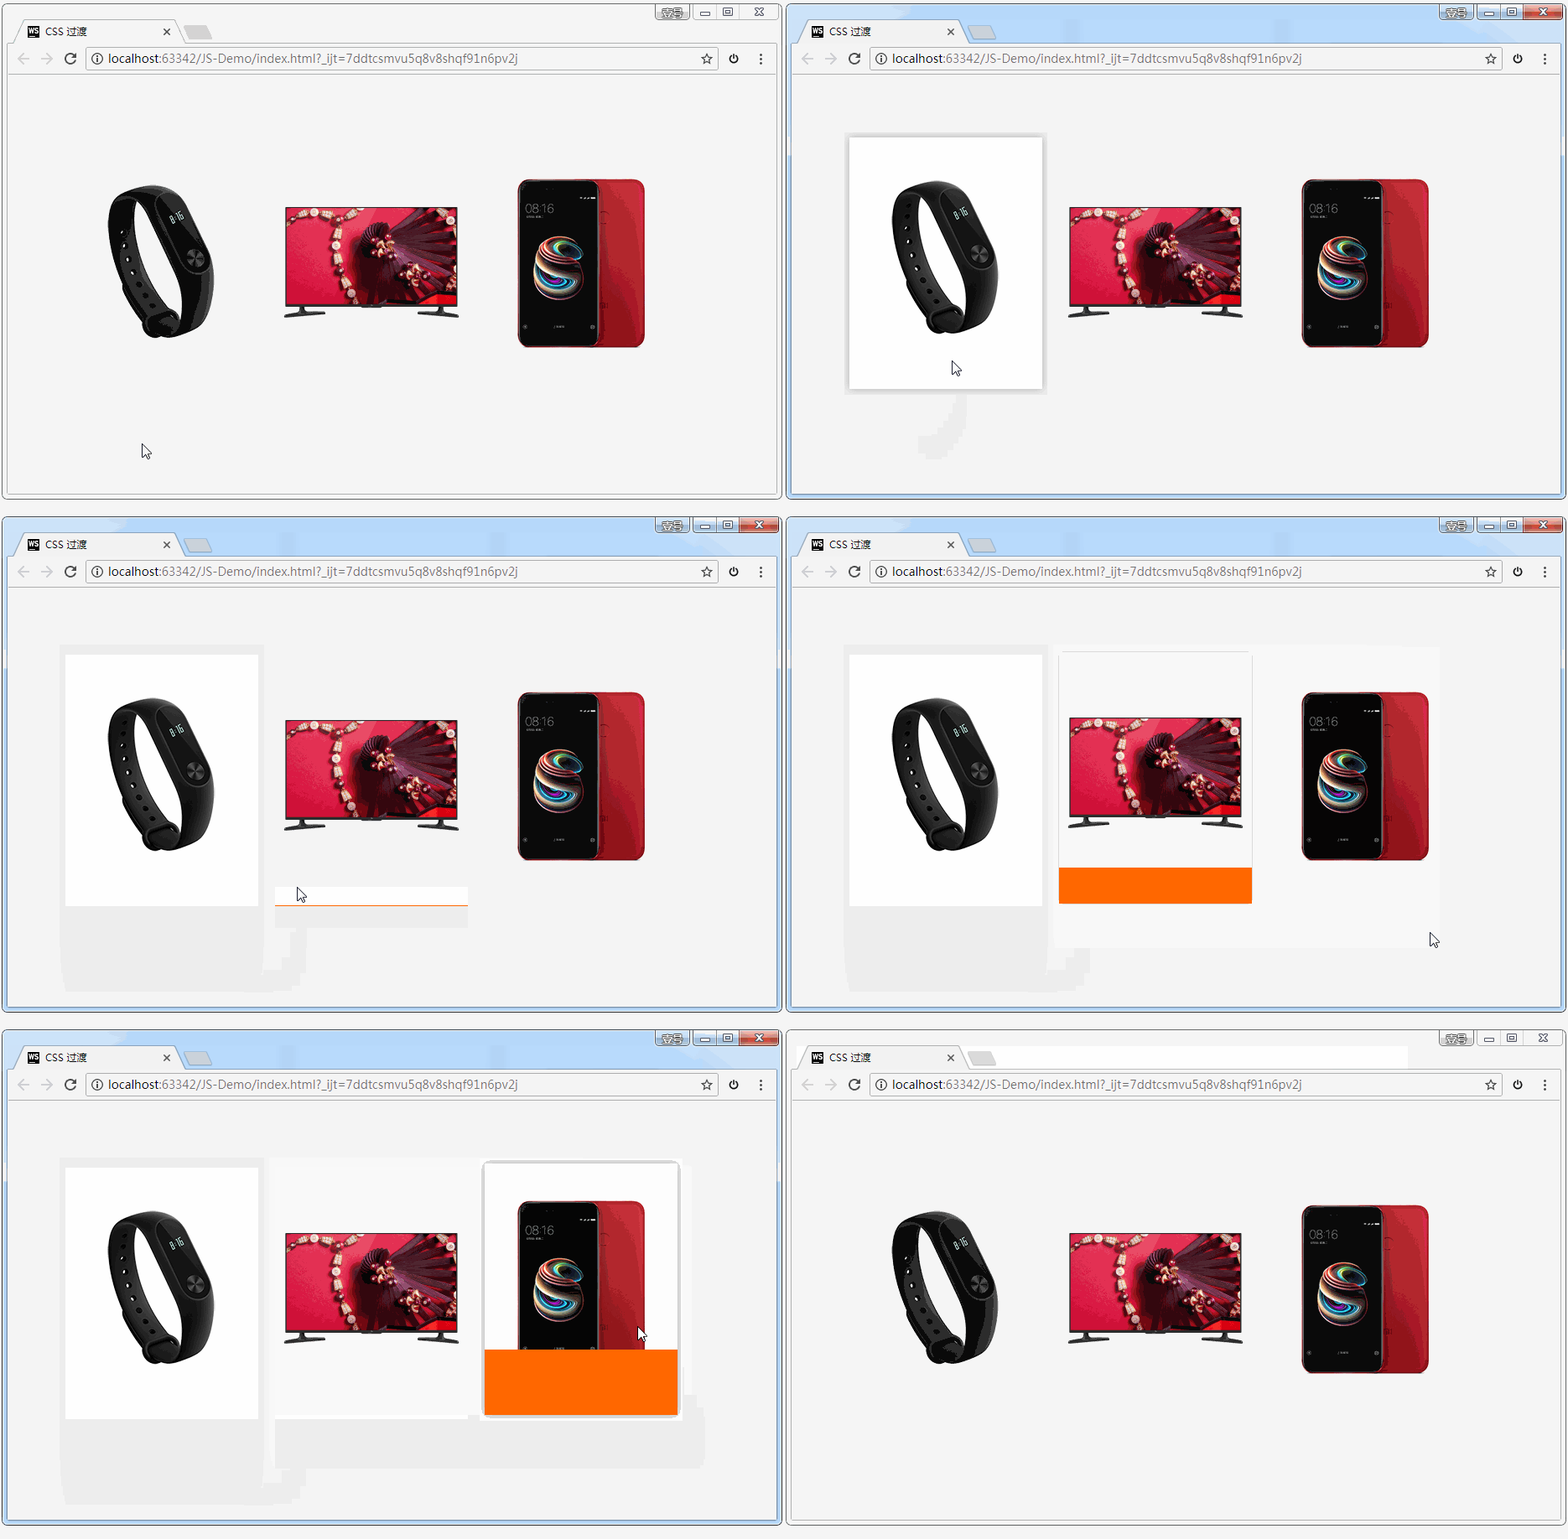
动画效果录制的比较差,但真实体验还是可以的。
2D 转换
转换是 CSS3 中具有颠覆性的一个特征,可以实现元素的位移、旋转、变形、缩放,甚至支持矩阵方式。
转换再配合过渡和动画,可以取代大量早期只能靠 Flash 才可以实现的效果。
在 CSS3 当中,通过 transform 转换来实现 2D 转换或者 3D 转换。
- 2D转换包括:缩放、移动、旋转。
我们依次来讲解。
1、缩放:scale
格式:
transform: scale(x, y);

	transform: scale(2, 0.5);
参数解释: x:表示水平方向的缩放倍数。y:表示垂直方向的缩放倍数。如果只写一个值就是等比例缩放。
取值:大于1表示放大,小于1表示缩小。不能为百分比。
格式举例:
<!DOCTYPE html>
<html>
<head lang="en">
    <meta charset="UTF-8">
    <title></title>
    <style>
        .box {
            width: 1000px;
            margin: 100px auto;
        }

        .box div {
            width: 300px;
            height: 150px;
            background-color: pink;
            float: left;
            margin-right: 15px;
            color: white;
            text-align: center;
            font: 400 30px/150px “宋体”;

        }

        .box .box2 {
            background-color: green;
            transition: all 1s;
        }

        .box .box2:hover {
            /*width: 500px;*/
            /*height: 400px;*/
            background-color: yellowgreen;

            /* transform:  css3中用于做变换的属性
                scale(x,y):缩放 */
            transform: scale(2, 0.5);
        }

    </style>
</head>
<body>
<div class="box">
    <div class="box1">1</div>
    <div class="box2">2</div>
    <div class="box3">3</div>
</div>

</body>
</html>
效果:
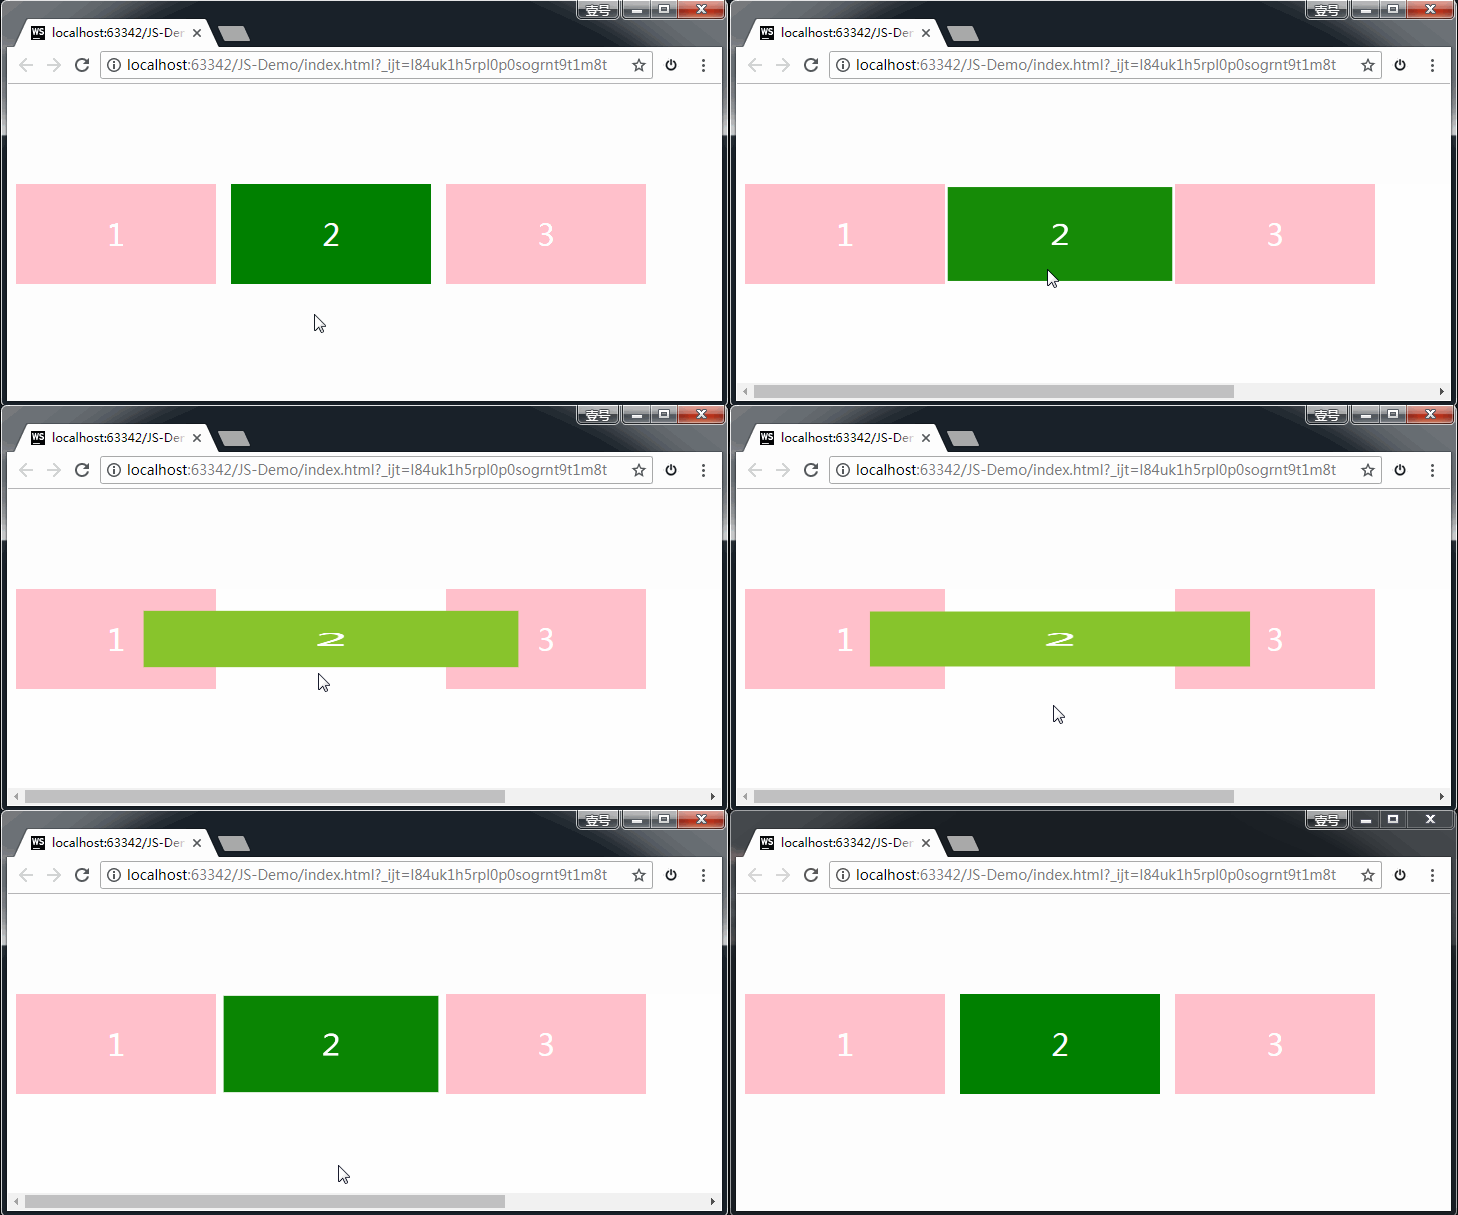
上图可以看到,给 box1 设置 2D 转换,并不会把兄弟元素挤走。
2、位移:translate
格式:
transform: translate(水平位移, 垂直位移);

	transform: translate(-50%, -50%);
参数解释:
- 参数为百分比,相对于自身移动。
- 正值:向右和向下。 负值:向左和向上。如果只写一个值,则表示水平移动。
格式举例:
<!DOCTYPE html>
<html>
<head lang="en">
    <meta charset="UTF-8">
    <title></title>
    <style>
        .box {
            width: 1000px;
            margin: 100px auto;
        }

        .box > div {
            width: 300px;
            height: 150px;
            border: 1px solid #000;
            background-color: red;
            float: left;
            margin-right: 30px;
        }

        div:nth-child(2) {
            background-color: pink;
            transition: all 1s;
        }

        /* translate:(水平位移,垂直位移)*/
        div:nth-child(2):hover {
            transform: translate(-50%, -50%);
        }
    </style>

</head>
<body>
<div class="box">
    <div class="box1">1</div>
    <div class="box2">2</div>
    <div class="box3">3</div>
</div>

</body>
</html>
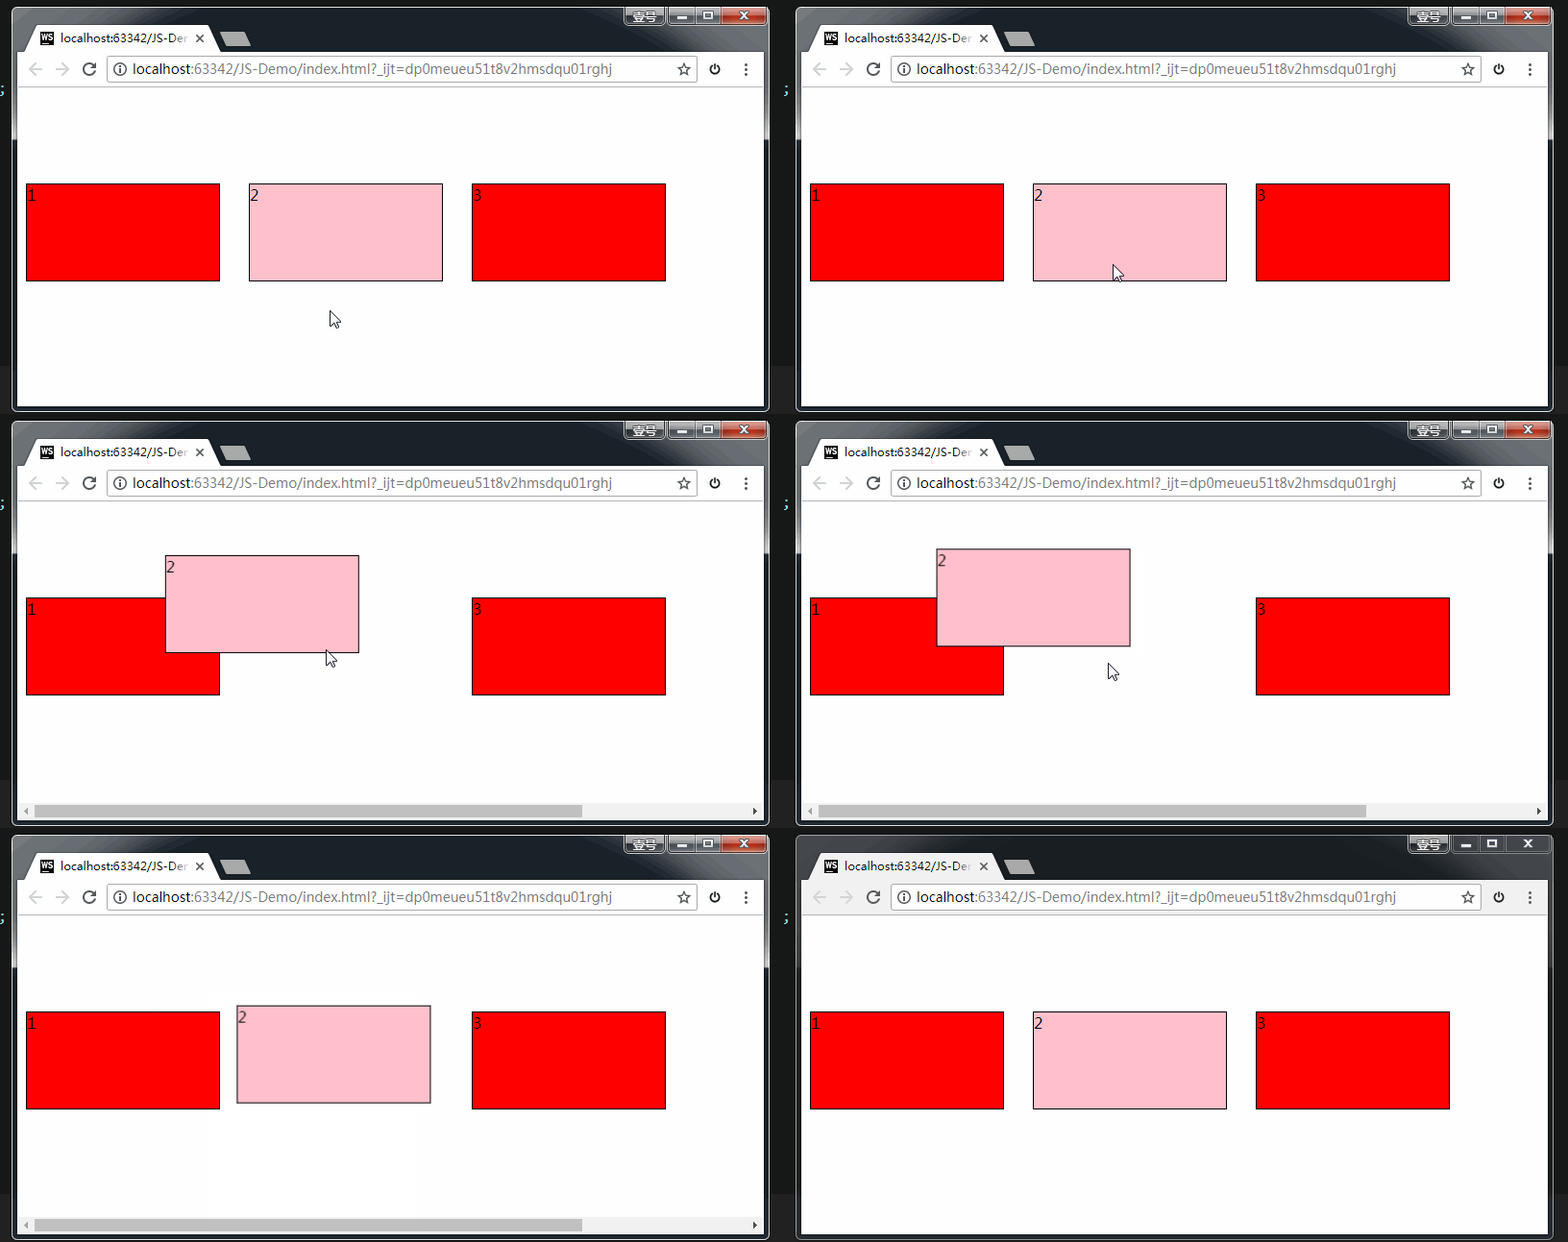
效果:
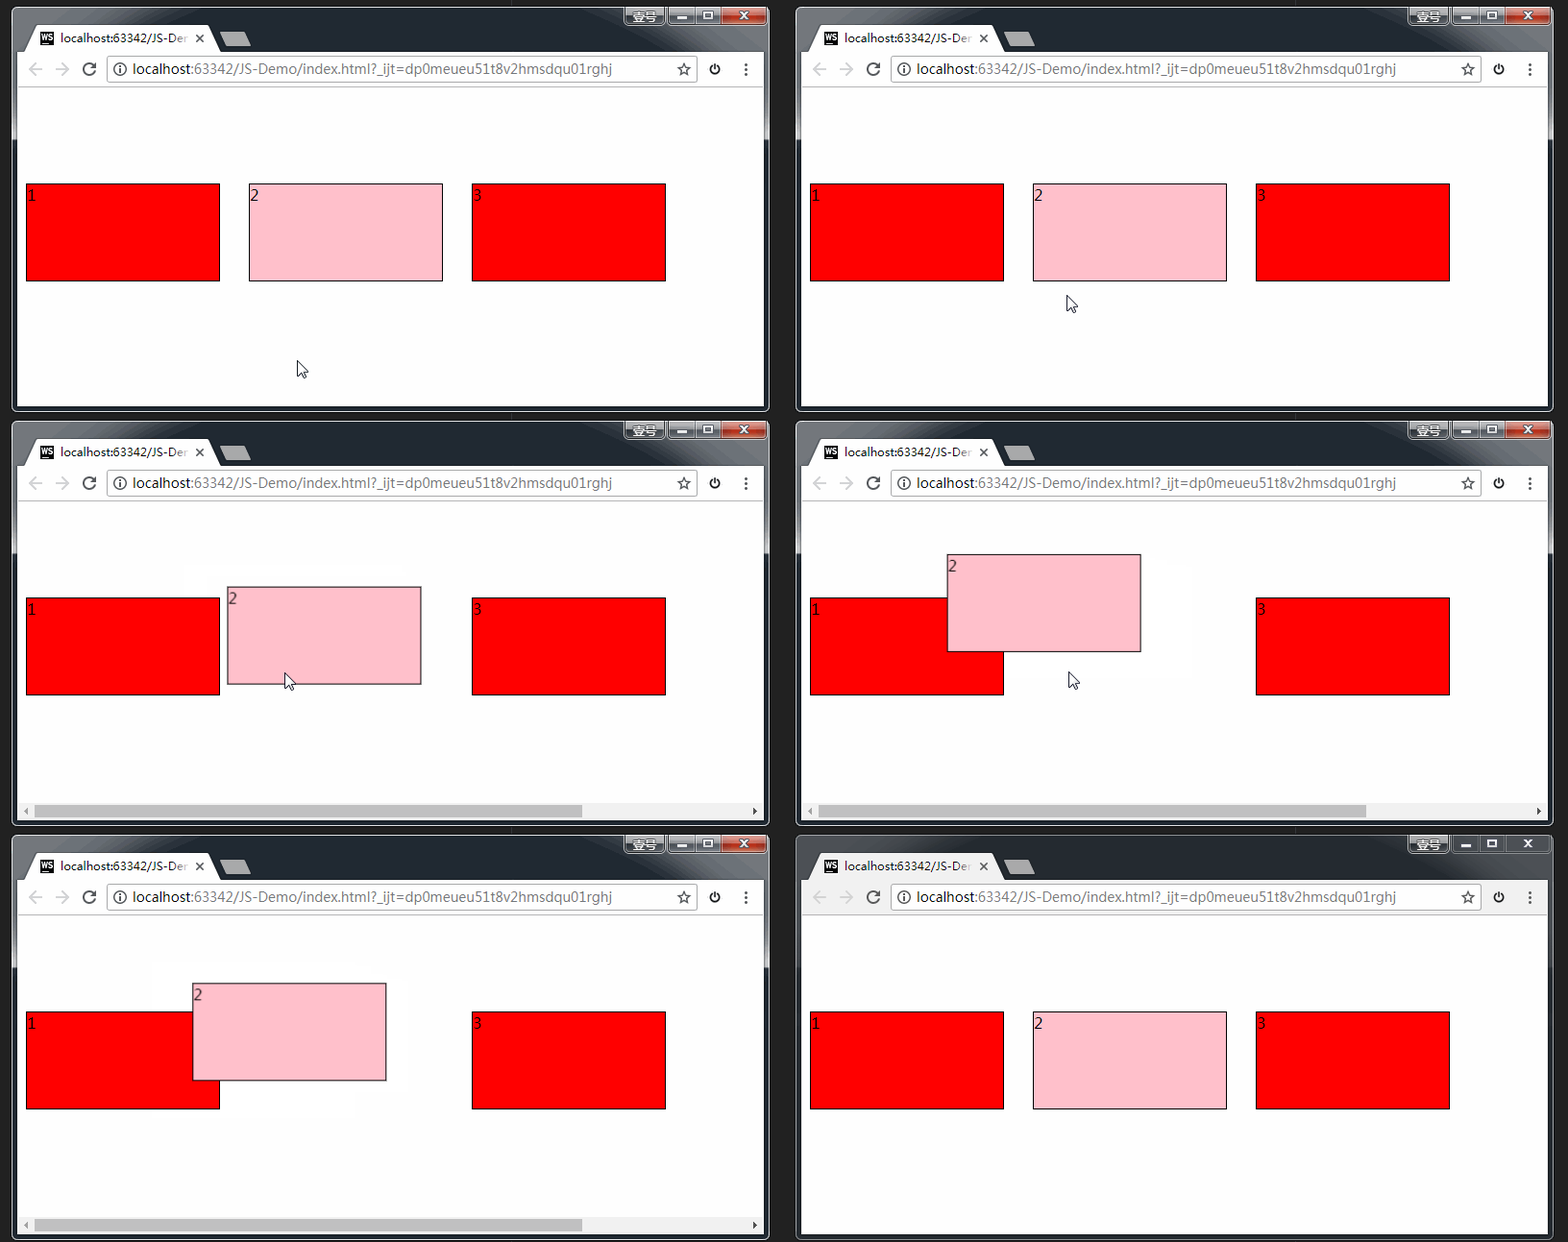
上图中,因为我在操作的时候,鼠标悬停后,立即进行了略微的移动,所以产生了两次动画。正确的效果应该是下面这样的:
**应用:**让绝对定位中的盒子在父亲里居中
我们知道,如果想让一个标准流中的盒子在父亲里居中(水平方向看),可以将其设置margin: 0 auto属性。
可如果盒子是绝对定位的,此时已经脱标了,如果还想让其居中(位于父亲的正中间),可以这样做:
div {
		width: 600px;
		height: 60px;
		position: absolute;  绝对定位的盒子
		left: 50%;           首先,让左边线居中
		top: 0;
		margin-left: -300px;  然后,向左移动宽度(600px)的一半
	}
如上方代码所示,我们先让这个宽度为600px的盒子,左边线居中,然后向左移动宽度(600px)的一半,就达到效果了。

现在,我们还可以利用偏移 translate 来做,这也是比较推荐的写法:
div {
	    width: 600px;
	    height: 60px;
	    background-color: red;
	    position: absolute;       绝对定位的盒子
	    left: 50%;               首先,让左边线居中
	    top: 0;
	    transform: translate(-50%);    然后,利用translate,往左走自己宽度的一半【推荐写法】
	}
3、旋转:rotate
格式:
transform: rotate(角度);

	transform: rotate(45deg);
参数解释:正值 顺时针;负值:逆时针。
举例:
<!DOCTYPE html>
<html>
<head lang="en">
    <meta charset="UTF-8">
    <title></title>
    <style>
        .box {
            width: 200px;
            height: 200px;
            background-color: red;
            margin: 50px auto;
            color: #fff;
            font-size: 50px;
            transition: all 2s; /* 过渡:让盒子在进行 transform 转换的时候,有个过渡期 */
        }

        /* rotate(角度)旋转 */
        .box:hover {
            transform: rotate(-405deg); /* 鼠标悬停时,让盒子进行旋转 */
        }

    </style>
</head>
<body>
<div class="box">1</div>

</div>
</body>
</html>
效果:
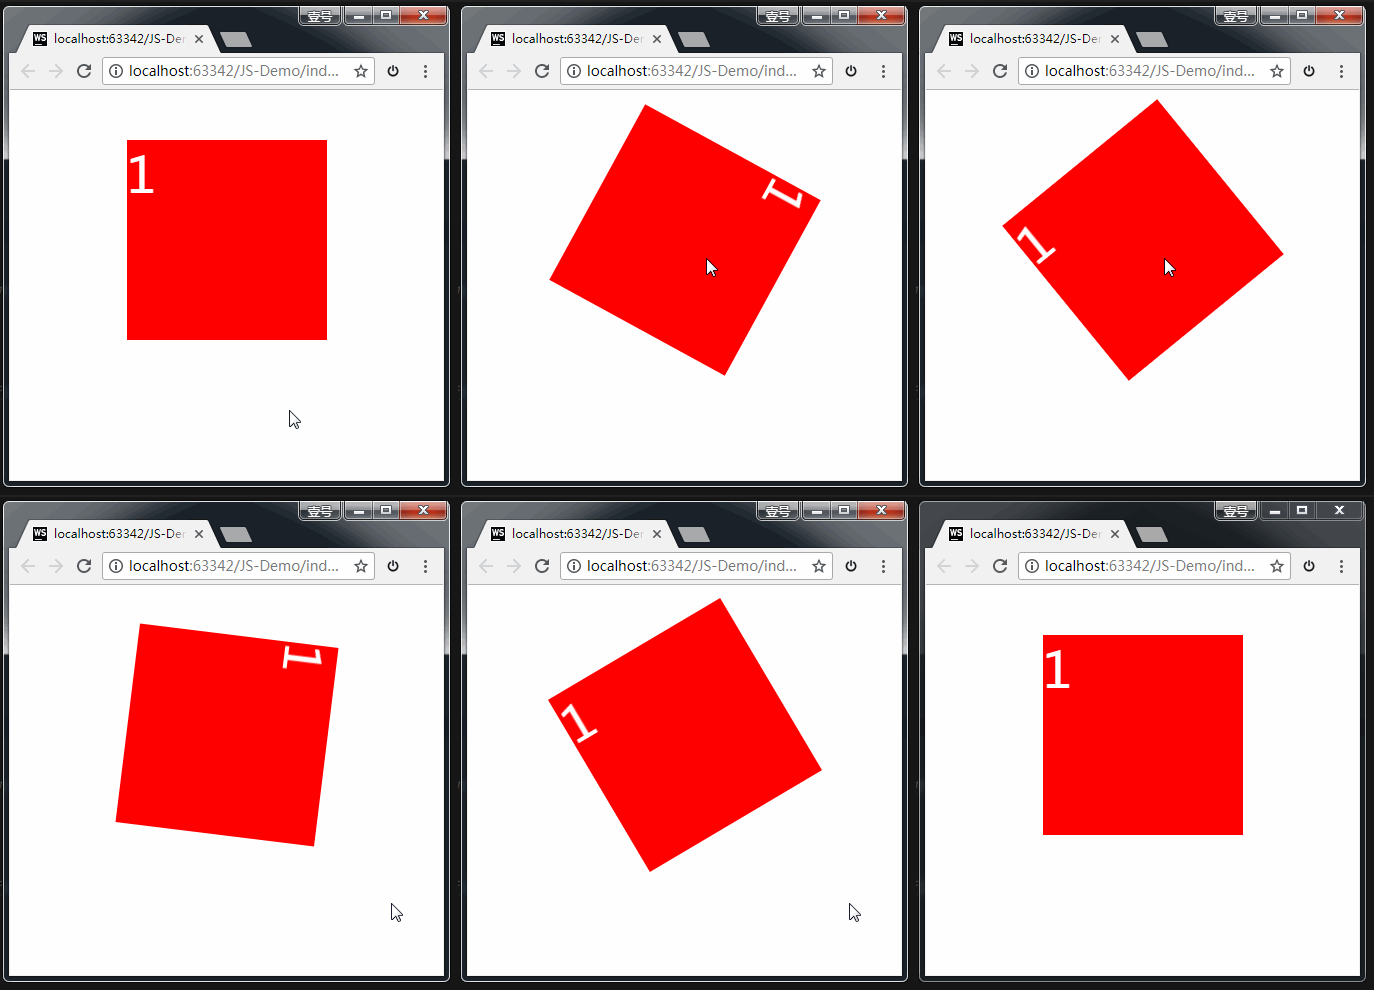
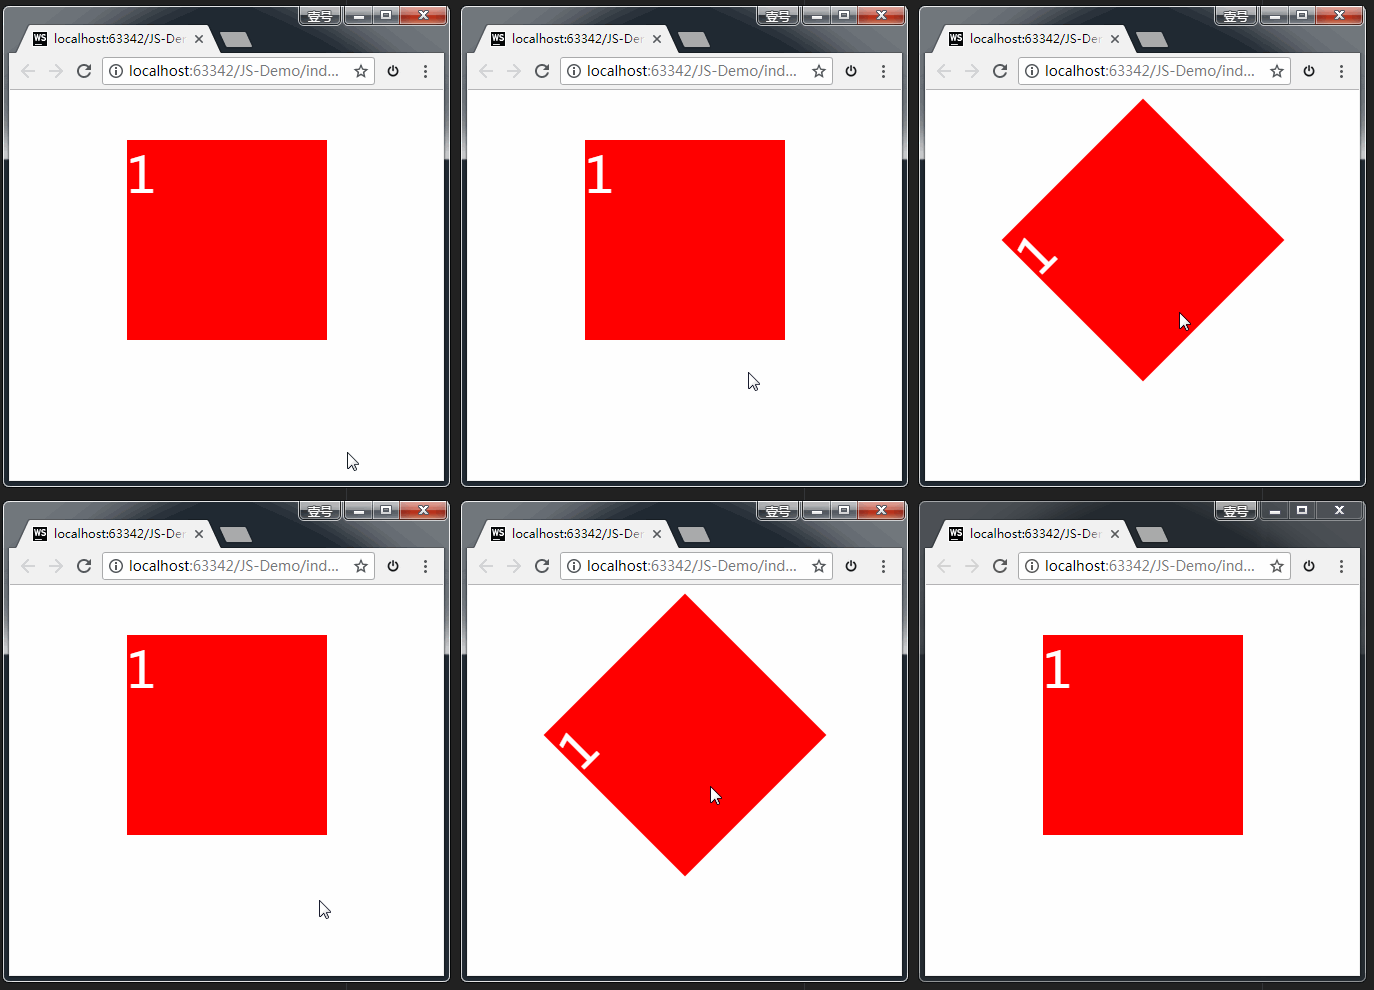
注意,上方代码中,我们给盒子设置了 transform 中的 rotate 旋转,但同时还要给盒子设置 transition 过渡。如果没有这行过渡的代码,旋转会直接一步到位,效果如下:(不是我们期望的效果)
**案例1:**小火箭
<!DOCTYPE html>
<html>
<head lang="en">
    <meta charset="UTF-8">
    <title></title>
    <style>
        html,body{
            height:100%;
        }

        body{
            background-color: #DE8910;
        }
        .rocket{
            position: absolute;
            left:100px;
            top:600px;
            height: 120px;
            transform:translate(-200px ,200px) rotate(45deg);
            transition:all 1s ease-in;
        }

        body:hover .rocket{
            transform:translate(500px,-500px) rotate(45deg);
        }
    </style>
</head>
<body>
    <img  class="rocket" src="images/rocket.png" alt=""/>
</body>
</html>
上方代码中,我们将 transform 的两个小属性合并起来写了。
小火箭图片的url:http://img.smyhvae.com/20180208-rocket.png">http://img.smyhvae.com/20180208-rocket.png
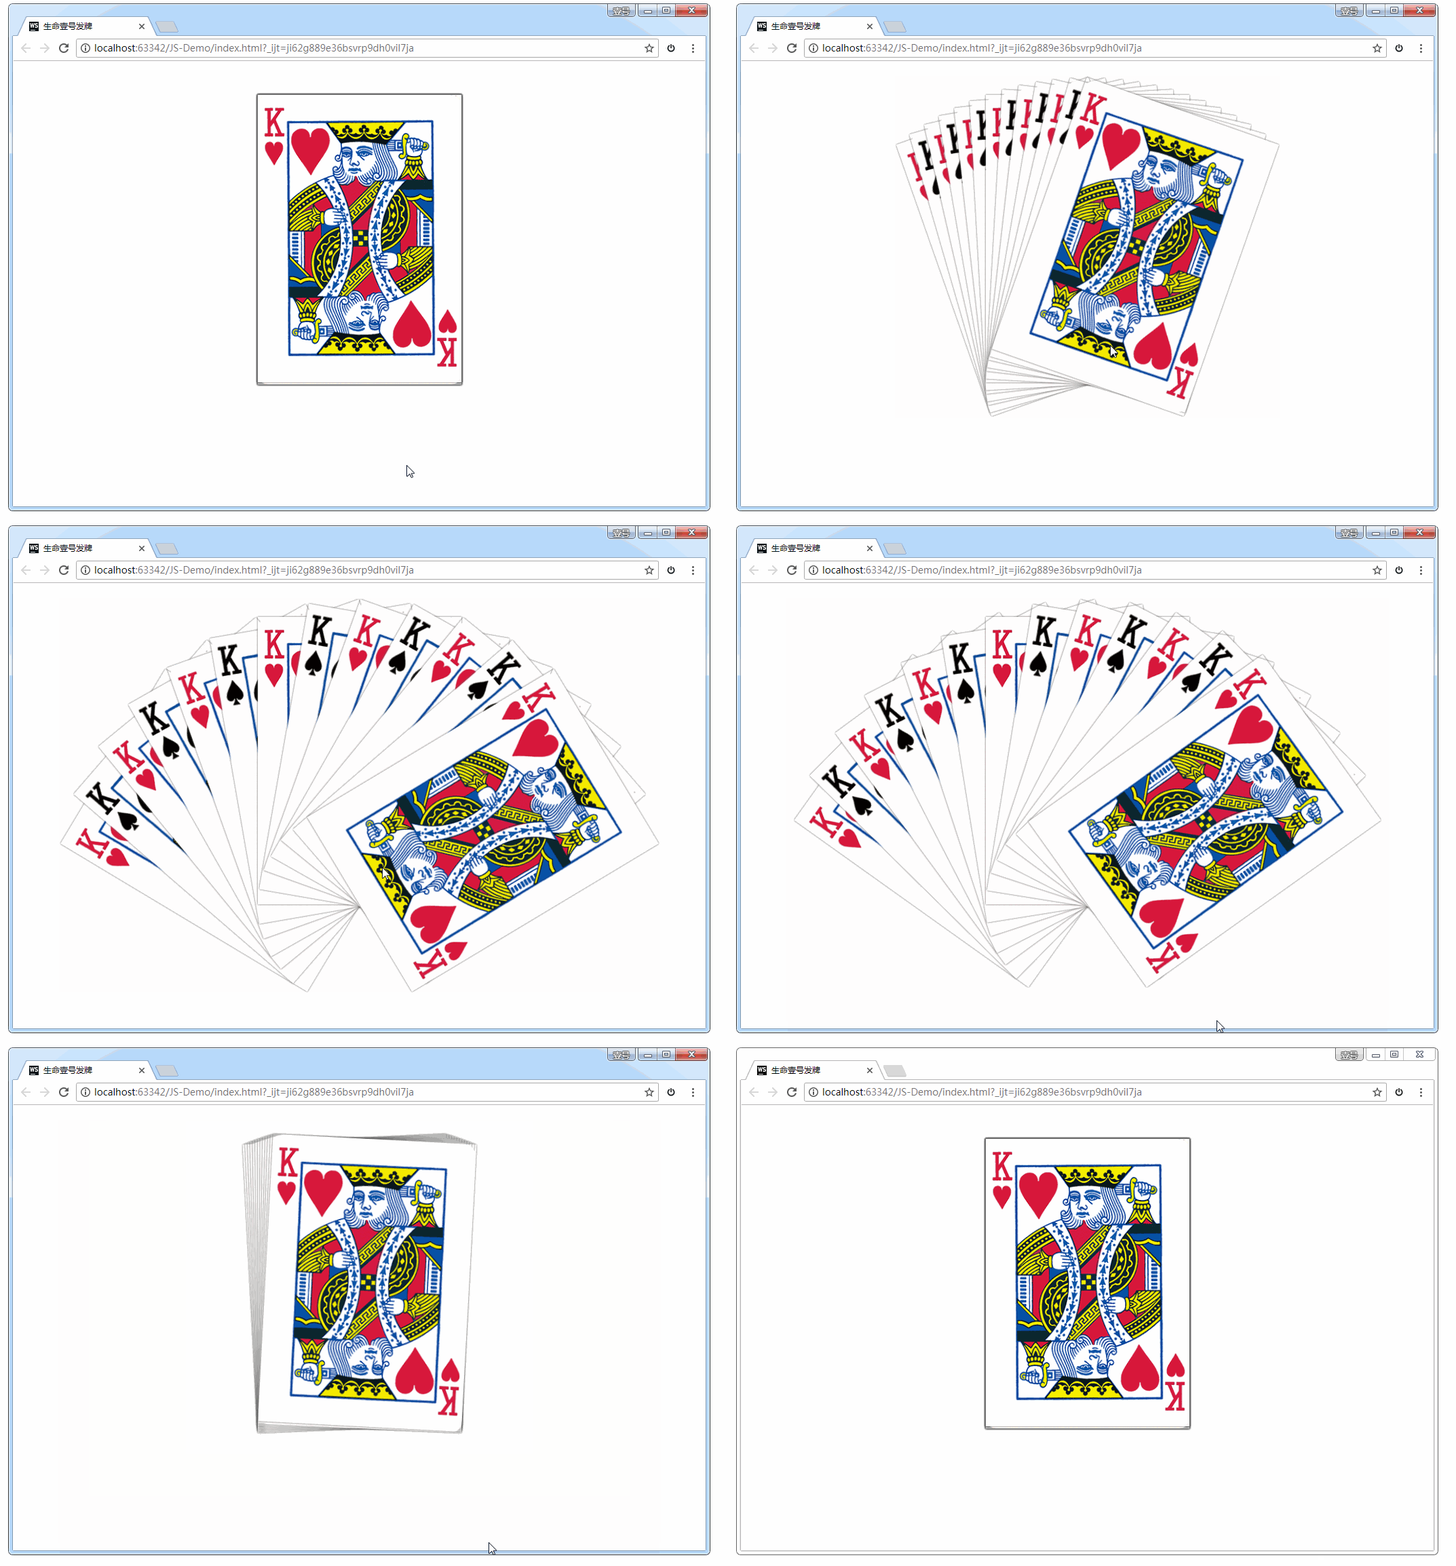
**案例2:**扑克牌
rotate 旋转时,默认是以盒子的正中心为坐标原点的。如果想改变旋转的坐标原点,可以用transform-origin属性。格式如下:
transform-origin: 水平坐标 垂直坐标;

	transform-origin: 50px 50px;

	transform-origin: center bottom;   //旋转时,以盒子底部的中心为坐标原点
我们来看一下 rotate 结合 transform-origin 的用法举例。
代码如下:
<!DOCTYPE html>
<html>
<head lang="en">
    <meta charset="UTF-8">
    <title></title>
    <style>
        body {
            /*background-color: #eee;*/
        }

        .box {

            width: 300px;
            height: 440px;
            margin: 100px auto;
            position: relative;
        }

        img {
            width: 100%;
            transition: all 1.5s;
            position: absolute;     /* 既然扑克牌是叠在一起的,那就都用绝对定位 */
            left: 0;
            top: 0;

            transform-origin: center bottom; /*旋转时,以盒子底部的中心为坐标原点*/
            box-shadow: 0 0 3px 0 #666;
        }

        .box:hover img:nth-child(6) {
            transform: rotate(-10deg);
        }

        .box:hover img:nth-child(5) {
            transform: rotate(-20deg);
        }

        .box:hover img:nth-child(4) {
            transform: rotate(-30deg);
        }

        .box:hover img:nth-child(3) {
            transform: rotate(-40deg);
        }

        .box:hover img:nth-child(2) {
            transform: rotate(-50deg);
        }

        .box:hover img:nth-child(1) {
            transform: rotate(-60deg);
        }

        .box:hover img:nth-child(8) {
            transform: rotate(10deg);
        }

        .box:hover img:nth-child(9) {
            transform: rotate(20deg);
        }

        .box:hover img:nth-child(10) {
            transform: rotate(30deg);
        }

        .box:hover img:nth-child(11) {
            transform: rotate(40deg);
        }

        .box:hover img:nth-child(12) {
            transform: rotate(50deg);
        }

        .box:hover img:nth-child(13) {
            transform: rotate(60deg);
        }

    </style>
</head>
<body>
<div class="box">
    <img src="images/pk1.png"/>
    <img src="images/pk2.png"/>
    <img src="images/pk1.png"/>
    <img src="images/pk2.png"/>
    <img src="images/pk1.png"/>
    <img src="images/pk2.png"/>
    <img src="images/pk1.png"/>
    <img src="images/pk2.png"/>
    <img src="images/pk1.png"/>
    <img src="images/pk2.png"/>
    <img src="images/pk1.png"/>
    <img src="images/pk2.png"/>
    <img src="images/pk1.png"/>
</div>
</body>
</html>
效果如下:
4、倾斜
暂略。
3D 转换
1、旋转:rotateX、rotateY、rotateZ
3D坐标系(左手坐标系)

如上图所示,伸出左手,让拇指和食指成“L”形,大拇指向右,食指向上,中指指向前方。拇指、食指和中指分别代表X、Y、Z轴的正方向,这样我们就建立了一个左手坐标系。
浏览器的这个平面,是X轴、Y轴;垂直于浏览器的平面,是Z轴。
旋转的方向:(左手法则)
左手握住旋转轴,竖起拇指指向旋转轴的正方向,正向就是其余手指卷曲的方向。
从上面这句话,我们也能看出:所有的3d旋转,对着正方向去看,都是顺时针旋转。
格式:
transform: rotateX(360deg);    //绕 X 轴旋转360度

	transform: rotateY(360deg);    //绕 Y 轴旋转360度

	transform: rotateZ(360deg);    //绕 Z 轴旋转360度
格式举例:
(1)rotateX 举例:
<!DOCTYPE html>
<html>
<head lang="en">
    <meta charset="UTF-8">
    <title></title>
    <style>
        .rotateX {
            width: 300px;
            height: 226px;
            margin: 200px auto;

            /* 透视 :加给变换的父盒子*/
            /* 设置的是用户的眼睛距离 平面的距离*/
            /* 透视效果只是视觉上的呈现,并不是正真的3d*/
            perspective: 110px;
        }

        img {
            /* 过渡*/
            transition: transform 2s;
        }

        /* 所有的3d旋转,对着正方向去看,都是顺时针旋转*/
        .rotateX:hover img {
            transform: rotateX(360deg);
        }

    </style>
</head>
<body>
<div class="rotateX">
    <img src="images/x.jpg" alt=""/>
</div>
</body>
</html>
效果:
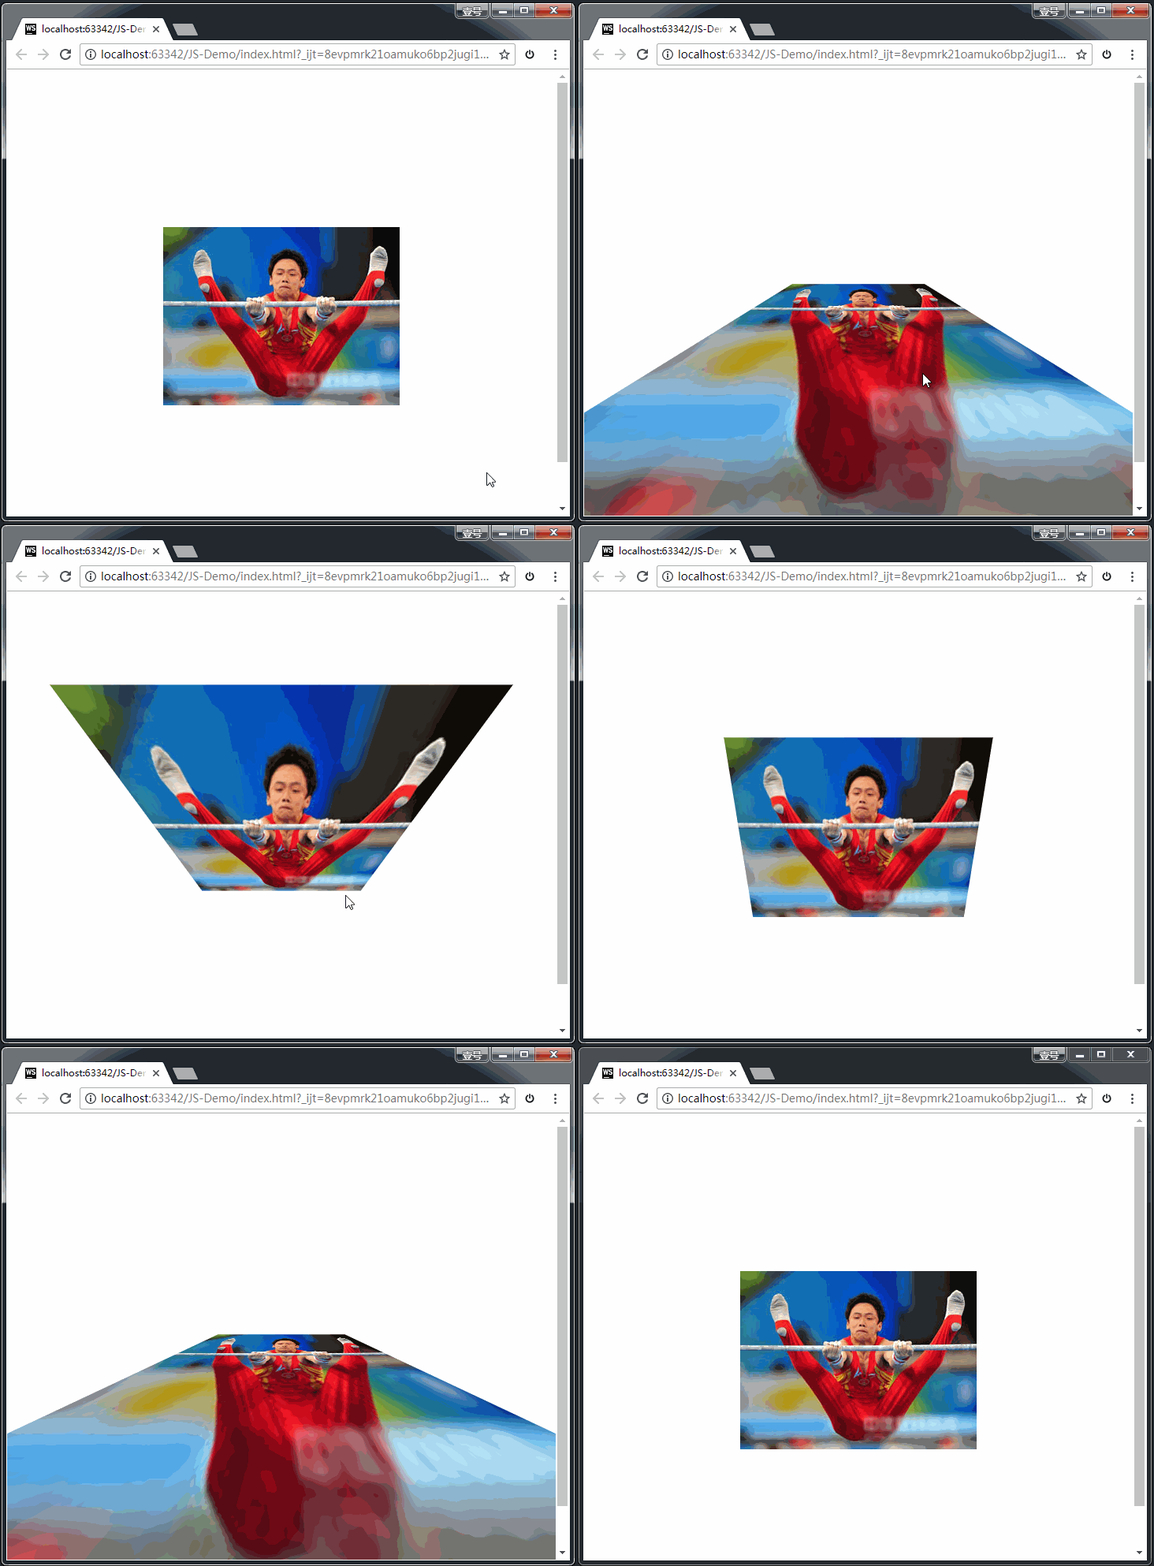
上方代码中,我们最好加个透视的属性,方能看到3D的效果;没有这个属性的话,图片旋转的时候,像是压瘪了一样。
而且,透视的是要加给图片的父元素 div,方能生效。我们在后面会讲解透视属性。
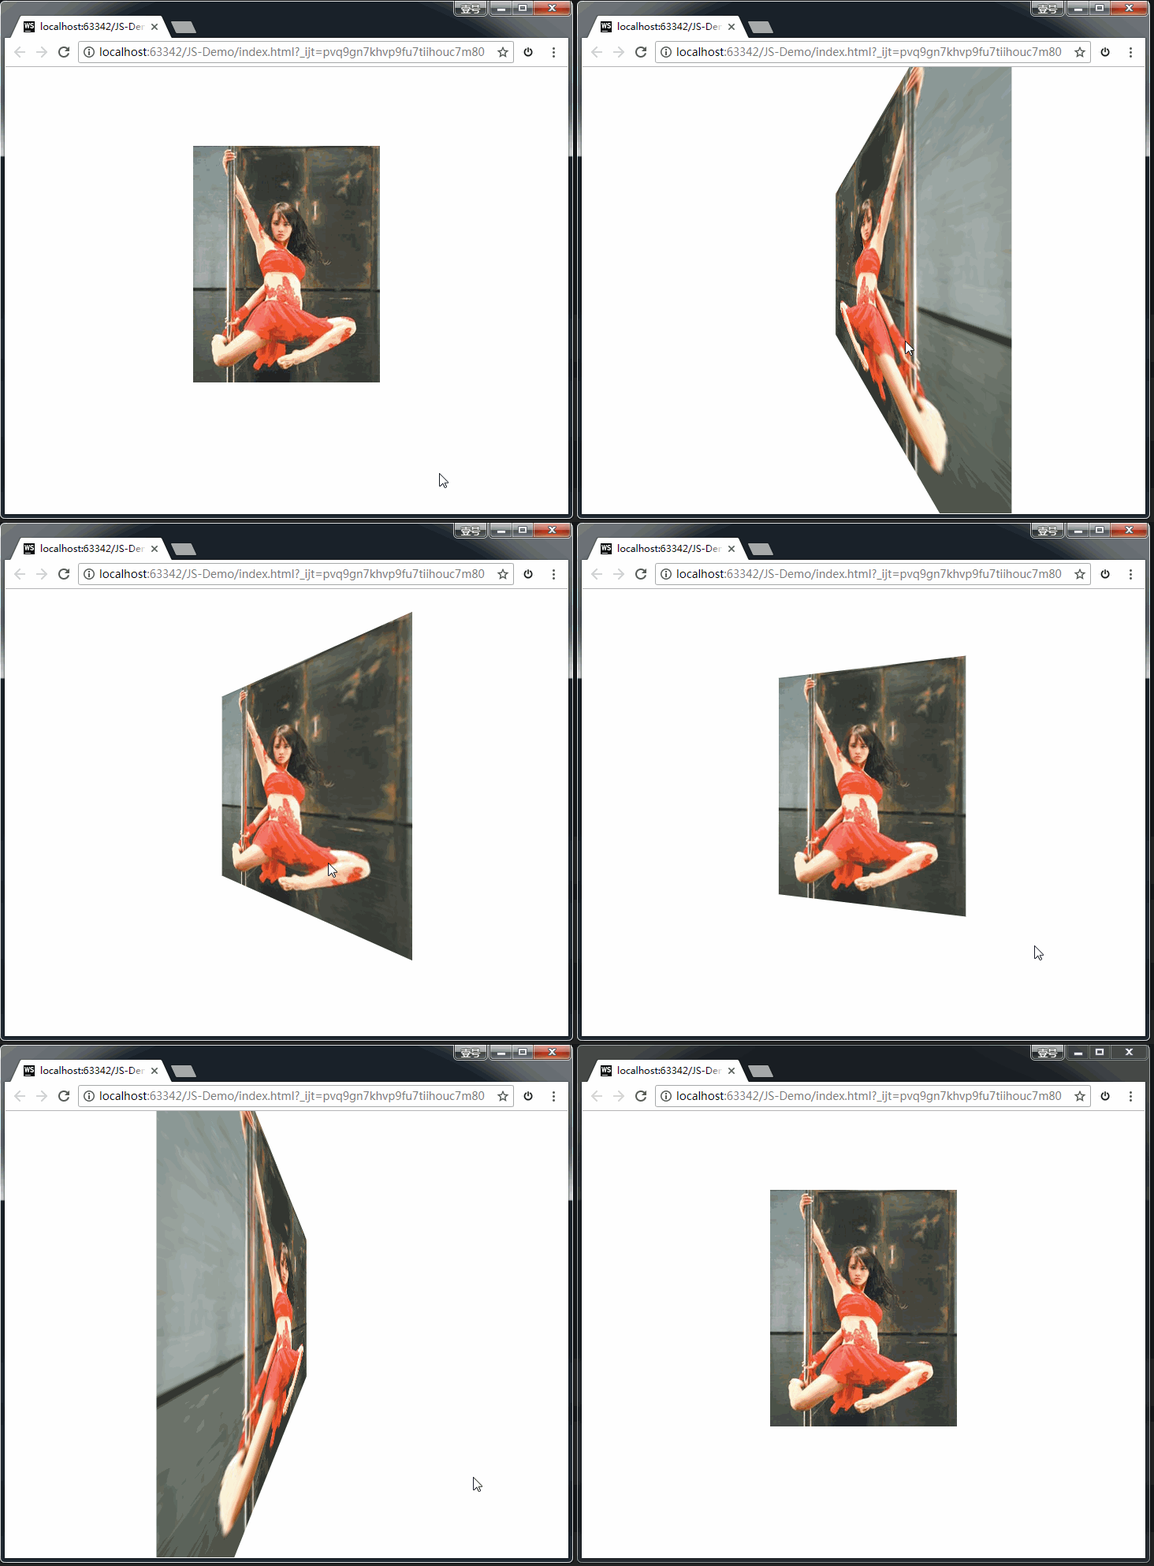
(2)rotateY 举例:
<!DOCTYPE html>
<html>
<head lang="en">
    <meta charset="UTF-8">
    <title></title>
    <style>
        .rotateY {
            width: 237px;
            height: 300px;
            margin: 100px auto;

            /* 透视 */
            perspective: 150px;
        }

        img {
            transition: all 2s;  /* 过渡 */
        }

        .rotateY:hover img {
            transform: rotateY(360deg);
        }
    </style>
</head>
<body>
<div class="rotateY">
    <img src="images/y.jpg" alt=""/>
</div>
</body>
</html>
效果:
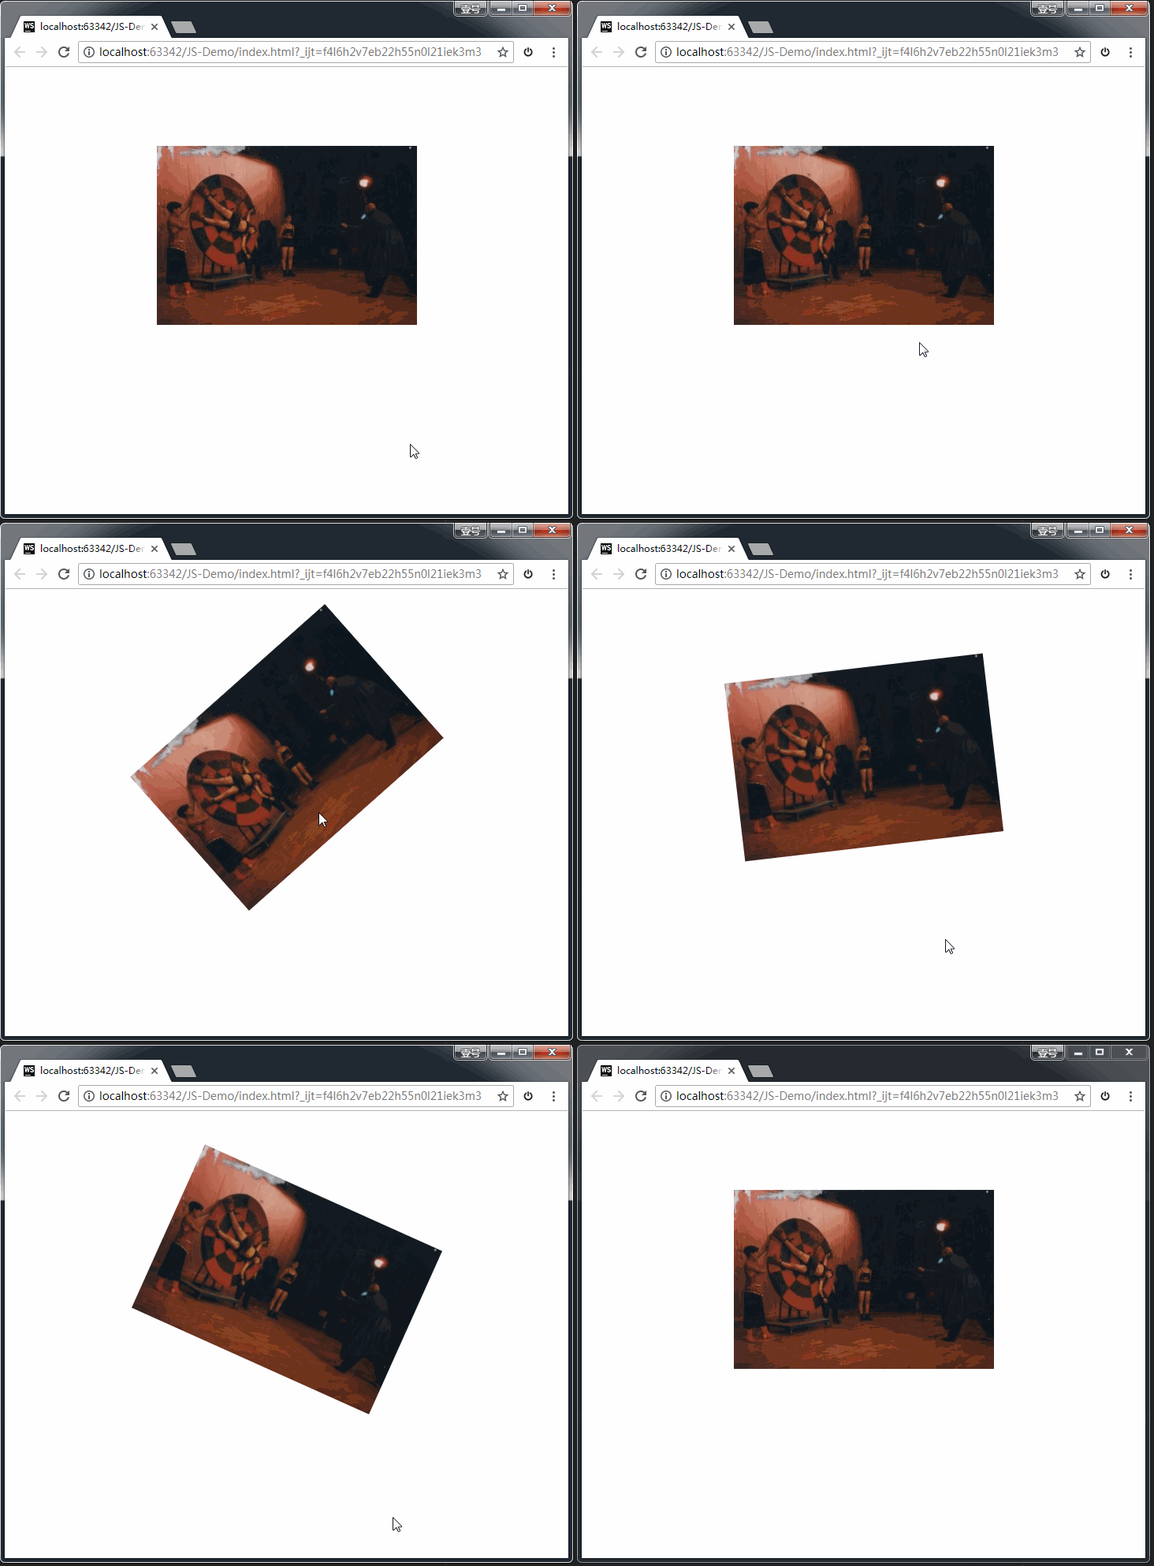
(3)rotateZ 举例:
<!DOCTYPE html>
<html>
<head lang="en">
    <meta charset="UTF-8">
    <title></title>
    <style>
        .rotateZ {
            width: 330px;
            height: 227px;
            margin: 100px auto;

            /* 透视*/
            perspective: 200px;
        }

        img {
            transition: all 1s;
        }

        .rotateZ:hover img {
            transform: rotateZ(360deg);
        }
    </style>
</head>
<body>
<div class="rotateZ">
    <img src="images/z.jpg" alt=""/>
</div>
</body>
</html>
效果:
**案例:**百度钱包
现在有下面这张图片素材:

要求做成下面这种效果:
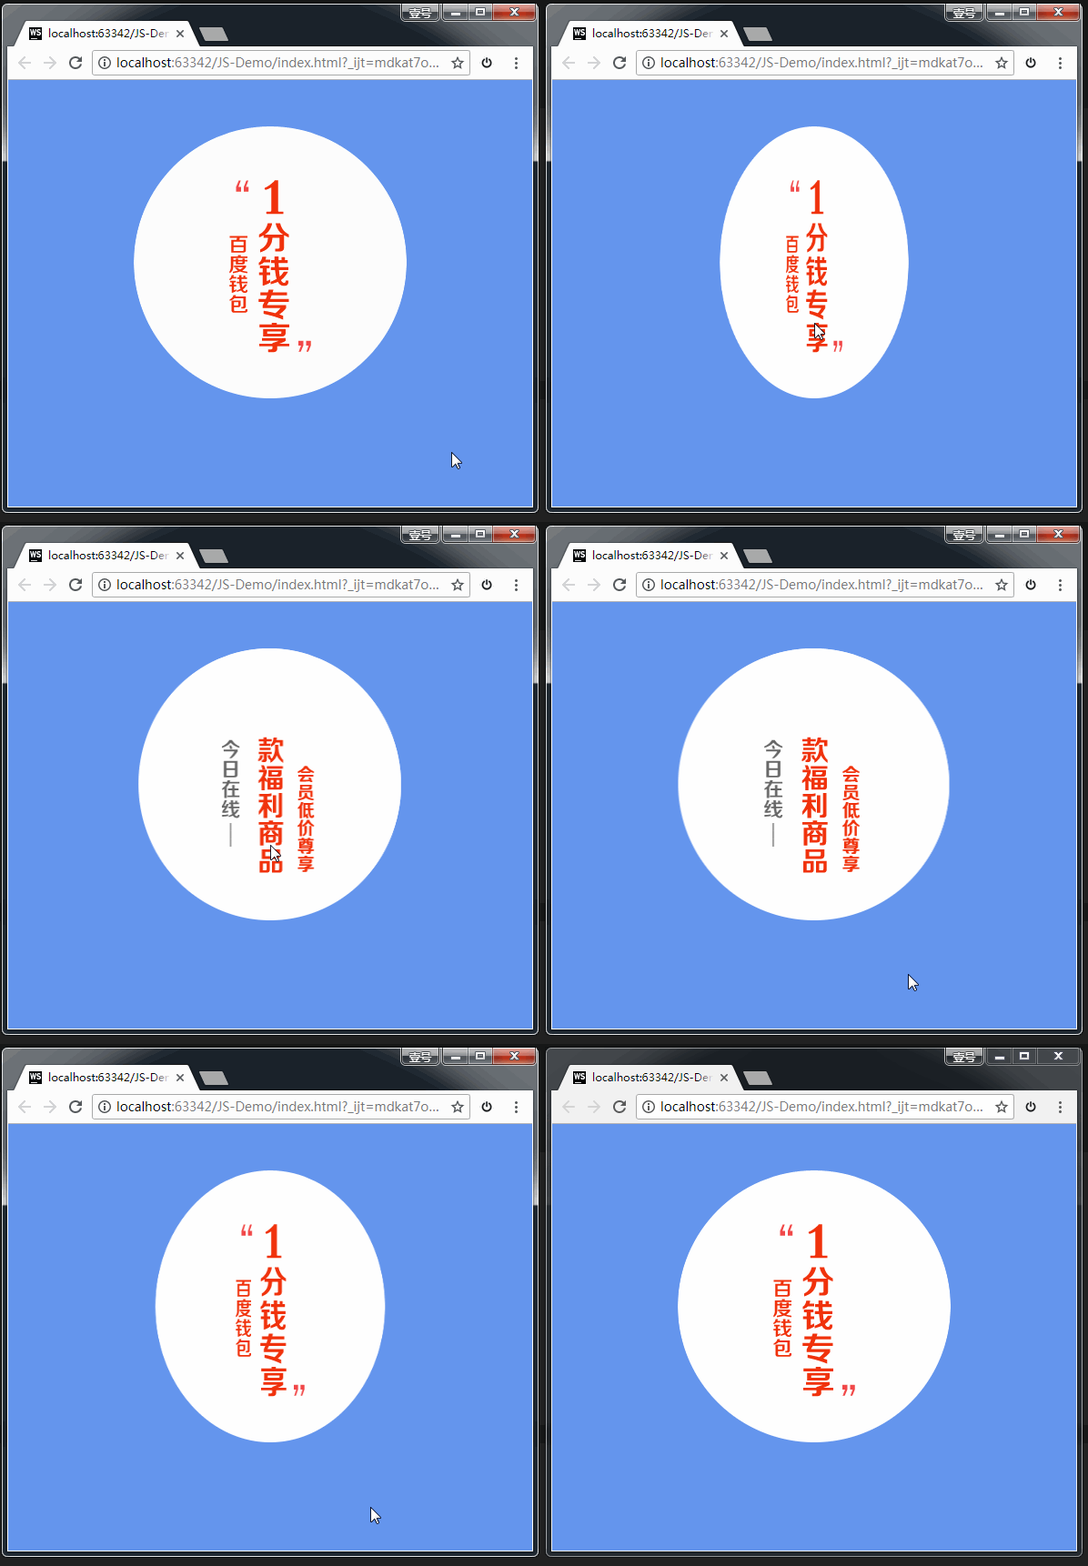
上面这张图片素材其实用的是精灵图。实现的代码如下:
<!DOCTYPE html>
<html>
<head lang="en">
    <meta charset="UTF-8">
    <title></title>
    <style>
        body {
            background-color: cornflowerblue;
        }

        .box {
            width: 300px;
            height: 300px;
            /*border: 1px solid #000;*/
            margin: 50px auto;
            position: relative;
        }

        .box > div {
            width: 100%;
            height: 100%;
            position: absolute;
            /*border: 1px solid #000;*/
            border-radius: 50%;
            transition: all 2s;
            backface-visibility: hidden;
        }

        .box1 {
            background: url(images/bg.png) left 0 no-repeat; /*默认显示图片的左半边*/
        }

        .box2 {
            background: url(images/bg.png) right 0 no-repeat;
            transform: rotateY(180deg); /*让图片的右半边默认时,旋转180度,就可以暂时隐藏起来*/

        }

        .box:hover .box1 {
            transform: rotateY(180deg); /*让图片的左半边转消失*/
        }

        .box:hover .box2 {
            transform: rotateY(0deg); /*让图片的左半边转出现*/
        }
    </style>
</head>
<body>
<div class="box">
    <div class="box1"></div>
    <div class="box2"></div>
</div>
</body>
</html>
2、移动:translateX、translateY、translateZ
格式:
transform: translateX(100px);    //沿着 X 轴移动

	transform: translateY(360px);    //沿着 Y 轴移动

	transform: translateZ(360px);    //沿着 Z 轴移动
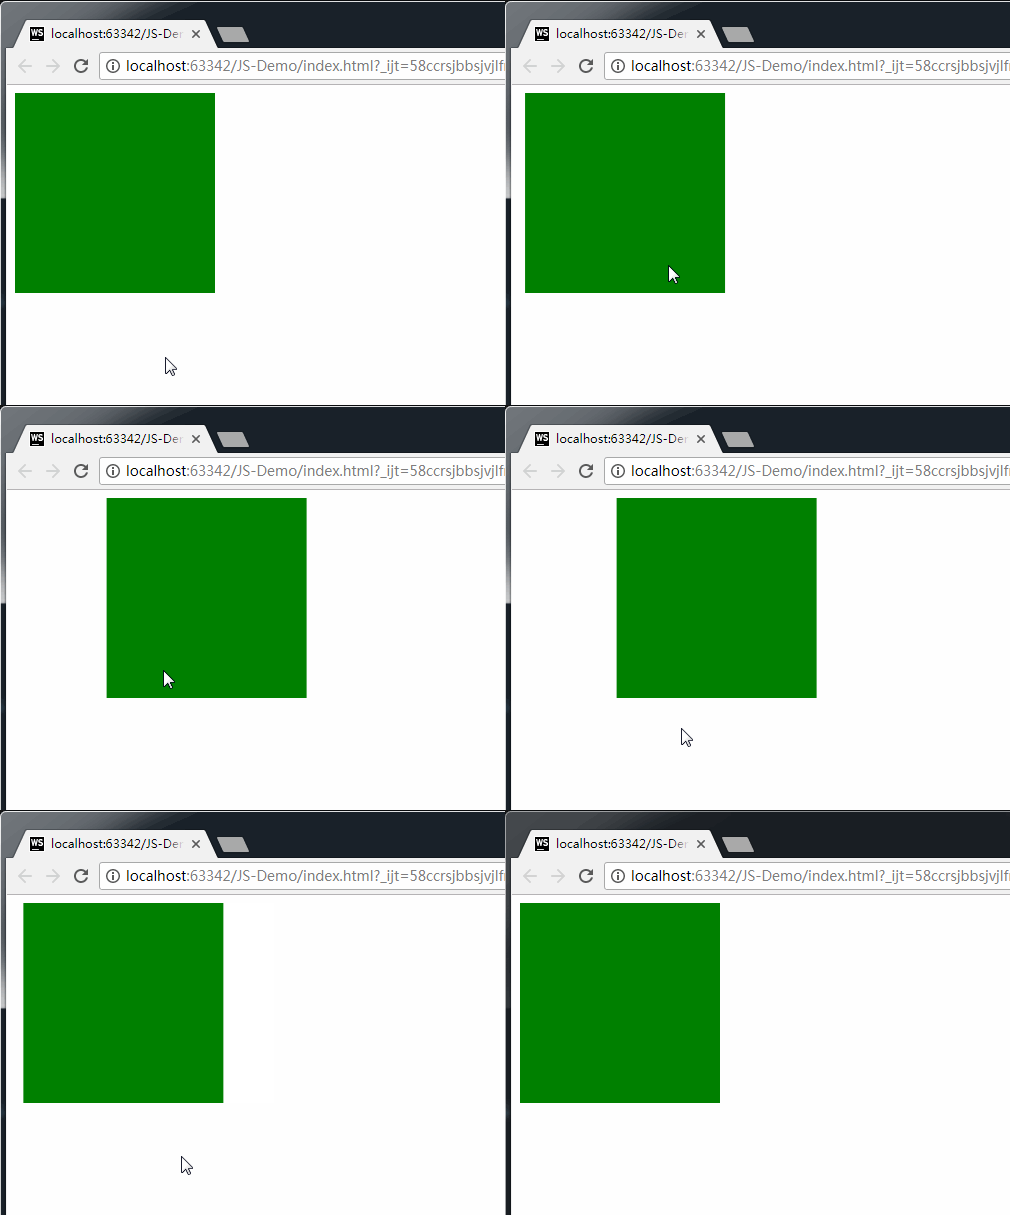
格式举例:
(1)translateX 举例:
<!DOCTYPE html>
<html>
<head lang="en">
    <meta charset="UTF-8">
    <title></title>
    <style>
        .box {
            width: 200px;
            height: 200px;
            background: green;
            transition: all 1s;
        }

        .box:hover {
            transform: translateX(100px);
        }
    </style>
</head>
<body>
<div class="box">

</div>
</body>
</html>
效果:
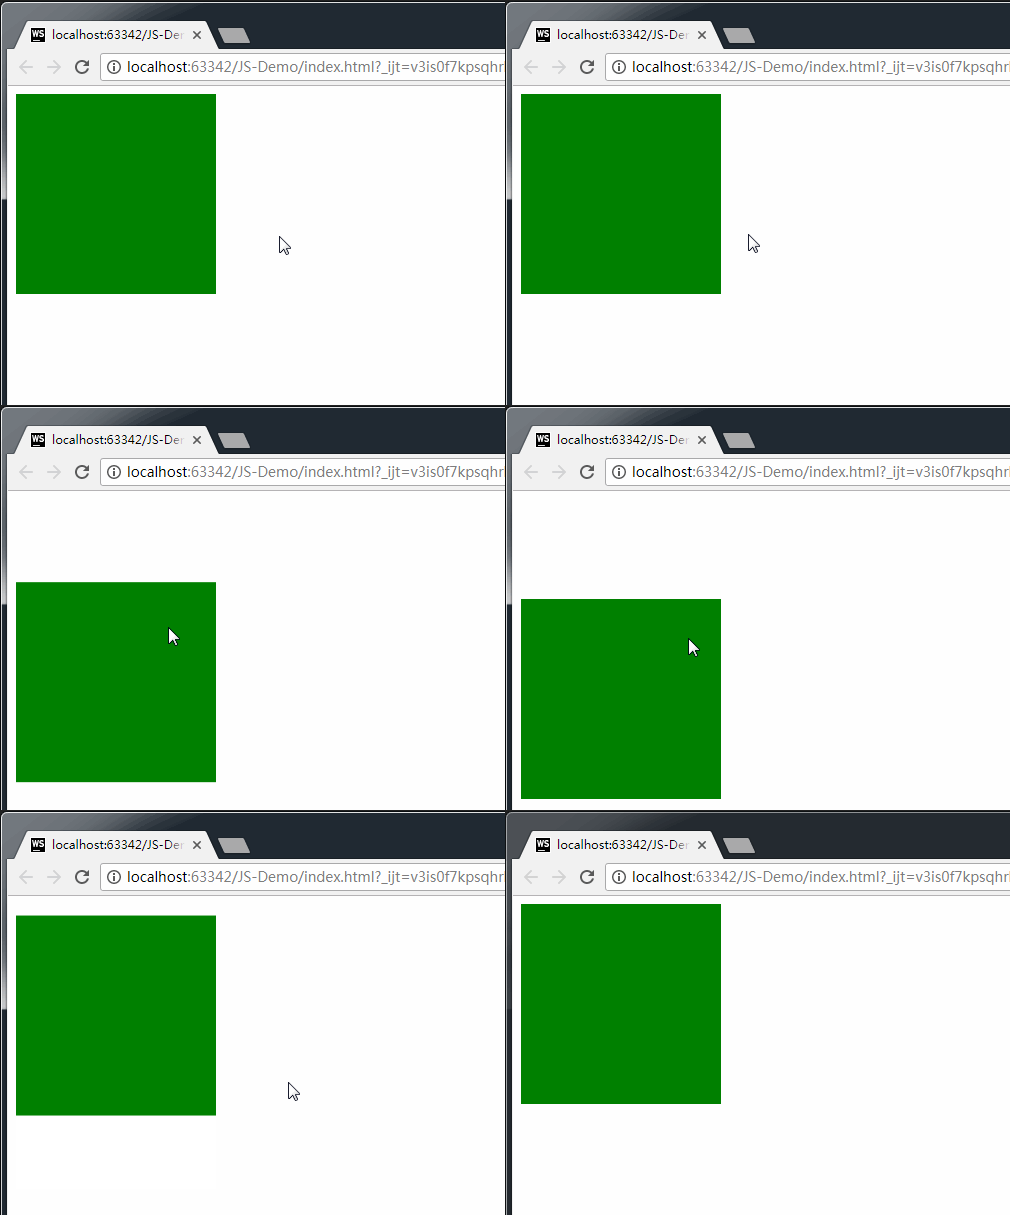
(2)translateY 举例:
<!DOCTYPE html>
<html>
<head lang="en">
    <meta charset="UTF-8">
    <title></title>
    <style>
        .box {
            width: 200px;
            height: 200px;
            background: green;
            transition: all 1s;
        }

        .box:hover {
            transform: translateY(100px);
        }
    </style>
</head>
<body>
<div class="box">

</div>
</body>
</html>
效果:
(3)translateZ 举例:
<!DOCTYPE html>
<html>
<head lang="en">
    <meta charset="UTF-8">
    <title></title>
    <style>
        body {
            /* 给box的父元素加透视效果*/
            perspective: 1000px;
        }

        .box {
            width: 250px;
            height: 250px;
            background: green;
            transition: all 1s;
            margin: 200px auto
        }

        .box:hover {
            /* translateZ必须配合透视来使用*/
            transform: translateZ(400px);
        }
    </style>
</head>
<body>
<div class="box">

</div>
</body>
</html>
效果:
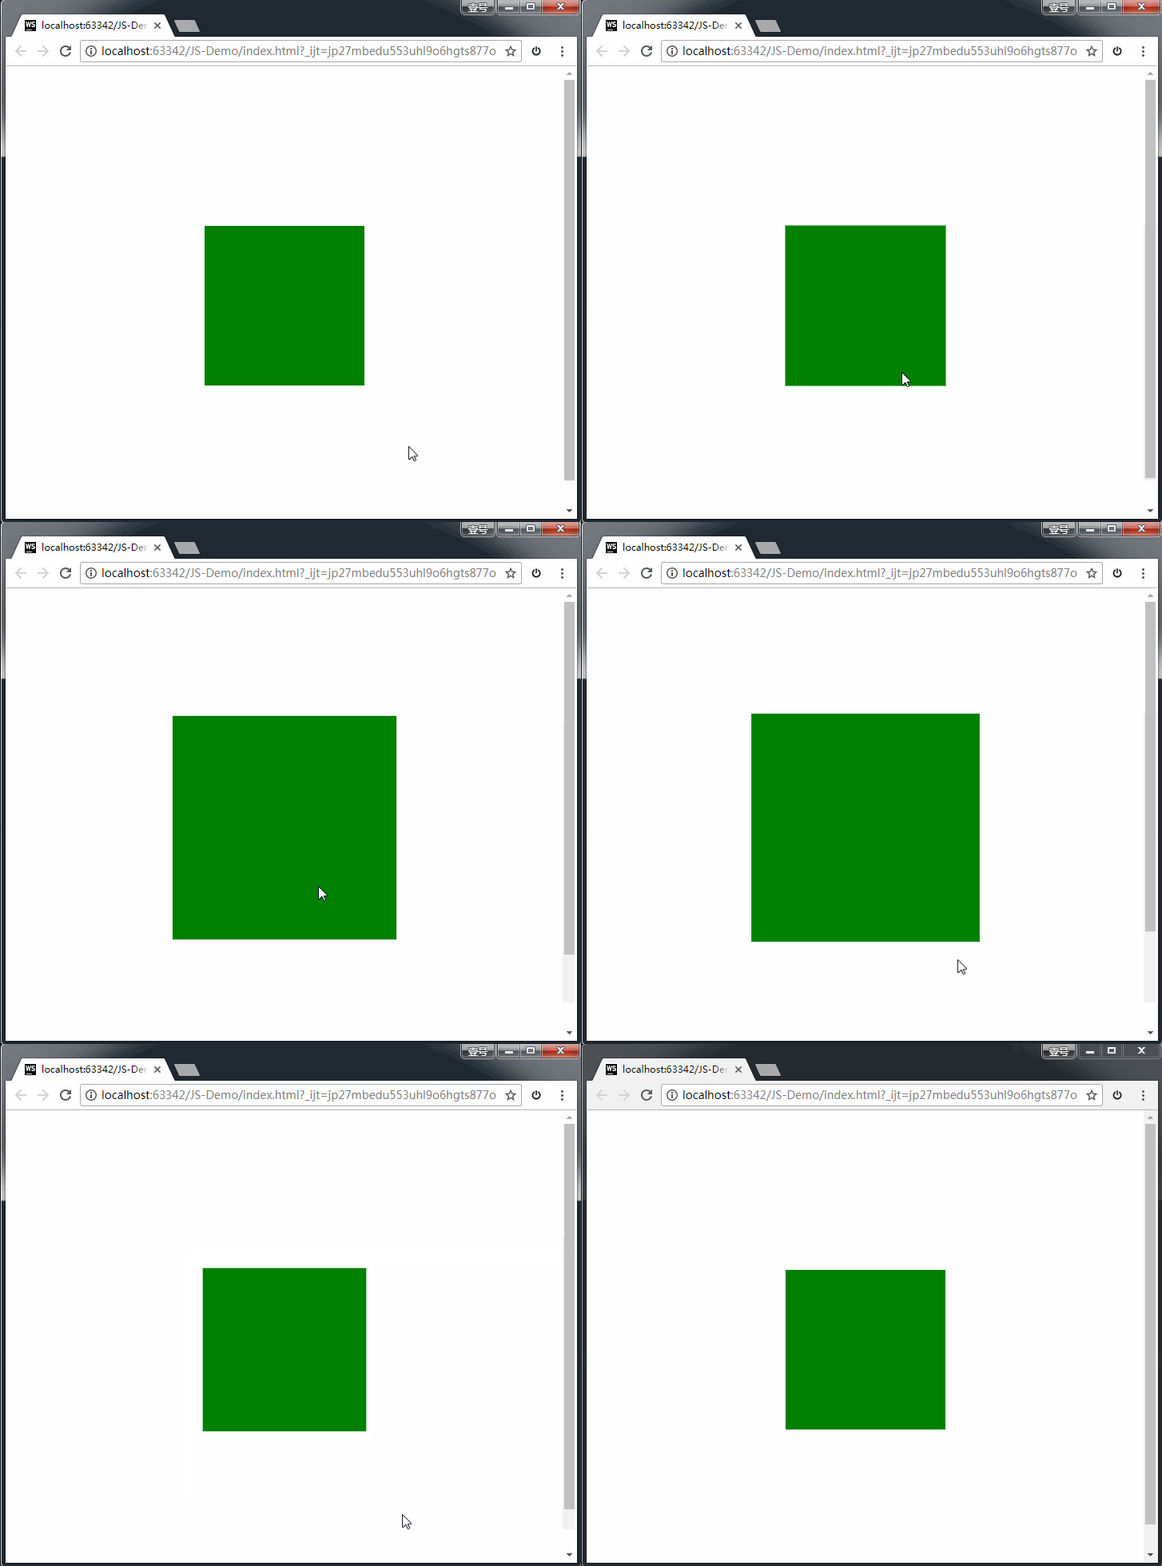
上方代码中,如果不加透视属性,是看不到translateZ的效果的。
3、透视:perspective
电脑显示屏是一个 2D 平面,图像之所以具有立体感(3D效果),其实只是一种视觉呈现,通过透视可以实现此目的。
透视可以将一个2D平面,在转换的过程当中,呈现3D效果。但仅仅只是视觉呈现出3d 效果,并不是正真的3d。
格式有两种写法:
- 作为一个属性,设置给父元素,作用于所有3D转换的子元素
- 作为 transform 属性的一个值,做用于元素自身。
4、3D呈现(transform-style)
3D元素构建是指某个图形是由多个元素构成的,可以给这些元素的父元素设置transform-style: preserve-3d来使其变成一个真正的3D图形。属性值可以如下:
transform-style: preserve-3d;     //让 子盒子 位于三维空间里

	transform-style: flat;            //让子盒子位于此元素所在的平面内(子盒子被扁平化)
**案例:**立方体
<!DOCTYPE html>
<html>
<head lang="en">
    <meta charset="UTF-8">
    <title></title>
    <style>
        .box {
            width: 250px;
            height: 250px;
            border: 1px dashed red;
            margin: 100px auto;
            position: relative;
            border-radius: 50%;

            /* 让子盒子保持3d效果*/

            transform-style: preserve-3d;

            /*transform:rotateX(30deg) rotateY(-30deg);*/

            animation: gun 8s linear infinite;
        }

        .box > div {
            width: 100%;
            height: 100%;
            position: absolute;
            text-align: center;
            line-height: 250px;
            font-size: 60px;
            color: #daa520;
        }

        .left {
            background-color: rgba(255, 0, 0, 0.3);
            /* 变换中心*/
            transform-origin: left;
            /* 变换*/
            transform: rotateY(90deg) translateX(-125px);
        }

        .right {
            background: rgba(0, 0, 255, 0.3);
            transform-origin: right;
            /* 变换*/
            transform: rotateY(90deg) translateX(125px);
        }

        .forward {
            background: rgba(255, 255, 0, 0.3);
            transform: translateZ(125px);
        }

        .back {
            background: rgba(0, 255, 255, 0.3);
            transform: translateZ(-125px);
        }

        .up {
            background: rgba(255, 0, 255, 0.3);
            transform: rotateX(90deg) translateZ(125px);
        }

        .down {
            background: rgba(99, 66, 33, 0.3);
            transform: rotateX(-90deg) translateZ(125px);
        }

        @keyframes gun {
            0% {
                transform: rotateX(0deg) rotateY(0deg);
            }

            100% {
                transform: rotateX(360deg) rotateY(360deg);
            }
        }
    </style>
</head>
<body>
<div class="box">
    <div class="up">上</div>
    <div class="down">下</div>
    <div class="left">左</div>
    <div class="right">右</div>
    <div class="forward">前</div>
    <div class="back">后</div>
</div>
</body>
</html>
动画
动画是CSS3中具有颠覆性的特征,可通过设置多个节点 来精确控制一个或一组动画,常用来实现复杂的动画效果。
1、定义动画的步骤
(1)通过@keyframes定义动画;
(2)将这段动画通过百分比,分割成多个节点;然后各节点中分别定义各属性;
(3)在指定元素里,通过 animation 属性调用动画。
之前,我们在 js 中定义一个函数的时候,是先定义,再调用:
js 定义函数:
        function fun(){ 函数体 }

     调用:
     	fun();
同样,我们在 CSS3 中定义动画的时候,也是先定义,再调用:
定义动画:
        @keyframes 动画名{
            from{ 初始状态 }
            to{ 结束状态 }
        }

     调用:
      animation: 动画名称 持续时间;
其中,animation属性的格式如下:
animation: 定义的动画名称 持续时间  执行次数  是否反向  运动曲线 延迟执行。(infinite 表示无限次)

            animation: move1 1s  alternate linear 3;

            animation: move2 4s;
定义动画的格式举例:
<!DOCTYPE html>
<html>
<head lang="en">
    <meta charset="UTF-8">
    <title></title>
    <style>
        .box {
            width: 100px;
            height: 100px;
            margin: 100px;
            background-color: red;

            /* 调用动画*/
            /* animation: 动画名称 持续时间  执行次数  是否反向  运动曲线 延迟执行。infinite 表示无限次*/
            /*animation: move 1s  alternate linear 3;*/
            animation: move2 4s;
        }

        /* 方式一:定义一组动画*/
        @keyframes move1 {
            from {
                transform: translateX(0px) rotate(0deg);
            }
            to {
                transform: translateX(500px) rotate(555deg);
            }
        }

        /* 方式二:定义多组动画*/
        @keyframes move2 {
            0% {
                transform: translateX(0px) translateY(0px);
                background-color: red;
                border-radius: 0;
            }

            25% {
                transform: translateX(500px) translateY(0px);

            }

            /*动画执行到 50% 的时候,背景色变成绿色,形状变成圆形*/
            50% {
                /* 虽然两个方向都有translate,但其实只是Y轴上移动了200px。
                因为X轴的500px是相对最开始的原点来说的。可以理解成此时的 translateX 是保存了之前的位移 */
                transform: translateX(500px) translateY(200px);
                background-color: green;
                border-radius: 50%;
            }

            75% {
                transform: translateX(0px) translateY(200px);
            }

            /*动画执行到 100% 的时候,背景色还原为红色,形状还原为正方形*/
            100% {
                /*坐标归零,表示回到原点。*/
                transform: translateX(0px) translateY(0px);
                background-color: red;
                border-radius: 0;
            }
        }
    </style>
</head>
<body>
<div class="box">

</div>
</body>
</html>
注意好好看代码中的注释。
效果如下:
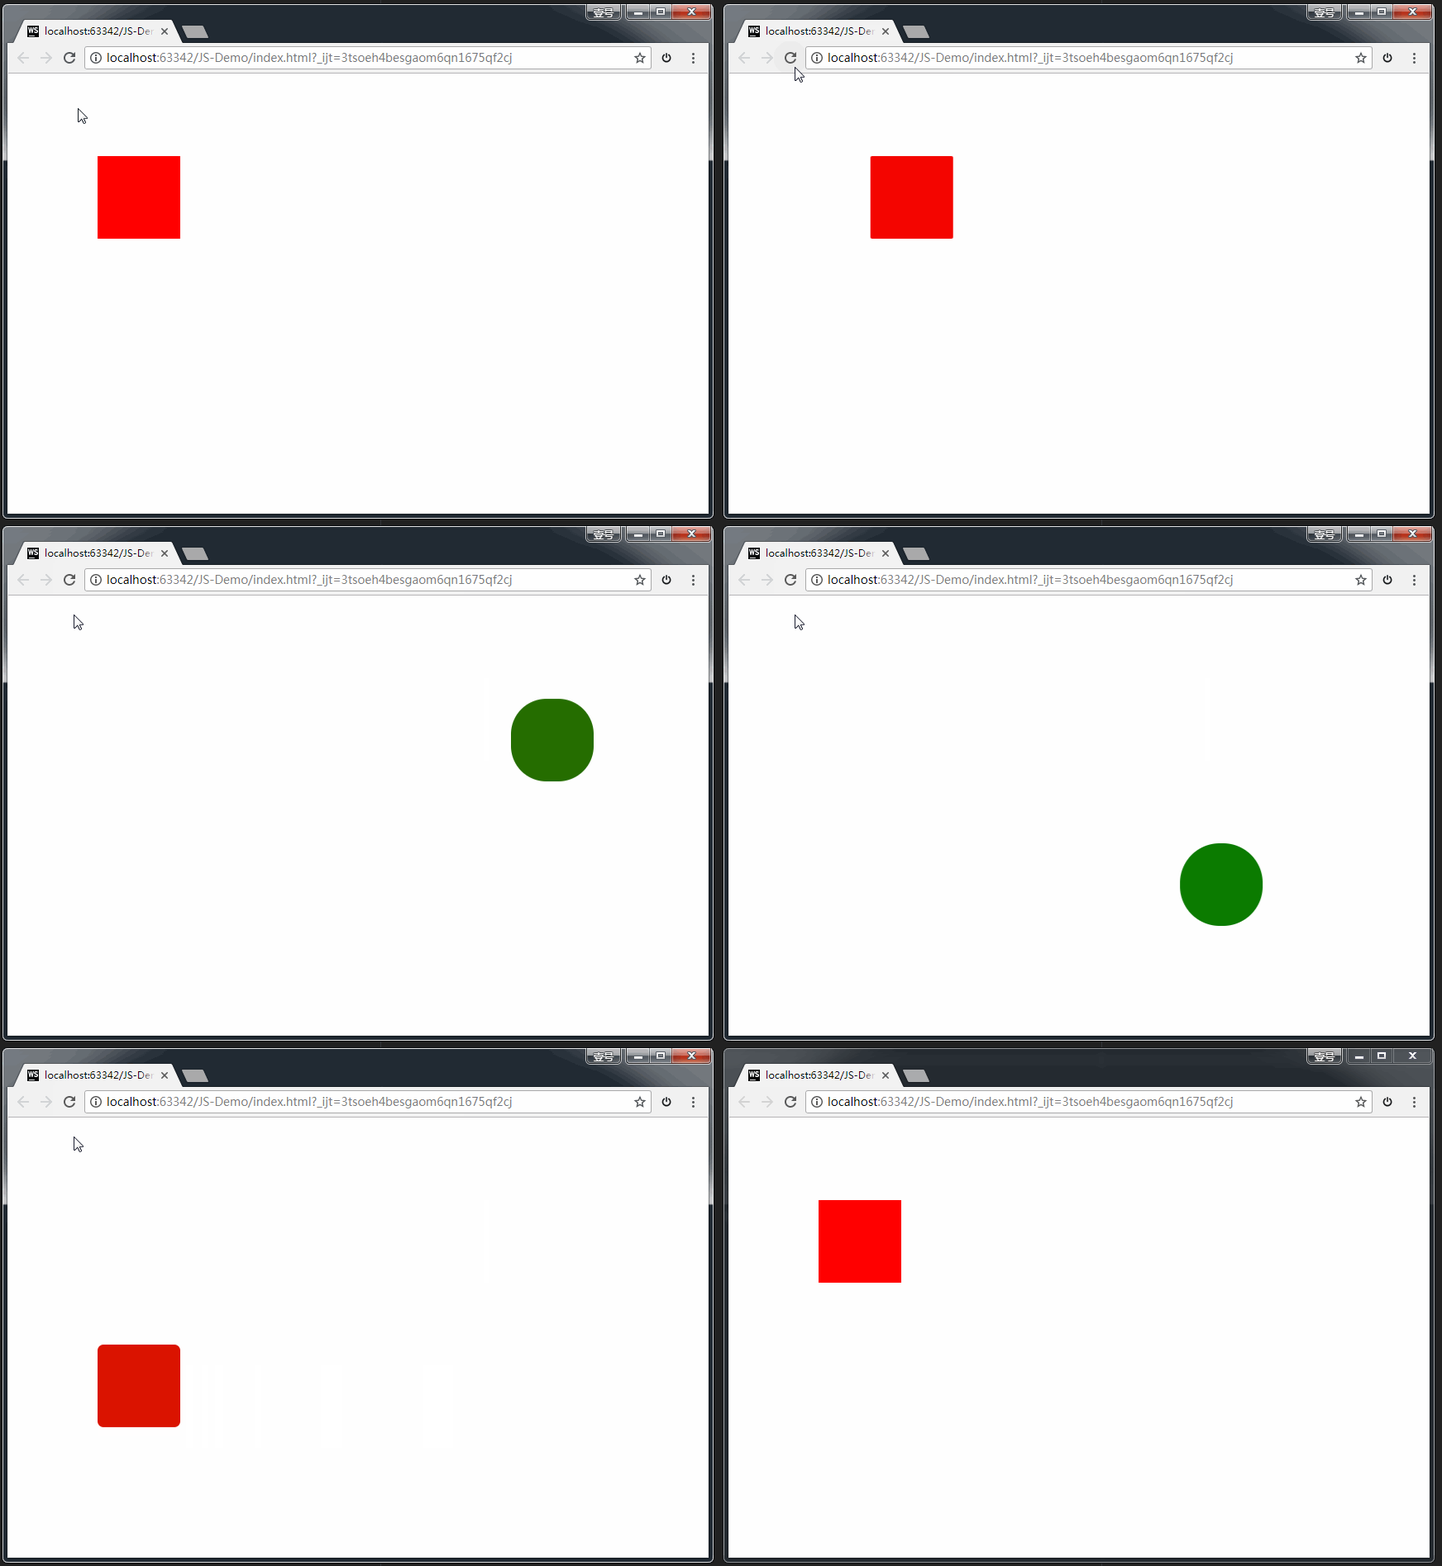
2、动画属性
我们刚刚在调用动画时,animation属性的格式如下:
animation属性的格式如下:
animation: 定义的动画名称  持续时间  执行次数  是否反向  运动曲线 延迟执行。(infinite 表示无限次)

            animation: move1 1s  alternate linear 3;

            animation: move2 4s;
可以看出,这里的 animation 是综合属性,接下来,我们把这个综合属性拆分看看。
(1)动画名称:
animation-name: move;(2)执行一次动画的持续时间:
animation-duration: 4s;备注:上面两个属性,是必选项,且顺序固定。
(3)动画的执行次数:
animation-iteration-count: 1; //iteration的含义表示迭代属性值infinite表示无数次。
(3)动画的方向:
animation-direction: alternate;属性值:normal 正常,alternate 反向。
(4)动画延迟执行:
animation-delay: 1s;(5)设置动画结束时,盒子的状态:
animation-fill-mode: forwards;属性值: forwards:保持动画结束后的状态(默认), backwards:动画结束后回到最初的状态。
(6)运动曲线:
animation-timing-function: ease-in;属性值可以是:linear ease-in-out steps()等。
注意,如果把属性值写成**steps(),则表示动画不是连续执行**,而是间断地分成几步执行。我们接下来专门讲一下属性值 steps()。
steps()的效果
我们还是拿上面的例子来举例,如果在调用动画时,我们写成:
animation: move2 4s steps(2);效果如下:
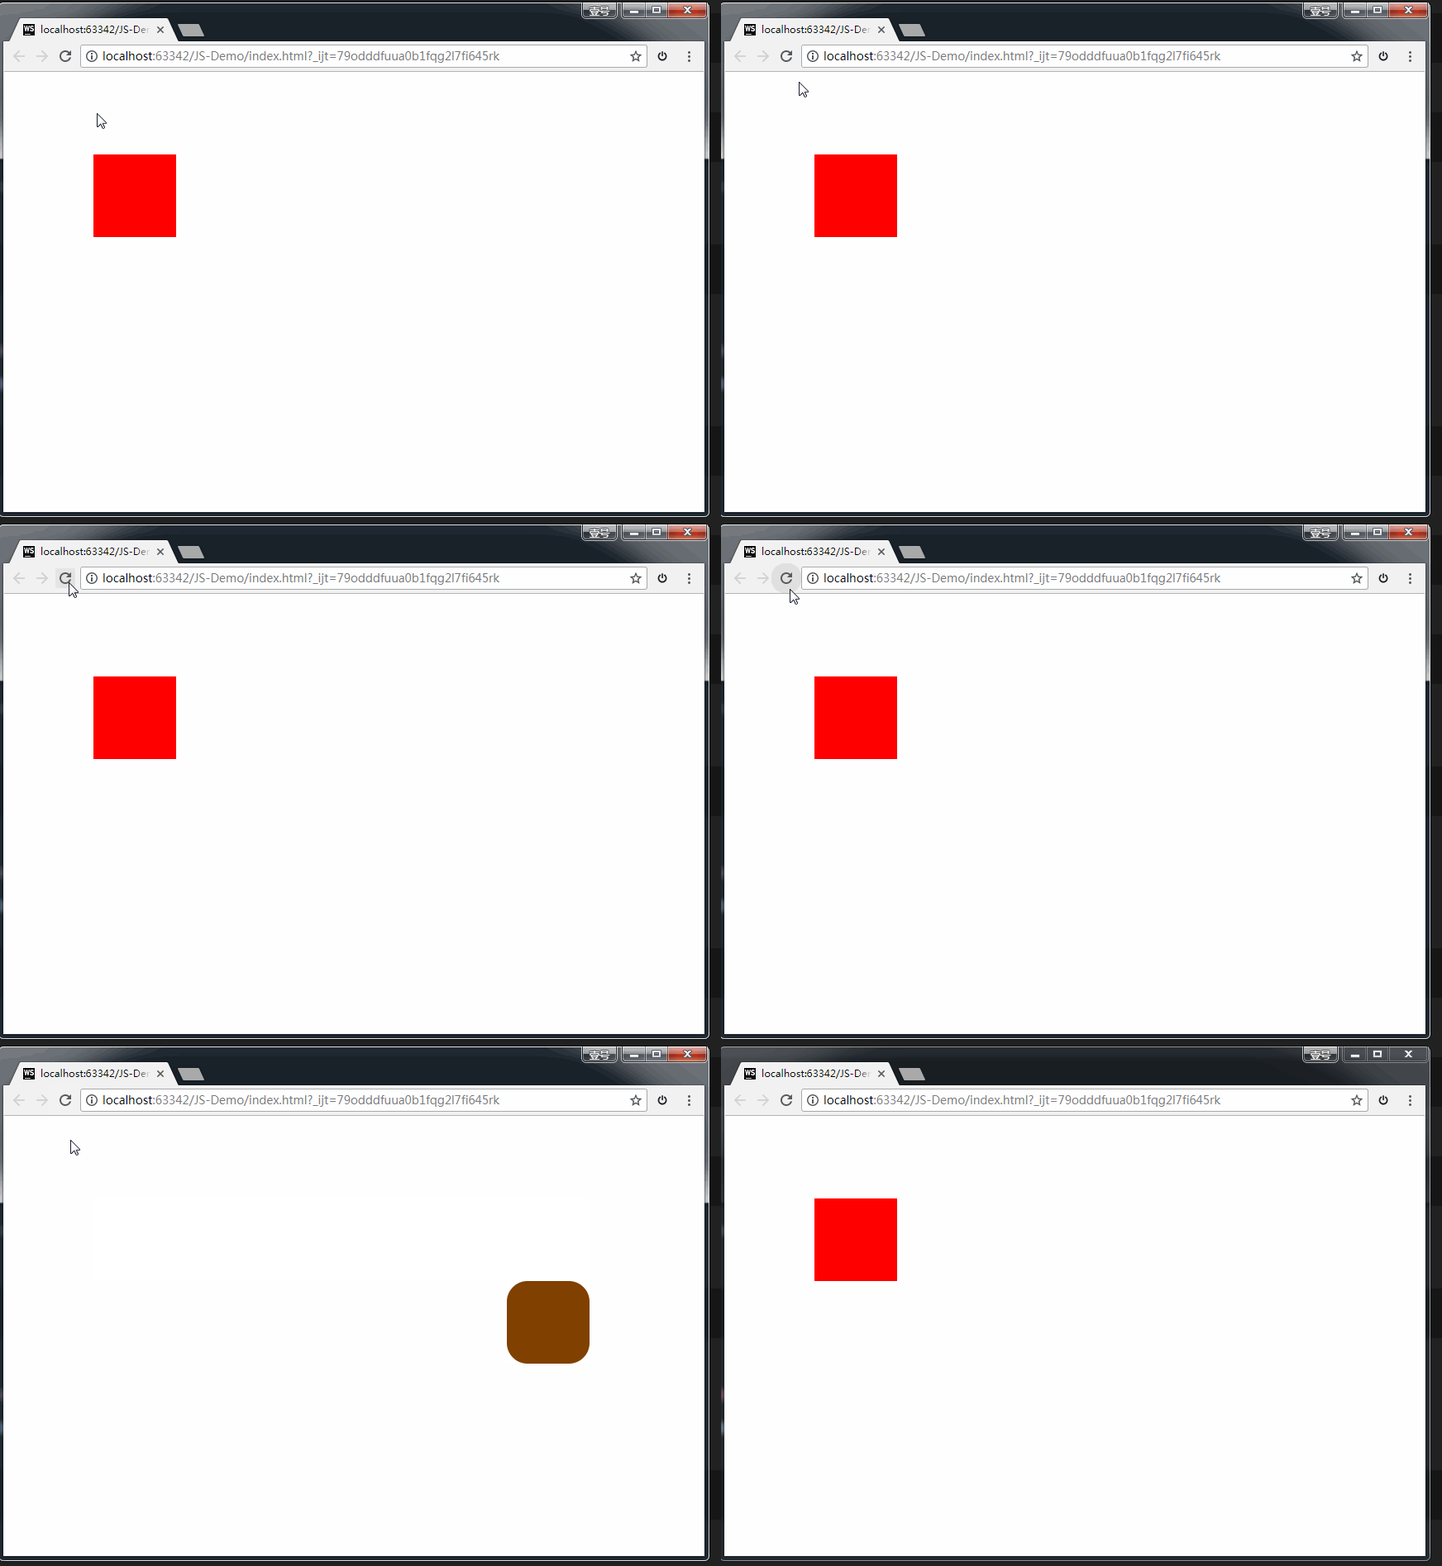
有了属性值 steps(),我们就可以作出很多不连续地动画效果。比如时钟;再比如,通过多张静态的鱼,作出一张游动的鱼。
**step()举例:**时钟的简易模型
<!DOCTYPE html>
<html>
<head lang="en">
    <meta charset="UTF-8">
    <title></title>
    <style>
        div {
            width: 3px;
            height: 200px;
            background-color: #000;
            margin: 100px auto;
            transform-origin: center bottom;    /* 旋转的中心点是底部 */
            animation: myClock 60s steps(60) infinite;
        }

        @keyframes myClock {
            0% {
                transform: rotate(0deg);
            }

            100% {
                transform: rotate(360deg);
            }
        }
    </style>
</head>
<body>
<div></div>
</body>
</html>
上方代码,我们通过一个黑色的长条div,旋转360度,耗时60s,分成60步完成。即可实现。
效果如下:
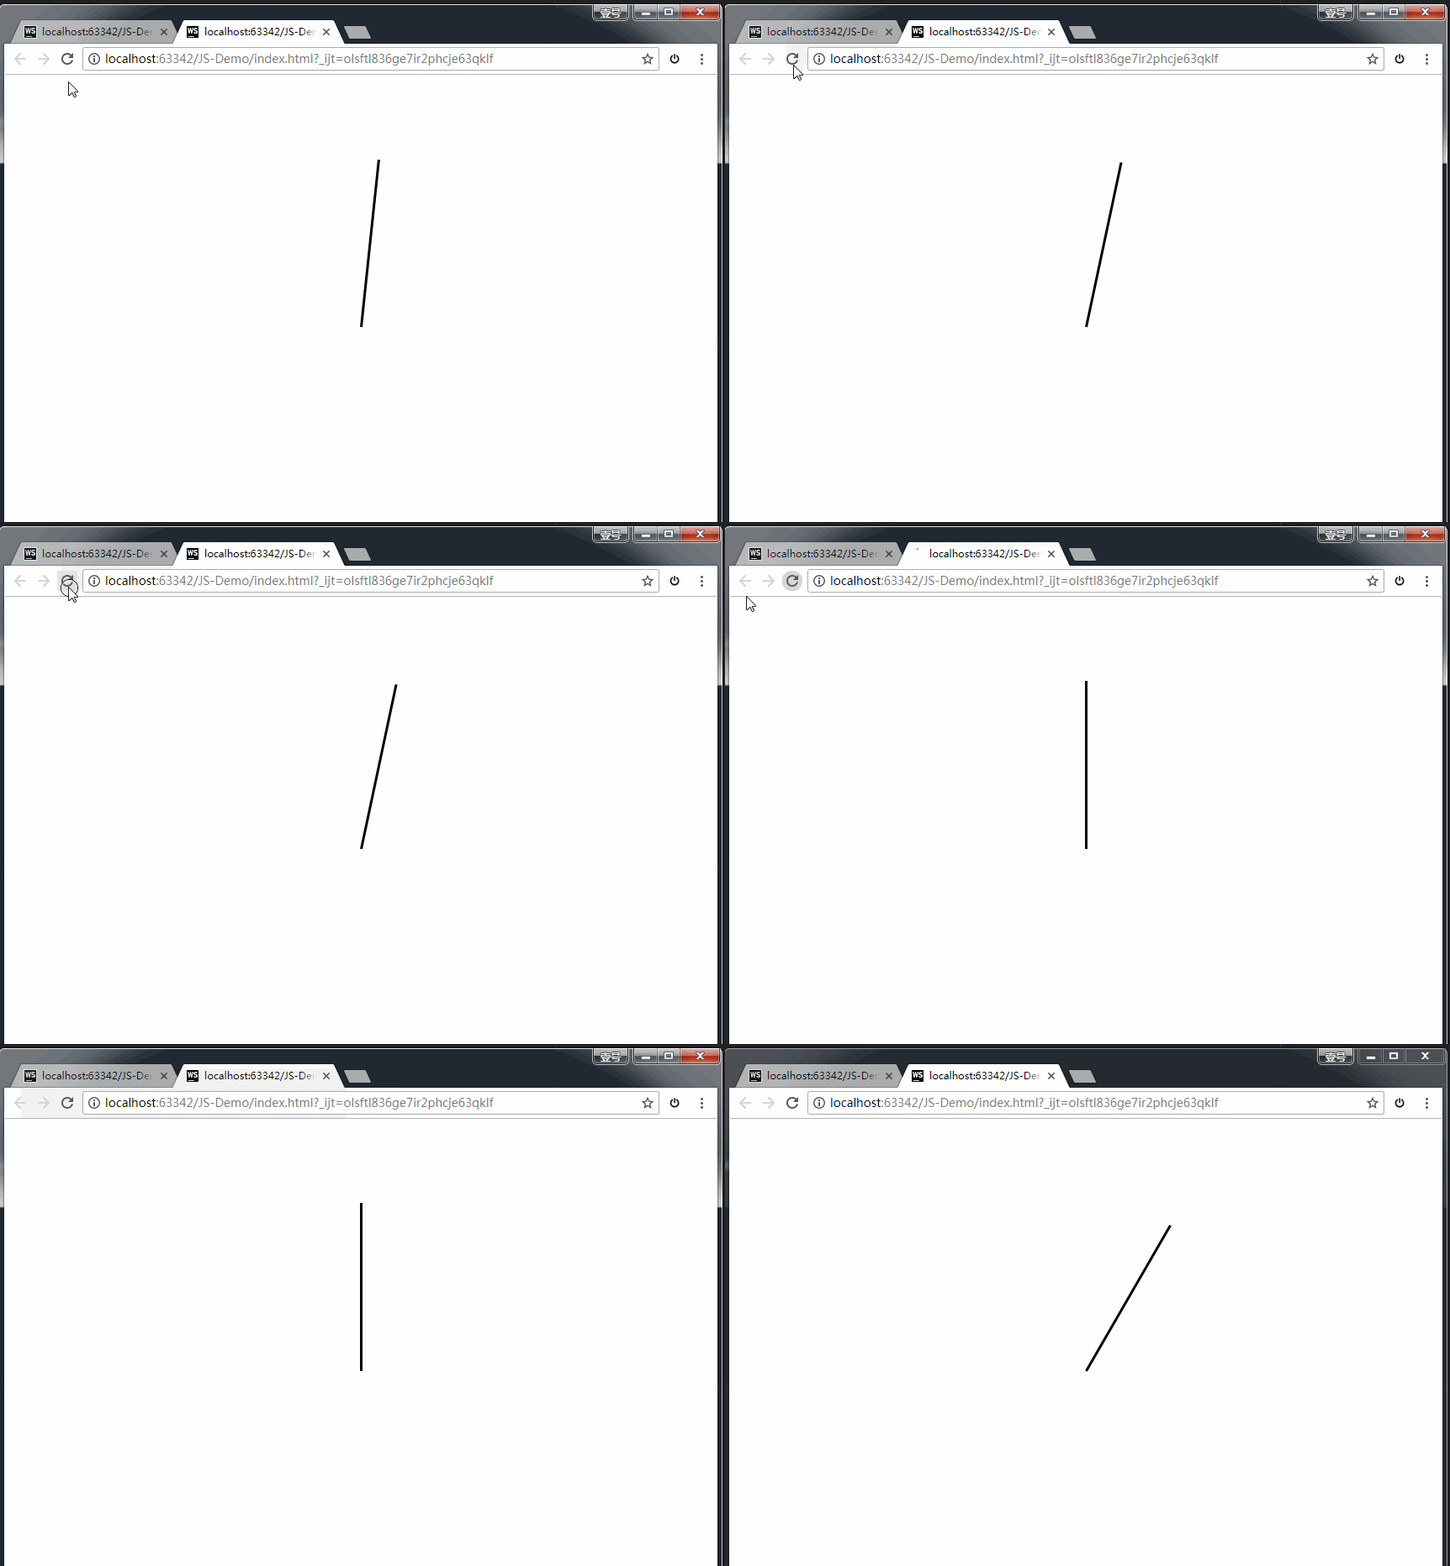
动画举例:摆动的鱼
现在,我们要做下面这种效果:
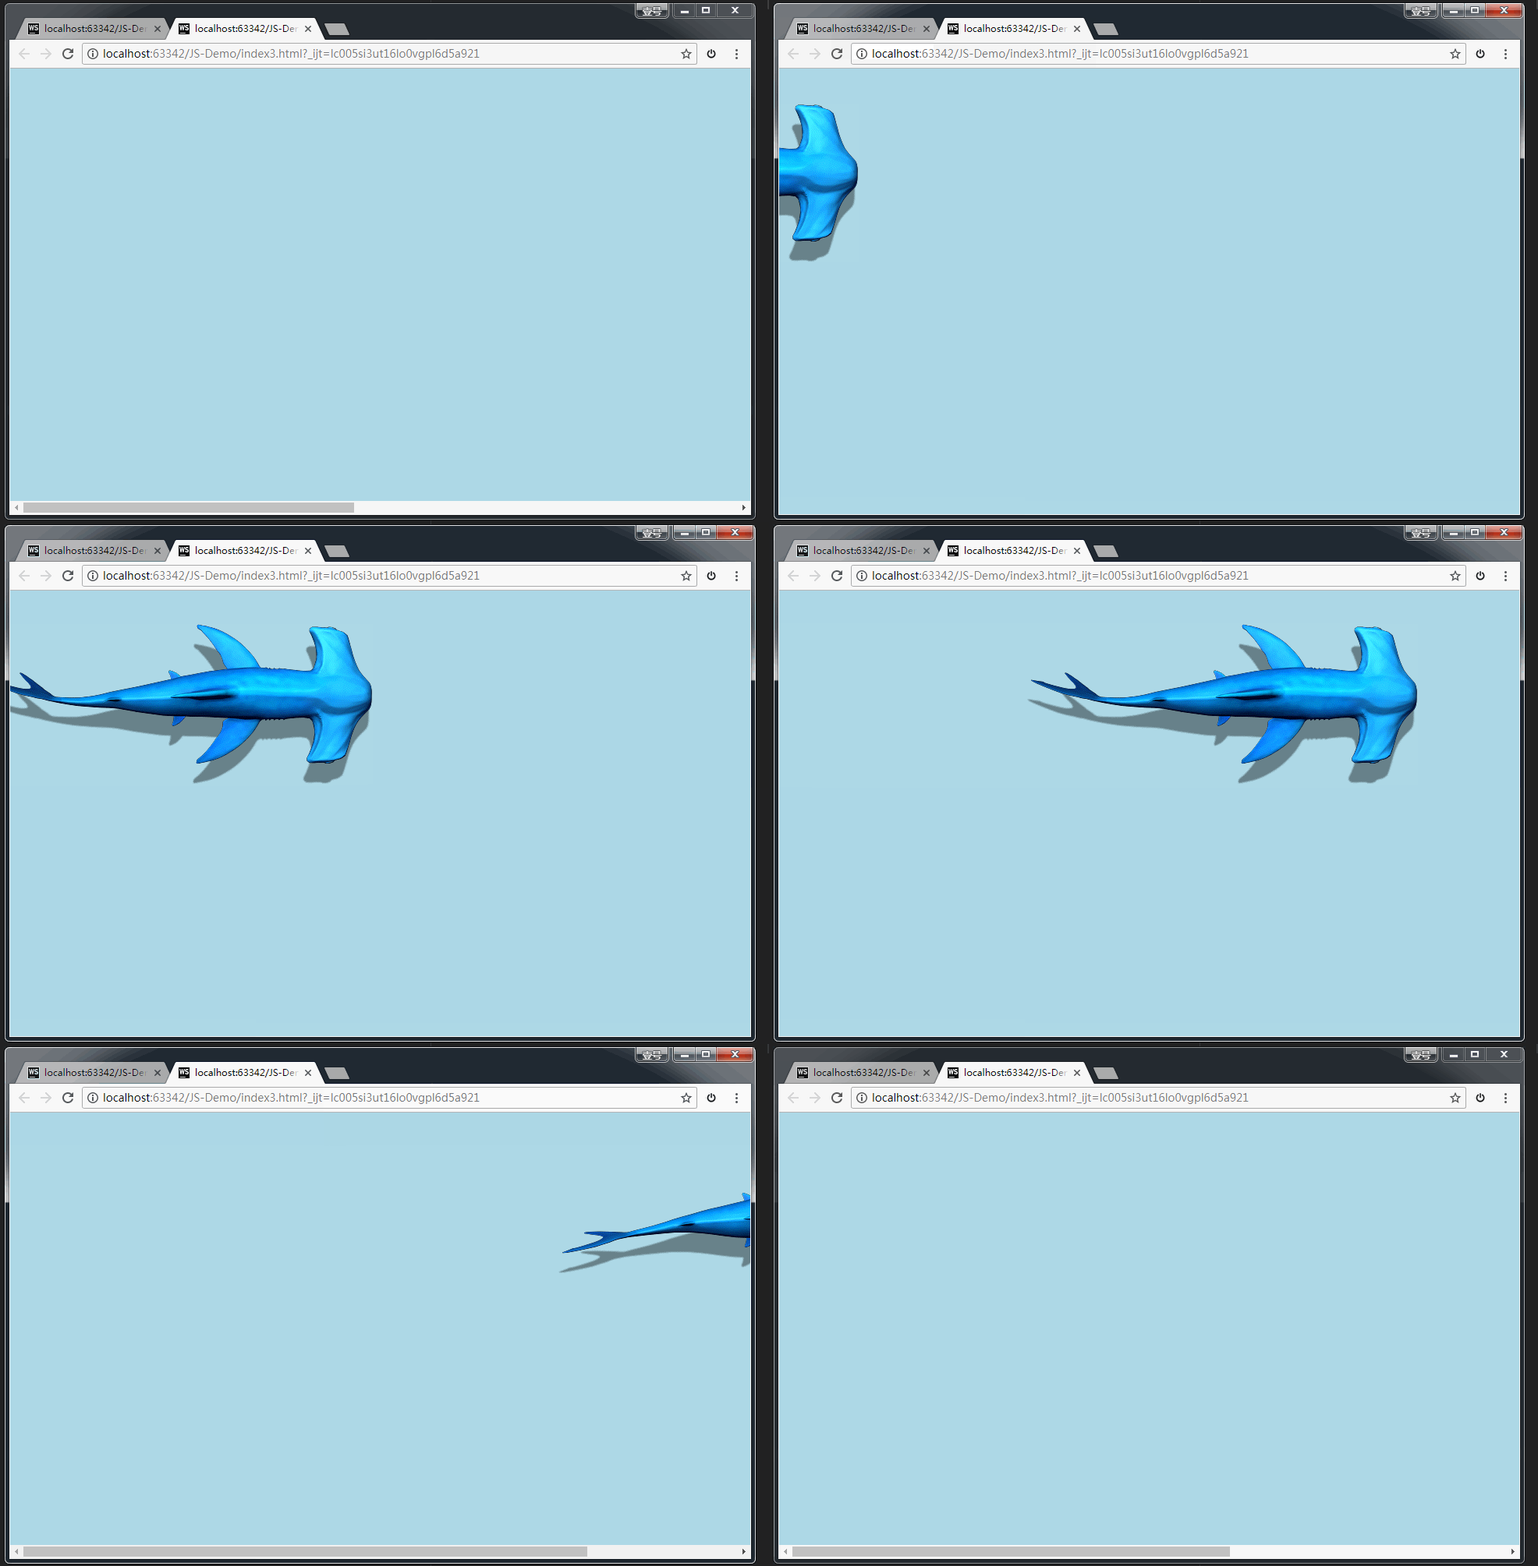
PS:图片的url是http://img.smyhvae.com/20180209_1245.gif">http://img.smyhvae.com/20180209_1245.gif,图片较大,如无法观看,可在浏览器中单独打开。
为了作出上面这种效果,要分成两步。
(1)第一步:让鱼在原地摆动
鱼在原地摆动并不是一张 gif动图,她其实是由很多张静态图间隔地播放,一秒钟播放完毕,就可以了:

上面这张大图的尺寸是:宽 509 px、高 2160 px。
我们可以理解成,每一帧的尺寸是:宽 509 px、高 270 px。270 * 8 = 2160。让上面这张大图,在一秒内从 0px 的位置往上移动2160px,分成8步来移动。就可以实现了。
代码是:
<!DOCTYPE html>
<html>
<head lang="en">
    <meta charset="UTF-8">
    <title></title>
    <style>
        .shark {
            width: 509px;
            height: 270px; /*盒子的宽高是一帧的宽高*/
            border: 1px solid #000;
            margin: 100px auto;
            background: url(images/shark.png) left top; /* 让图片一开始位于 0 px的位置 */
            animation: sharkRun 1s steps(8) infinite; /* 一秒之内,从顶部移动到底部,分八帧, */
        }

        @keyframes sharkRun {
            0% {
            }

            /* 270 * 8 = 2160 */
            100% {
                background-position: left -2160px; /* 动画结束时,让图片位于最底部 */
            }
        }
    </style>
</head>
<body>
<div class="sharkBox">
    <div class="shark"></div>
</div>

</div>
</body>
</html>
效果如下:
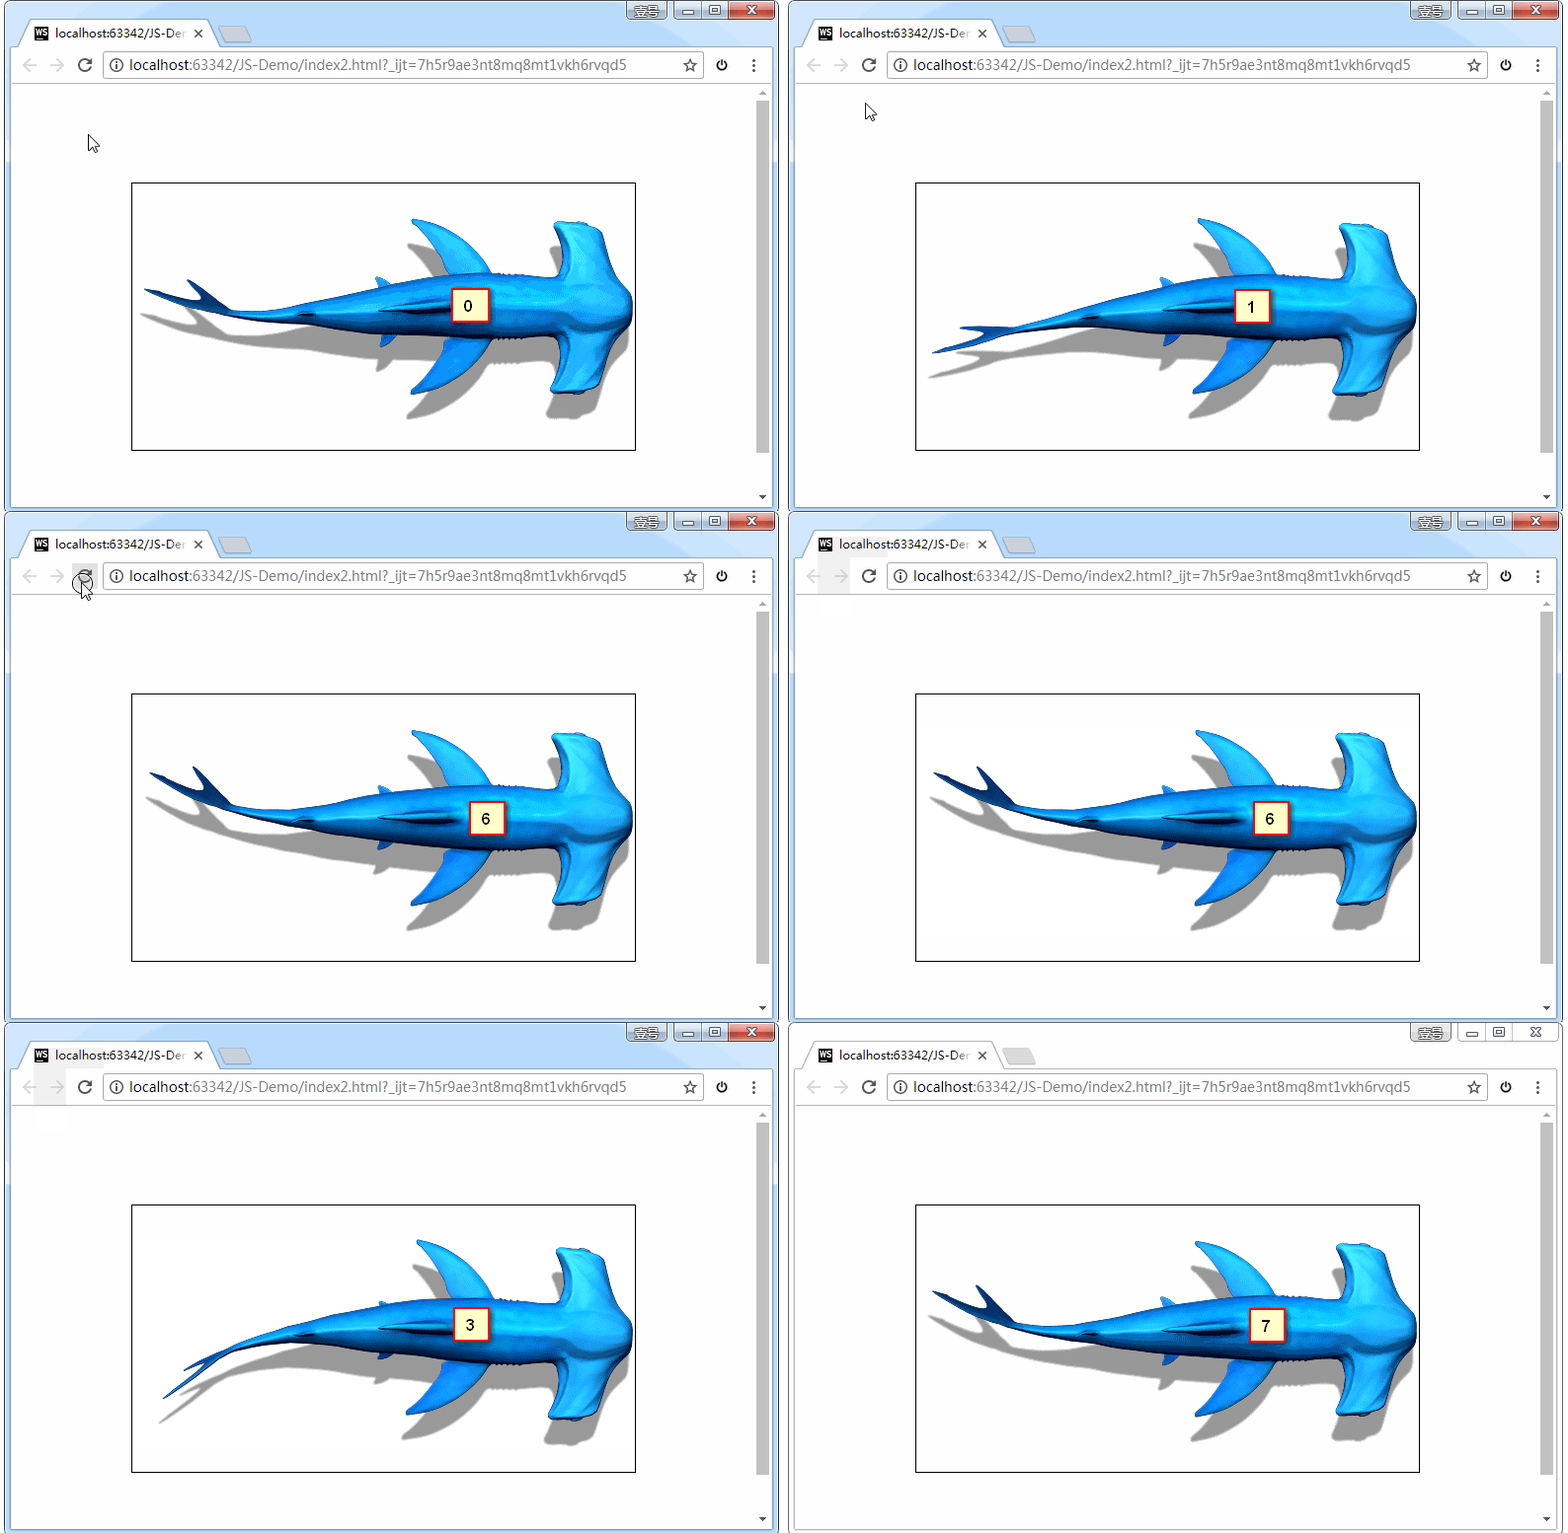
我们不妨把上面的动画的持续时间从1s改成 8s,就可以看到动画的慢镜头:
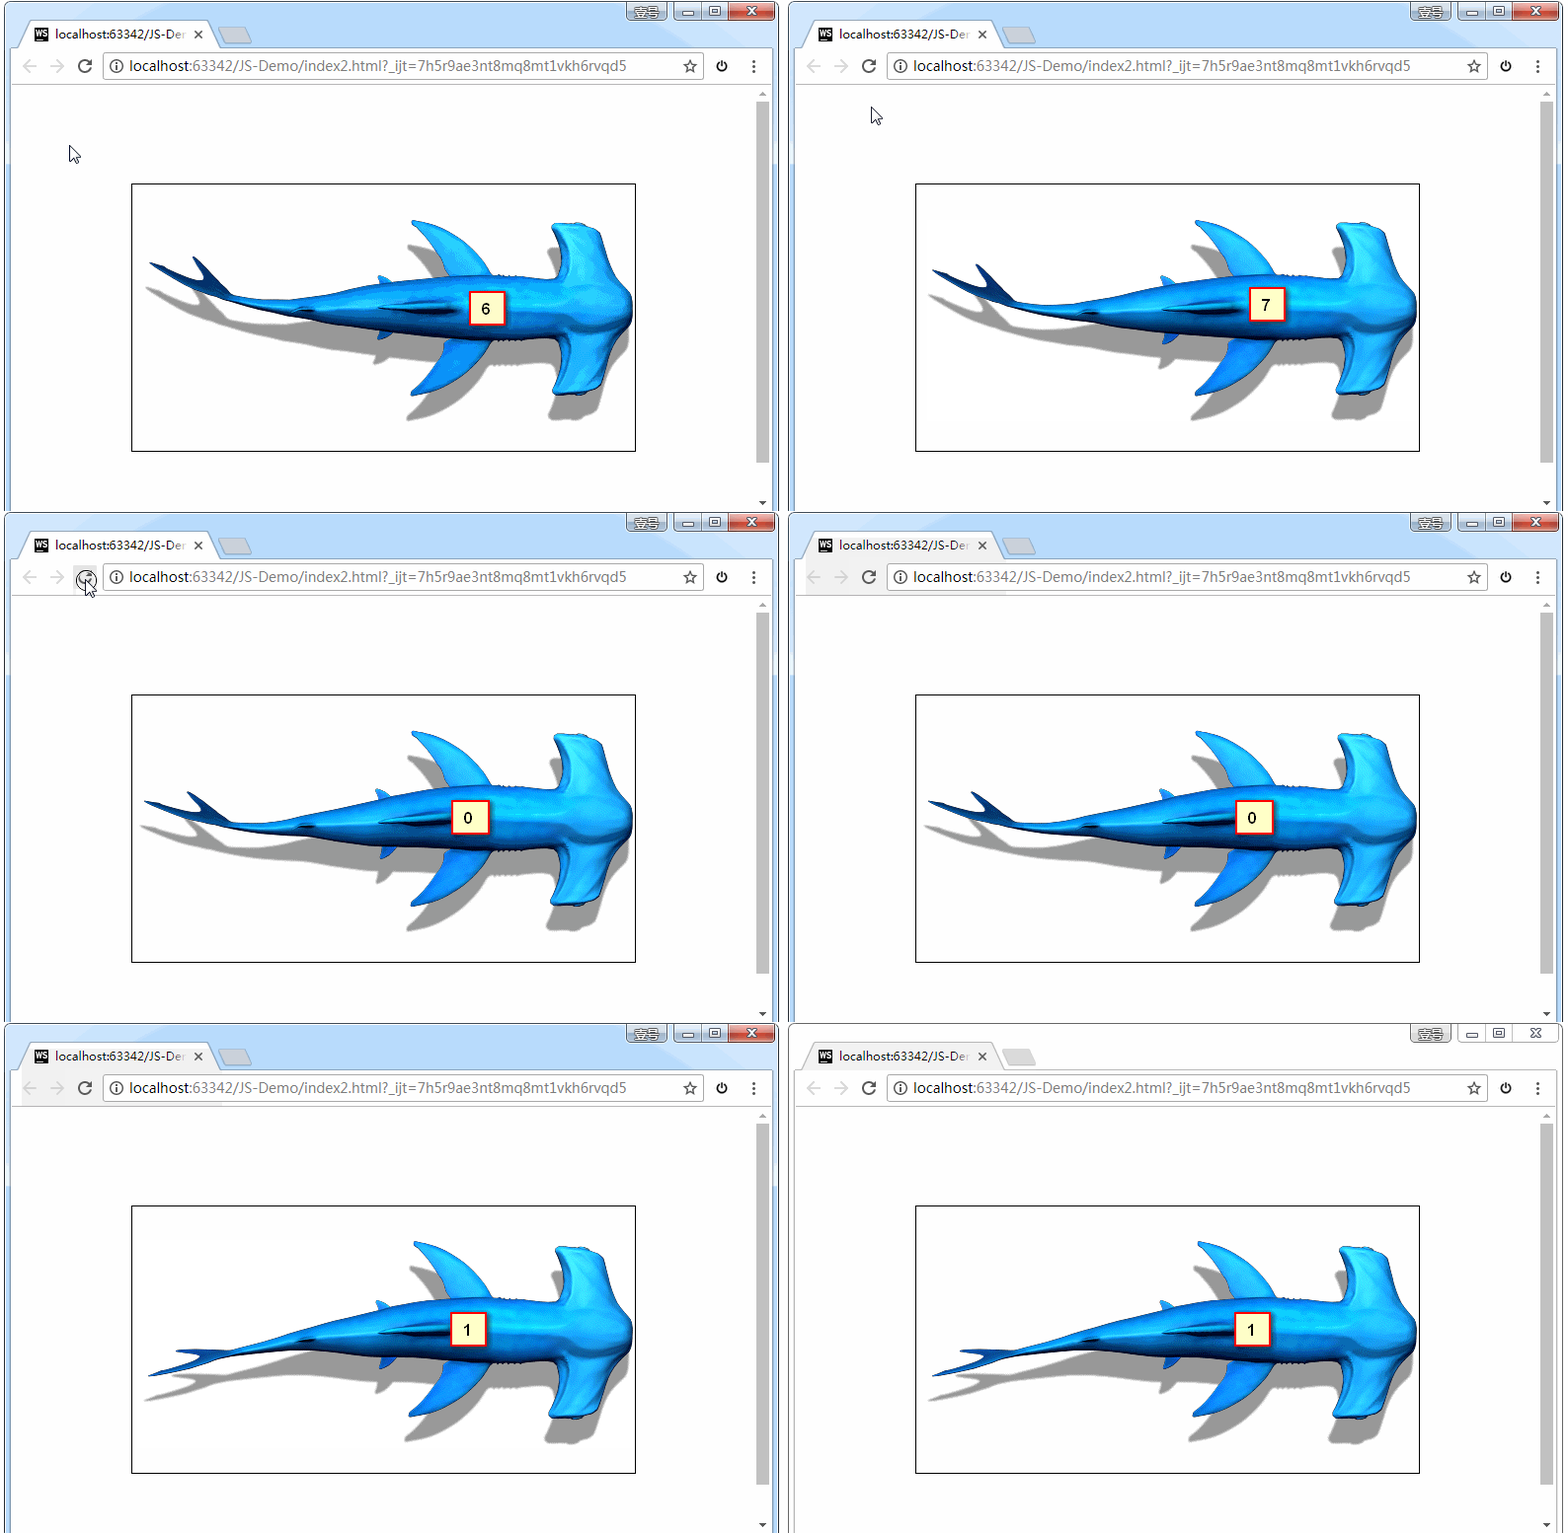
这下,你应该恍然大悟了。
(2)第二步:让鱼所在的盒子向前移动。
实现的原理也很简单,我们在上一步中已经让shark这个盒子实现了原地摇摆,现在,让 shark 所在的父盒子 sharkBox向前移动,即可。完整版代码是:
<!DOCTYPE html>
<html>
<head lang="en">
    <meta charset="UTF-8">
    <title></title>
    <style>
        .shark {
            width: 509px;
            height: 270px; /* 盒子的宽高是一帧的宽高 */
            border: 1px solid #000;
            margin: 100px auto;
            background: url(images/shark.png) left top; /* 让图片一开始位于 0 px的位置 */
            animation: sharkRun 1s steps(8) infinite; /* 一秒之内,从顶部移动到底部,分八帧 */
        }

        /* 鱼所在的父盒子 */
        .sharkBox {
            width: 509px;
            height: 270px;
            animation: sharkBoxRun 20s linear infinite;
        }

        @keyframes sharkRun {
            0% {
            }

            /* 270 * 8 = 2160 */
            100% {
                background-position: left -2160px; /* 动画结束时,让图片位于最底部 */
            }
        }

        @keyframes sharkBoxRun {
            0% {
                transform: translateX(-600px);
            }

            100% {
                transform: translateX(3000px);
            }
        }

    </style>
</head>
<body>
<div class="sharkBox">
    <div class="shark"></div>
</div>

</div>
</body>
</html>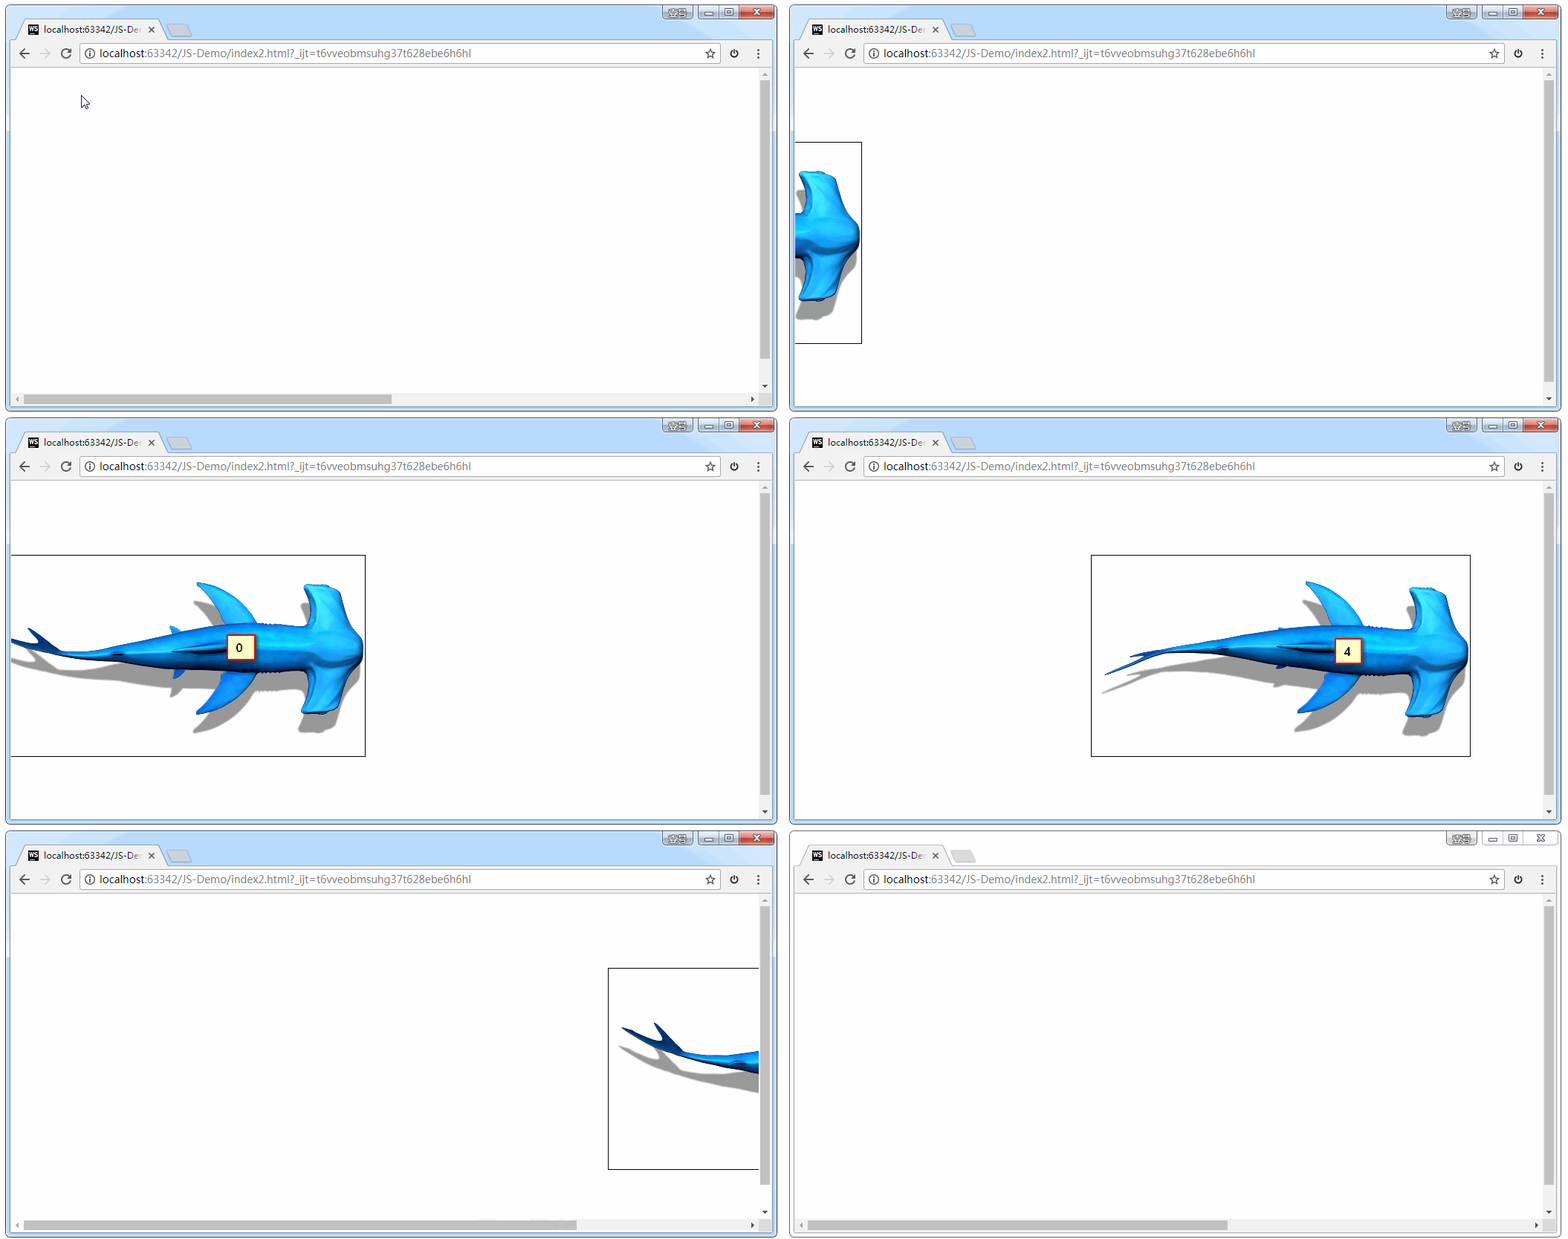
大功告成。
工程文件如下:
- 2018-02-09-fishes.rar
多列布局
类似报纸或杂志中的排版方式,上要用以控制大篇幅文本。用得不多。
格式举例:
.wrapper{
        /* 分成几列 */
        -webkit-column-count: 3;

        /* 每列之间,用分割线隔开 */
        -webkit-column-rule: 1px dashed red;

        /* 设置列之间的间距 */
        -webkit-column-gap: 60px;

        /* 设置每一列的宽度 */
        /* -webkit-column-width: 400px; */

        /*-webkit- -moz-  -ms- -o-*/
    }

    h4{
        /* 设置跨列:让h4这标题位于整个文flex-wrap本的标题,而不是处在某一列之中*/
        -webkit-column-span: all;
        text-align: center;
    }
备注:上面这几个属性涉及到兼容性问题,需要加私有前缀。
flex:伸缩布局
CSS3在布局方面做了非常大的改进,使得我们对块级元素的布局排列变得十分灵活,适应性非常强。其强大的伸缩性,在响应式开中可以发挥极大的作用。

如上图所示,有几个概念需要了解一下:
- 主轴:Flex容器的主轴主要用来配置Flex项目,默认是水平方向,从左向右。
- 侧轴:与主轴垂直的轴称作侧轴,默认是垂直方向,从上往下。
PS:主轴和侧轴并不是固定不变的,通过flex-direction可以互换。
设置伸缩布局的步骤
(1)指定一个盒子为伸缩布局:
display: flex;(2)设置 flex-direction 属性来调整此盒的子元素的布局方式。默认的方向是水平方向。
(3)可互换主侧轴,也可改变主侧轴的方向。
各属性详解
**1、flex-direction属性:**设置主轴方向。
flex-direction: row;设置主轴方向,默认是水平方向。属性值可以是:
-
row水平方向(默认值) -
reverse-row反转 -
column垂直方向 -
reverse-column反转列
代码演示:
<!DOCTYPE html>
<html>
<head lang="en">
    <meta charset="UTF-8">
    <title></title>
    <style>
        *{
            margin: 0;
            padding: 0;
            list-style: none;
        }
       body{
           background-color: #eee;
           font-family: "Microsoft Yahei";
           font-size:22px;
       }

        h3{
            font-weight: normal;
        }
        section{
            width: 1000px;

            margin:40px auto;
        }

        ul{
            background-color: #fff;
            border: 1px solid #ccc;

        }

        ul li{
            width: 200px;
            height: 200px;
            background-color: pink;
            margin:10px;
        }
        section:nth-child(1) ul{
            overflow: hidden; /* 清除浮动 */
        }
        section:nth-child(1) ul li{
            float: left;
        }
        /* 设置伸缩盒子*/
        section:nth-child(2) ul{
            display: flex;
        }

        section:nth-child(3) ul{
            /* 设置伸缩布局*/
            display: flex;
            /* 设置主轴方向*/
            flex-direction: row;
        }

        section:nth-child(4) ul{
            /* 设置伸缩布局*/
            display: flex;
            /* 设置主轴方向 :水平翻转*/
            flex-direction: row-reverse;
        }

        section:nth-child(5) ul{
            /* 设置伸缩布局*/
            display: flex;
            /* 设置主轴方向 :垂直*/
            flex-direction: column;
        }

        section:nth-child(6) ul{
            /* 设置伸缩布局*/
            display: flex;
            /* 设置主轴方向 :垂直*/
            flex-direction: column-reverse;
        }
    </style>
</head>
<body>
    <section>
        <h3>传统布局</h3>
        <ul>
            <li>1</li>
            <li>2</li>
            <li>3</li>
        </ul>
    </section>

    <section>
        <h3>伸缩布局 display:flex</h3>
        <ul>
            <li>1</li>
            <li>2</li>
            <li>3</li>
        </ul>
    </section>

    <section>
        <h3>主轴方向 flex-direction:row</h3>
        <ul>
            <li>1</li>
            <li>2</li>
            <li>3</li>
        </ul>
    </section>

    <section>
        <h3>主轴方向 flex-direction:row-reverse</h3>
        <ul>
            <li>1</li>
            <li>2</li>
            <li>3</li>
        </ul>
    </section>

    <section>
        <h3>主轴方向 flex-direction:column</h3>
        <ul>
            <li>1</li>
            <li>2</li>
            <li>3</li>
        </ul>
    </section>

    <section>
        <h3>主轴方向 flex-direction:column-reverse</h3>
        <ul>
            <li>1</li>
            <li>2</li>
            <li>3</li>
        </ul>
    </section>
</body>
</html>2、justify-content:设置子元素在主轴上的对齐方式。
justify-content: flex-start;设置子元素在主轴上的对齐方式。属性值可以是:
-
flex-start从主轴的起点对齐(默认值) -
flex-end从主轴的终点对齐 -
center居中对齐 -
space-around在父盒子里平分 -
space-between两端对齐 平分
代码演示:
<!DOCTYPE html>
<html>
<head lang="en">
    <meta charset="UTF-8">
    <title></title>
    <style>
        *{
            margin: 0;
            padding: 0;
            list-style:none;}
        body{
            background-color: #eee;
            font-family: "Microsoft Yahei";

        }
        section{
            width: 1000px;
            margin:50px auto;
        }
        section h3{
            font-size:22px;
            font-weight: normal;
        }

        ul{
            border: 1px solid #999;
            background-color: #fff;
            display: flex;

        }

        ul li{
            width: 200px;
            height: 200px;
            background: pink;
            margin:10px;

        }

        section:nth-child(1) ul{
            /* 主轴对齐方式:从主轴开始的方向对齐*/
            justify-content: flex-start;
        }

        section:nth-child(2) ul{
            /* 主轴对齐方式:从主轴结束的方向对齐*/
            justify-content: flex-end;
        }

        section:nth-child(3) ul{
            /* 主轴对齐方式:居中对齐*/
            justify-content: center;
        }

        section:nth-child(4) ul{
            /* 主轴对齐方式:在父盒子中平分*/
            justify-content: space-around;

           }

        section:nth-child(5) ul{
            /* 主轴对齐方式:两端对齐 平分*/
            justify-content: space-between;
        }
    </style>
</head>
<body>
    <section>
        <h3>主轴的对齐方式:justify-content:flex-start</h3>
        <ul>
            <li>1</li>
            <li>2</li>
            <li>3</li>
        </ul>
    </section>

    <section>
        <h3>主轴的对齐方式:justify-content:flex-end</h3>
        <ul>
            <li>1</li>
            <li>2</li>
            <li>3</li>
        </ul>
    </section>

    <section>
        <h3>主轴的对齐方式:justify-content:center</h3>
        <ul>
            <li>1</li>
            <li>2</li>
            <li>3</li>
        </ul>
    </section>

    <section>
        <h3>主轴的对齐方式:justify-content:space-round</h3>
        <ul>
            <li>1</li>
            <li>2</li>
            <li>3</li>
        </ul>
    </section>

    <section>
        <h3>主轴的对齐方式:justify-content:space-bettwen</h3>
        <ul>
            <li>1</li>
            <li>2</li>
            <li>3</li>
            <li>4</li>
        </ul>
    </section>
</body>
</html>3、align-items:设置子元素在侧轴上的对齐方式。
align-items:flex-start;设置子元素在侧轴上的对齐方式。属性值可以是:
-
flex-start从侧轴开始的方向对齐 -
flex-end从侧轴结束的方向对齐 -
baseline基线 默认同flex-start -
center中间对齐 -
stretch拉伸
代码演示:
<!DOCTYPE html>
<html>
<head lang="en">
    <meta charset="UTF-8">
    <title></title>
    <style>
        *{
            margin: 0;
            padding: 0;
            list-style:none;
        }
        body{
            background-color: #eee;
            font-family: "Microsoft Yahei";

        }
        section{
            width: 1000px;
            margin:50px auto;
        }
        section h3{
            font-size:22px;
            font-weight: normal;
        }

        ul{
            border: 1px solid #999;
            background-color: #fff;
            display: flex;
            height:500px;

        }

        ul li{
            width: 200px;
            height: 200px;
            background: pink;
            margin:10px;

        }

        section:nth-child(1) ul{
            /* 侧轴对齐方式 :从侧轴开始的方向对齐*/
            align-items:flex-start;
        }

        section:nth-child(2) ul{
            /* 侧轴对齐方式 :从侧轴结束的方向对齐*/
            align-items:flex-end;
        }

        section:nth-child(3) ul{
            /* 侧轴对齐方式 :居中*/
            align-items:center;
        }

        section:nth-child(4) ul{
            /* 侧轴对齐方式 :基线 默认同flex-start*/
            align-items:baseline;
        }

        section:nth-child(5) ul{
            /* 侧轴对齐方式 :拉伸*/
            align-items:stretch;

        }

        section:nth-child(5) ul li{
            height:auto;
        }


    </style>
</head>
<body>
<section>
    <h3>侧轴的对齐方式:align-items :flex-start</h3>
    <ul>
        <li>1</li>
        <li>2</li>
        <li>3</li>
    </ul>
</section>

<section>
    <h3>侧轴的对齐方式:align-items:flex-end</h3>
    <ul>
        <li>1</li>
        <li>2</li>
        <li>3</li>
    </ul>
</section>

<section>
    <h3>侧轴的对齐方式:align-items:center</h3>
    <ul>
        <li>1</li>
        <li>2</li>
        <li>3</li>
    </ul>
</section>

<section>
    <h3>侧轴的对齐方式:align-itmes:baseline</h3>
    <ul>
        <li>1</li>
        <li>2</li>
        <li>3</li>
    </ul>
</section>

<section>
    <h3>侧轴的对齐方式:align-itmes: stretch</h3>
    <ul>
        <li>1</li>
        <li>2</li>
        <li>3</li>
    </ul>
</section>
</body>
</html>4、flex属性:设置子盒子的权重
代码演示:
<!DOCTYPE html>
<html>
<head lang="en">
    <meta charset="UTF-8">
    <title></title>
    <style>
        *{
            margin: 0;
            padding: 0;
            list-style:none;
        }
        body{
            background-color: #eee;
            font-family: "Microsoft Yahei";

        }
        section{
            width: 1000px;
            margin:50px auto;
        }
        section h3{
            font-size:22px;
            font-weight: normal;
        }

        ul{
            border: 1px solid #999;
            background-color: #fff;
            display: flex;

        }

        ul li{
            width: 200px;
            height: 200px;
            background: pink;
            margin:10px;

        }

        section:nth-child(1) ul li:nth-child(1){
            flex:1;
        }

        section:nth-child(1) ul li:nth-child(2){
            flex:1;
        }

        section:nth-child(1) ul li:nth-child(3){
            flex:8;
        }

        section:nth-child(2) ul li:nth-child(1){

        }

        section:nth-child(2) ul li:nth-child(2){
            flex:1;
        }

        section:nth-child(2) ul li:nth-child(3){
           flex:4;
        }


    </style>
</head>
<body>
<section>
    <h3>伸缩比例:flex</h3>
    <ul>
        <li>1</li>
        <li>2</li>
        <li>3</li>
    </ul>
</section>

<section>
    <h3>伸缩比例:flex</h3>
    <ul>
        <li>1</li>
        <li>2</li>
        <li>3</li>
    </ul>
</section>


</body>
</html>
字体的常见格式
不同浏览器所支持的字体格式是不一样的,我们有必要了解一下字体格式的知识。
TureTpe格式:(.ttf)
.ttf 字体是Windows和Mac的最常见的字体,是一种RAW格式。
支持这种字体的浏览器有IE9+、Firefox3.5+、Chrome4+、Safari3+、Opera10+、iOS Mobile、Safari4.2+。
OpenType格式:(.otf)
.otf 字体被认为是一种原始的字体格式,其内置在TureType的基础上。
支持这种字体的浏览器有Firefox3.5+、Chrome4.0+、Safari3.1+、Opera10.0+、iOS Mobile、Safari4.2+。
Web Open Font Format格式:(.woff)
woff字体是Web字体中最佳格式,他是一个开放的TrueType/OpenType的压缩版本,同时也支持元数据包的分离。
支持这种字体的浏览器有IE9+、Firefox3.5+、Chrome6+、Safari3.6+、Opera11.1+。
Embedded Open Type格式:(.eot)
.eot字体是IE专用字体,可以从TrueType创建此格式字体,支持这种字体的浏览器有IE4+。
SVG格式:(.svg)
.svg字体是基于SVG字体渲染的一种格式。
支持这种字体的浏览器有Chrome4+、Safari3.1+、Opera10.0+、iOS Mobile Safari3.2+。
总结:
了解了上面的知识后,我们就需要为不同的浏览器准备不同格式的字体。通常我们会通过字体生成工具帮我们生成各种格式的字体,因此无需过于在意字体格式之间的区别。
WebFont 的使用步骤
打开网站http://iconfont.cn/webfont#!/webfont/index,如下:

上图中,比如我想要「思源黑体-粗」这个字体,那我就点击红框中的「本地下载」。
下载完成后是一个压缩包,压缩包链接:
解压后如下:

上图中, 我们把箭头处的html文件打开,里面告诉了我们 webfont 的使用步骤:

(1)第一步:使用font-face声明字体
@font-face {font-family: 'webfont';
    src: url('webfont.eot'); /* IE9*/
    src: url('webfont.eot?#iefix') format('embedded-opentype'), /* IE6-IE8 */
    url('webfont.woff') format('woff'), /* chrome、firefox */
    url('webfont.ttf') format('truetype'), /* chrome、firefox、opera、Safari, Android, iOS 4.2+*/
    url('webfont.svg#webfont') format('svg'); /* iOS 4.1- */
}
(2)第二步:定义使用webfont的样式
.web-font{
    font-family:"webfont" !important;
    font-size:16px;font-style:normal;
    -webkit-font-smoothing: antialiased;
    -webkit-text-stroke-width: 0.2px;
    -moz-osx-font-smoothing: grayscale;}
(3)第三步:为文字加上对应的样式
<i class="web-font">这一分钟,你和我在一起,因为你,我会记得那一分钟。从现在开始,我们就是一分钟的朋友。这是事实,你改变不了,因为已经完成了。</i>举例:
我们按照上图中的步骤来,引入这个字体。完整版代码如下:
<!DOCTYPE html>
<html>
<head lang="en">
    <meta charset="UTF-8">
    <title></title>
    <style>

        p{
            font-size:30px;
        }

        /*  如果要在网页中使用web字体(用户电脑上没有这种字体)*/
        /* 第一步:声明字体*/
        /* 告诉浏览器 去哪找这个字体*/
        @font-face {font-family: 'my-web-font';
            src: url('font/webfont.eot'); /* IE9*/
            src: url('font/webfont.eot?#iefix') format('embedded-opentype'), /* IE6-IE8 */
            url('font/webfont.woff') format('woff'), /* chrome、firefox */
            url('font/webfont.ttf') format('truetype'), /* chrome、firefox、opera、Safari, Android, iOS 4.2+*/
            url('font/webfont.svg#webfont') format('svg'); /* iOS 4.1- */
        }
        /* 第二步:定义一个类名,谁加这类名,就会使用 webfont 字体*/
        .webfont{
            font-family: 'my-web-font';
        }
    </style>
</head>
<body>
    <!-- 第三步:引用 webfont 字体 -->
    <p class="webfont">生命壹号,永不止步</p>
</body>
</html>
代码解释:
(1)my-web-font这个名字是随便起的,只要保证第一步和第二步中的名字一样就行。
(2)因为我把字体文件单独放在了font文件夹中,所以在src中引用字体资源时,写的路径是 font/...
工程文件:
字体图标(阿里的 iconfont 网站举例)
我们其实可以把图片制作成字体。常见的做法是:把网页中一些小的图标,借助工具生成一个字体包,然后就可以像使用文字一样使用图标了。这样做的优点是:
- 将所有图标打包成字体库,减少请求;
- 具有矢量性,可保证清晰度;
- 使用灵活,便于维护。
也就是说,我们可以把这些图标当作字体来看待,凡是字体拥有的属性(字体大小、颜色等),均适用于图标。
使用步骤如下:(和上一段的使用步骤是一样的)
打开网站http://iconfont.cn/">http://iconfont.cn/,找到想要的图标,加入购物车。然后下载下来:

压缩包下载之后,解压,打开里面的demo.html,里面告诉了我们怎样引用这些图标。

举例1:(图标字体引用)
<!DOCTYPE html>
<html>
<head lang="en">
<meta charset="UTF-8">
<title></title>
<style>
/*申明字体*/
@font-face {font-family: 'iconfont';
src: url('font/iconfont.eot'); /* IE9*/
src: url('font/iconfont.eot?#iefix') format('embedded-opentype'), /* IE6-IE8 */
url('font/iconfont.woff') format('woff'), /* chrome、firefox */
url('font/iconfont.ttf') format('truetype'), /* chrome、firefox、opera、Safari, Android, iOS 4.2+*/
url('font/iconfont.svg#iconfont') format('svg'); /* iOS 4.1- */
}
.iconfont{
font-family: iconfont;
}
p{
width: 200px;
border: 1px solid #000;
line-height: 60px;
font-size:30px;
margin:100px auto;
text-align: center;
}
p span{
color:red;
}
</style>
</head>
<body>
<!-- 【重要】编码代表图标 -->
<p><span class="iconfont"></span>扫码付款</p>
</body>
</html>效果如下:

举例2:(伪元素的方式使用图标字体)
如果想要在文字的前面加图标字体,我们更习惯采用伪元素的方式进行添加。
代码如下:
<!DOCTYPE html>
<html>
<head lang="en">
<meta charset="UTF-8">
<title></title>
<style>
/*申明字体*/
@font-face {font-family: 'iconfont';
src: url('font/iconfont.eot'); /* IE9*/
src: url('font/iconfont.eot?#iefix') format('embedded-opentype'), /* IE6-IE8 */
url('font/iconfont.woff') format('woff'), /* chrome、firefox */
url('font/iconfont.ttf') format('truetype'), /* chrome、firefox、opera、Safari, Android, iOS 4.2+*/
url('font/iconfont.svg#iconfont') format('svg'); /* iOS 4.1- */
}
p{
width: 200px;
border: 1px solid #000;
line-height: 60px;
font-size:30px;
margin:100px auto;
text-align: center;
position: relative;
}
.icon::before{
/**/
content:"\e628";
/*position: absolute;*/
/*left:10px;*/
/*top:0px;*/
font-family: iconfont;
color:red;
}
span{
position: relative;
}
</style>
</head>
<body>
<p class="icon">扫码付款</p>
<span class="icon" >我是span</span>
<div class="icon">divvvvvvvvvvv</div>
</body>
</html>效果如下:

工程文件:
- 2018-02-20-图标字体demo.zip
360浏览器网站案例
暂略。
这里涉及到:jQuery fullPage 全屏滚动插件。
- 中文网址:http://www.dowebok.com
- 相关说明:http://www.dowebok.com/77.html
使用 Bootstrap 网站的图标字体
打开如下网站:http://www.bootcss.com/p/font-awesome/

如上图所示,下载字体后,进行解压:

使用步骤如下:
(1)如图只是想要字体的话,可以把css和font这两个文件夹拷贝到项目里。
(2)在html文档中的 标签里,引入 font-awesome.min.css 文件:
<link rel="stylesheet" href="css/font-awesome.min.css">(3)想在哪个标签里用这个图标,直接在这个标签里加className就行(className都在网站上列出来了)。
完整版代码如下:
<!DOCTYPE html>
<html lang="en">
<head>
    <meta charset="UTF-8">
    <title>Title</title>
    <link rel="stylesheet" href="css/font-awesome.min.css">
    <style>

    </style>
</head>
<body>
    <span class="icon-play">播放</span>
</body>
</html>
CSS3 常见边框汇总
<!DOCTYPE html>
<html lang="en">
<head>
    <meta charset="UTF-8">
    <title>CSS3 边框</title>
    <style>
        body, ul, li, dl, dt, dd, h1, h2, h3, h4, h5 {
            margin: 0;
            padding: 0;
        }

        body {
            background-color: #F7F7F7;
        }

        .wrapper {
            width: 1000px;
            margin: 0 auto;
            padding: 20px;
            box-sizing: border-box;
        }

        header {
            padding: 20px 0;
            margin-bottom: 20px;
            text-align: center;
        }

        header h3 {
            line-height: 1;
            font-weight: normal;
            font-size: 28px;
        }

        .main {
            /*overflow: hidden;*/
        }

        .main:after {
            content: '';
            clear: both;
            display: block;
        }

        .main .item {
            width: 210px;
            height: 210px;
            margin: 0 30px 30px 0;
            display: flex;
            position: relative;
            background-color: #FFF;
            float: left;
            box-shadow: 2px 2px 5px #CCC;
        }

        .main .item:after {
            content: attr(data-brief);
            display: block;
            width: 100%;
            height: 100%;
            text-align: center;
            line-height: 210px;
            position: absolute;
            top: 0;
            left: 0;
            color: #FFF;
            font-family: '微软雅黑';
            font-size: 18px;
            background-color: rgba(170, 170, 170, 0);
            z-index: -1;
            transition: all 0.3s ease-in;
        }

        .main .item:hover:after {
            background-color: rgba(170, 170, 170, 0.6);
            z-index: 100;
        }

        .main .item:nth-child(4n) {
            margin-right: 0;
        }

        /*.main .item:nth-last-child(-n+5) {
            margin-bottom: 0;
        }*/

        /* 以上是骨架样式 */
        /* 1、2、3、4 顺时针 */
        .border-radius {
            width: 180px;
            height: 180px;
            margin: auto;
            border: 1px solid red;
            /*border-radius: 50% 30% 20%;*/
        }

        .square {
            border-radius: 0;
        }

        /*拱形*/
        .item:nth-child(1) .border-radius {
            border-radius: 90px;
        }

        /*拱形*/
        .item:nth-child(2) .border-radius {
            border-radius: 90px 90px 0 0;
        }

        /*半圆*/
        .item:nth-child(3) .border-radius {
            height: 90px;
            border-radius: 90px 90px 0 0;
        }

        /*左上角*/
        .item:nth-child(4) .border-radius {
            /*height: 90px;*/
            border-radius: 90px 0 0 0;
        }

        /*四分之一圆*/
        .item:nth-child(5) .border-radius {
            width: 90px;
            height: 90px;
            border-radius: 90px 0 0 0;
        }

        /*横着的椭圆*/
        .item:nth-child(6) .border-radius {
            height: 90px;
            /*border-radius: 50%;*/
            border-radius: 90px 90px 90px 90px / 45px 45px 45px 45px;
            /*border-radius: 45px / 90px;*/
        }

        /*竖着的椭圆*/
        .item:nth-child(7) .border-radius {
            width: 90px;
            border-radius: 45px 45px 45px 45px / 90px 90px 90px 90px;
        }

        /*半个横着的椭圆*/
        .item:nth-child(8) .border-radius {
            height: 45px;
            border-radius: 90px 90px 0 0 / 45px 45px 0 0;
        }

        /*半个竖着的椭圆*/
        .item:nth-child(9) .border-radius {
            width: 45px;
            border-radius: 45px 0 0 45px / 90px 0 0 90px;
        }

        /*四分之一竖着的椭圆*/
        .item:nth-child(10) .border-radius {
            width: 45px;
            height: 90px;
            border-radius: 45px 0 0 0 / 90px 0 0 0;
        }

        /*饼环*/
        .item:nth-child(11) .border-radius {
            width: 40px;
            height: 40px;
            border: 70px solid red;
            border-radius: 90px;
        }

        /*圆饼*/
        .item:nth-child(12) .border-radius {
            width: 40px;
            height: 40px;
            border: 70px solid red;
            border-radius: 60px;
        }

        /*左上角圆饼*/
        .item:nth-child(13) .border-radius {
            width: 60px;
            height: 60px;
            border: 60px solid red;
            border-radius: 90px 0 0 0;
        }

        /*对角圆饼*/
        .item:nth-child(14) .border-radius {
            width: 60px;
            height: 60px;
            border: 60px solid red;
            border-radius: 90px 0 90px 0;
        }

        /*四边不同色*/
        .item:nth-child(15) .border-radius {
            width: 0px;
            height: 0px;
            border-width: 90px;
            border-style: solid;
            border-color: red green yellow blue;
        }

        /*右透明色*/
        .item:nth-child(16) .border-radius {
            width: 0px;
            height: 0px;
            border-width: 90px;
            border-style: solid;
            border-color: red green yellow blue;
            border-right-color: transparent;
        }

        /*圆右透明色*/
        .item:nth-child(17) .border-radius {
            width: 0px;
            height: 0px;
            border-width: 90px;
            border-style: solid;
            border-color: red;
            border-right-color: transparent;
            border-radius: 90px;
        }

        /*圆右红透明色*/
        .item:nth-child(18) .border-radius {
            width: 0px;
            height: 0px;
            border-width: 90px;
            border-style: solid;
            border-color: transparent;
            border-right-color: red;
            border-radius: 90px;
        }

        /*阴阳图前世*/
        .item:nth-child(19) .border-radius {
            width: 180px;
            height: 0px;
            border-top-width: 90px;
            border-bottom-width: 90px;
            border-style: solid;
            border-top-color: red;
            border-bottom-color: green;
            /*border-right-color: red;*/
            border-radius: 90px;
        }

        /*阴阳图前世2*/
        .item:nth-child(20) .border-radius {
            width: 180px;
            height: 90px;
            border-bottom-width: 90px;
            border-style: solid;
            border-bottom-color: green;
            background-color: red;
            /*border-right-color: red;*/
            border-radius: 90px;
        }

        /*阴阳图今生*/
        .item:nth-child(21) .border-radius {
            width: 180px;
            height: 90px;
            border-bottom-width: 90px;
            border-style: solid;
            border-bottom-color: green;
            background-color: red;
            border-radius: 90px;
            position: relative;
        }

        .item:nth-child(21) .border-radius::after,
        .item:nth-child(21) .border-radius::before {
            content: '';
            position: absolute;
            top: 50%;
            width: 20px;
            height: 20px;
            /*margin: -10px 0 0 0;*/
            border-width: 35px;
            border-style: solid;
            border-radius: 45px;
        }

        /*左阴阳*/
        .item:nth-child(21) .border-radius::after {
            background-color: red;
            border-color: green;
        }

        /*右阴阳*/
        .item:nth-child(21) .border-radius::before {
            background-color: green;
            border-color: red;
            right: 0;
        }

        /*右阴阳*/
        .item:nth-child(22) .border-radius {
            width: 180px;
            height: 90px;
            border-bottom-width: 90px;
            border-bottom-color: green;
            border-bottom-style: solid;
            background-color: red;
            border-radius: 90px;
            position: relative;
        }

        .item:nth-child(22) .border-radius::after,
        .item:nth-child(22) .border-radius::before {
            content: '';
            position: absolute;
            top: 50%;
            width: 20px;
            height: 20px;
            border-width: 35px;
            border-style: solid;
            border-radius: 45px;
        }

        .item:nth-child(22) .border-radius::before {
            border-color: green;
            background-color: red;
        }

        .item:nth-child(22) .border-radius::after {
            right: 0;
            border-color: red;
            background-color: green;
        }

        /*消息框*/
        .item:nth-child(23) .border-radius {
            width: 160px;
            height: 80px;
            background-color: red;
            border-radius: 6px;
            position: relative;
        }

        .item:nth-child(23) .border-radius::after {
            content: '';
            width: 0;
            height: 0;
            border-width: 10px;
            border-style: solid;
            border-color: transparent;
            border-right-color: red;
            position: absolute;
            top: 16px;
            left: -20px;
        }

        /*奇怪的图形*/
        .item:nth-child(24) .border-radius {
            width: 40px;
            height: 40px;
            border-width: 45px 0 45px 70px;
            border-style: solid;
            border-radius: 0 0 60px 0;
            border-color: red;
        }

        /*奇怪的图形2*/
        .item:nth-child(25) .border-radius {
            width: 100px;
            height: 40px;
            border-width: 45px 20px 45px 70px;
            border-style: solid;
            border-radius: 60px;
            border-color: red;
        }

        /*QQ对话*/
        .item:nth-child(26) .border-radius {
            width: 160px;
            height: 80px;
            background-color: red;
            border-radius: 6px;
            position: relative;
        }

        .item:nth-child(26) .border-radius::after {
            content: '';
            position: absolute;
            top: 0;
            right: -20px;
            width: 30px;
            height: 30px;
            border-width: 0 0 30px 30px;
            border-style: solid;
            border-bottom-color: red;
            border-left-color: transparent;
            border-radius: 0 0 60px 0;
        }

        /*圆角的百分比设置 */
        .item:nth-child(27) .border-radius {
            width: 180px;
            /*height: 180px;*/
            height: 90px;
            border-radius: 50%;
            border-radius: 90px/45px;

            /*百分比是按横竖两个对应的方向的长度进行计算*/
        }

    </style>
</head>
<body>
<div class="wrapper">
    <header>
        <h3>CSS3 边框圆角</h3>
    </header>
    <div class="main">
        <div class="item" data-brief="整圆">
            <div class="border-radius"></div>
        </div>
        <div class="item" data-brief="拱形">
            <div class="border-radius"></div>
        </div>
        <div class="item" data-brief="半圆">
            <div class="border-radius"></div>
        </div>
        <div class="item" data-brief="左上角">
            <div class="border-radius"></div>
        </div>
        <div class="item" data-brief="四分之一圆">
            <div class="border-radius"></div>
        </div>
        <div class="item" data-brief="横着的椭圆">
            <div class="border-radius"></div>
        </div>
        <div class="item" data-brief="竖着的椭圆">
            <div class="border-radius"></div>
        </div>
        <div class="item" data-brief="半个横着的椭圆">
            <div class="border-radius"></div>
        </div>
        <div class="item" data-brief="半个竖着的椭圆">
            <div class="border-radius"></div>
        </div>
        <div class="item" data-brief="四分之一竖着的椭圆">
            <div class="border-radius"></div>
        </div>
        <div class="item" data-brief="饼环">
            <div class="border-radius"></div>
        </div>
        <div class="item" data-brief="圆饼">
            <div class="border-radius"></div>
        </div>
        <div class="item" data-brief="左上角圆饼">
            <div class="border-radius"></div>
        </div>
        <div class="item" data-brief="对角圆饼">
            <div class="border-radius"></div>
        </div>
        <div class="item" data-brief="四边不同色">
            <div class="border-radius"></div>
        </div>
        <div class="item" data-brief="右透明色">
            <div class="border-radius"></div>
        </div>
        <div class="item" data-brief="圆右透明色">
            <div class="border-radius"></div>
        </div>
        <div class="item" data-brief="圆右红透明色">
            <div class="border-radius"></div>
        </div>
        <div class="item" data-brief="阴阳图前世">
            <div class="border-radius"></div>
        </div>
        <div class="item" data-brief="阴阳图前世2">
            <div class="border-radius"></div>
        </div>
        <div class="item" data-brief="阴阳图今生">
            <div class="border-radius"></div>
        </div>
        <div class="item" data-brief="阴阳图今生2">
            <div class="border-radius"></div>
        </div>
        <div class="item" data-brief="消息框">
            <div class="border-radius"></div>
        </div>
        <div class="item" data-brief="奇怪的图形">
            <div class="border-radius"></div>
        </div>
        <div class="item" data-brief="奇怪的图形2">
            <div class="border-radius"></div>
        </div>
        <div class="item" data-brief="QQ对话">
            <div class="border-radius"></div>
        </div>
        <div class="item" data-brief="圆角百分比">
            <div class="border-radius"></div>
        </div>
    </div>
</div>
</body>
</html>
效果如下:

爱心
<!DOCTYPE html>
<html>
<head lang="en">
    <meta charset="UTF-8">
    <title></title>
    <style>
        .heart {
            width: 200px;
            height: 300px;
            /*border: 1px solid #000;*/
            margin: 100px auto;
            position: relative;
        }

        .heart::before, .heart::after {
            content: "左一半";
            width: 100%;
            height: 100%;
            position: absolute;
            background-color: red;
            left: 0;
            top: 0;

            border-radius: 100px 100px 0 0;
            transform: rotate(-45deg);
            text-align: center;
            line-height: 100px;
            color: yellow;
            font-size: 30px;
            font-family: "MIcrosoft Yahei";
        }

        .heart::after {
            content: "右一半";
            left: 71px;
            transform: rotate(45deg);
        }
    </style>
</head>
<body>
<div class="heart">

</div>
</body>
</html>
效果如下:

它其实是下面这两个盒子叠起来的:

改变 .heart::after 的 left值,即可叠起来。
CSS 预处理器
为什么要有 CSS 预处理器
CSS基本上是设计师的工具,不是程序员的工具。在程序员的眼里,CSS是很头痛的事情,它并不像其它程序语言,比如说PHP、Javascript等等,有自己的变量、常量、条件语句以及一些编程语法,只是一行行单纯的属性描述,写起来相当的费事,而且代码难以组织和维护。
很自然的,有人就开始在想,能不能给CSS像其他程序语言一样,加入一些编程元素,让CSS能像其他程序语言一样可以做一些预定的处理。这样一来,就有了“CSS预处器(CSS Preprocessor)”。
什么是 CSS 预处理器
- 是 CSS 语言的超集,比CSS更丰满。
CSS 预处理器定义了一种新的语言,其基本思想是:用一种专门的编程语言,为CSS增加了一些编程的特性,将CSS作为目标生成文件,然后开发者就只要使用这种语言进行编码工作。
通俗的说,CSS预处理器用一种专门的编程语言,进行Web页面样式设计,然后再编译成正常的CSS文件,以供项目使用。CSS预处理器为CSS增加一些编程的特性,无需考虑浏览器的兼容性问题,例如你可以在CSS中使用变量、简单的逻辑程序、函数等等在编程语言中的一些基本特性,可以让你的CSS更加简洁、适应性更强、可读性更佳,更易于代码的维护等诸多好处。
CSS预处理器技术已经非常成熟,而且也涌现出了很多种不同的CSS预处理器语言,比如说:Sass(SCSS)、LESS、Stylus、Turbine、Swithch CSS、CSS Cacheer、DT CSS等。如此之多的CSS预处理器,那么“我应该选择哪种CSS预处理器?”也相应成了最近网上的一大热门话题,在Linkedin、Twitter、CSS-Trick、知呼以及各大技术论坛上,很多人为此争论不休。相比过计我们对是否应该使用CSS预处理器的话题而言,这已经是很大的进步了。
到目前为止,在众多优秀的CSS预处理器语言中就属Sass、LESS和Stylus最优秀,讨论的也多,对比的也多。本文将分别从他们产生的背景、安装、使用语法、异同等几个对比之处向你介绍这三款CSS预处理器语言。相信前端开发工程师会做出自己的选择——我要选择哪款CSS预处理器。
less 的介绍
less 是一款比较流行的预处理 CSS,支持变量、混合、函数、嵌套、循环等特点。
- 官网
- 中文网(less 文档)
- Bootstrap网站的 less 文档
less 的语法
注释
less 的注释可以有两种。
第一种注释:模板注释
// 模板注释 这里的注释转换成CSS后将会删除因为 less 要转换为 css才能在浏览器中使用。转换成 css 之后,这种注释会被删除(毕竟 css 不识别这种注释)。
第二种注释:CSS 注释语法
/* CSS 注释语法 转换为CSS后让然保留 */总结:如果在less中写注释,我们推荐写第一种注释。除非是类似于版权等内容,就采用第二种注释。
定义变量
我们可以把重复使用或经常修改的值定义为变量,在需要使用的地方引用这个变量即可。这样可以避免很多重复的工作量。
(1)在less文件中,定义一个变量的格式:
@变量名: 变量值;        //格式

@bgColor: #f5f5f5;      //格式举例
(2)同时,在 less 文件中引用这个变量。
最终,less文件的完整版代码如下:
main.less:
// 定义变量
@bgColor: #f5f5f5;

// 引用变量
body{
    background-color: @bgColor;
}
我们将上面的less文件编译为 css 文件后(下一段讲less文件的编译),自动生成的代码如下:
main.css:
body{
    background-color: #f5f5f5;
}
使用嵌套
在 css 中经常会用到子代选择器,效果可能是这样的:
.container {
  width: 1024px;
}

.container > .row {
  height: 100%;
}

.container > .row a {
  color: #f40;
}

.container > .row a:hover {
  color: #f50;
}
上面的代码嵌套了很多层,写起来很繁琐。可如果用 less 的嵌套语法来写这段代码,就比较简洁。
嵌套的举例如下:
main.less:
.container {
  width: @containerWidth;

  > .row {
    height: 100%;
    a {
      color: #f40;

      &:hover {
        color: #f50;
      }

    }
  }

  div {
    width: 100px;

    .hello {
      background-color: #00f;
    }

  }
}
将上面的less文件编译为 css 文件后,自动生成的代码如下:
main.css
.container {
    width: 1024px;
}

.container > .row {
    height: 100%;
}

.container > .row a {
    color: #f40;
}

.container > .row a:hover {
    color: #f50;
}

.container div {
    width: 100px;
}

.container div .hello {
    background-color: #00f;
}
Mixin
Mixin 的作用是把重复的代码放到一个类当中,每次只要引用类名,就可以引用到里面的代码了,非常方便。
(1)在 less 文件中定义一个类:(将重复的代码放到自定义的类中)
/* 定义一个类 */
.roundedCorners(@radius: 5px) {
  -moz-border-radius: @radius;
  -webkit-border-radius: @radius;
  border-radius: @radius;
}上方代码中,第一行里面,括号里的内容是参数:这个参数是缺省值。
(2)在 less 文件中引用上面这个类:
#header {
  .roundedCorners;
}
#footer {
  .roundedCorners(10px);
}
上方代码中,header 中的引用没有带参数,表示参数为缺省值; footer 中的引用带了参数,那就用这个参数。
Import
在开发阶段,我们可以将不同的样式放到多个文件中,最后通过@import 的方式合并。意思就是,当出现多个 less 文件时,怎么引用它们。
这个很好理解, css 文件可以有很多个,less文件也可以有很多个。
(1)定义一个被引用的less文件,名为_button1.less:
_button1.less:
.btn{
  line-height: 100px;
  color: @btnColor;
}PS1:被引用的less文件,我们习惯在前面加下划线,表示它是部分文件。
PS2:_button1.less里可以引用main.css里的自定义变量。
(2)在 main.css 中引用上面的 _button1.less:(代码的第二行)
main.css:
@btnColor: red;

@import url(`_button1.less:');    //这里的路径写的是相对路径

body{
  width: 1024px;
}
将 上面的main.less 编译为 main.css之后,自动生成的代码如下:
.btn {
    line-height: 100px;
    color: red;
}

body {
    width: 1024px;
}
内置函数
less 里有一些内置的函数,这里讲一下 lighten 和 darken 这两个内置函数。
main.less:
body {
  background-color: lighten(#000, 10%);   // 让黑色变亮 10%
  color: darken(#fff, 10%);               // 让白色变暗 10%
}
将 上面的 main.less 编译为 main.css 之后,自动生成的代码如下:
main.css:
body {
  background-color: #1a1a1a;
  color: #e6e6e6;
}
如果还有什么不懂的,可以看 api 文档,在上面的第二段附上了链接。
在 index.html中直接引用 less.js
- 做法一:写完 less文件后,将其编译为 css 文件,然后在代码中引用css文件。
- 做法二:在代码中直接用引用 less 文件。
产品上线后,当然是使用做法一,因为做法二会多出编译的时间。
平时开发或演示demo的时候可以用做法二。
这一段,我们讲一下做法二,其实是浏览器在本地在线地把 less 文件转换为 css 文件。
(1)在 less 官网下载 less.js 文件:
[外链图片转存失败(img-9bdMsglq-1568711720854)(http://img.smyhvae.com/20180226_2131.png)]
把下载好的文件放在工程文件的lib文件夹里:
[外链图片转存失败(img-eL9bVlDc-1568711720856)(http://img.smyhvae.com/20180226_2143.png)]
(2)在 index.html 中引入 less.js 和我们自己写的 main.less。位置如下:
[外链图片转存失败(img-HIKvU9QI-1568711720862)(http://img.smyhvae.com/20180226_2145.png)]
copy 红框那部分的代码如下:
<link rel="stylesheet/less" href="../main.less">我们可以在打开的网页中,通过控制台看到效果:

注意,我们要在服务器中打开 html 文件,否则,看不到效果。
这里也告诉了我们:
不提倡将 less 引入页面,因为 less 需要编译,因此你就需要再引入一个less.js, 多了一个HTTP 请求,同时当浏览器禁用了 js 你的样式就不起作用了,less 编译应该在服务端或使用 grunt 自动编译。
工程文件:(工程文件中,我引用的less.js版本是 2.5.3)
- 2018-02-27-LessDemo.rar
less 的编译
less 的编译指的是将写好的 less 文件 生成为 css 文件。
less 的编译,依赖于 NodeJS 环境。因此,我们需要先安装 NodeJS。
1、安装 Node.js
去 Node.js的官网下载安装包:
[外链图片转存失败(img-Z2Y4FGyc-1568711720869)(http://img.smyhvae.com/20180226_2153.png)]
一路 next 进行安装。
安装完成后,配置环境变量:
在 path 变量中追加安装路径:;C:\Program Files\nodejs。重启资源管理器,即可生效。
PS:我发现,我安装的 node.js v8.9.4 版本,已经自动添加了环境变量。
在 cmd 命令行,输入node.exe -v,可以查看 node.js 的版本。
2、安装 less 的编译环境
将 npm.zip 解压,将解压后的文件拷贝到路径C:\Users\smyhvae\AppData\Roaming\npm下:
[外链图片转存失败(img-DWJbZYFZ-1568711720869)(http://img.smyhvae.com/20180226_2212.png)]
然后重启资源管理器(或者重启电脑)。在 cmd 中输入 lessc,如果能看到下面的效果,说明 less编译环境安装成功:
[外链图片转存失败(img-BCZDK1D9-1568711720873)(http://img.smyhvae.com/20180226_2217.png)]
如果你用的是 linux 系统,可以输入下面的命令安装:
npm install -g less3、将 less 文件编译为 css 文件
在 less 所在的路径下,输入 lessc xxx.less,即可编译成功。或者,如果输入 lessc xxx.less > ..\xx.css,表示输出到指定路径。


