
瀑布流的特点是:1、等宽;2、高度不一样;2、每一个盒子相对于父标签定位;4、第二行第一个元素拼接到第一行最矮的盒子底下;
瀑布流的布局原理:子盒子相对于父盒子的一个定位,所以,先将第一行排列好,求出每个盒子的高度,如果是第一行的盒子,加入到数组中,如果是其他行的,遍历查找上一行的最矮盒子,把当前盒子相对于最矮盒子进行一下定位,然后更新数组最矮盒子的高度;
实现思路:每一个盒子,包含上边距和左边距,这样就省去计算图片与图片之间的间距了。这是比较简单一点的,如果需要在图片上添加赞或者购买等按钮或其他介绍信息的话,再当前的基础上再进行一些修改即可。

因为每个盒子都是等宽的,所以,布局的时候,只需要知道每个盒子距离浏览器的上边距和左边距是多少,左边距只需要当前盒子的索引 * 每个盒子的宽度即可,上边距就是最矮盒子的高度;
实现方式
1、用JS实现瀑布流布局
2、用CSS3
3、用jQuery
代码的地址
https://github.com/CoderXAndZ/WateFallFlow.git
方式一:JS实现瀑布流布局
js实现瀑布流布局代码:
// 实现瀑布流布局
function waterFall ( parent , child ) {
// 最需要的两个参数:父盒子和子盒子
// -----子盒子在父盒子中居中-----
// 获取屏幕宽度,然后除以图片宽度,得到图片的列数
// 1.1 拿到父盒子中所有的子盒子
var allbox = $(parent).getElementsByClassName(child);
// 1.2 求出盒子的宽度 202
var boxWidth = allbox[ 0 ].offsetWidth;
// 1.3 动态求出浏览器的宽度,包括边线的宽
var screenWidth = document .body.offsetWidth;
// 1.4 求出列数并取整
var columns = Math.floor(screenWidth / boxWidth);
// 1.5 让父标签居中
$(parent). style .width = boxWidth * columns + 'px' ;
$(parent). style .margin = '0 auto' ;
// ---- 子盒子定位 ----
// 1.1 高度数组
var heightArr = [];
// 1.2 遍历所有的盒子,将每个盒子的高度放在数组中
for ( var i = 0 ;i < allbox.length;i ++ ) {
// 1.2.1 求出单个盒子的高度
var boxHeight = allbox[i].offsetHeight;
if (i < columns) {
// 取出第一行的盒子
heightArr.push(boxHeight);
} else {
// 需要定位的盒子
// 1.2.1 求出最矮盒子的高度
var minBoxHeight = Math.min.apply( this ,heightArr);
// 1.2.2 求出最矮盒子对应的索引
var minBoxIndex = getMinBoxIndex(minBoxHeight,heightArr);
// 1.2.3 盒子定位
allbox[i]. style . position = 'absolute' ;
allbox[i]. style .top = minBoxHeight + 'px' ;
allbox[i]. style .left = minBoxIndex * boxWidth + 'px' ;
// 1.2.4 更新数组中最矮盒子的高度
heightArr[minBoxIndex] += boxHeight;
}
}
console .log(heightArr);
}
// 取出数据中最矮盒子对应的索引
function getMinBoxIndex ( val , arr ) {
for ( var i in arr) {
if (val == arr[i]) return i;
}
}
实现瀑布流布局页面滚动加载的原理:
当(最后一个盒子高度的一半 + 头部偏离位置) > (浏览器的高度+页面偏离屏幕的高度)时,就加载下一页的数据,从最外层往里一层一层的创建盒子,将里层盒子加到外层盒子的里面,然后再将下一页的数据进行瀑布流布局;
// 滚动加载盒子
window . onscroll = function () {
// alert(0);
// 条件是否加载
if (checkWillLoad()) {
// 假数据
var data = { 'dataImg' : [{ 'img' : '1.jpg' },{ 'img' : '10.jpg' },{ 'img' : '13.jpg' },{ 'img' : '15.jpg' },{ 'img' : '17.jpg' },{ 'img' : '19.jpg' }]}
// 加载数据
for ( var i = 0 ;i < data.dataImg.length;i ++ ) {
// 创建最外面的盒子
var newBox = document .createElement( 'div' );
newBox.className = 'box' ;
// 拿到父盒子,并插入
$( 'main' ).appendChild(newBox);
// 创建里面的盒子
var newPic = document .createElement( 'div' );
newPic.className = 'pic' ;
// 插入到父盒子,
newBox.appendChild(newPic);
// 创建img
var newImg = document .createElement( 'img' );
newImg.src = 'imgs/' + data.dataImg[i].img;
newPic.appendChild(newImg);
}
// 瀑布流布局
waterFall( 'main' , 'box' );
}
}
}
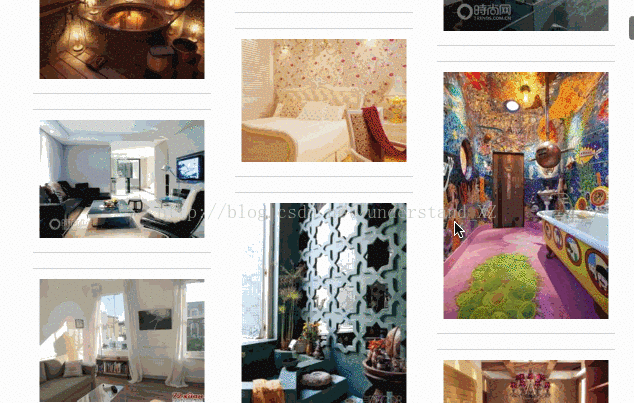
实现的页面效果:
方式二:CSS实现瀑布流布局
css实现瀑布局布局的大致框架的一个代码,在最外层的div的css布局中写如下代码即可,这只能实现一个瀑布流布局:
# main {
/*多栏布局:设置栏宽*/
- webkit - column - width : 202 px;
- moz - column - width : 202 px;
column - width : 202 px;
}
方式三:jQuery实现瀑布流布局
jQuery实现瀑布流布局与CSS的不同在于,语言的的不同,思路都是一样的,只是js代码中换了一种写法
实现代码:
// 当页面加载完毕

$(    window    ).on(
   'load'
   ,
   function
   () {

// 1.实现瀑布流布局

waterFall();

// 2.实现滚动加载

$(    window    ).on(
   'scroll'
   ,
   function
   () {

// 判断是否加载

if    (checkWillLoad()) {

// 造数据

var    data    =
   {
   'dataImg'
   :[{
   'img'
   :
   '1.jpg'
   },{
   'img'
   :
   '10.jpg'
   },{
   'img'
   :
   '13.jpg'
   },{
   'img'
   :
   '15.jpg'
   },{
   'img'
   :
   '17.jpg'
   },{
   'img'
   :
   '19.jpg'
   }]};

// 遍历创建盒子,创建了一个div,设置类名为box,

$.each(data.dataImg,    function    (
   index
   ,
   value
   ) {

var    newBox    =
   $(
   '<div>'
   ).addClass(
   'box'
   ).appendTo($(
   '#main'
   ));

var    newPic    =
   $(
   '<div>'
   ).addClass(
   'pic'
   ).appendTo($(newBox));

$(    '<img />'    ).
   attr
   (
   'src'
   ,
   'imgs/'
   +
   $(value).
   attr
   (
   'img'
   )).appendTo($(newPic));

})

// 实现瀑布流布局

waterFall();

}

});


//    alert(134);

});


// 实现瀑布流布局

function    waterFall    (){

// 拿到所有的盒子

var    allBox    =
   $(
   '#main .box'
   );

//    alert($(allBox).length);

// 取出其中一个盒子的宽度,outerWidth带边距的宽度 202

var    boxWidth    =
   $(allBox).eq(
   0
   ).outerWidth();

// 取出屏幕的宽度

var    screenWidth    =
   $(
   window
   ).width();

// 求出列数

var    cols    =
   Math.floor(screenWidth
   /
   boxWidth);

// 父标签居中

$(    '#main'    ).
   css
   ({

width:cols    *    boxWidth
   +
   'px'
   ,

margin:    '0 auto'    })

// 对子盒子定位

var    heightArr    =
   [];

// 遍历

$.each(allBox,    function    (
   index
   ,
   value
   ) {

// 取出单独的盒子高度

var    boxHeight    =
   $(value).outerHeight();

// 判断,

if    (index    <
   cols) {

// 第一行盒子

heightArr[index]    =    boxHeight;

}    else    {

// 剩余行的盒子    // 取出高度数组中最矮的高度

var    minBoxHeight    =
   Math.min.apply(
   null
   ,heightArr);

// 取出最矮高度对应的索引

var    minBoxIndex    =
   $.inArray(minBoxHeight,heightArr);

// 定位

$(value).    css    ({

position    :    'absolute'
   ,

top:minBoxHeight    +    'px'
   ,

left:minBoxIndex    *    boxWidth
   +
   'px'
   });

// 更新数组中最矮的高度

heightArr[minBoxIndex]    +=    boxHeight;

}

});

//    alert(cols);

}


// 设置滚动条件

function    checkWillLoad    () {

// 拿到最后一个盒子

var    lastBox    =
   $(
   '#main>div'
   ).last();

// 取出最后一个盒子高度的一半 + 头部偏离位置

var    lastBoxDis    =
   $(lastBox).outerHeight()
   +
   $(lastBox).offset().top;

// 求出浏览器高度

var    clientHeight    =
   $(
   window
   ).height();

// 求出页面偏离浏览器的高度

var    scrollTopHeight    =
   $(
   window
   ).scrollTop();


console    .log(lastBoxDis,clientHeight,scrollTopHeight);

// 比较返回

return    lastBoxDis    <=
   clientHeight
   +
   scrollTopHeight;

}


