网络设备的批量,自动备份算是一个刚需,很多运维系统都有集成,功能全面而强大,依赖于备份的配置文件信息,扩展出许多的其他功能:分析文件,巡检设备异常信息;分析文件,统计并可视化展示;分析文件,自动生成配置文件等等。但有时候需要把这个小功能单独拆出来,方便灵活的部署,仅仅当做一个小工具使用,简单,轻量就好。网络上其他人写的各种版本都觉得太琐碎,所以,脑袋一热,写了个,练练手。
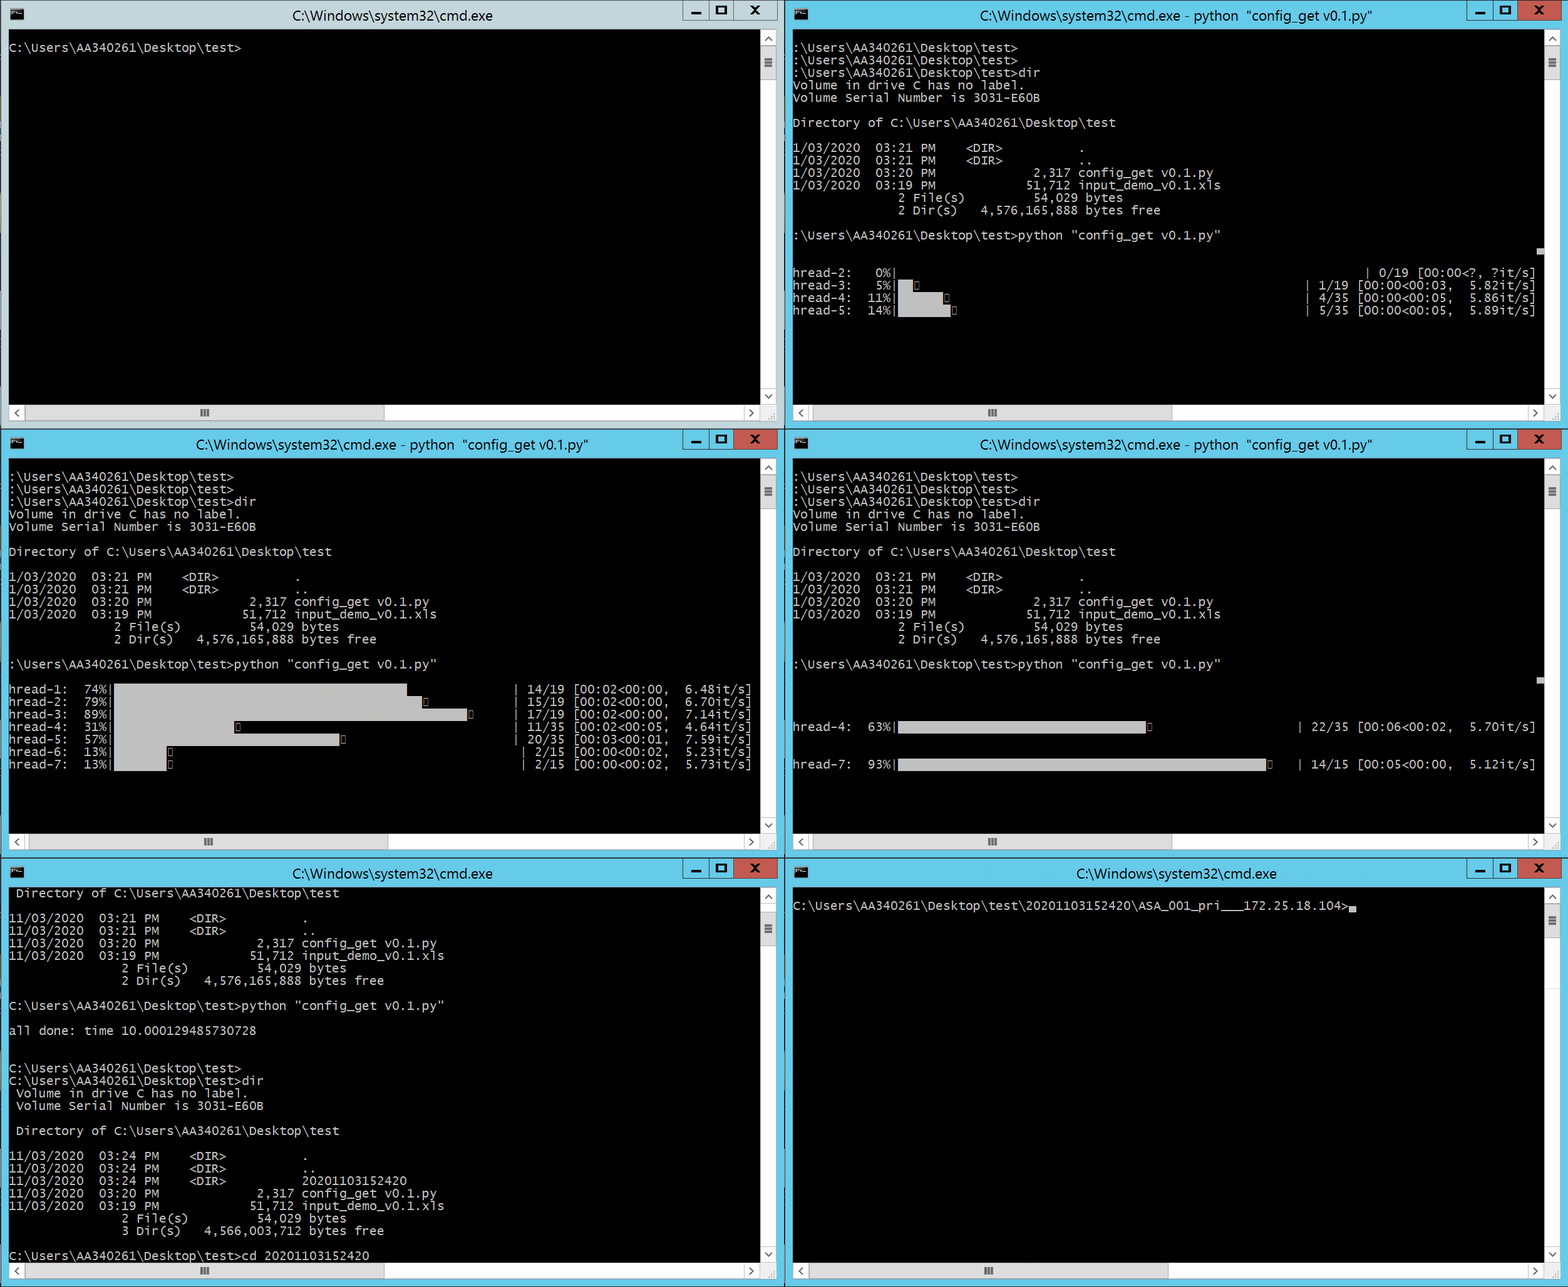
先看效果:

效果展示
整个工具分两部分:一个Excel输入表格,包含设备登录信息,不同类型设备对应的命令集;一个不到100行代码的主程序。主程序读取同一目录下的输入信息表格,登录设备,按命令集抓取信息后以单个命令生成单独文件保存到各个设备的独立文件夹下
Excel表格格式如下:
‘Devices‘表格,录入设备基本信息,

Devices sheet
‘Switch' 表格,关联‘Devices’的‘cmd_set’列的值, 除‘Devices’表格,其他表格用途相同,录入的为不同类型设备的命令集

Switch sheet
主程序:
# pip install colorama (windows need to install the lib first!!!)
import os
import xlrd
from netmiko import ConnectHandler
import re
import time
import threading
from tqdm import tqdm

BASE_DIR = os.path.dirname(os.path.abspath(__file__))  #get the script's root path

BASE_DIR_configuration = os.path.join(BASE_DIR, time.strftime("%Y%m%d%H%M%S", time.localtime()))
os.mkdir(BASE_DIR_configuration)

for file in os.listdir(BASE_DIR):
	if file == 'input_demo_v0.1.xls':
		file_name = file

wb = xlrd.open_workbook(filename=file_name)
sheet1 = wb.sheet_by_index(0)#get the sheet by index and it start with 0
#  sheet2 = wb.sheet_by_name('Devices')#get the sheet by name

device_infor_all = []
title_rows = sheet1.row_values(0)#get row values

for number_rows in range(1, sheet1.nrows):
	value_rows = sheet1.row_values(number_rows)
	device_infor_all.append(dict(zip(title_rows, value_rows)))

def devices_conn(device, position):
	cmd_set = wb.sheet_by_name(device['cmd_set']).col_values(0)

	cisco1 = {
    "device_type": "cisco_ios" if device['ssh_telnet'] == "ssh" else "cisco_ios_telnet",
    "host": device['IP'],
    "username": device['Username'],
    "password": device['Password'],
    "secret": None if device['Enable'] == '' else device['Enable'],
	}

	device_directory = os.path.join(BASE_DIR_configuration, re.sub(r'[@#!|/]', '_', device['Hostname']) + '___' + device['IP'])

	os.mkdir(device_directory)

	with ConnectHandler(**cisco1) as net_connect:
		if device['Enable'] != '':
			net_connect.enable()
		#print(net_connect.find_prompt())
		th_name = threading.current_thread().getName()
		for command in tqdm(cmd_set, th_name, ncols = 100, position = int(position), leave = False):
			output = net_connect.send_command(command.strip())
			with open(os.path.join(device_directory, re.sub(r'[@#!|/]', '_', command) + '.txt'), 'wt') as f:
				f.write(output)


if __name__ == '__main__':
	start = time.perf_counter()
	thread_list = [threading.Thread(target=devices_conn, args=(device, device['ID'])) for device in device_infor_all]

	for t in thread_list:
		t.start()
	for t in thread_list:
		if t.is_alive():
			t.join()

	#print(threading.active_count())
	print()
	print("all done: time", time.perf_counter() - start, "n")
程序主要用到以下几个库:
xlrd: 对Excel表格的操作,官方文档看的蛋疼,偷懒的参考这个
netmiko:登录设备等一系列操作,详细可以参考官方案例
tqdm:进度条参考官方github 项目地址,多行进度条的折腾了好久却没有达到预期效果,原因是没有看到官方的FAQ and Known Issues 里面有提到多行进度条 Windows需要‘'pip install colorama'
线程或异步:还是选择线程,异步好像麻烦了点,有时间再研究下
程序在Cisco部分类型设备下测试通过,支持ssh,telnet,
测试环境: Windows ,python3.8,
后续想完善的:
对设备类型支持使功能再通用些(无非就是把netmiko的"device_type"参数在Excel表格体现出来);各种异常的捕获,是程序更健壮;添加一个GUI的版本,用pyqt库来实现,便于使用;异步可以尝试下,看看和线程比效率上有啥实际的区别


