今天分享一篇文章,是关于如何使用 Manim 这个工具 Python 工具库来制作视频的。
据我所知,目前应该是没有专门的书籍和教程来介绍这个工具的。至于教程,不同版本的Manim有一部分文档,其中 Manim社区
版的文档相对而言要完善些。
本次仅介绍 Manim 中 文本 的使用,使用的版本为 Manim Community v0.14.0,本文内容主要如下:

01Manim的安装与运行
安装
如何安装Manim,参见下面的官方链接:
https://docs.manim.community/en/stable/installation.html
如何运行 Manim
用 Manim 绘制图形,首先需要引入 Manim 库,然后将需要绘制的内容封装到一个 类(class) 里面。
社区版的导入代码如下:
from manim import *
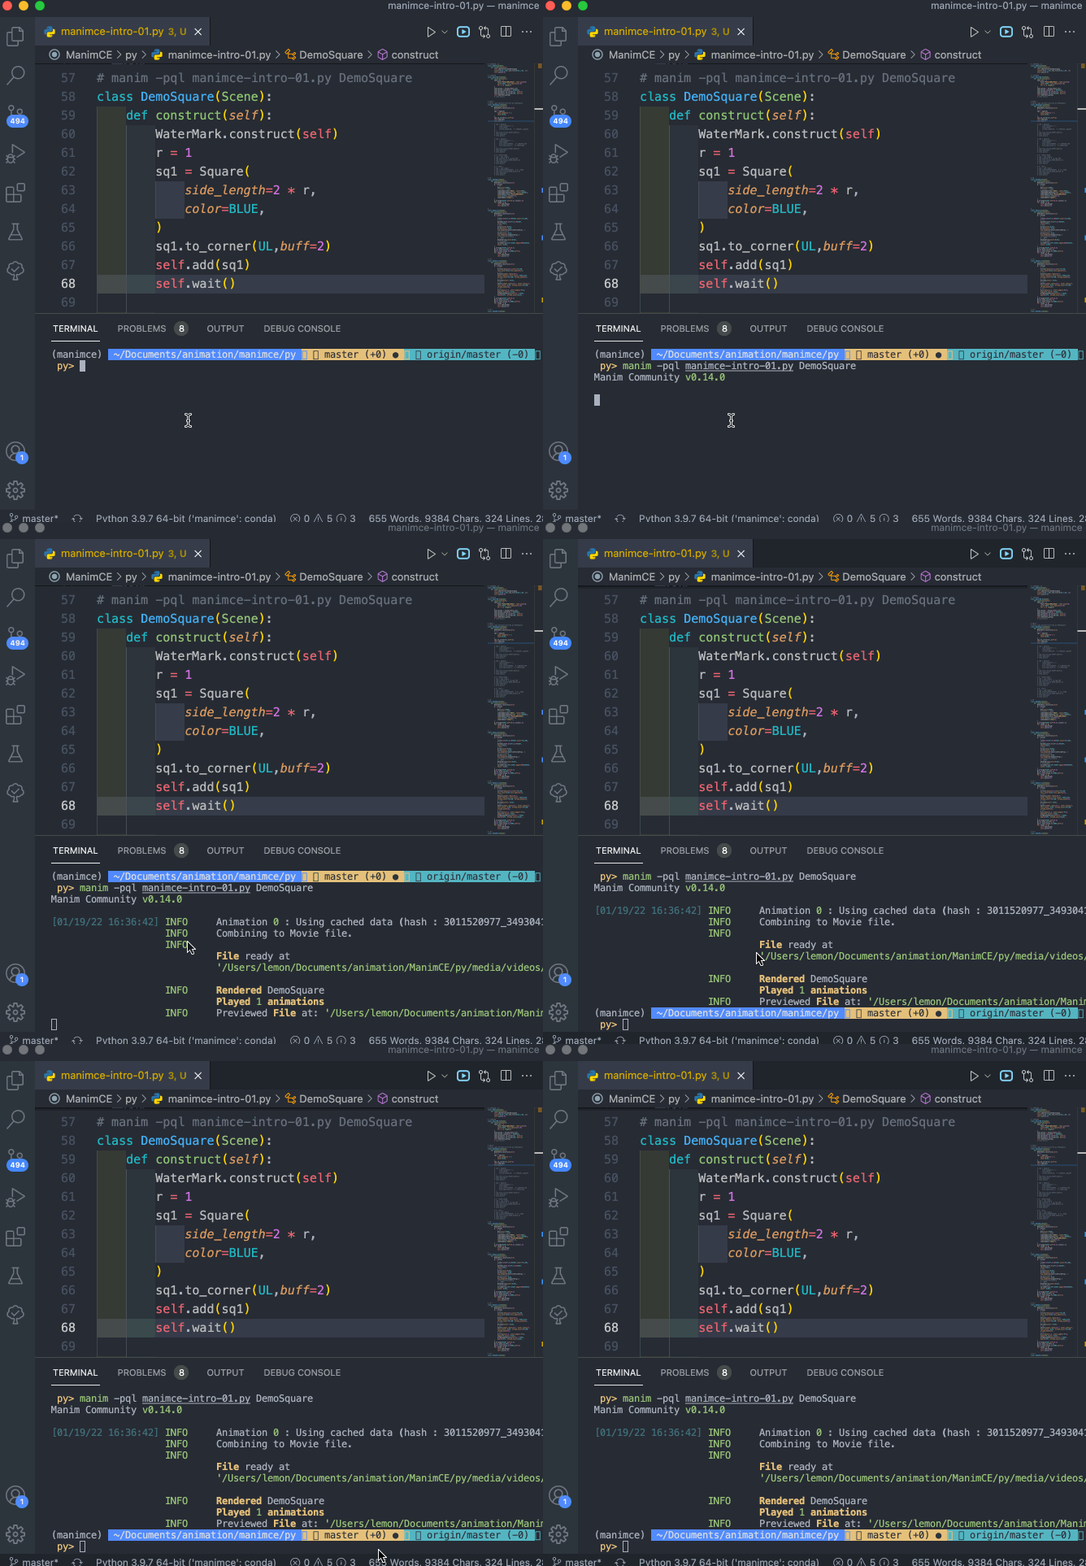
对于 编辑好的程序文件( XXXX.py 文件),需要在同一个文件夹下运行命令来运行程序,命令格式如下:
manim -pql XXXX.py DemoSquare
上面的命令行中:
•manim 是社区版Manim运行程序的主要标志用语;
•p 表示程序运行后会进行预览(图片或视频);
•ql 表示低质量(quality low), 其他的选项有 -ql, -qm, -qh, -qk, 分别表示 低质量、正常质量、高质量、4K质量;
•XXXX.py 是py代码文件;
•DemoSquare 是 py代码文件中的一个类;
演示过程录屏如下:
命令行中,还有其他许多参数可以设置,可以通过社区版的支持文档来进一步了解:
https://docs.manim.community/en/stable/tutorials/configuration.html#command-line-arguments
02文本使用介绍
在 Manim社区版中,文本的使用可以分为几个大类,分别是:
•纯文本
•标记文本
•LaTex 文本
•代码文本
2.1 纯文本
纯文本是最常见的一类文字,在视频中使用的标题、正文等,都可以使用纯文本,在Manim 中,纯文本可以通过 Text() 对象来实现。
比如要输出 文字 “Python数据之道”,核心代码如下:
Text("Python数据之道")效果如下:

设置文本大小
对于文本而言,设置文本在屏幕中显示的大小,是经常要做的一个事情,Text() 对象可以通过多种方法来实现:
•设置 scale 属性值;
•设置 set_width 属性值;
•设置 font_size 参数值;
python学习交流Q群:906715085###
# 设置文本大小
class Demo2(Scene):
    def construct(self):
        WaterMark.construct(self)
        s = "Python数据之道"
        t1 = Text(s)
        t1.to_edge(UP,buff=0.5)
        t2 = Text(s).scale(2)
        t2.next_to(t1,DOWN)
        t3 = Text(s).set_width(10)
        t3.next_to(t2,DOWN)
        t4 = Text(s,font_size=40)
        t4.next_to(t3,DOWN)
        self.add(t1)
        self.play(Write(t2))
        self.play(Create(t3))
        self.play(Write(t4))
        self.wait()
上述代码的实现效果如下:

设置文本颜色
文本颜色设置包括指定某种颜色以及渐变颜色设置,通常情况下,颜色通过 color 参数来设置,渐变颜色通过 gradient 参数来设置。
演示案例的代码如下:
# 设置文本颜色
class Demo3(Scene):
    def construct(self):
        WaterMark.construct(self)
        s = "Python数据之道"
        t1 = Text(s,color=BLUE)
        t1.to_edge(UP,buff=2)
        t2 = Text("一份价值,一份收获",gradient=[BLUE,YELLOW,RED]).next_to(t1,DOWN)
        t3 = Text("Hello World",gradient=[BLUE,YELLOW,RED]).next_to(t2,DOWN)
        t4 = Text("@Python数据之道",gradient=[BLUE,YELLOW,RED],font_size=30,fill_opacity=0.8)
        t4.next_to(t3,DOWN)
        t5 = Text("Python数据之道",gradient=[BLUE,YELLOW,RED]).next_to(t4,DOWN)
        # 当英文和汉字混合时, 当前的manim社区版,使用 gradient 时会出现 bug
        self.add(t1)
        self.play(Write(t2))
        self.play(Create(t3))
        self.play(Write(t4))
        self.play(Write(t5))
        self.wait()
上述代码的实现效果如下:

需要注意的是,当英文和汉字混合时, 当前的manim社区版,使用 gradient 时可能会出现 bug,没有渐变的效果,上述案例中的
变量 t5 实例 就没有实现渐变效果。
设置文本样式
文本样式的设置,包括文本加粗、斜体文本、文本字体设置、文本透明度设置、文本换行以及行距设置等。
演示案例的代码如下:
python学习交流Q群:906715085###
# 设置字体样式
class Demo4(Scene):
    def construct(self):
        WaterMark.construct(self)
        t1 = Text("Python数据之道",font="Alibaba PuHuiTi")
        t1.to_edge(UP,buff=0.5)
        t2 = Text("Python数据之道",color=BLUE,font="Times")
        t2.next_to(t1,DOWN)
        t3 = Text("Python数据之道", weight=BOLD)
        t3.next_to(t2,DOWN)
        t4 = Text("Python数据之道", slant=ITALIC)
        t4.next_to(t3,DOWN)
        t5 = Text("Python数据之道", fill_opacity=0.5)
        t5.next_to(t4,DOWN)
        t6 = Text("Hello\nPython", line_spacing=0.5)
        t6.next_to(t5,DOWN,buff=1).shift(LEFT)
        t7 = Text("Hello\nPython", line_spacing=2)
        t7.next_to(t6,RIGHT,buff=1)
        self.add(t1)
        self.play(Write(t2))
        self.play(Write(t3))
        self.play(Write(t4))
        self.play(Write(t5))
        self.add(t6,t7)
        self.wait()
上述代码的实现效果如下:

需要主要的是,在选择字体设置时,所选择的字体需要在自己的电脑中已经安装了对应的字体,才会有效果。
此外,在对于非英文字体的设置时,可能有些样式设置会不起作用,具体的需要自己去根据实际情况测试下。
对于咱们而言,一般就是英文和中文的使用,常用的字体加粗、斜体文字、透明度等,是有效的。对于字体,我一般是使用 “Alibaba PuHuiTi” 字体,这个字体可以免费使用。
个性化设置部分文本
在控制显示过程中,经常会遇到只需要显示一段文本中一部分文本的情况,可以通过以下几个参数来进行设置:
•t2c,全称为 “text2color”,用来设置部分文字的颜色;
•t2f,全称为 “text2font”,用来设置部分文字的字体;
•t2w,全称为 “text2weight”,用来设置部分文字加粗;
•t2s,全称为 “text2slant”,用来设置部分文字为斜体;
•t2g,全称为 “text2gradient”,用来设置部分文字的渐变颜色;
演示案例的代码如下:
# 个性化设置部分文本的样式
class Demo5(Scene):
    def construct(self):
        WaterMark.construct(self)
        t1 = Text("Python数据之道",t2c={"Python":RED,'[7:9]':YELLOW})
        t1.to_edge(UP,buff=0.5)
        t2 = Text("Python数据之道",t2s={"Python":ITALIC})
        t2.next_to(t1,DOWN)
        t3 = Text("Python数据之道", t2w={"Python":BOLD})
        t3.next_to(t2,DOWN)
        t4 = Text("Python数据之道", t2f={"Python":"Times"})
        t4.next_to(t3,DOWN)
        t5 = Text(
            "Hello,PyDataLab",
            t2g={
                'PyData':[BLUE,YELLOW,RED],
                # 'offset':"1",
            },
            )
        t5.next_to(t4,DOWN)
        t6 = Text(
            "Hello,Python数据之道",
            t2g={
                'Python':[BLUE,YELLOW,RED],
            },
            )
        t6.next_to(t5,DOWN)
        t7 = Text(
            "一份价值,一份收获",
            t2g={
                '一份价值':[BLUE,YELLOW,RED],
            },
            )
        t7.next_to(t6,DOWN)
        # "t2c"、"t2s"、"t2w"、"t2g"、"t2f" 参数设置,可以直接是 字符串,或者是 字符串的位置切片
        self.add(t1)
        self.play(Write(t2))
        self.play(Write(t3))
        self.play(Write(t4))
        self.play(Write(t5))
        self.play(Write(t6))
        self.play(Write(t7))
        self.wait()
上述代码的实现效果如下:

通过上面的代码可以看出,“t2c”、“t2s”、“t2w”、“t2g”、“t2f” 参数设置,可以直接是 字符串,或者是 字符串的位置切片。
需要注意的是,当英文和汉字混合或者全部是中文时, 当前的manim社区版,使用 t2g 对部分文字进行渐变设置 时可能会出现
bug,会出现部分文字渐变效果不完整,或者全部文字都有渐变效果。
纯文本应用案例
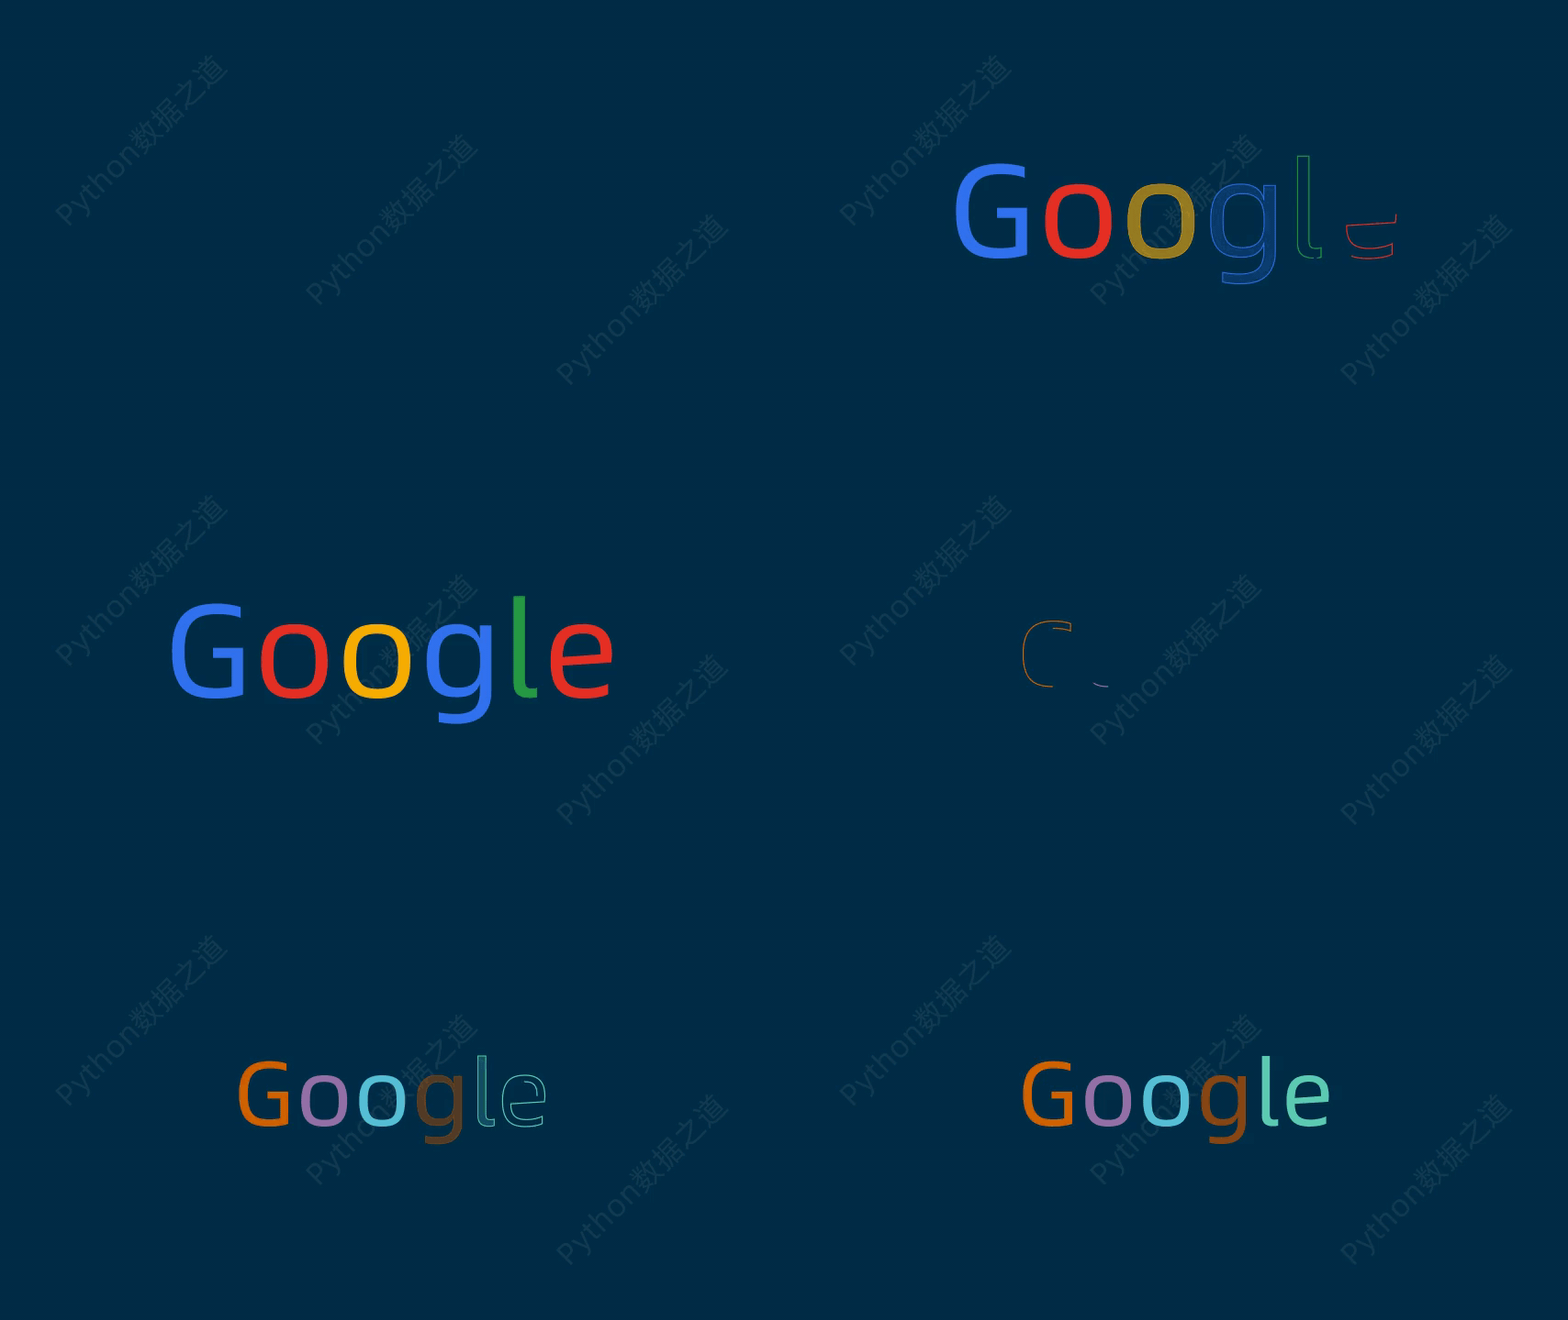
下面咱们来看一个用纯文本实现 “Google” 彩色 logo 的案例,如下:
class Demo6(Scene):
    def construct(self):
        WaterMark.construct(self)
        text1 = Text(
            'Google',
            t2c={'[:1]': '#3174f0', '[1:2]': '#e53125',
                 '[2:3]': '#fbb003', '[3:4]': '#3174f0',
                 '[4:5]': '#269a43', '[5:]': '#e53125'}, font_size=58).scale(3)
        self.play(Write(text1),run_time=3)
        self.wait()
        self.play(FadeOut(text1))
        t2 = Text('Google',font_size=120)
        colors = [BLUE, ORANGE, PURPLE, PINK, TEAL,DARK_BROWN, RED,LIGHT_BROWN,GOLD,BLUE_L_C,ORANGE_L_A,PURPLE_E]*10
        # for i in range(len(t2)):
        #     t2[i].set_color(colors[i])
        for letter in t2:
            letter.set_color(np.random.choice(colors,size=1))
        self.play(Write(t2),run_time=3)
        self.wait()
上述代码的实现效果如下:
2.2 标记文本
Manim社区版使用 Pango 来渲染非 LaTex 文本。
Pango标记语言是一种类似 html 的标记语言,可以使用一系列的标记符号。
PangoMarkup is a small markup language like html and it helps you avoid using “range of characters”
 while coloring or styling a piece a Text. You can use this language with MarkupText.
标记文本的基础应用
一个简单的应用案例如下:
class Markup01(Scene):
    def construct(self):
        WaterMark.construct(self)
        t1 = MarkupText('<span foreground="yellow" size="x-large">Hello, </span> <i>Welcome to </i>ValueLab !"')
        t1.to_edge(UP,buff=2)
        self.add(t1)
        self.wait()

        t2 = MarkupText('<span foreground="yellow" size="x-large">一份价值,</span> 一份 <i>收获</i>!"')
        t2.next_to(t1,DOWN,buff=1)
        self.add(t2)
        self.wait()
上述代码的实现效果如下:

可以看到,对于 Markup 标记语言,在应用于英文文字的时候,应用效果是挺好的,但对于中文字体,上面的文字中,斜体效果
就没有体现出来。不知道是 Pango本身渲染的问题还是 Manim社区版存在一些瑕疵。
当前,Manim中进行文字渲染,支持以下标签:

标记文本的样式设置
标记文本的样式设置包括文字加粗、下划线、斜体、上标、下表、删除线等,演示案例的代码如下:
# 样式设置,加粗、下划线、斜体等
class Markup02(Scene):
    def construct(self):
        WaterMark.construct(self)
        text1 = MarkupText("<b>Hello</b> <i>welcome to</i> <b><i>ValueLab</i></b>")
        text2 = MarkupText("<s>foo</s> <u>bar</u> <big>big</big> <small>small</small>")
        text3 = MarkupText("H<sub>2</sub>O and H<sub>3</sub>O<sup>+</sup>")
        text4 = MarkupText("type <tt>help</tt> for help")
        text5 = MarkupText(
            '<span underline="double">foo</span> <span underline="error">bar</span>'
        )
        group = VGroup(text1, text2, text3, text4, text5).arrange(DOWN)
        self.add(group)
上述代码的实现效果如下:

标记文本的颜色设置
标记文本的颜色设置,主要是渐变色的设置比较复杂,仔细看下面案例中渐变色设置时的各个参数:
python学习交流Q群:906715085###
# 颜色设置,设置不同的颜色、渐变色等
class Markup03(Scene):
    def construct(self):
        text1 = MarkupText(
            f'all in red <span fgcolor="{YELLOW}">except this</span>', color=RED
        )
        text2 = MarkupText("nice gradient", gradient=(BLUE, GREEN))
        text3 = MarkupText(
            'nice <gradient from="RED" to="YELLOW">intermediate</gradient> gradient',
            gradient=(BLUE, GREEN),
        )
        text4 = MarkupText(
            'fl ligature <gradient from="RED" to="YELLOW">causing trouble</gradient> here'
        )
        text5 = MarkupText(
            'fl ligature <gradient from="RED" to="YELLOW" offset="1">defeated</gradient> with offset'
        )
        text6 = MarkupText(
            'fl ligature <gradient from="RED" to="YELLOW" offset="1">floating</gradient> inside'
        )
        text7 = MarkupText(
            'fl ligature <gradient from="RED" to="YELLOW" offset="1,1">floating</gradient> inside'
        )
        group = VGroup(text1, text2, text3, text4, text5, text6, text7).arrange(DOWN)
        self.add(group)
上述代码的实现效果如下:

文字对齐
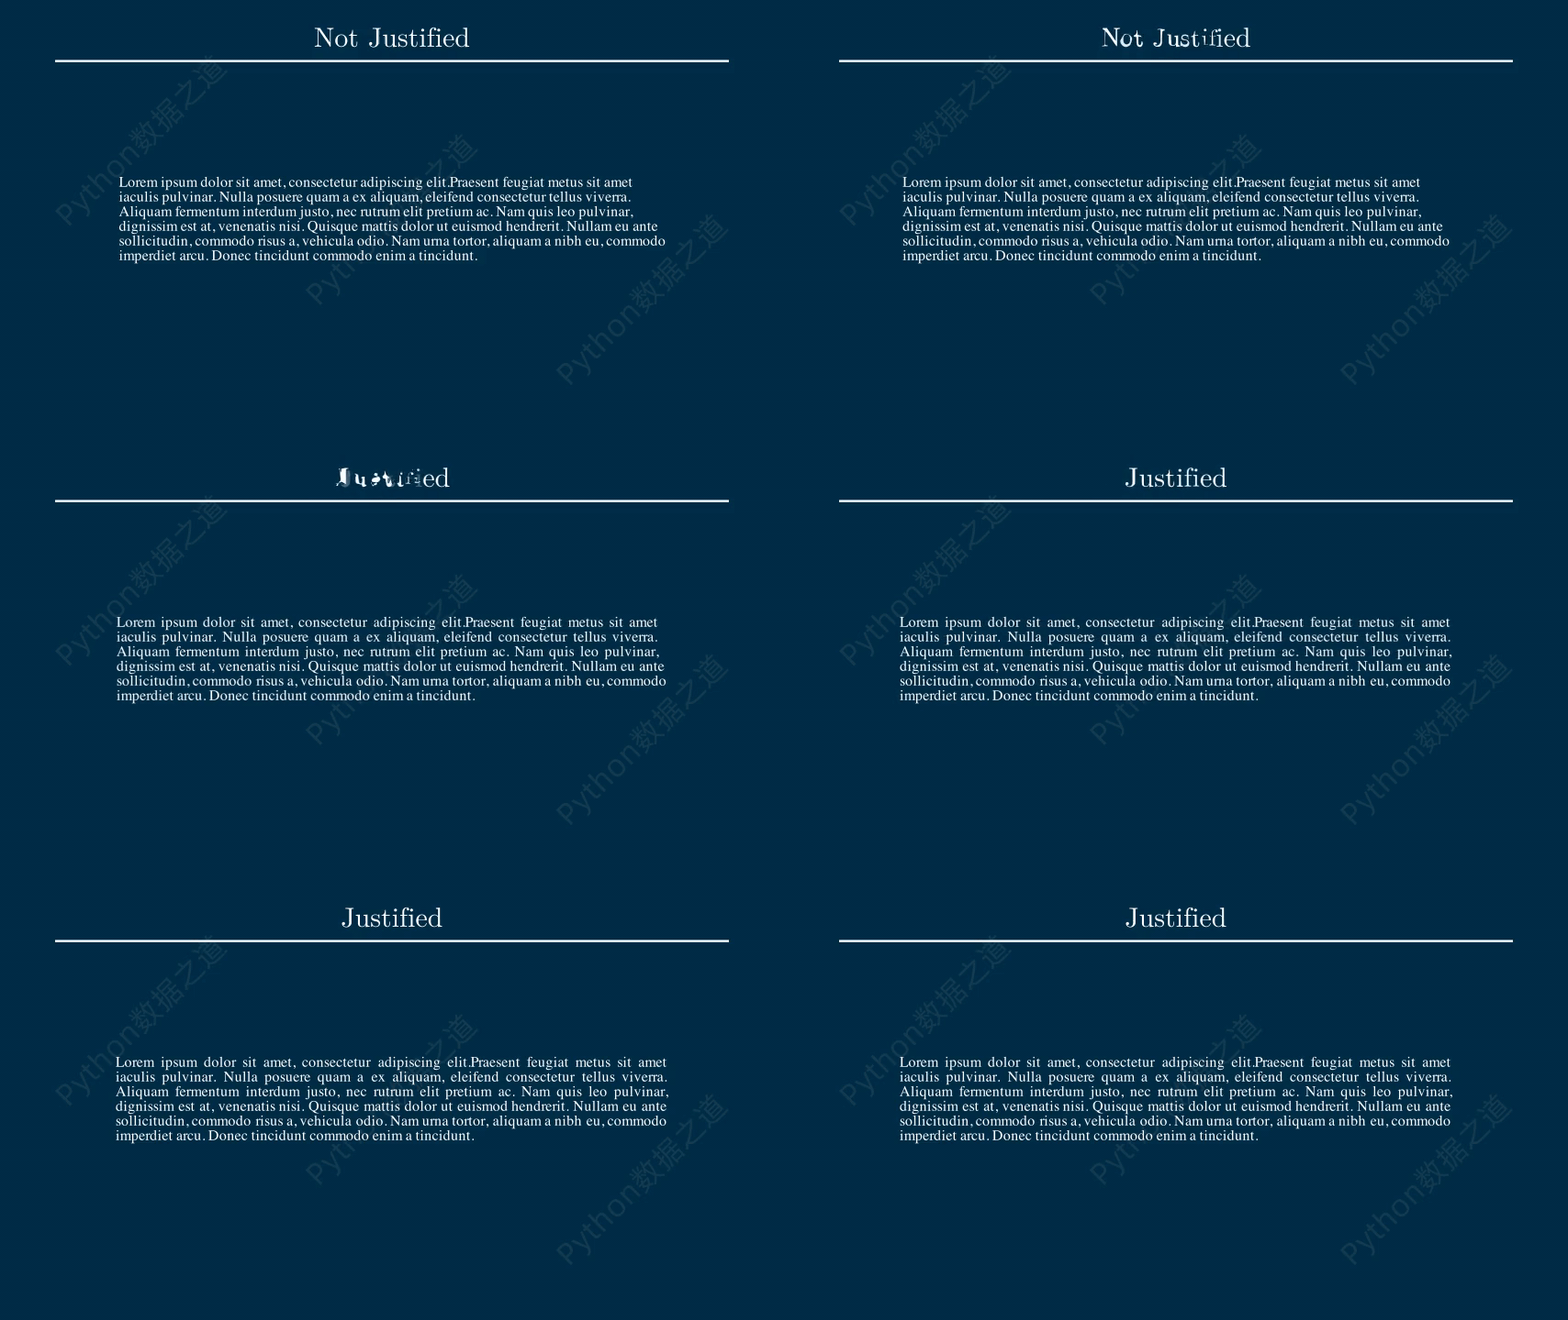
在书写英文文字时,为了排版效果好看,经常需要将文字进行对齐显示,这个在 Manim中,也可以实现。
演示案例的代码如下:
# 文字对齐
class Markup05(Scene):
    def construct(self):
        WaterMark.construct(self)
        ipsum_text = (
            "Lorem ipsum dolor sit amet, consectetur adipiscing elit."
            "Praesent feugiat metus sit amet iaculis pulvinar. Nulla posuere "
            "quam a ex aliquam, eleifend consectetur tellus viverra. Aliquam "
            "fermentum interdum justo, nec rutrum elit pretium ac. Nam quis "
            "leo pulvinar, dignissim est at, venenatis nisi. Quisque mattis "
            "dolor ut euismod hendrerit. Nullam eu ante sollicitudin, commodo "
            "risus a, vehicula odio. Nam urna tortor, aliquam a nibh eu, commodo "
            "imperdiet arcu. Donec tincidunt commodo enim a tincidunt."
        )
        justified_text = MarkupText(ipsum_text, justify=True).scale(0.4)
        not_justified_text = MarkupText(ipsum_text, justify=False).scale(0.4)
        just_title = Title("Justified")
        njust_title = Title("Not Justified")
        self.add(njust_title, not_justified_text)
        self.play(
            Transform(
                not_justified_text,
                justified_text,
            ),
            Transform(
                njust_title,
                just_title,
            ),
            run_time=2,
        )
        self.wait(1)
上述代码的实现效果如下:
2.3 LaTex 文本
LaTeX(LATEX,音译“拉泰赫”)是一种基于ΤΕΧ的排版系统,由美国计算机学家莱斯利·兰伯特(Leslie Lamport)在20世纪80年
代初期开发,利用这种格式,即使使用者没有排版和程序设计的知识也可以充分发挥由TeX所提供的强大功能,能在几天、甚至
几小时内生成很多具有书籍质量的印刷品。
对于生成复杂表格和数学公式,这一点表现得尤为突出。因此它非常适用于生成高印刷质量的科技和数学类文档。这个系统同样
适用于生成从简单的信件到完整书籍的所有其他种类的文档。
在 Manim 中使用 latex 文本,需要你的电脑环境中已经安装了 latex的相关软件和支持工具。
在 Manim 中,可以通过以下几种方法来使用 latex 文本,如下:
•Tex
•MathTex
•Title
•BulletedList
文本型的 LaTex 可以通过 Tex、Title、BulletedList 来实现,数学公式类型的文本,可以通过 Tex 或 MathTex 来实现。
基础应用
先来看一个 latex 的基础应用案例,如下:
class DemoTex01(Scene):
    def construct(self):
        WaterMark.construct(self)
        tex1 = Tex(r"\LaTeX", font_size=144)
        tex1.to_edge(UP,buff=1)
        self.add(tex1)
        self.wait()

        tex2 = Tex(r'$x^2 + y^2 = z^2$', font_size=144)
        tex2.next_to(tex1,DOWN,buff=0.5)
        tex3 = MathTex(r'x^2 + y^2 = z^2', font_size=144,color=BLUE)
        tex3.next_to(tex2,DOWN,buff=0.5)
        self.add(tex2)
        self.wait()
        self.add(tex3)
        self.wait()
上述代码的实现效果如下:

在 Tex 或 MathTex 中使用字符串时,一般会使用 r"…" 的形式,而不是 ‘…’ 的形式,这是因为在 latex文本中,经常会涉及到一些
特殊的字符,比如 \ 。
在进行数学公式的表达时,使用 Tex 时需要在字符串前后添加符号
了。两者之间的区别,需要注意下。
使用 latex 工具包
在 latex 中输出特殊符号时,可以通过 latex 工具包来实现。
当然,需要你的电脑中已经安装了对应的 latex 工具包。对于没有使用过 latex 的同学来说,这个确实会有些繁琐。
演示案例的代码如下:
# 使用 latex 工具包
class DemoTex02(Scene):
    def construct(self):
        WaterMark.construct(self)
        myTemplate = TexTemplate()
        myTemplate.add_to_preamble(r"\usepackage{mathrsfs}")
        tex = Tex(r'$\mathscr{H} \rightarrow \mathbb{H}$}', tex_template=myTemplate, font_size=144)
        self.add(tex)
上述代码的实现效果如下:

数学公式的颜色设置
在 Manim 中,对于数学公式中字符的颜色设置,可以通过参数 set_color_by_tex 和 substrings_to_isolate 的组合来实现不同的效
果。
演示案例的代码如下:
# 数学公式的颜色设置
class DemoTex03(Scene):
    def construct(self):
        WaterMark.construct(self)
        eq1 = MathTex(
            r"e^x = x^0 + x^1 + \frac{1}{2} x^2 + \frac{1}{6} x^3 + \cdots + \frac{1}{n!} x^n + \cdots"
        )
        eq1.scale(1.2)
        eq1.set_color_by_tex("x", YELLOW)
        eq1.to_edge(UP,buff=2)
        self.add(eq1)
        self.wait()
        # self.play(FadeOut(eq1))

        eq2 = MathTex(
            r"e^x = x^0 + x^1 + \frac{1}{2} x^2 + \frac{1}{6} x^3 + \cdots + \frac{1}{n!} x^n + \cdots",
            substrings_to_isolate="x",
        )
        eq2.scale(1.2)
        eq2.set_color_by_tex("x", RED)
        eq2.next_to(eq1,DOWN,buff=1)
        self.add(eq2)
        self.wait()
上述代码的实现效果如下:

在 eq1 中,仅设置参数 set_color_by_tex 时,是对于包含 “x” 的整个公式进行颜色设置;而在 eq2 中,同时设置参数
set_color_by_tex 和 substrings_to_isolate 时,仅仅对公式中的 “x” 字符进行颜色设置;这两种是不一样的应用场景,大家选择合
适的去使用。
我在自己视频中涉及数学公式的部分代码如下:
class DemoTex04(Scene):
    def construct(self):
        WaterMark.construct(self)
        equations = VGroup(
            MathTex(
                r"1.01^{365} = 37.8",
                # size=80,
            ),
            MathTex(
                r"1.00^{365} = 1.00",
                # size=80,
            ),
            MathTex(
                r"0.99^{365} = 0.03",
                # size=80,
            ),
        )

        # 设置宽度
        # equations.set_width(FRAME_WIDTH-4)
        equations.set_width(8)

        for equation in equations:
            equation.set_color_by_tex_to_color_map({
                "1.01": BLUE,
                "0.99": RED,
            })

        equations.arrange(DOWN, buff=0.7, aligned_edge=LEFT)
        self.play(Write(equations[0]))
        self.wait()

        self.play(Write(equations[2]))
        self.wait()

        self.play(Write(equations[1]))
        self.wait()

        self.play(equations[1].animate.set_opacity(0.2))
        self.wait()
上述代码的实现效果如下:

tex 模板应用
在 LaTex 中,可以通过设置使用的模板,来设置使用的字体。此外,在使用中文字符时,经常需要设置中文的模板(一般使用 ctex)。
演示案例的代码如下:
# tex 模板应用
class DemoTex05(Scene):
    def construct(self):
        WaterMark.construct(self)
        tex1 = Tex(r'$x^2 + y^2 = z^2$', tex_template=TexFontTemplates.french_cursive, font_size=144)
        tex1.to_edge(UP,buff=1)
        self.add(tex1)
        self.wait()

        tex2 = Tex(r'Hello 你好 \LaTeX', tex_template=TexTemplateLibrary.ctex, font_size=144)
        tex2.next_to(tex1,DOWN,buff=0.5)
        self.add(tex2)
        self.wait()
上述代码的实现效果如下:

对于 TexFontTemplates,可以使用的模板说明如下:
A collection of TeX templates for the fonts described at http://jf.burnol.free.fr/showcase.html
公式换行
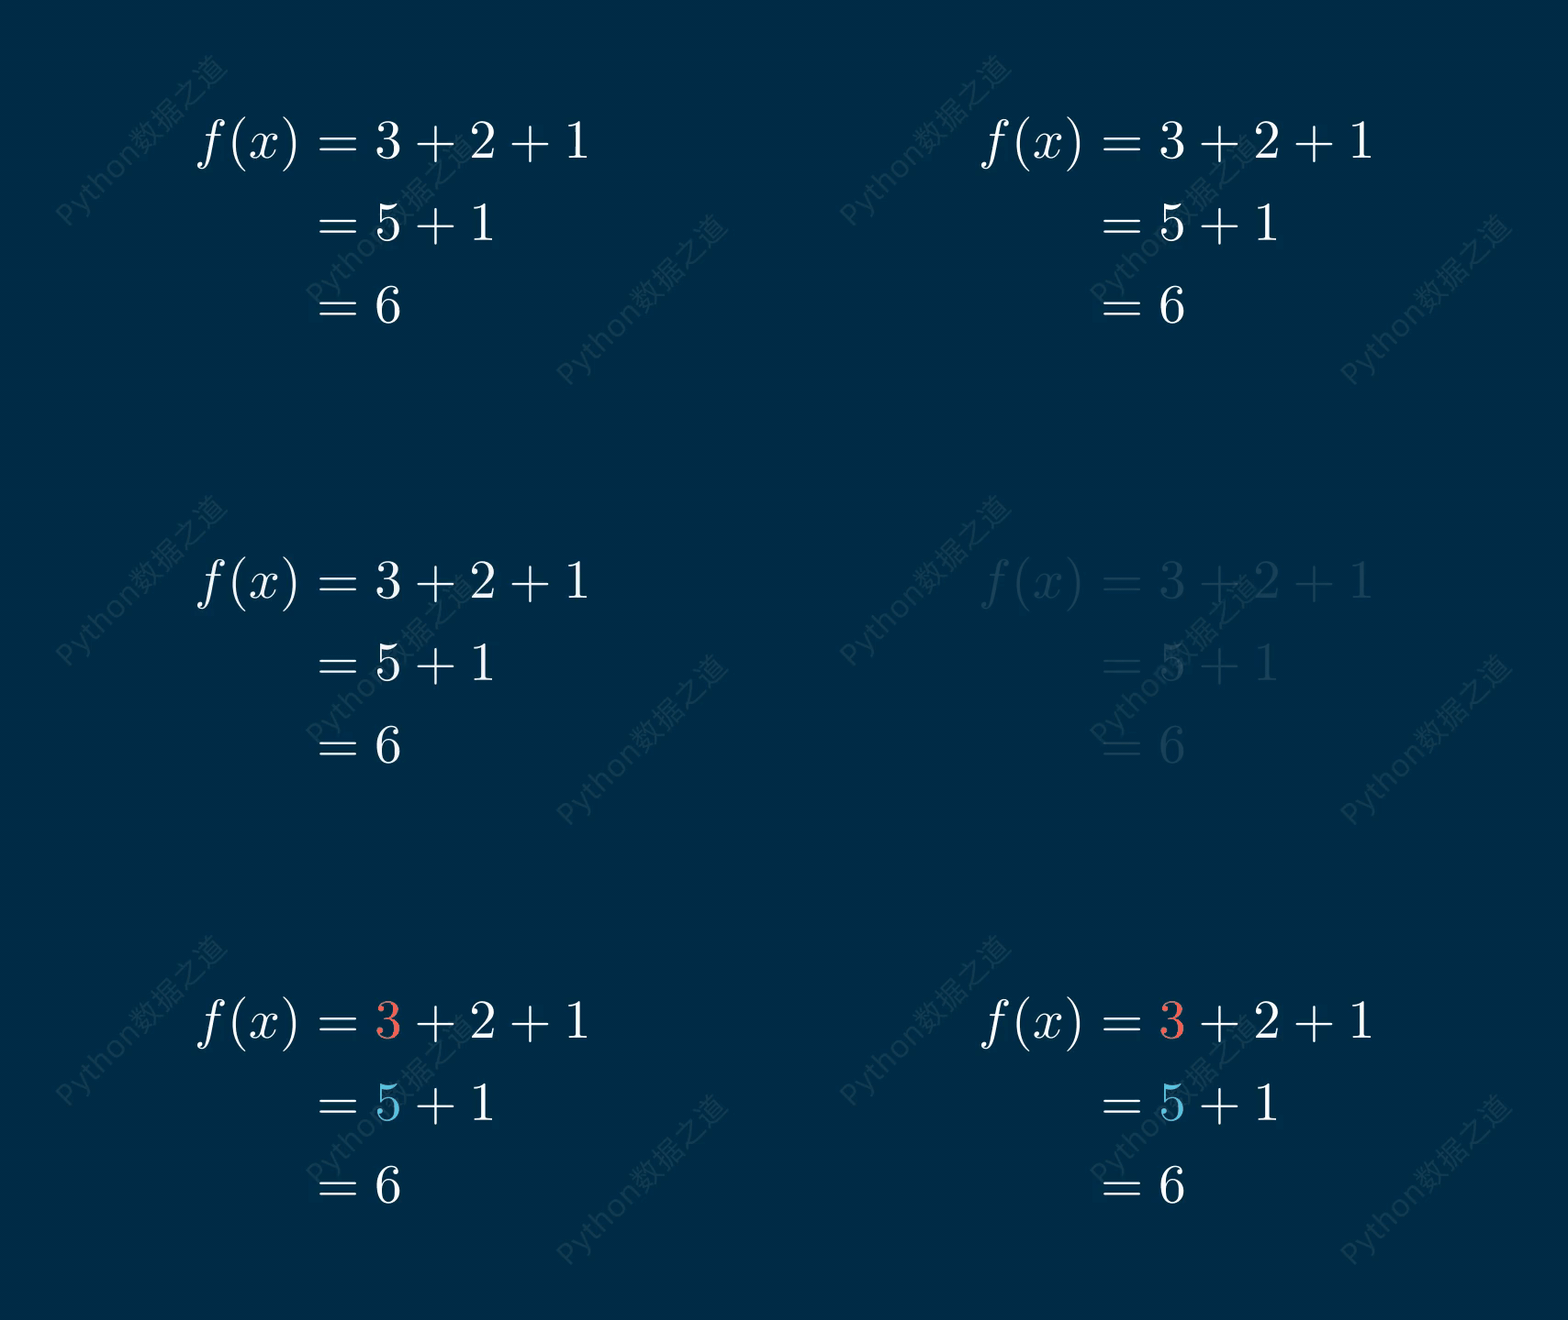
在数学公式中,可以实现换行效果,如下:
# 公式换行
class DemoTex06(Scene):
    def construct(self):
        WaterMark.construct(self)
        tex1 = MathTex(
            r'f(x) &= 3 + 2 + 1\\ &= 5 + 1 \\ &= 6',
            font_size=96,
        )
        self.add(tex1)
        self.wait()
        self.play(FadeOut(tex1))

        tex2 = MathTex(
            r'f(x) &= 3 + 2 + 1\\ &= 5 + 1 \\ &= 6',
            font_size=96,
            substrings_to_isolate=['5','3'],
        )
        tex2.set_color_by_tex_to_color_map({
                "5": BLUE,
                "3": RED,
            })
        self.add(tex2)
        self.wait()
上述代码的实现效果如下:
Title 对象应用
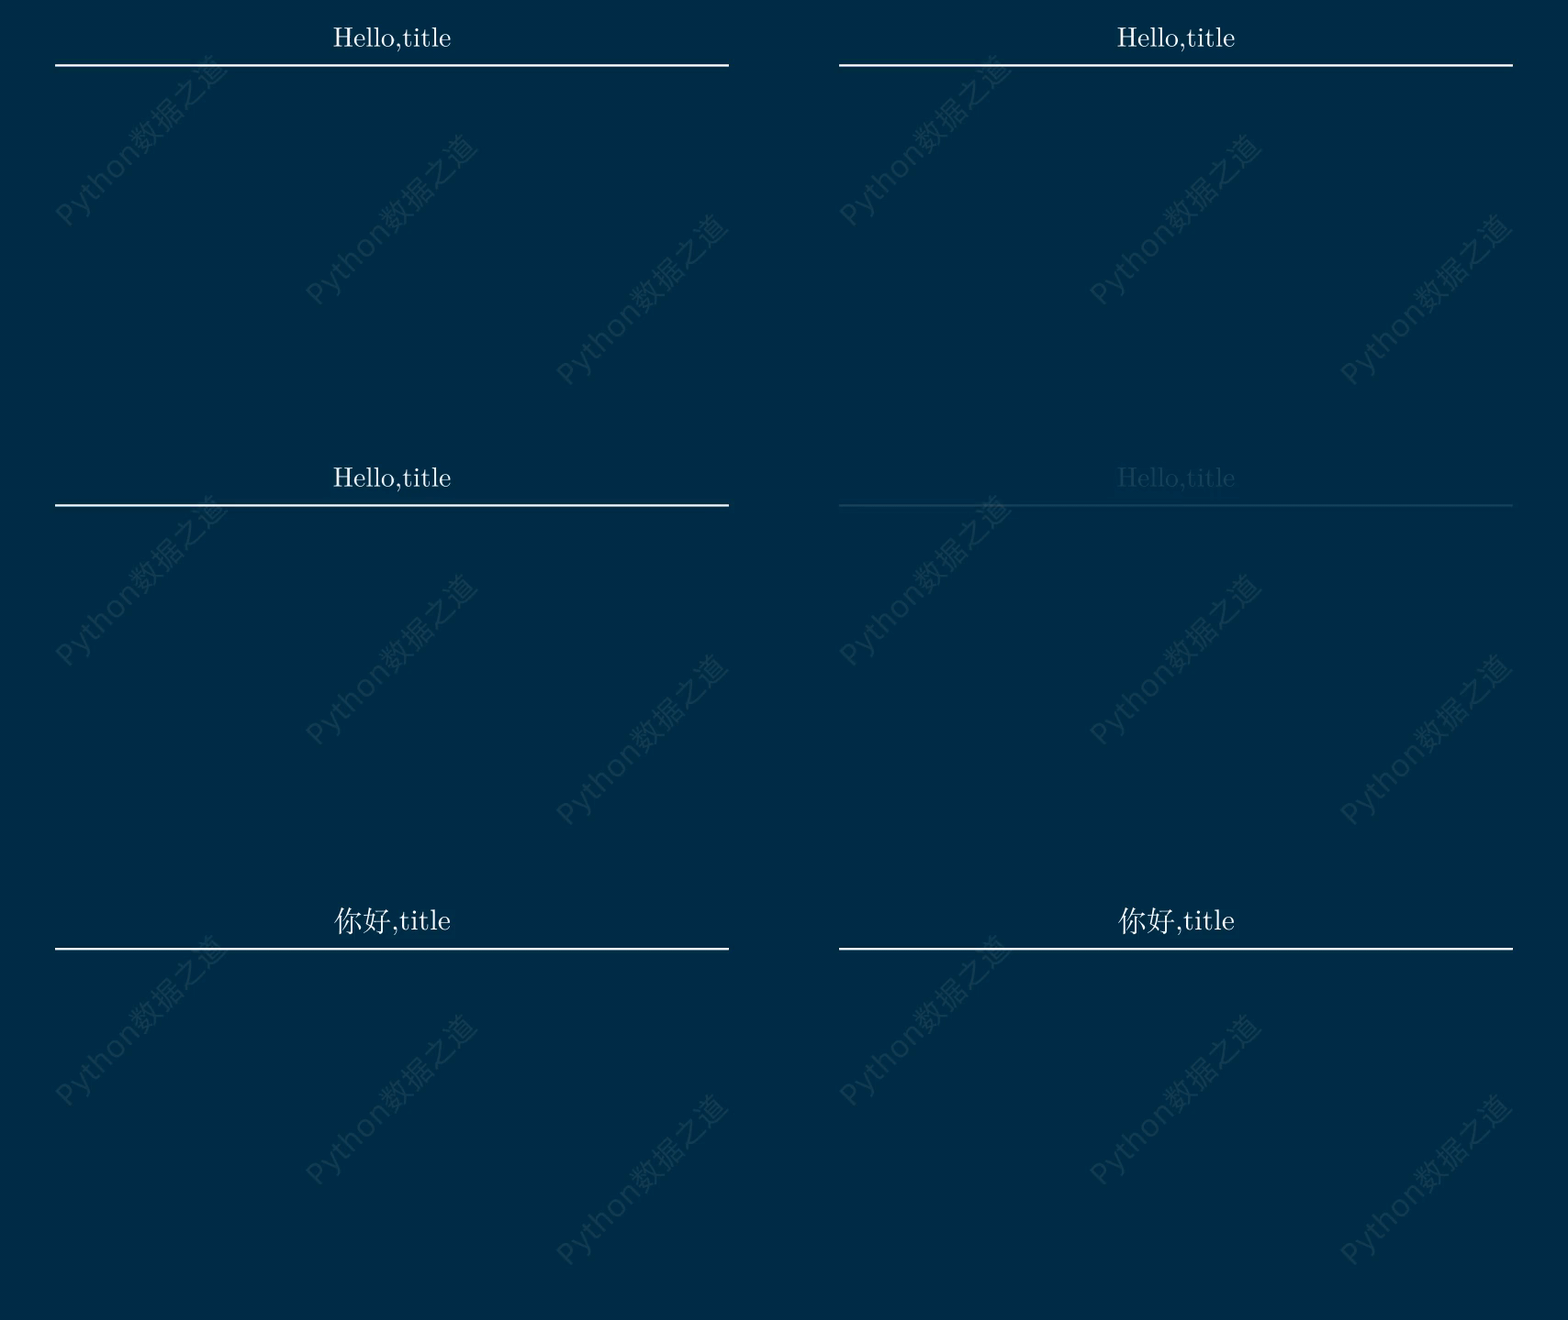
在视频中设置文字标题时,可以直接使用 Title 对象,需要说明的是,Title 对象是基于 Tex 来实现的,在涉及中文输出时,需要设置使用的模板为中文适用的模板。
演示案例的代码如下:
# Title 对象应用
class DemoTex07(Scene):
    def construct(self):
        WaterMark.construct(self)
        title1 = Title("Hello,title")
        self.add(title1)
        self.wait()
        self.play(FadeOut(title1))

        # 使用 “Title” 对象,当有中文时,需要设置中文字体模板(电脑中需要安装了 ctex)
        title2 = Title("你好,title",tex_template=TexTemplateLibrary.ctex)
        self.add(title2)
        self.wait()
上述代码的实现效果如下:
列表类型的文本
在文本的使用过程中,会时不时涉及到 列表型文本,目前,在 Manim 中,可以直接实现无序号型的列表文本,通过 BulletedList
对象来实现。
演示案例的代码如下:
# 列表类型的文本
class DemoTex08(Scene):
    def construct(self):
        blist = BulletedList("Python", "Java", "C++", height=2, width=2)
        blist.set_color_by_tex("Python", RED)
        blist.set_color_by_tex("Java", GREEN)
        blist.set_color_by_tex("C++", BLUE)
        self.add(blist)
上述代码的实现效果如下:

2.4 代码文本
在 IT编程领域,代码的高亮显示是一个常见的需求,在 Manim 制作的视频中,也可以实现代码高亮的效果,主要是通过 Code() 对象来实现。
下面以快速排序的Python代码为例,来演示如何在视频中进行代码高亮显示。
class Code1(Scene):
    def construct(self):
        WaterMark.construct(self)
        code_str_1 = """
        def quickSort(Array):
            n = len(Array)
            if n <= 1:
                return Array
            baseline = Array[0]
            left = [Array[i] for i in range(1, len(Array)) if Array[i] < baseline]
            right = [Array[i] for i in range(1, len(Array)) if Array[i] >= baseline]
            return quickSort(left) + [baseline] + quickSort(right)
        """
        code1 = Code(
            code=code_str_1,
            tab_width=4,
            background="window",
            language="Python",
            font="Monospace",
            insert_line_no=False,  # 是否显示代码行数
            style='monokai',
        )

        code1.scale(0.8).to_edge(UP,buff=1)

        self.play(Write(code1))
        self.wait()
代码高亮效果如下:

上述代码中,变量 code_str_1 是快速排序算法的Python实现代码, 变量 code1 是 Code() 对象的实例, Code() 有许多参数可以
进行设置,这里只对部分参数进行设置:
•background 参数,可以选择 “rectangle” 或 “window”,默认是 “rectangle”,我自己一般喜欢用 “window”;
•language 参数是所用的编程语言,支持常用的编程语言;
•font 参数,代码字体,默认为 “Monospac821 BT”,我一般用 “Monospace”;
•insert_line_no 参数,是否显示代码行数,默认是 True;需要注意的是,在显示代码行数时,有时行数与代码的对齐效果不一定完美;
•style 参数,代码显示风格,有多种风格可以选择,其可选代码样式来源于 “pygments” (https://pygments.org/docs/styles/)。可在Python中运行代码来获取支持的样式。
from pygments.styles import get_all_styles
styles = list(get_all_styles())
style支持的样式如下:
['default', 'emacs', 'friendly', 'colorful', 'autumn', 'murphy', 'manni', 'monokai', 'perldoc', 'pastie', 'borland', 'trac', 'native', 'fruity', 'bw',

'vim', 'vs', 'tango', 'rrt', 'xcode', 'igor', 'paraiso-light', 'paraiso-dark', 'lovelace', 'algol', 'algol_nu', 'arduino', 'rainbow_dash', 'abap', 'solarized-dark',
 'solarized-light', 'sas', 'stata', 'stata-light', 'stata-dark', 'inkpot'] 默认的样式为 'vim',我一般喜欢用 'monokai' 样式。

再选择一款浅色的样式(‘solarized-light’),并设置不同的参数值,来对比下效果,如下:
class Code1(Scene):
    def construct(self):
        WaterMark.construct(self)
        code_str_1 = """
        def quickSort(Array):
            n = len(Array)
            if n <= 1:
                return Array
            baseline = Array[0]
            left = [Array[i] for i in range(1, len(Array)) if Array[i] < baseline]
            right = [Array[i] for i in range(1, len(Array)) if Array[i] >= baseline]
            return quickSort(left) + [baseline] + quickSort(right)
        """
        code1 = Code(
            code=code_str_1,
            tab_width=4,
            background="window",
            language="Python",
            font="Monospace",
            insert_line_no=False,  # 是否显示代码行数
            style='monokai',
        )

        code1.scale(0.8).to_edge(UP,buff=1)

        self.play(Write(code1))
        self.wait()

        code2 = Code(
            code=code_str_1,
            tab_width=4,
            background="rectangle", # rectangle , window
            language="Python",
            font="Monospace",
            insert_line_no=True,  # 是否显示代码行数
            style='solarized-light',
            # line_spacing=0.3,
        )

        code2.scale(0.8)
        code2.next_to(code1,DOWN,buff=0.5)

        self.play(Write(code2))
        self.wait()
代码高亮效果如下:

Code() 对象还有更多的参数可以进行设置,详细的参数设置说明,大家可以通过官方文档来了解。

官方文档地址:
https://docs.manim.community/en/stable/reference/manim.mobject.svg.code_mobject.Code.html#manim.mobject.svg.code_mobject.Code最后
文本的使用,是咱们最常见的领域,在使用文本时,从频率来看,纯文本 是用的最多的,标记文本是对纯文本的进一步拓展,而
latex 文本,则是 针对数学公式等特殊且频率较高的场景来使用的,至于 代码高亮,则是在IT编程特定领域进行应用。
对于涉及中文的使用,经常需要通过 latex 来实现一些效果,因此,对想进一步深入了解中文排版的同学来,可能需要有一些
latex 的基础知识。
熟练的使用文本,可以给视频的排版和外观带来不少好处,不要小看这些。
以上就是我使用 Manim 的一些经验,希望对你有帮助。


