文章目录
- 1、简介
- 2、功能实现
1、简介
PyQt 多界面之间数据传递,我们在这里使用属性传参的方式来进行数据传递,
本例子将自定义对话框作为一个子窗口,后面新建一个主窗口来调用i窗口的属性。
思路 就是 在一个类A里 创建另一个类B, 引用B 类里面的属性值和函数

2、功能实现
1)创建子窗口 DateDialog.py
# -*- coding: utf-8 -*-

'''
    【简介】

    对话框关闭时返回值给主窗口 例子

'''

from PyQt5.QtCore import *
from PyQt5.QtGui import *
from PyQt5.QtWidgets import *


class DateDialog(QDialog):
    def __init__(self, parent=None):
        super(DateDialog, self).__init__(parent)
        self.setWindowTitle('DateDialog')

        # 在布局中添加部件
        layout = QVBoxLayout(self)
        self.datetime = QDateTimeEdit(self)
        self.datetime.setCalendarPopup(True)
        self.datetime.setDateTime(QDateTime.currentDateTime())
        layout.addWidget(self.datetime)

        # 使用两个button(ok和cancel)分别连接accept()和reject()槽函数
        buttons = QDialogButtonBox(
            QDialogButtonBox.Ok | QDialogButtonBox.Cancel,
            Qt.Horizontal, self)
        buttons.accepted.connect(self.accept)
        buttons.rejected.connect(self.reject)
        layout.addWidget(buttons)

    # 从对话框中获取当前日期和时间
    def dateTime(self):
        return self.datetime.dateTime()

    # 静态方法创建对话框并返回 (date, time, accepted)
    @staticmethod
    def getDateTime(parent=None):
        dialog = DateDialog(parent)
        result = dialog.exec_()
        date = dialog.dateTime()
        return (date.date(), date.time(), result == QDialog.Accepted)
2) 创建主窗口 callDialogMainWin.py
# -*- coding: utf-8 -*-

'''
    【简介】
     对话框关闭时返回值给主窗口例子


'''

import sys
from PyQt5.QtCore import *
from PyQt5.QtGui import *
from PyQt5.QtWidgets import *
from DateDialog import DateDialog


class WinForm(QWidget):
    def __init__(self, parent=None):
        super(WinForm, self).__init__(parent)
        self.resize(400, 90)
        self.setWindowTitle('对话框关闭时返回值给主窗口例子')

        self.lineEdit = QLineEdit(self)
        self.button1 = QPushButton('弹出对话框1')
        self.button1.clicked.connect(self.onButton1Click)

        self.button2 = QPushButton('弹出对话框2')
        self.button2.clicked.connect(self.onButton2Click)

        gridLayout = QGridLayout()
        gridLayout.addWidget(self.lineEdit)
        gridLayout.addWidget(self.button1)
        gridLayout.addWidget(self.button2)
        self.setLayout(gridLayout)

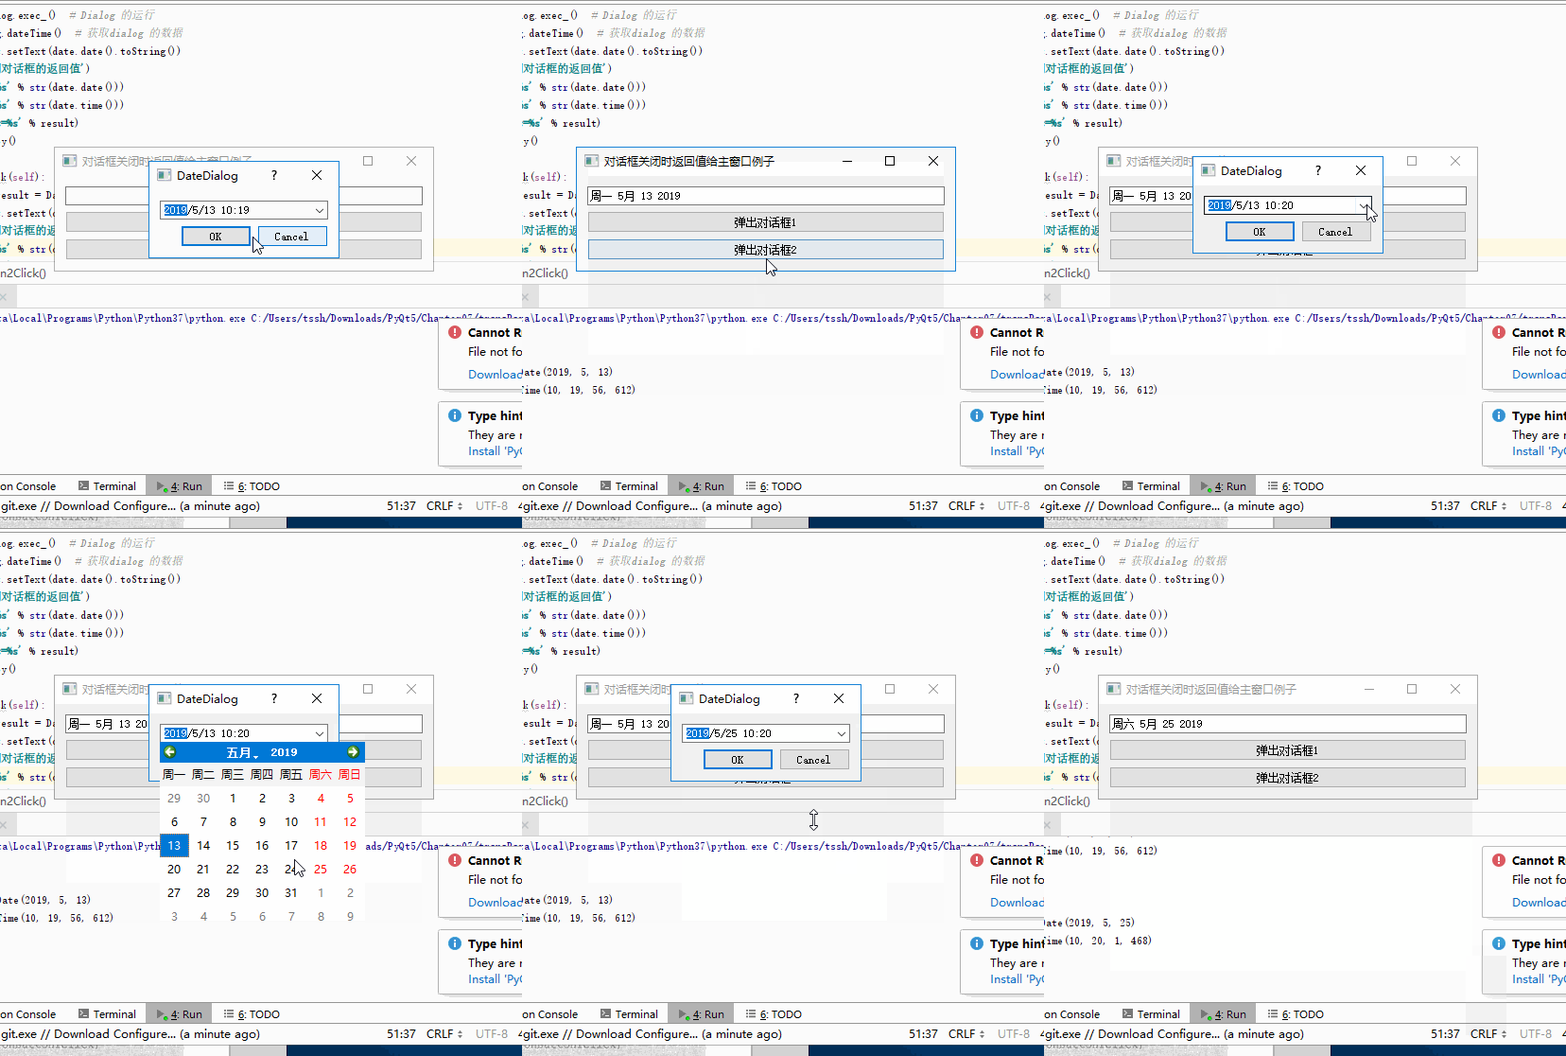
    def onButton1Click(self):
        dialog = DateDialog(self) # 实例化一个 DateDialog
        result = dialog.exec_()  # Dialog 的运行
        date = dialog.dateTime()  # 获取dialog 的数据
        self.lineEdit.setText(date.date().toString())
        print('\n日期对话框的返回值')
        print('date=%s' % str(date.date()))
        print('time=%s' % str(date.time()))
        print('result=%s' % result)
        dialog.destroy()

    def onButton2Click(self):
        date, time, result = DateDialog.getDateTime() #采用静态方式 直接调用 Data 数据函数
        self.lineEdit.setText(date.toString())
        print('\n日期对话框的返回值')
        print('date=%s' % str(date))
        print('time=%s' % str(time))
        print('result=%s' % result)
        if result == QDialog.Accepted:
            print('点击确认按钮')
        else:
            print('点击取消按钮')


if __name__ == "__main__":
    app = QApplication(sys.argv)
    form = WinForm()
    form.show()
    sys.exit(app.exec_())
文件参考:
PyQt 快速开发与实践
本人郑重声明,本博客所著文章、图片版权归权利人持有,本博只做学习交流分享所用,不做任何商业用途。访问者可將本博提供的內容或服务用于个人学习、研究或欣赏,不得用于商业使用。同時,访问者应遵守著作权法及其他相关法律的规定,不得侵犯相关权利人的合法权利;如果用于商业用途,须征得相关权利人的书面授权。若以上文章、图片的原作者不愿意在此展示內容,请及时通知在下,將及时予以刪除


