1 可视化图表
1.1 常用数据可视化图标库
- echarts
a. https://echarts.baidu.com/b. 百度开源, 如果要在react项目中使用, 需要下载echarts-for-react - G2
a. https://antv.aplipay.com/zh-ch/g2/3.x/index.htmlb. 阿里开源 - bizcharts
a. https://bizcharts,net/products/bizCharts
b. 基于react包装G2的开源库
c. 需要额外下载 @antv/data-set - d3
a. https://d3js.org.cn/b. 国外的免费可视化图表库
1.2 下载依赖
npm install echarts echarts-for-react
npm install bizcharts @antv/data-set
1.3 echarts 柱形图
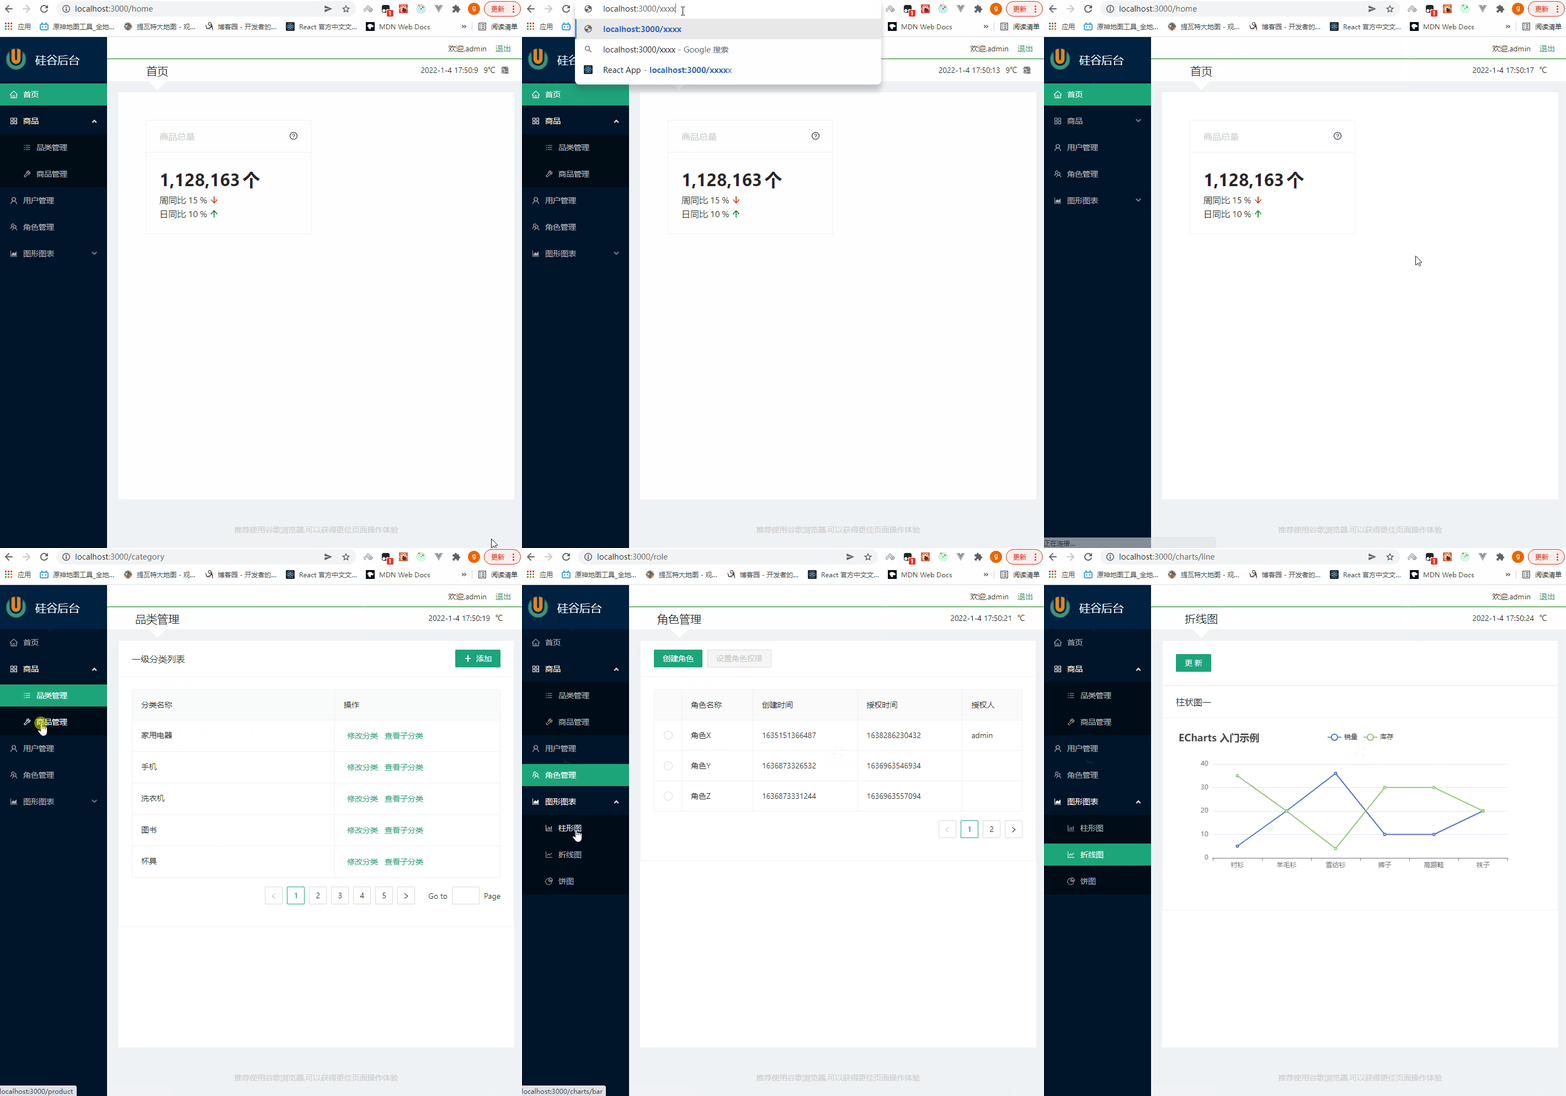
首先分析一下我们想要实现的页面结构,首先是两个区域, 第一个区域是一个更新按钮, 第二个区域是echarts柱形图, 我们使用Card来实现, 柱形图需要有两个系列的数据, 分别为销量和库存. 更新按钮的功能是将销量的数据全都+1, 库存的数据全部-1.

然后我们知道echarts是通过配置options来实现可视化的,所以我们也需要配置一下来达到我们的需求:
{
    title: {
        text: 'ECharts 入门示例', // 在左上角显示title标题文字
    },
        tooltip: {},
            legend: {
                data: ['销量','库存'] // 所有的数据种类
            },
                xAxis: {
                    data: ['衬衫', '羊毛衫', '雪纺衫', '裤子', '高跟鞋', '袜子'] // X轴
                },
                    yAxis: {}, // y轴
                        series: [
                            {
                                name: '销量',
                                type: 'bar',
                                data: sales
                            },
                            {
                                name: '库存',
                                type: 'bar',
                                data: stores
                            },
                        ]
}
至此可以写出Bar.js的所有代码:
import React, { Component } from 'react'
import { Card, Button } from "antd"
import ReactECharts from "echarts-for-react"


export default class Bar extends Component {

    state = {
        sales: [5, 20, 36, 10, 10, 20], // 销量数组
        stores: [35, 20, 4, 30, 30, 20], // 库存数组
    }

    update = () => {
        this.setState( state => ({
            sales:state.sales.map(sale => sale + 1),
            stores:state.stores.reduce((pre, store) => {
                if(store === 0) {
                    pre.push(store)
                } else {
                    pre.push(store - 1)
                }
                return pre
            }, []),
        }))
    }

    // 返回柱状图的配置对象
    getOption = (sales, stores) => {

        return ({
            title: {
                text: 'ECharts 入门示例'
            },
            tooltip: {},
            legend: {
                data: ['销量','库存']
            },
            xAxis: {
                data: ['衬衫', '羊毛衫', '雪纺衫', '裤子', '高跟鞋', '袜子']
            },
            yAxis: {},
            series: [
            {
                name: '销量',
                type: 'bar',
                data: sales
            },
            {
                name: '库存',
                type: 'bar',
                data: stores
            },
            ]
        })
    }

    render() {
        const {sales, stores} = this.state
        return (
            <div>
                <Card>
                    <Button type="primary" onClick={this.update}>更新</Button>
                </Card>
                <Card title="柱状图一">
                    <ReactECharts
                        option={this.getOption(sales,stores)} // options:图表配置项
                    />
                </Card>

            </div>
        )
    }
}
1.2 前台404组件页面
我们现在的需求是当用户输入一个不存在的路由时, 需要弹出404页面并且有返回按钮可以返回首页我们需要写一个新的组件PageNotFound, 简单的写一下代码和样式:
PageNotFound/index.jsx
import React, { Component } from 'react'
import {Button, Row, Col} from "antd"
import "./index.less"

// 前台404页面
export default class PageNotFound extends Component {
    goHome = () => {
        this.props.history.replace("/home")
    }

    render() {
        return (
            <Row className='not-found'>
                <Col span={12} className="left"></Col>
                <Col span={12} className="right">
                    <h1>404</h1>
                    <h2>抱歉,您访问的页面不存在</h2>
                    <div>
                        <Button type="primary" onClick={this.goHome}>
                            回到首页
                        </Button>
                    </div>
                </Col>
            </Row>
        )
    }
}
PageNotFound/index.less
.not-found {
    background-color: #f0f2f5;
    height: 100%;
    .left {
        height: 100%;
        background: url("./images/404.png") no-repeat center;
    }
    .right {
        padding-left: 50px;
        margin-top: 150px;
        h1 {
            font-size: 35px;
        }
        h2 {
            margin-bottom: 20px;
            font-size: 20px;
        }
    }
}
将404.png放置在PageNotFound的images文件夹下, 然后使用严格匹配修改路由的匹配规则:
<Switch>
    <Redirect exact from='/' to="/home"/>
    <Route path="/home" component={Home}/>
    <Route path="/category" component={Category}/>
    <Route path="/product" component={Product}/>
    <Route path="/role" component={Role}/>
    <Route path="/user" component={User}/>
    <Route path="/charts/bar" component={Bar}/>
    <Route path="/charts/line" component={Line}/>
    <Route path="/charts/pie" component={Pie}/>
    <Route component={PageNotFound} />
</Switch>
然后进行测试的时候发现我们在输入错误的路由时headTitle也还是原来的, 所以我们应该在PageNotFound里使用redux来设置headTitle, 将reduer.js中initHeadTitle设置为"":
PageNotFound/index.jsx 最终代码:
import React, { Component } from 'react'
import {Button, Row, Col} from "antd"
import { connect } from "react-redux"
import { setHeadTitle } from '../../redux/actions'

import "./index.less"

// 前台404页面
class PageNotFound extends Component {
    goHome = () => {
        this.props.setHeadTitle("首页")
        this.props.history.replace("/home")
    }

    render() {
        return (
            <Row className='not-found'>
                <Col span={12} className="left"></Col>
                <Col span={12} className="right">
                    <h1>404</h1>
                    <h2>抱歉,您访问的页面不存在</h2>
                    <div>
                        <Button type="primary" onClick={this.goHome}>
                            回到首页
                        </Button>
                    </div>
                </Col>
            </Row>
        )
    }
}

export default connect(
    state => ({}),
    { setHeadTitle }
)(PageNotFound)
2 使用HashRouter 替代BrowserRouter
实际开发环境中我们使用更多的时HashRouter, 我们在App.js使用HashRouter代替BrowserRouter.
App.js
/*
    应用的根组件
 */

import React, { Component } from 'react';
import {HashRouter, Route,Switch} from "react-router-dom";
import Login from './pages/Login';
import Admin from './pages/Admin';


export default class App extends Component {

    render() {
        return (
            <HashRouter>
                <Switch> {/* 只匹配其中一个,而且是从上往下对比 */}
                    <Route path="/login" component={Login}></Route>
                    <Route path="/" component={Admin}></Route>
                </Switch>
            </HashRouter>
        )
    }
}
此时会产生一个问题, 我们在Product组件块上点击详情和更新时要跳转路由, 当时用的是BrowerRouter自带的功能传递过去, 现在不行了, 我们使用utils里的memoryUtils来保存当前product数据, 并在组件将要被卸载时将其中data数据清空就可以完美解决问题.
memoryUtils.js
/*
    用来在内存中存储一些数据的工具模块
*/

let  memoryUtils = {
    user: {}, //保存当前登录的user
    product: {}, // 指定的商品对象
}

export default memoryUtils;
3 nginx 解决跨域
在项目打包之后, 当前端请求后端数据库而不在同一个端口号时, 就会产生跨域问题, 跨域问题可以后端通过cors解决, 也可以通过前端配置nginx解决:
3.1 nginx常用命令
start nginx 开启nginx
nginx -s reload #重新加载Nginx配置文件,然后以优雅的方式重启Nginx
nginx -s stop #强制停止Nginx服务
nginx -s quit #优雅地停止Nginx服务(即处理完所有请求后再停止服务)
3.2 配置conf
nginx.conf中http server的配置
server {
        # nginx 访问应用时应输入的端口号
        listen       8888;
        server_name  localhost;

        #charset koi8-r;

        #access_log  logs/host.access.log  main;

        # 所有以/api开头的请求都转发给后台服务器应用
        location ~ /api {
            rewrite  ^/api/(.*)$ /$1 break; # 重写路径. 将/api删除
            proxy_pass   http://localhost:5000; # 所需要代理到的后台服务器应用端口
        }

        # 所有请求都不匹配时转发给前台应用
        location / {
            root  D:/Vscode/workspace/admin-client_blank/build; # 前端网页所在的绝对路径
            index  index.html index.htm; # 前端网页的入口文件
        }


        #error_page  404              /404.html;

        # redirect server error pages to the static page /50x.html
        #
        error_page   500 502 503 504  /50x.html;
        location = /50x.html {
            root   html;
        }

        # proxy the PHP scripts to Apache listening on 127.0.0.1:80
        #
        #location ~ \.php$ {
        #    proxy_pass   http://127.0.0.1;
        #}

        # pass the PHP scripts to FastCGI server listening on 127.0.0.1:9000
        #
        #location ~ \.php$ {
        #    root           html;
        #    fastcgi_pass   127.0.0.1:9000;
        #    fastcgi_index  index.php;
        #    fastcgi_param  SCRIPT_FILENAME  /scripts$fastcgi_script_name;
        #    include        fastcgi_params;
        #}

        # deny access to .htaccess files, if Apache's document root
        # concurs with nginx's one
        #
        #location ~ /\.ht {
        #    deny  all;
        #}
    }
3.3 访问页面
访问页面http://localhost:8888即可看到页面, 并发现功能正常
4 解决BrowserRouter 生产环境404的问题
- 问题: 刷新某个路由路径时, 会出现404的错误.
- 原因: 项目根路径后的path路径会被当做后台路由路径, 去请求对应的后台路由, 但没有.
- 解决: 使用自定义中间件去读取返回index页面呈现.
app.use((req, res) => {
  fs.readFile(__dirname + '/public/index.html', (err, data)=>{
    if(err){
      console.log(err)
      res.send('后台错误')
    } else {
      res.writeHead(200, {
        'Content-Type': 'text/html; charset=utf-8',
      });
      res.end(data)
    }
  })
})


