文章目录
- 添加并下载依赖,以集成Mysql连接、Mybatis
- 新增DataSource,提供数据库连接信息
- SpringBoot项目的各层
- model层
- mapper层
- service层
- controller层
- 接口测试
- 参考文章
所谓“持久层”,简单来说就是和数据库交互的那一层。
常用的持久层框架有 Mybatis和Hibernate,二者的区别是,使用MyBatis时需要我们自己写sql,使用Hibernate时则不用自己写sql。
现在我们来看看如何集成Mybatis。
添加并下载依赖,以集成Mysql连接、Mybatis
在pom.xml中新增依赖,并下载更新依赖
<!--		集成mybatis-->
		<dependency>
			<groupId>org.mybatis.spring.boot</groupId>
			<artifactId>mybatis-spring-boot-starter</artifactId>
			<version>2.1.3</version>
		</dependency>
<!--		集成mysql连接-->
		<dependency>
			<groupId>mysql</groupId>
			<artifactId>mysql-connector-java</artifactId>
			<version>8.0.22</version>
		</dependency>
这时运行WikiApplication会遇到如下报错:
***************************
APPLICATION FAILED TO START
***************************

Description:

Failed to configure a DataSource: 'url' attribute is not specified and no embedded datasource could be configured.

Reason: Failed to determine a suitable driver class信息提示说,没有配置DataSource的url属性。
恩,接下来我们就在resources/application.properties中配置DataSource。
新增DataSource,提供数据库连接信息
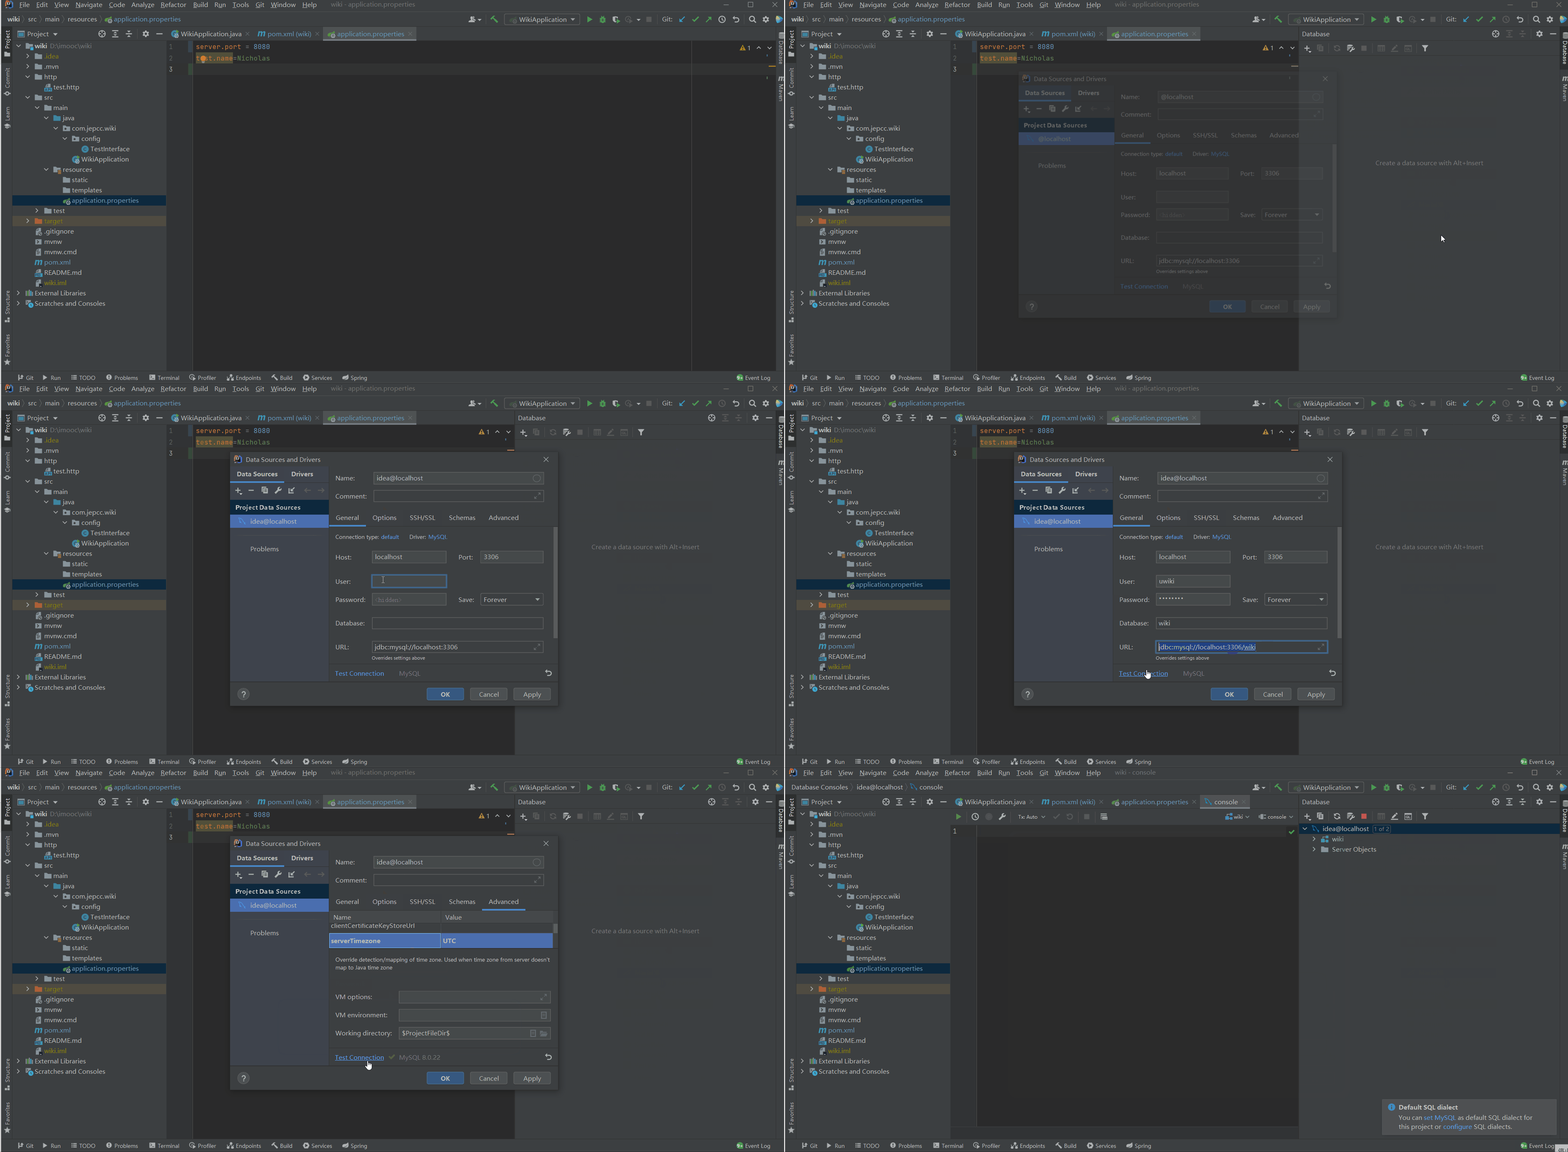
- 首先,我们在IDEA中新建一个MySQL连接:
idea@localhost - 然后,在
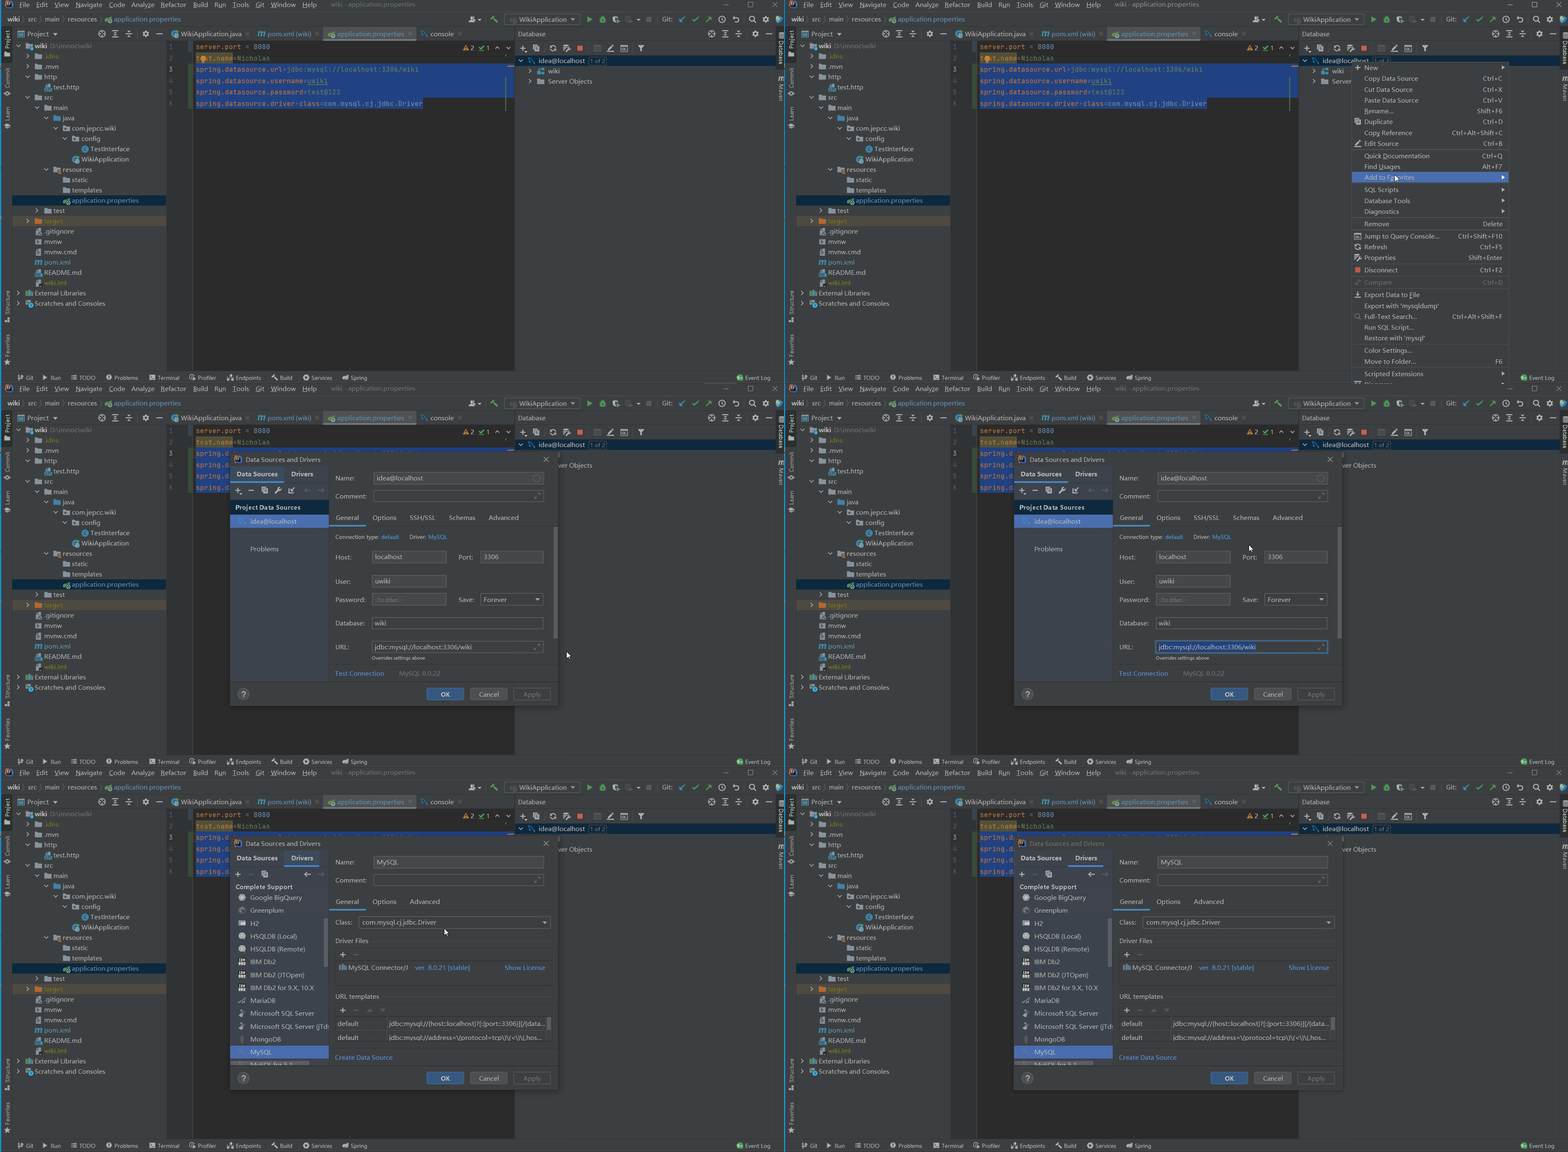
resources/application.properties中配置DataSource的url

spring.datasource.url=jdbc:mysql://localhost:3306/wiki
spring.datasource.username=uwiki
spring.datasource.password=test@123
spring.datasource.driver-class=com.mysql.cj.jdbc.Driver以上信息可以通过查看idea@localhost这个连接的属性得到。

SpringBoot项目的各层

model层
model是模型的意思,和entity、domain、pojo类似,用来存放实体的类,类中定义了类的多个属性,并与数据库表中的字段保持一致,一张表对应一个model类。主要用于定义与数据库对象对应的属性,提供getter/setter、有参无参构造函数。
//com.jepcc.wiki.domain.Test
package com.jepcc.wiki.domain;

public class Test {
    private Integer id;
    private String name;
    private String passwd;

    public Integer getId() {
        return id;
    }

    public void setId(Integer id) {
        this.id = id;
    }

    public String getName() {
        return name;
    }

    public void setName(String name) {
        this.name = name;
    }

    public String getPasswd() {
        return passwd;
    }

    public void setPasswd(String passwd) {
        this.passwd = passwd;
    }
}
mapper层
持久层,也叫mapper层,也就是以前的Dao层,其作用是对数据库进行持久化操作。
所谓“持久化操作”,就是将数据放到持久化的介质中,同时提供增删改查操作。
持久是相对于瞬时来说的,其实就是把数据固化在硬盘或者磁带这类可以保存很长时间的设备上,不像放在内存中一断电就消失了。企业应用中数据很重要,比如各种订单数据、客户数据、库存数据等等,这些数据比应用程序本身更重要,所以需要把数据持久化。持久化有很多方式,写文件或者写数据库都可以。只是现在企业一般都会选择把数据持久化到数据库中,因为可以很方便地查询统计分析,但数据库中的数据最终还是会写到磁盘上。

- 在启动类中添加注解
@MapperScan("com.jepcc.wiki.mapper"),告诉整个项目,mapper目录下就是mapper层。
//com.jepcc.wiki.WikiApplication
package com.jepcc.wiki;


import org.mybatis.spring.annotation.MapperScan;
import org.slf4j.Logger;
import org.slf4j.LoggerFactory;
import org.springframework.boot.SpringApplication;
import org.springframework.boot.autoconfigure.SpringBootApplication;
import org.springframework.core.env.Environment;

@SpringBootApplication
@MapperScan("com.jepcc.wiki.mapper")
public class WikiApplication {

	private static final Logger LOG = LoggerFactory.getLogger(WikiApplication.class);
	public static void main(String[] args){
		SpringApplication app = new SpringApplication(WikiApplication.class);
		Environment env = app.run(args).getEnvironment();
		LOG.info("启动成功!");
		LOG.info("地址:\t http://127.0.0.1:{}",env.getProperty("server.port"));
	}
}- 在
application.properties中添加mybatis.mapper-locations=classpath:/mapper/**/*.xml,用来告诉整个项目,xml就是mapper层要执行的sql语句。
server.port = 8080

spring.datasource.url=jdbc:mysql://localhost:3306/wiki?serverTimezone=UTC
spring.datasource.username=uwiki
spring.datasource.password=test@123
spring.datasource.driver-class=com.mysql.cj.jdbc.Driver

mybatis.mapper-locations=classpath:/mapper/**/*.xml- 类
TestMapper可以访问数据库,向数据库发送sql语句
//com.jepcc.wiki.mapper.TestMapper
package com.jepcc.wiki.mapper;

import com.jepcc.wiki.domain.Test;

import java.util.List;

public interface TestMapper {
    public List<Test> list();
}- src/main/resources/mapper/TestMapper.xml
<?xml version="1.0" encoding="UTF-8" ?>
<!DOCTYPE mapper PUBLIC "-//mybatis.org//DTD Mapper 3.0//EN" "http://mybatis.org/dtd/mybatis-3-mapper.dtd">

<mapper namespace="com.jepcc.wiki.mapper.TestMapper">
    <select id="list" resultType="com.jepcc.wiki.domain.Test">
        select `id`,`name`,`passwd` from `test`
    </select>
</mapper>
service层
service层,存放业务逻辑处理,也是一些关于数据库处理的操作,但是不直接和数据库打交道,而是通过调用mapper层的接口。
要用mapper层,就得注入mapper,可以使用注解@Resource来注入,@Resource是JDK自带得;也可以使用注解@Autowired来注入,@Autowired是Spring的。
另外,使用注解@Service将service交给Spring管理。
//com.jepcc.wiki.service.TestService
package com.jepcc.wiki.service;

import com.jepcc.wiki.domain.Test;
import com.jepcc.wiki.mapper.TestMapper;
import org.springframework.beans.factory.annotation.Autowired;
import org.springframework.stereotype.Service;

//import javax.annotation.Resource;
import java.util.List;

@Service
public class TestService {
//    @Resource
    @Autowired
    private TestMapper testMapper;
    public List<Test> list(){
        return testMapper.list();
    }
}
controller层
controller层,控制请求和响应,会调用service层里的接口。
要用service层,就要注入service,可以使用JDK自带的注解@Resource,也可以使用Spring的@Autowired。
//com.jepcc.wiki.controller.TestController
package com.jepcc.wiki.controller;

import com.jepcc.wiki.domain.Test;
import com.jepcc.wiki.service.TestService;
import org.springframework.beans.factory.annotation.Autowired;
import org.springframework.web.bind.annotation.GetMapping;
import org.springframework.web.bind.annotation.RestController;

//import javax.annotation.Resource;
import java.util.List;

@RestController
public class TestController {
    @GetMapping("/test")
    public String test(){
        return "Hello,World!";
    }
//    @Resource
    @Autowired
    private TestService testService;
    @GetMapping("test/list")
    public List<Test> list(){
        return testService.list();
    }
}
接口测试


