Android编程 移动应用开发 经典习题案例 (附案例 注意点)
注:本文中的题目来自学校,仅供学习使用
11月25日起.正式开始复习(预习)Android编程
中间因为课程设计停了几个月,到今天为止终于结束了一轮复习
小小的记录一下一些注意点以及我第一遍犯的错
顺便掐个做题时间(创建项目往往就要1分种左右)
之后还会总结一篇核心的知识点的文章
本章的所有代码前往这 Android编程 习题集 源码 下载
期末刷题 注意点汇总
Task1-1 show my name
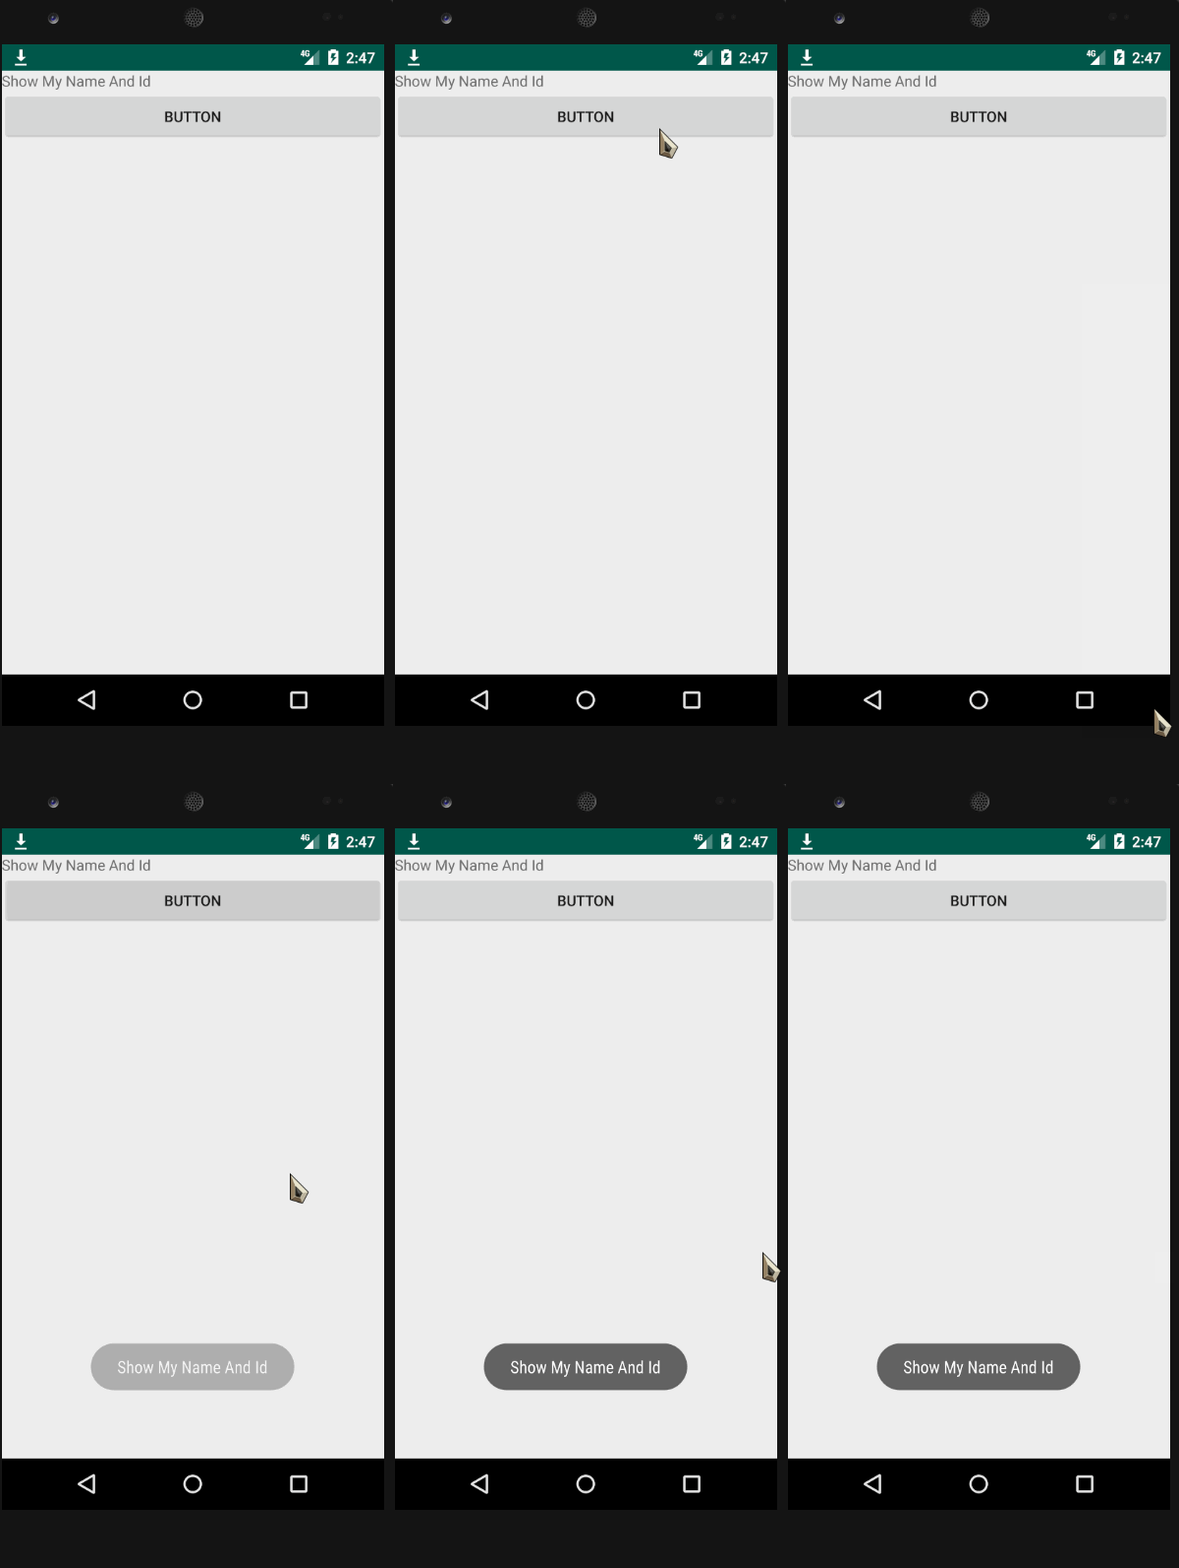
Make an app with 2 components. The root layout is a LinearLayout. The 1st component shows your name and ID. The 2nd component a Button. Click the Button will show a Toast, which shows your name and ID.0
耗时: 3:52.482
Task1-2 RelativeLayout
To layout 3 TextViews in the RelativeLayout. The 1st TextView shows your name and ID and aligns in the center of the screen. The 2nd TextView shows your name and aligns in the left of the screen and below the 1st screen. The 3rd TextView aligns in the bottom and right of the screen.
耗时: 4:10.729

关于RelativeLayout的一些属性记录

除了最上面的两个,下面的都是相对于整个容器来说的
而最上面的两个可以通过指定id来寻找 相对位置
通常打Parent和below above等就会自动跳出来
Task1-3 Gravity
Make an app with 3 components. The root layout is LinearLayout. The 1st one is a TextView shows your name and ID. It aligns in horizontal center of the first row. The 2nd one is a Button with 200dp width and aligns in the right of the 2nd row. The 3rd one is a Button with 200dp width and aligns in the left of the 3rd row, but the text in the Button aligns right.
耗时: 3:34.279

关于Gravity的一些属性记录
- layout gravity 指的是UI组件相对于父类(手机屏幕来说的位置)
- gravity 指的是UI组件内部的东西相对于UI组件的位置,及不改变UI组件的位置
Task1-4 Layout_weight
The root layout is LinearLayout.
- Add 3 EditTexts, 1 Button and 1 TextView to the LinearLayout
- The Message EditText using layout_weight=“3”3) The TextView using layout_weight=“1”
- All EditTexts have android:hint attribute to show the hint message for users
- The TextView shows your name and student number
耗时: 5:04.760

不要忘记hint这个属性就好了
关于weight的一些记录
layout_weight为各个组件设置权重
这里需要注意他均分的空间是去除组件所占空间的剩余空间(总的长度减去组件自身的长度)
而他究竟是设置在水平上还是垂直上由父组件的orientation属性来决定,所以有时候需要实现在水平方向上的均分,还需要新建一个线性布局,在它的里面放置想要均分空间的组件
(提示一次)Task1-5 Checkbox
The root layout is LinearLayout.
- 1 TextView in the first row, shows your name and student number;
- 3 CheckBoxes in the 2nd row;
- 1 TextView in the 3rd row, which shows the checked message when the checkboxes’s states are changed.
耗时: 14:15.391
耗时: 6:08.302
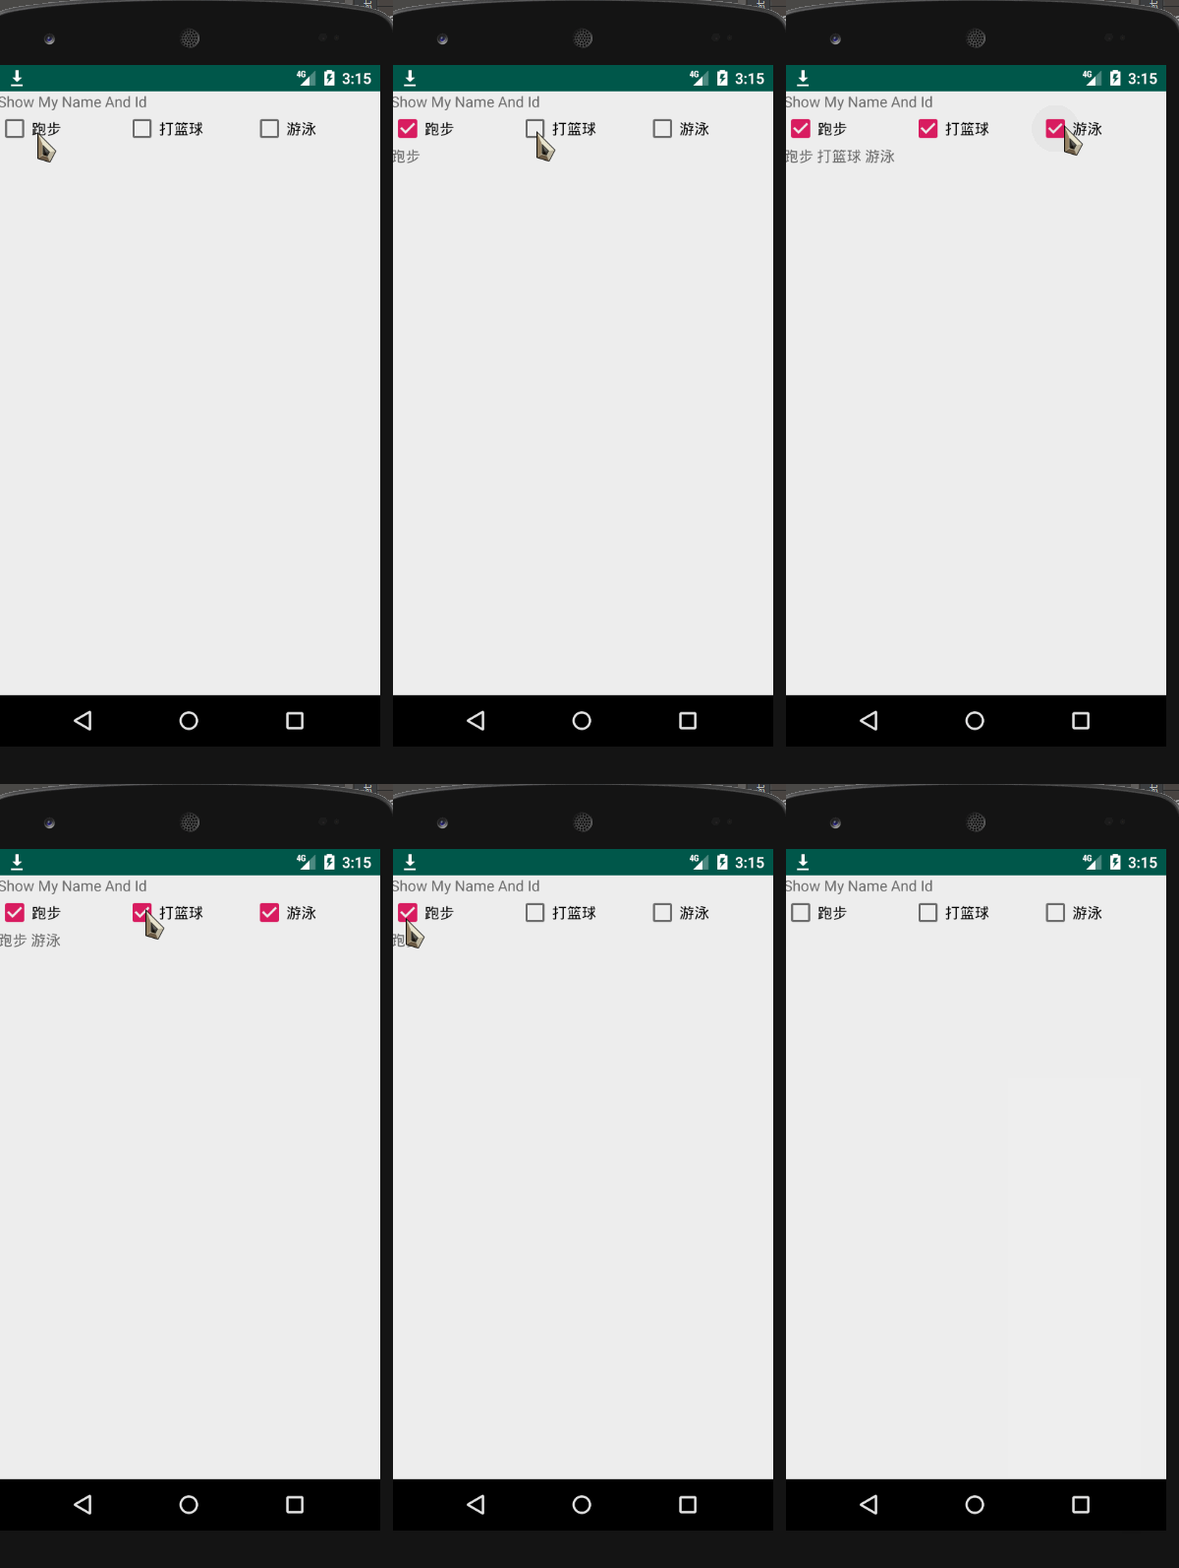
摘要
- 本题我做错了一次,原因是直接使用findViewById(R.id.t5_c1).setxxx , 结果没有找到对应的方法,在老老实实的创建
c1 = findViewById(R.id.t5_c1);c1.setOnCheckedChangeListener之后才成功 - 除此之外,本题的Checkbox可以多个同时被选中,所以建议使用老师给出的案例,另外编写一个方法专门用来upadate textview的内容,
关于本题的优化方法
为了节省每个setOnCheckedChangeListener都要被写一遍,可以采用优化方法(但是我第一次写的时候没有记住): 就是使用接口CheckBox.OnCheckedChangeListener
课件内容如下,整体思路类似,但是只需要实现一次方法即可

(提示一次)Task1-6 RadioButton
The root layout is LinearLayout.
- 1 TextView shows your name and student number
- 3 RadioButtons in a row enclosed with RadioGroup
- 1 TextView shows the selected information of the RadioButtons when the checked state changes.
耗时: 11:52.344
耗时: 6:30.495
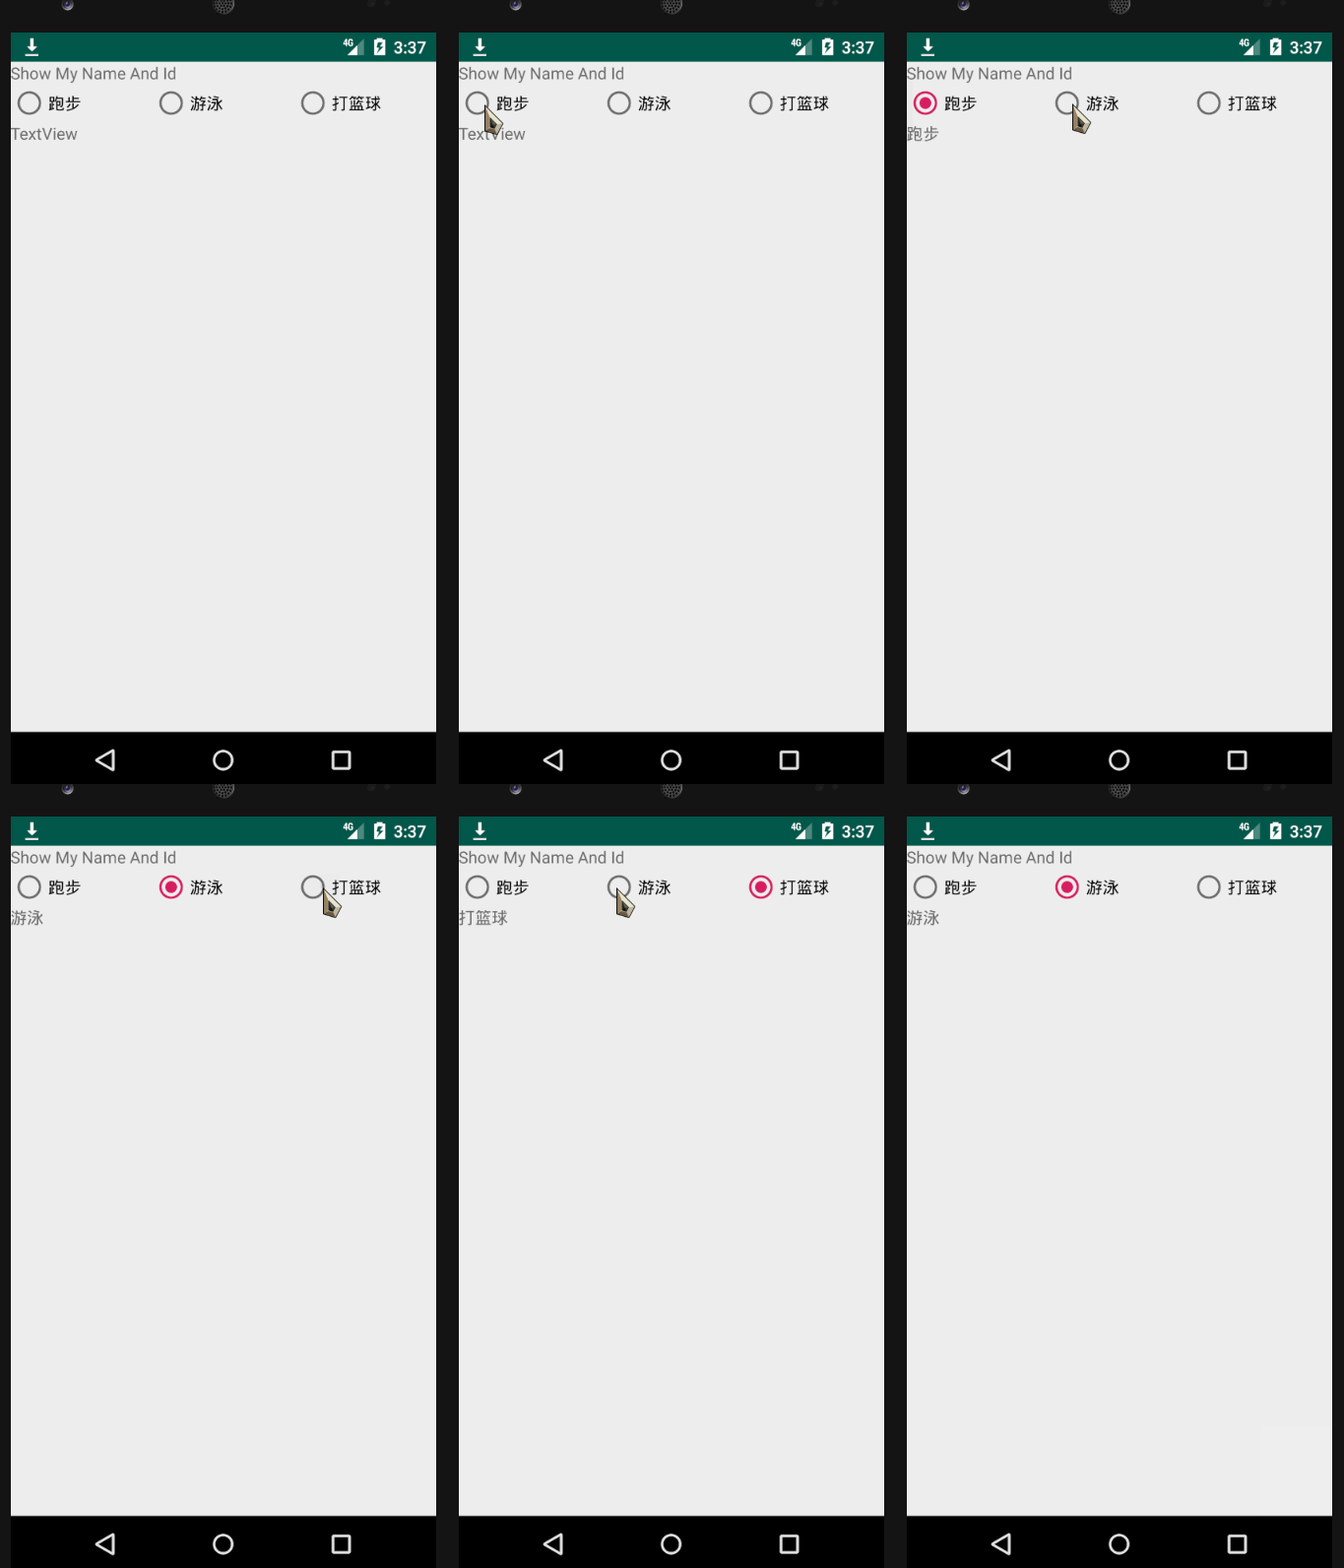
摘要
本题使用的是RadioButton这个组件
第一个考点是三个RadioButton在RadioGroup中的布局,需要为RadioGroup添加水平的属性,以及三个RadioButton的layout_weight
第二个考点.也是我看了提示的考点在java编程中,我忘记了如何获取RadioButton,只需要findViewById即可,checkedId在方法中作为参数已经传入
因为RadioGroup没有多选,所以textview只显示一个的值,直接设置text就好了

Task1-7 EditText
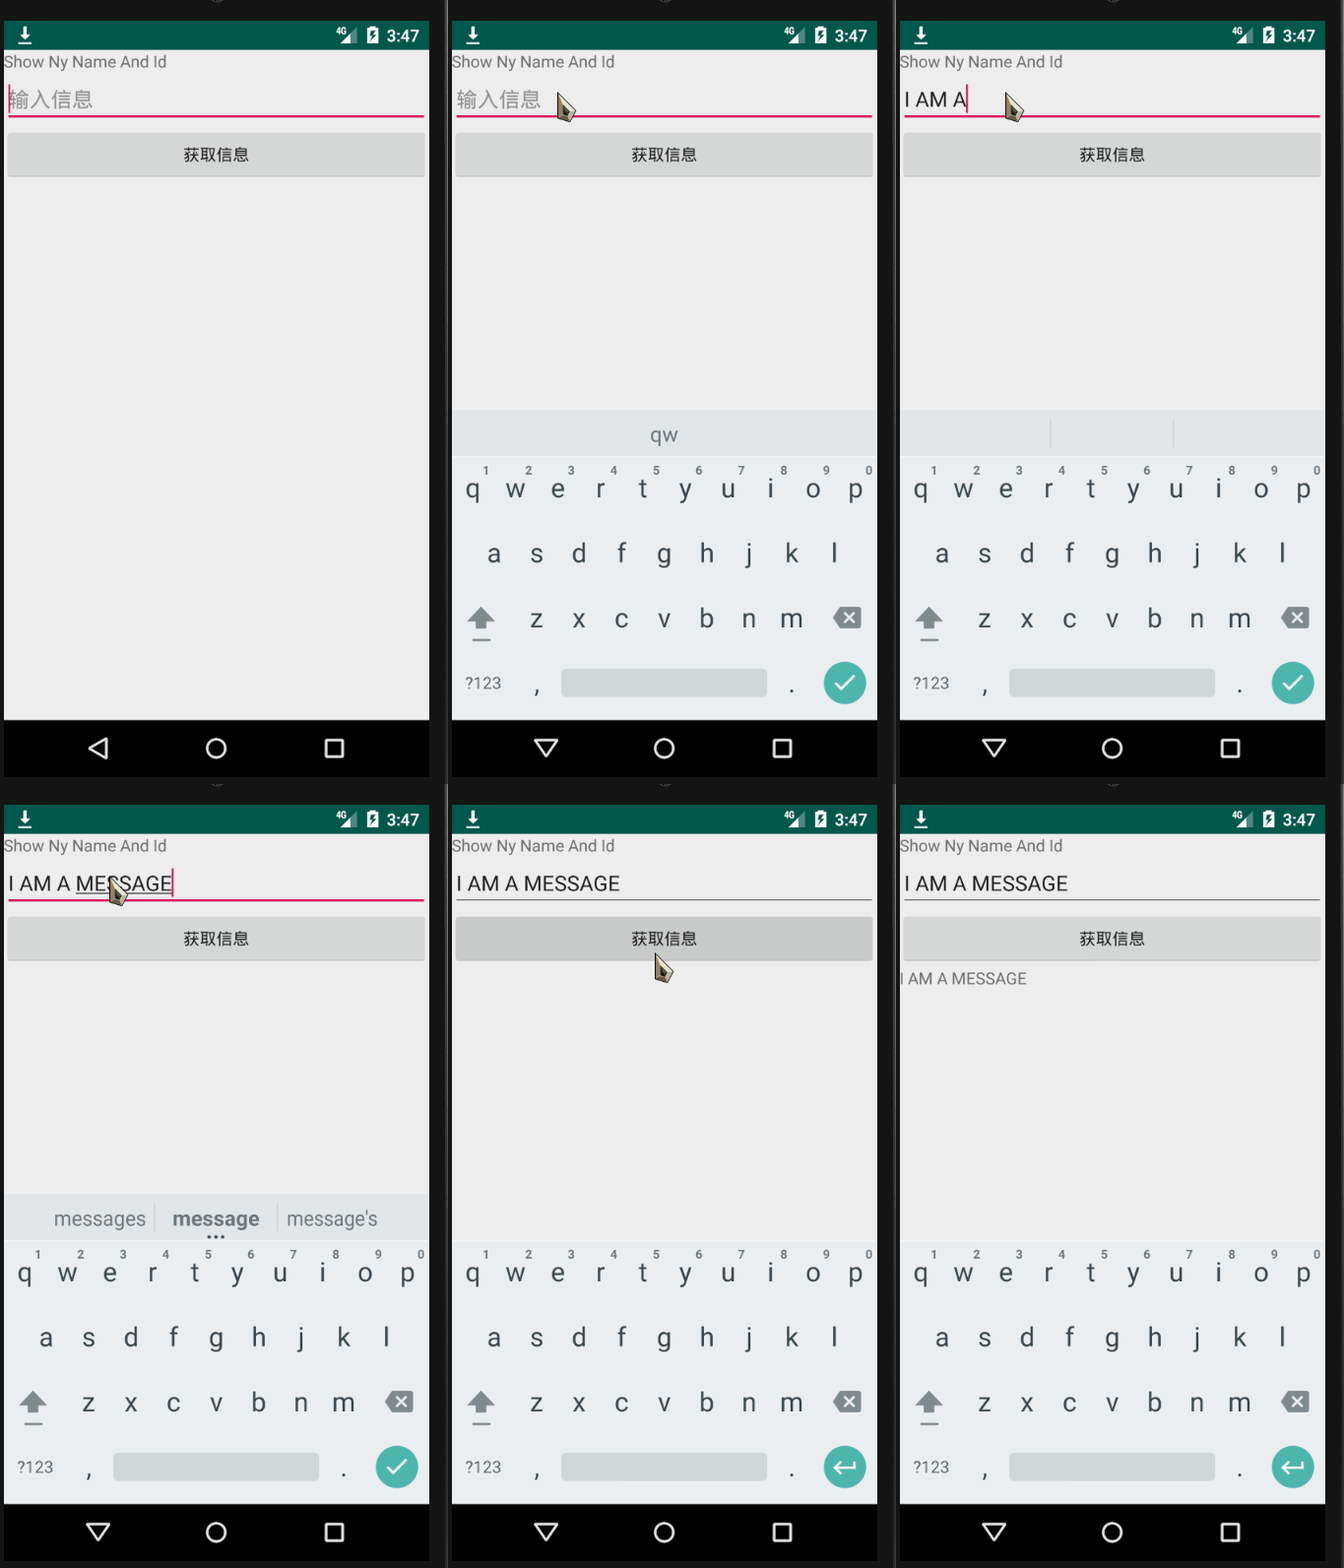
Make an app with 3 components. The root layout is LinearLayout. The 1st one is a TextViewshows your name and ID. The 2nd one is an EditText with hint message “Please input your
name”. The 3rd one is a Button. The 4th one is a TextView. When the Button clicks, the TextViewshows the content of the EditText.
耗时: 4:16.823
Task1-8 Colors
Make an app with 3 components. The root layout is LinearLayout. The 1st one is a TextView shows your name and ID. The 2nd one is a horizontal LinearLayout with 3 equal width Buttons. Click red Button, the TextView changes the text color to red. Click blue Button, the TextView changes the text color to blue. Click other Button, the TextView changes the text color to a customized color defined in res/values/colors.xml.
耗时: 8:36.400
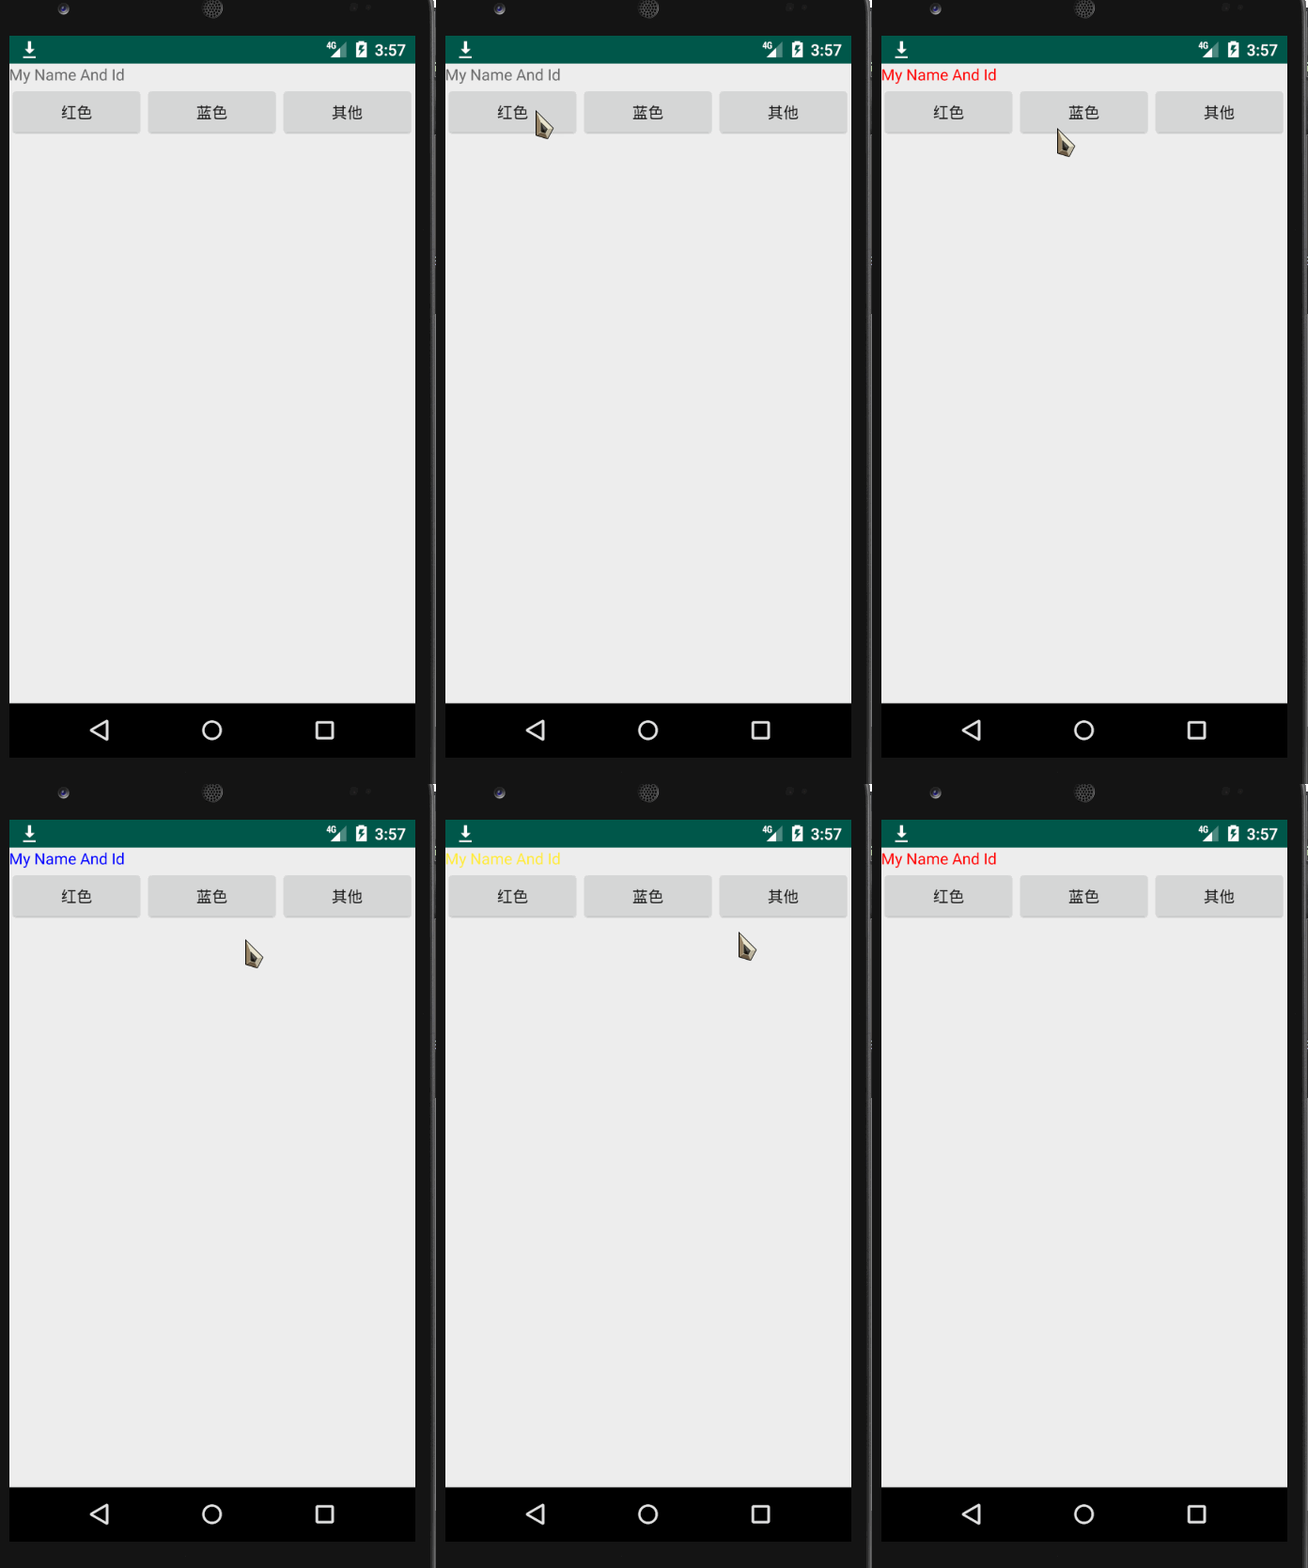
摘要
本题有1个需要注意的点
- 资源文件配置自定义颜色及调用
- 在资源文件中添加自己的颜色
- 在java代码中正确的调用
getResources().getColor(R.color.mycolor)下图是他们的对应关系
BigTask1
1、编写一个程序,在一个垂直布局LinearLayout里有4个水平布局的LinearLayout和3个TextView。
第一个水平布局的LinearLayout里面有1个TextView部件和EditText部件,其中TextView和EditText按1:3分布,TextView文字右对齐;
第二个水平布局的LinearLayout里面依次放有1个Button和1个TextView部件,Button点击后能把第一个水平布局里的EditText的内容更新到Button右边的TextView部件上;
第三个水平布局的LinearLayout里有一组RadioButton(三个组件所占空间平均分配,LinearLayout可不需要);
第四个水平布局的LinearLayout里有三个Checkbox(三个组件所占空间平均分配);
第五个部件为TextView,字体红色,显示RadioButton选中项(单选);
第六个部件为TextView,字体蓝色,显示CheckBox选中项(多选); 第七个部件为TextView,显示你的学号和姓名。

耗时:29:11.107
(提示一次)Task2-1 Spinner

耗时: 11:08.600

摘要
注意点1 获取资源路径的StringArray
本题我忘了如何获取到 res文件中自己配置的String array了
对我来说容易忘记的是后面的R.array
String[] cities = getResources().getStringArray(R.array.cities);这里回顾一下之前那道获取color的题目 getResources().getColor(R.color.others);
如果实在忘记了R.array.cities或者如何获取
可以直接手动写String数组,最后的效果是一样的,写在res里面可能为了便于修改维护等操作吧
String[] cities = new String[]{"Ningbo","Beijing","Shanghai"};注意点2 ArrayAdapter的使用
另一个注意点就是ArrayAdapter了,通常通过Listview或者Spinneer来使用ArrayAdapter(Context context, int resource, List<T> objects)第一个参数是 Activity.this
第二个参数是 布局的资源ID 包含textview 最普遍的是(android.layout.simple_list_item_1)
第三个参数是 一个数组, 里面可以放不同的类型 这里的就是String 数组
可以理解成 第三个参数里面的每个数据都会被放到一个Textview中

在他的方法中,我们可以直接使用position来感知第几个选项被点击了,结合传入的数组就知道了点击的数据是什么

Task2-2

耗时: 11:05.775
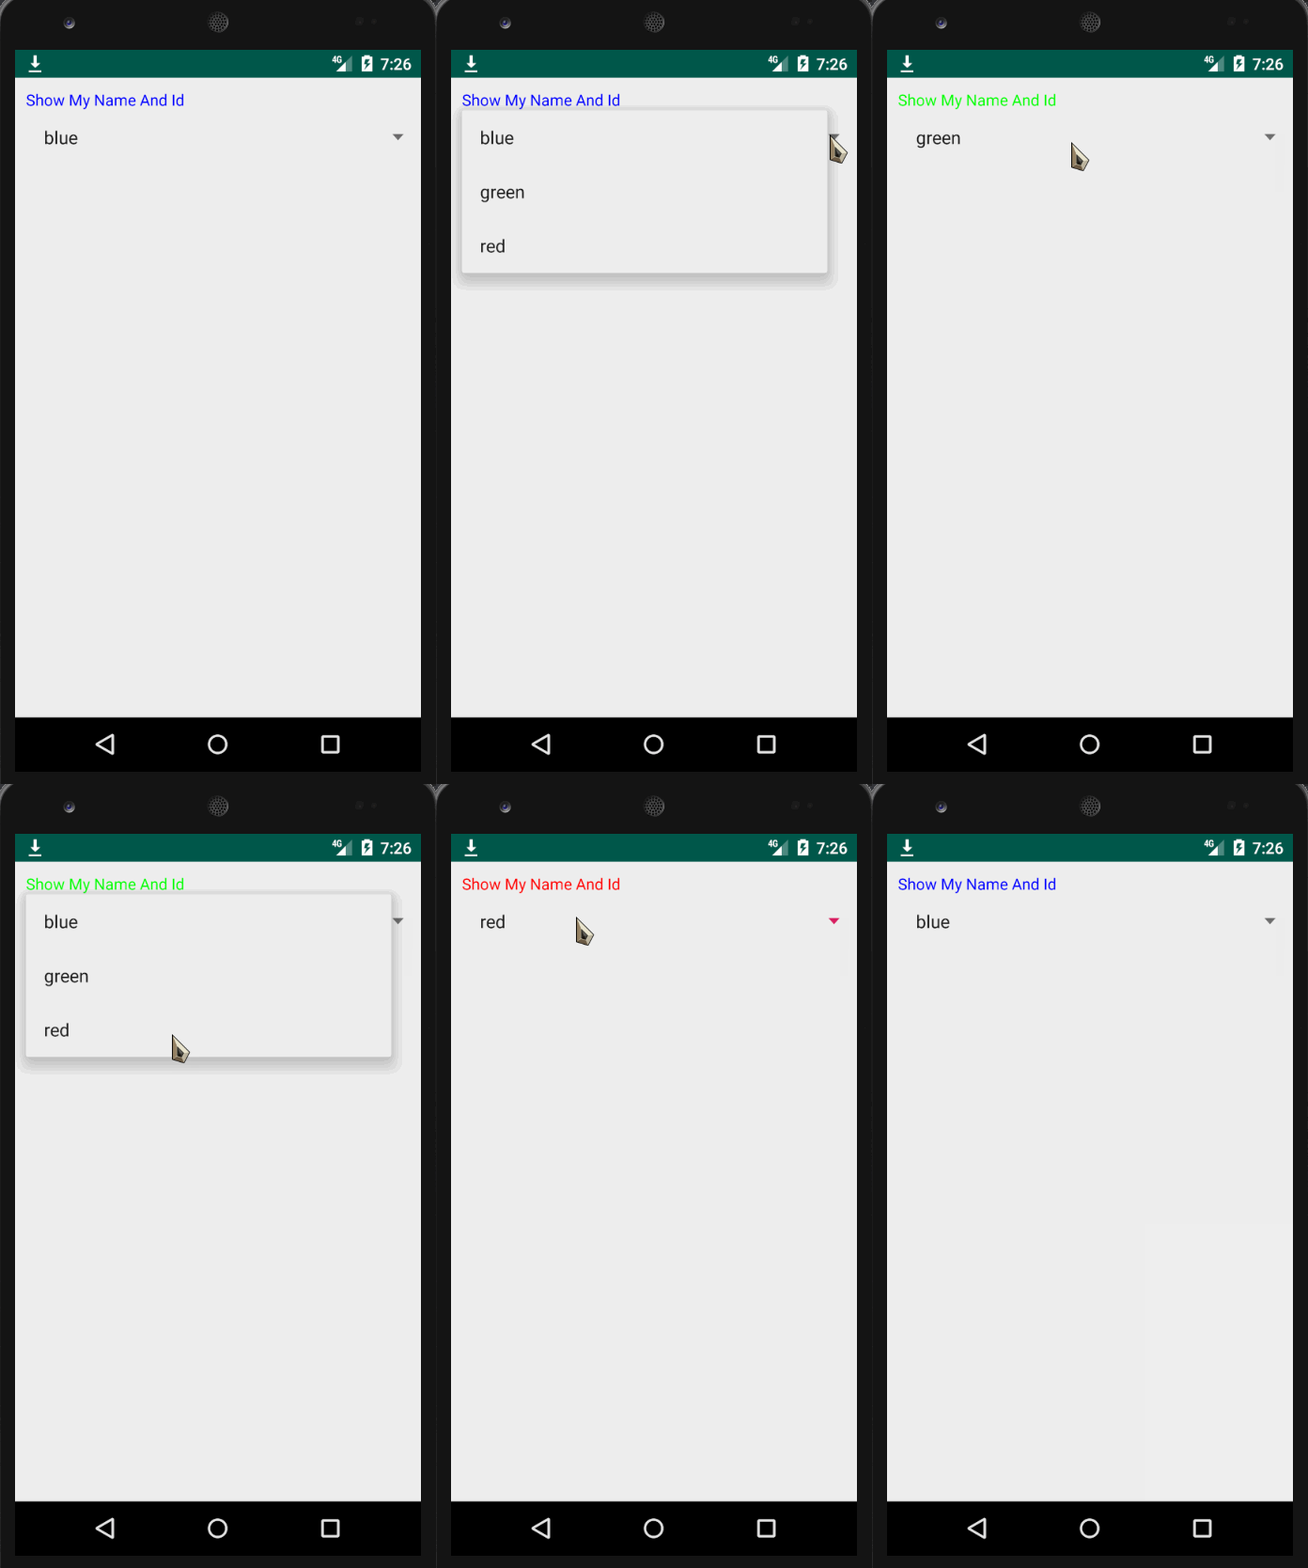
摘要
注意点1: TypedArray对象的使用
之前提到了getResources().getStringArray(R.array.xxx)可以获取资源文件中自定义的StringArray,而这里我们定义的是array,并且里面存放的是int类型的Color
<array name="color_array">
        <item>#f00</item>
        <item>#0f0</item>
        <item>#00f</item>
    </array>
所以获取方式需要修改为
final TypedArray color_array = getres.obtainTypedArray(R.array.color_array);其在Spinner中的获取方式如下
color_array.getColor(position, Color.BLACK)其中第二个参数是获取失败的替换方案,不一定要Black

注意点2: 从资源文件创建Adapter的两种方式
第一种方式就是我们经常使用的
- 通过TypedArray 获取资源文件中自定义的属性
- 通过ArrayAdapter创建一个新的adapter
第二种方式较为方便,当资源文件不变时,可以使用如下方法创建
sp.setAdapter(ArrayAdapter.createFromResource(this,R.array.color_array,android.R.layout.simple_list_item_1));两种方式对比
# 第一种
String[] color_name = getres.getStringArray(R.array.color_list);
sp.setAdapter(new ArrayAdapter<>(this, android.R.layout.simple_list_item_1, color_name));

# 第二种
sp.setAdapter(ArrayAdapter.createFromResource(this,R.array.color_name,android.R.layout.simple_list_item_1));
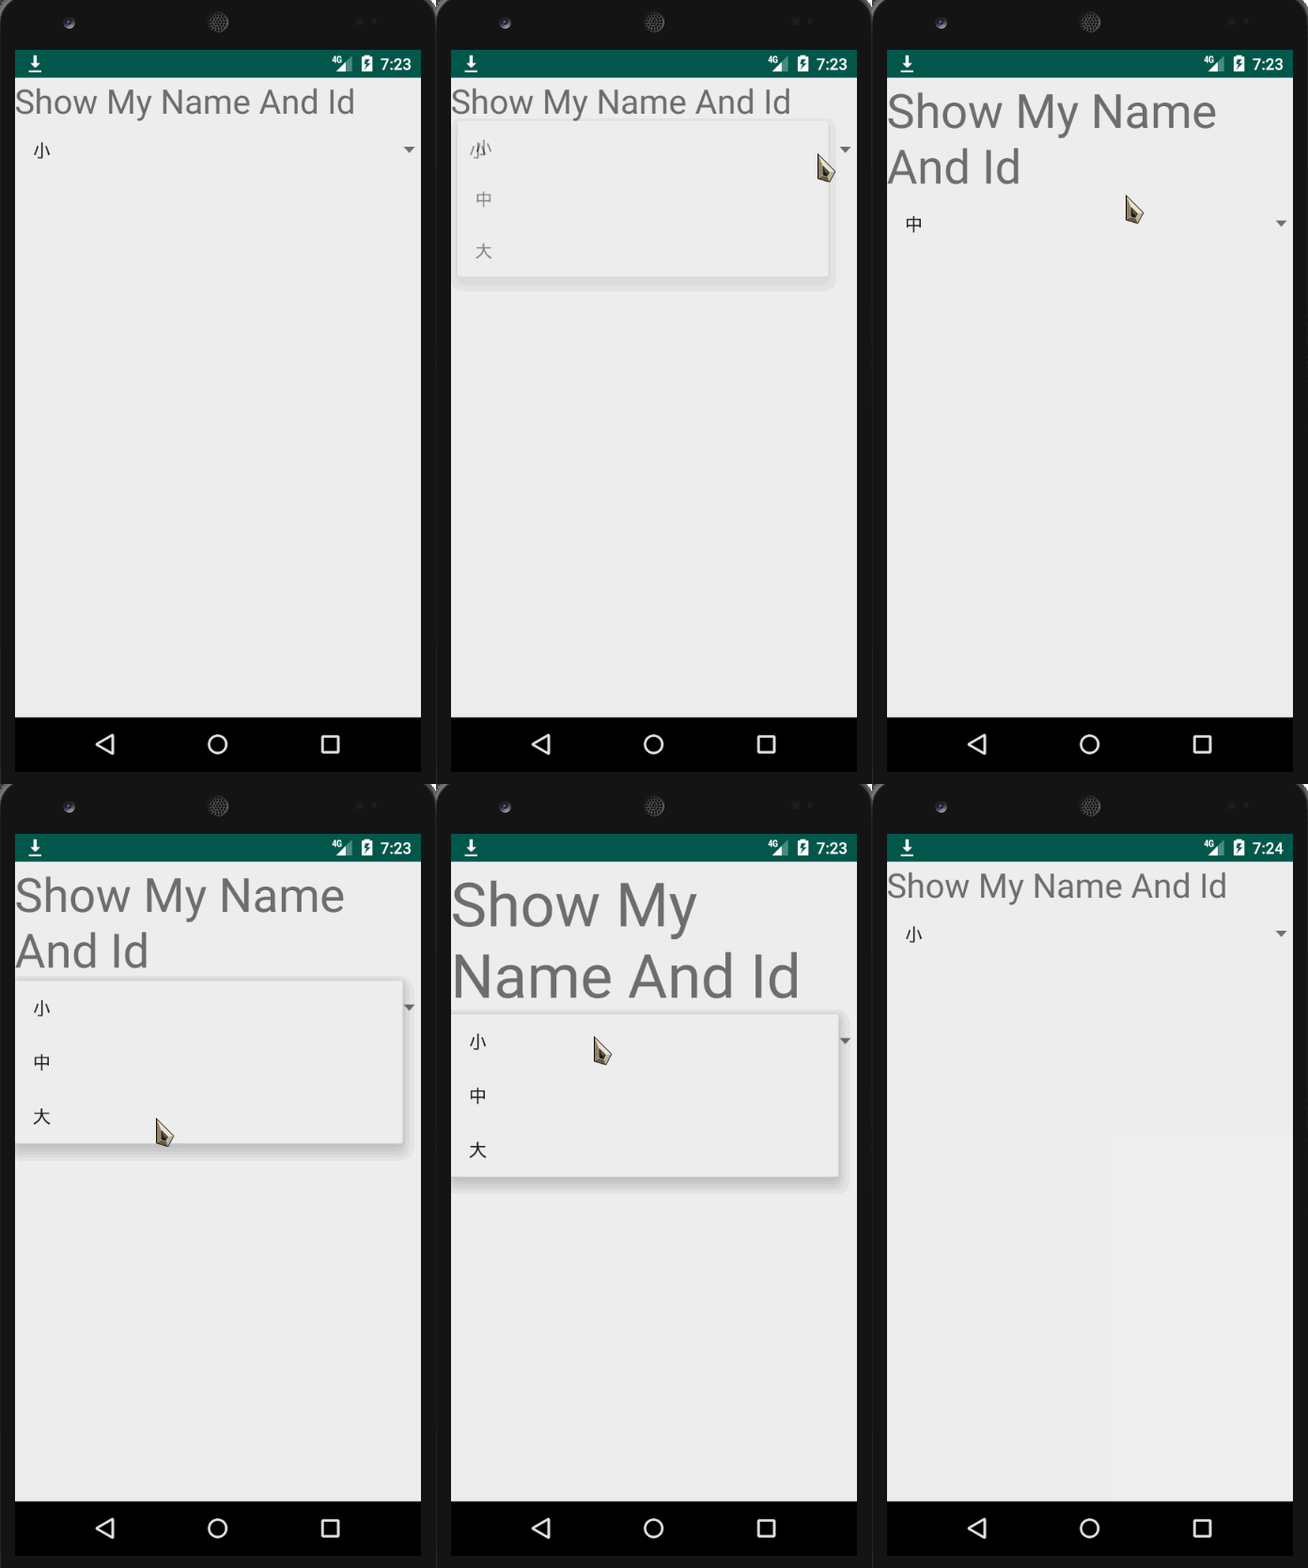
Task2-3

耗时: 9:06.527
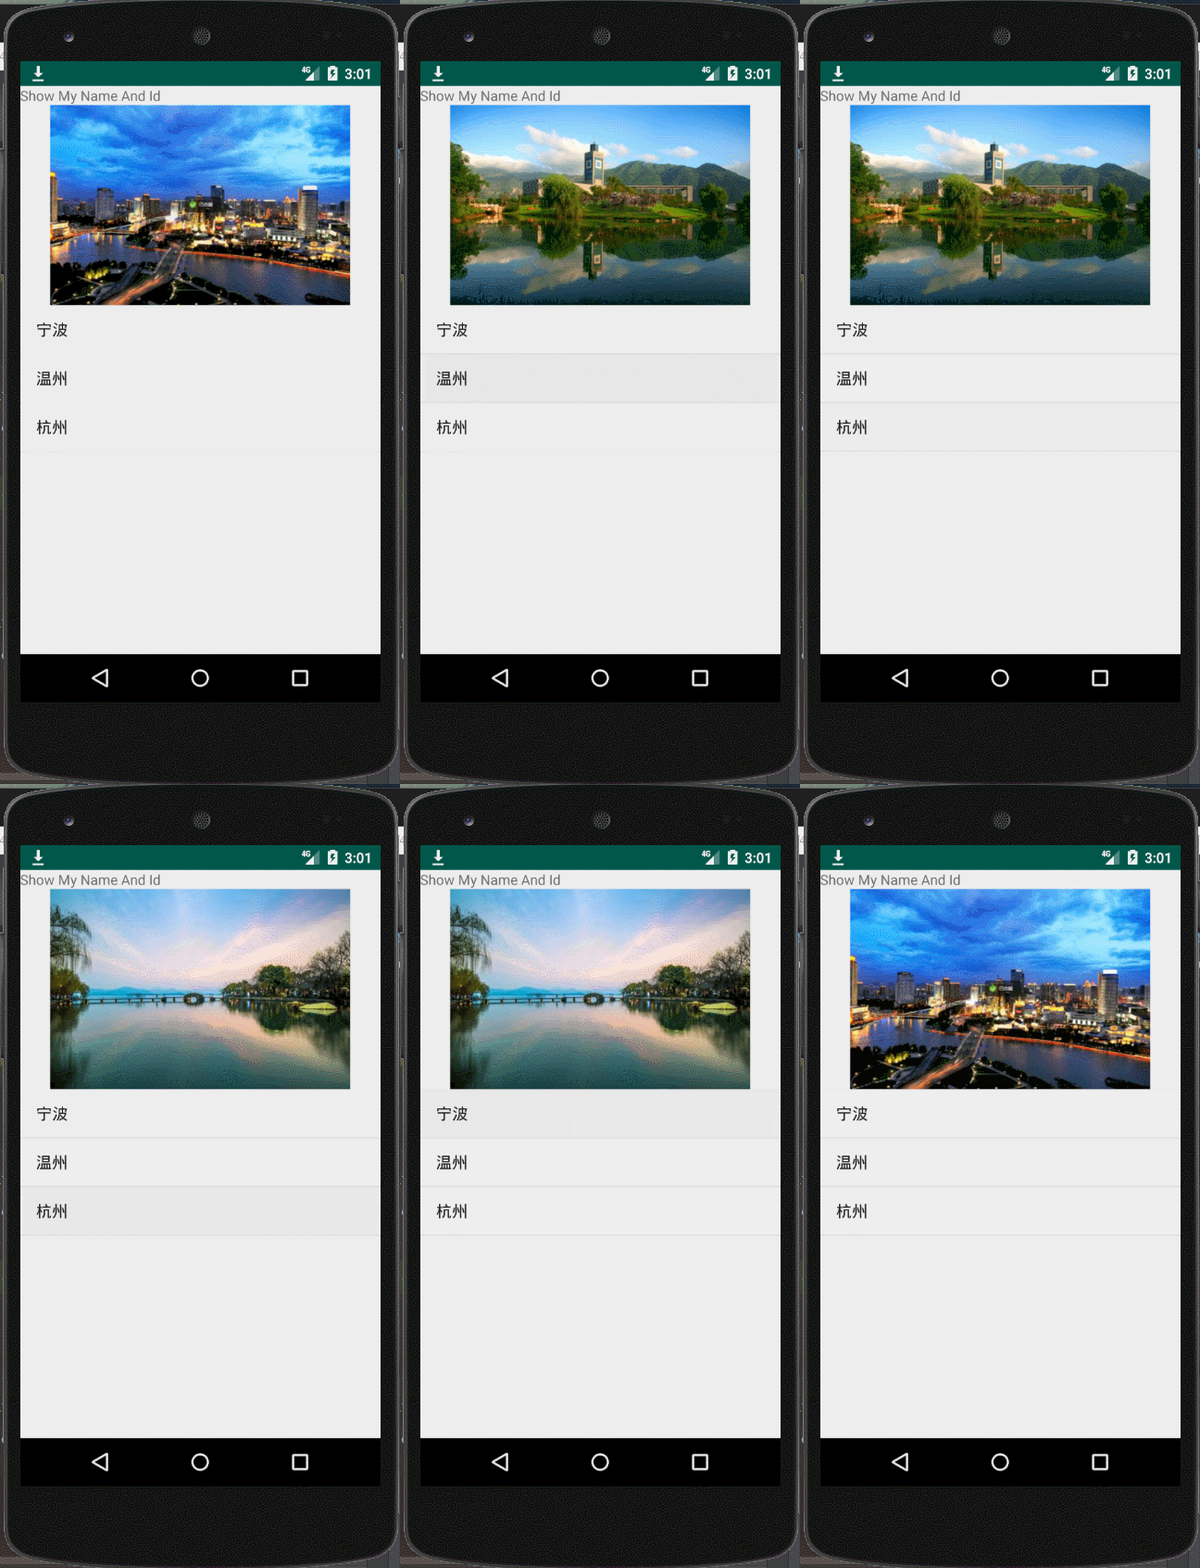
Task2-4

耗时: 9:07.014
摘要
注意点1: imgView的使用与资源文件的结合
- 图片的命名必须要小写字母
- 图片不要放到带有v24的那个目录里面去
- java代码获取图片的方式是获取到其 resId 通过
R,drawble.xxx获取,最后通过imgView去设置图片 - 图片的大小设置有一个属性是
scaleType设置图片铺满规定的大小
注意点2: 对于ListView的使用复习
- setAdapter不要忘记
- ArrayAdapter的参数要熟记
Task2-5(提示2次)

耗时:23:25.365
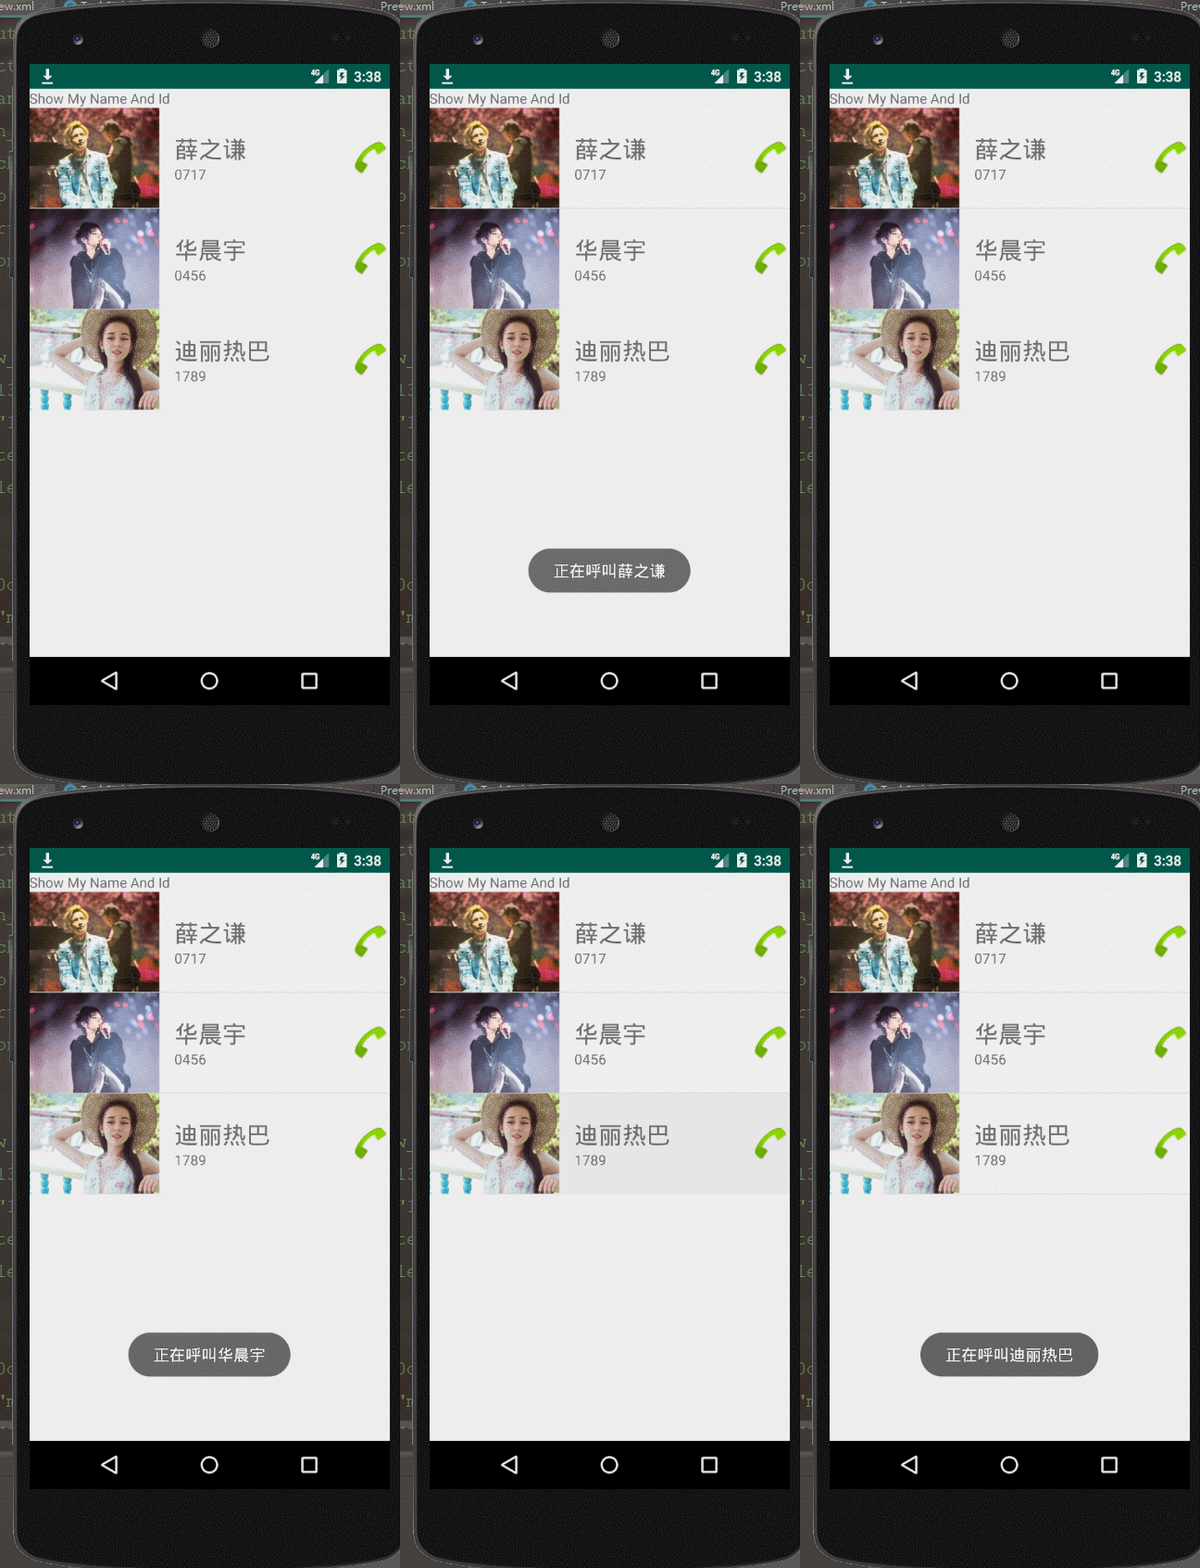
摘要
本题我第一遍很惭愧的没有做出来,问题出在SimpleAdapter的创建上,其中的一个参数应该是java.util.List<? extends java.util.Map<String, ?>> data 也就是说是个List 然后里面放一个Map类型的 在这里就可以是ArrayList<HashMap<String,Object>>
另一个问题出通过ListView来获取 Phonenumber,本质的原因也是对SimpleAdapter参数的不熟悉
注意点1: SimpleAdapter的创建
需要如下几个参数:
-
context: 显然是this或者Activity.this -
java.util.List<? extends java.util.Map<String, ?>> data这个要注意是List<Map<String,?>>这里Map类型的第一个参数的String是确定的,他相当于python字典中key的作用,通过键来获取值,这里的值可以是String类型(姓名,电话号,也可以是int类型(图片的资源id) -
resource这个遇到过很多次了 之前用的都是android.R.layout.simplexxx,现在可以用自己定义的R.layout.xxx String[]这个参数表示要显示在界面的Key值,
- 他的作用是: 在之前的
List<Map<String,>>类型中,我们可能放了很多字段,如电话号码,姓名,邮箱,地址,身份证号等等等等,但是在界面中我们要显示的可能只有其中的几个字段,如姓名,电话号. 所以这里的String中只要放那些你需要显示的Key值就好了
-
int[]注意这里的int[] 里面存放的是一堆R.id.xxx长度必须和前面的那个参数String[]等长,他的目的是把需要显示的Key值所对应的Value显示在界面上,所以前面的一个Key值对应这里的一个R.id,并且位置要想对应,不然会出错. 比如第一个Key 是PHONE_IMG,后面的第一个id就得是R.id.img
SimpleAdapter的数据是由ArrayList和HashMap数据构造的,HashMap的键字符串可以由公共静态 final字段变量定义(先定义好 KEY 如 private String PHONE_NUMBER="PHONE_NUMBER";😉 这样的可读性更高,而且代码更加简洁
注意点2: ArrayList<Map<String,Object>>的创建与使用方式
Java学的不太好 😭 所以记一下
ArrayList<HashMap<String, Object>> list = new ArrayList<>();
        String[] names = new String[]{"华晨宇", "薛之谦", "迪丽热巴"};
        String[] numbers = new String[]{"123456", "666666", "99999"};
        for (int i = 0; i < 3; i++) {
            HashMap<String, Object> map = new HashMap<>();
            map.put(Phone_img, picid[i]);
            map.put(Phone_name, names[i]);
            map.put(Phone_number, numbers[i]);
            list.add(map);
        }
注意点3: 通过ListView来获取 Phonenumber
本质上没什么难度,理解了前两点就没问题了
lv.setOnItemClickListener(new AdapterView.OnItemClickListener() {
            @Override
            public void onItemClick(AdapterView<?> parent, View view, int position, long id) {
                HashMap<String, Object> map = list.get(position);
                Toast.makeText(task2_5.this, map.get(Phone_number) + "has been called", Toast.LENGTH_SHORT).show();
            }
});通过positon获取到list中相应的位置数据,这里获取到的数据类型是HashMap,所以通过HashMap.get(key_name)就可以获取到想要的value了
Task2-6 (提示一次)

耗时:23:56.117
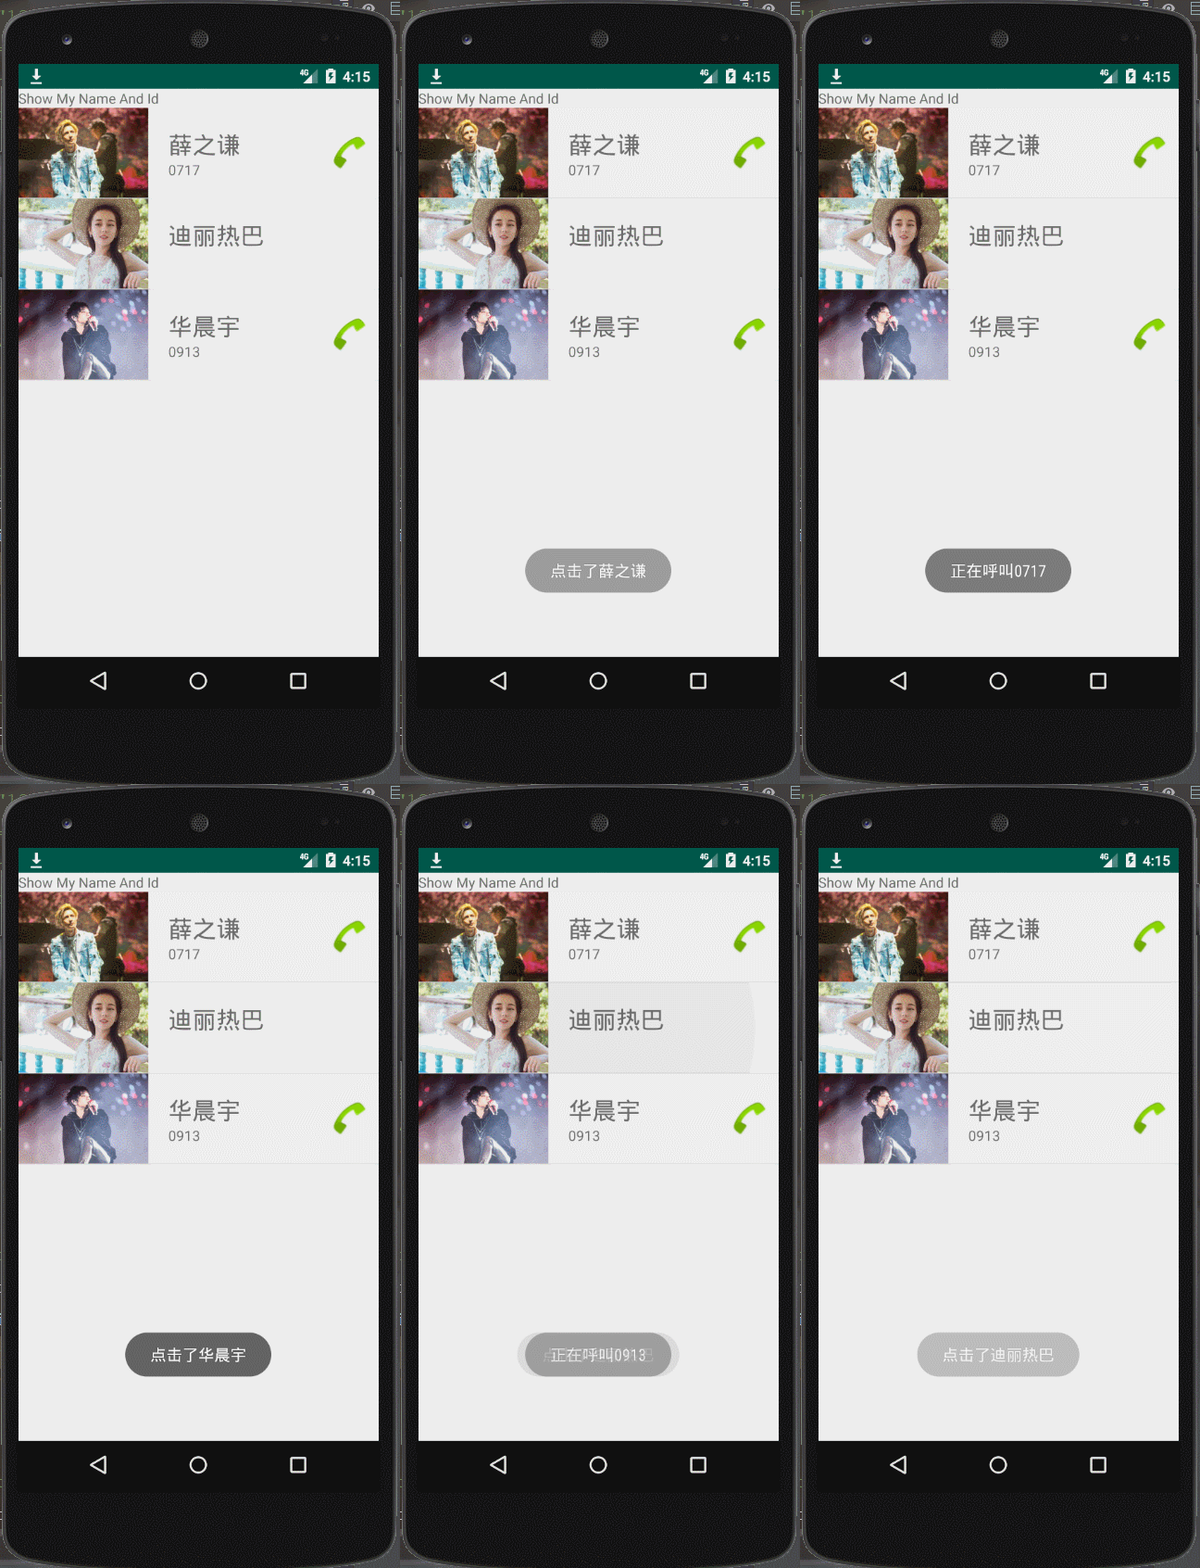
摘要
跟2-5不一样的地方是,这道题对ListView中的对象作出了区分,点击不同的地方要得到不同的回应,并且当电话号码为空的时候,右边的图标不显示
当然最主要的就是自定义Adapter的操作了
注意点1: 自定义ArrayAdapter
自定义ArrayAdapter在很多情况下使用,一般流程如下
- 1. 创建Java类 作为
ArrayAdapter<?>的类型 - 2. 创建ArrayAdapter
- 需要创建 layout
row_view - 需要完成方法 GetView的重写
- 需要继承
extends ArrayAdapter<PhoneData> - 注意构造函数需要传入的东西 如
context,list(尤其重要)
这里我写错了继承的对象,以及构造函数的参数
注意点2: 设置View的可见度
View是否可见由属性android:visibility="?"来决定,共有三种情况
- visible: 正常显示
- invisible: 隐藏(不可见但占用空间)
- gone: 消失(不可见 不占用空间)
而在java代码中则可以使用形如 View.setVisibility(View.GONE);的样子来设置
注意点3: GetView方法的重写
在构造函数里面有一句话是super(context,android.R.layout.simple_list_item_1,list); 这里的layout可以随便写,因为在GetView方法中我们会设置自定义的layout
为了使得 我们自定义的layout中的UI和list中的相对应起来,
所以需要先将它转换为View 对象
转换的语句如下
设置Layout的语句很容易记错
v = LayoutInflater.from(context).inflate(R.layout.t26_row_view,null,false);注意点4: View的细节
在GetView方法中通过id获取对象 需要使用v.findViewById 而在方法的最后不要忘记 return v
Task2-7
Write an app like GridView-task1 with 2 Textviews , and 1 GridView. The first TextView shows your name and student number. The second TextView shows the clicked item of the GridView. The GridView shows 99 string items in 3 columns. The 99 strings are generated and stored in ArrayList.
耗时: 7 : 54 : 31
注意点1: ArrayAdapter的参数

-
context代表上下文对象 -
resource代表布局的设置 可以选用默认的 也可以用自定义的 -
List第三个参数通常用List 来表示,List的类型要与ArrayAdapter的类型相对应, 本题用的是String类型, 因为每个格子只显示一个String 所以不用改写.
注意点2: GridView的属性设置
stretchMode 这个属性不要忘记
更详细的各个属性会写在另一篇专门介绍GridView的文章中

Task2-8

耗时: 20分钟内
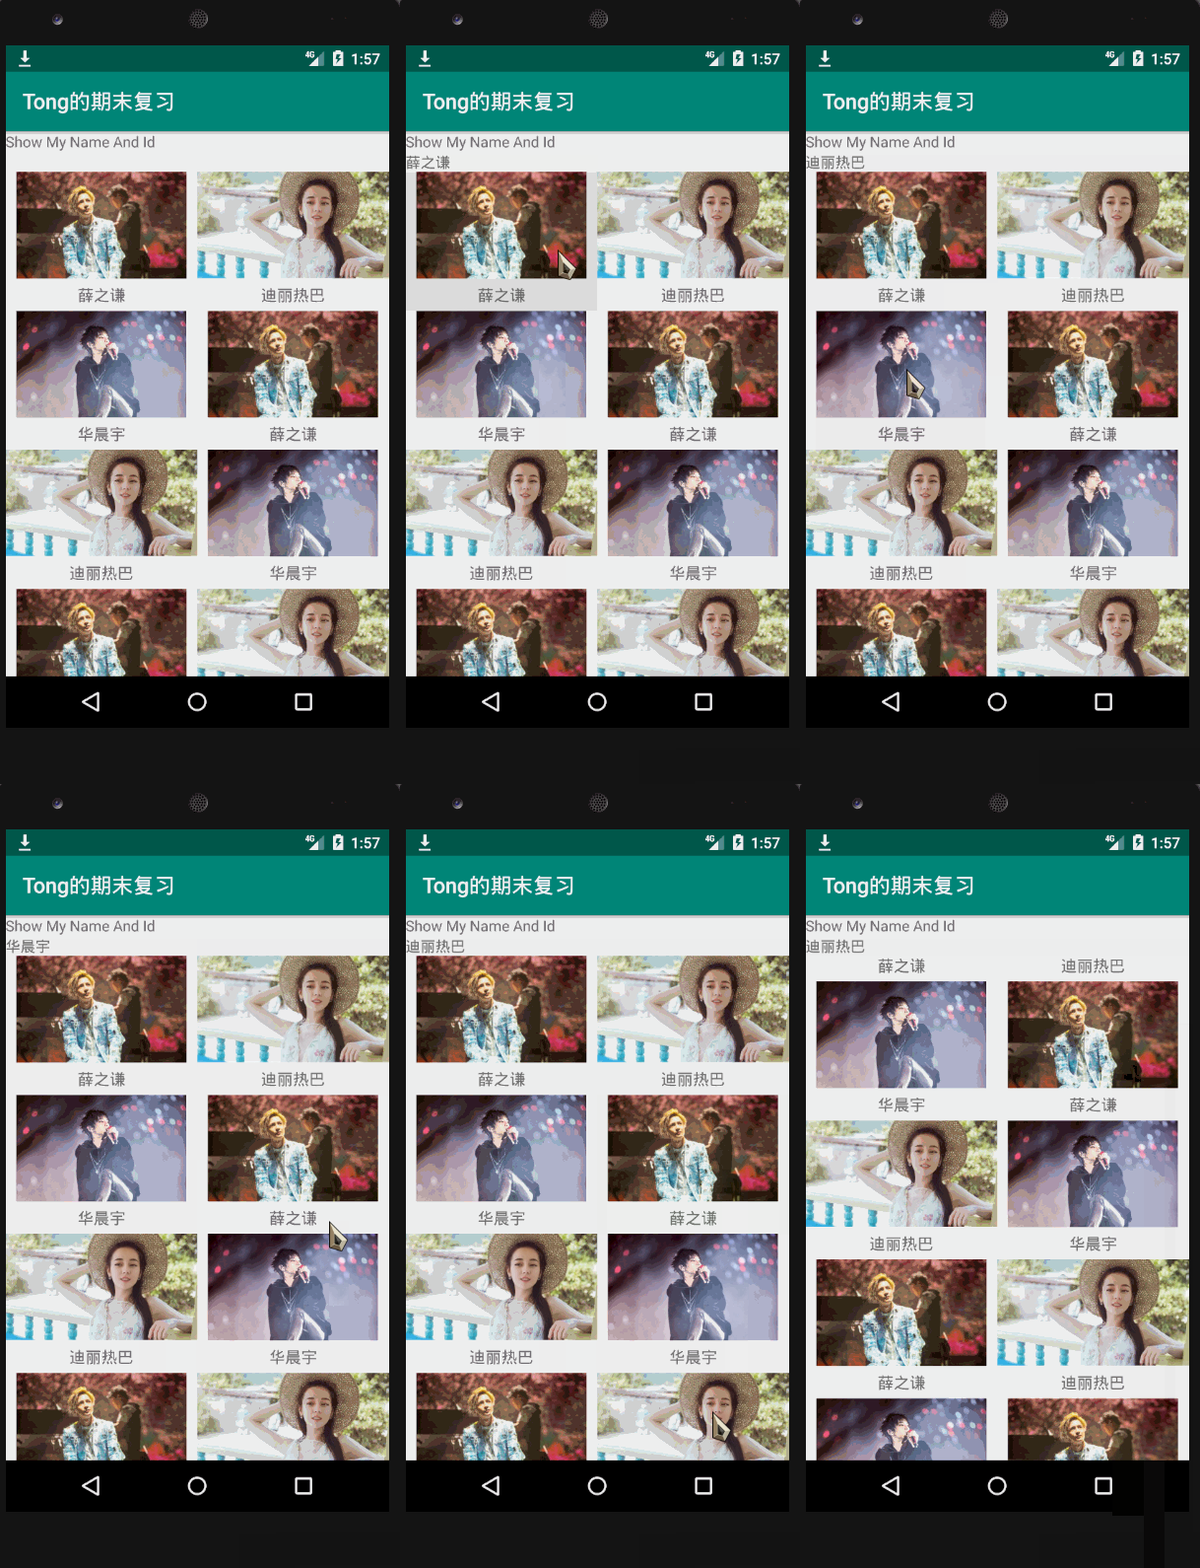
本题没什么注意点 ,理解了之前的改写ArrayAdapter和GridView的基本操作即可,如果不熟练可以再去练练前面的题目
task3-1

耗时: 12:00
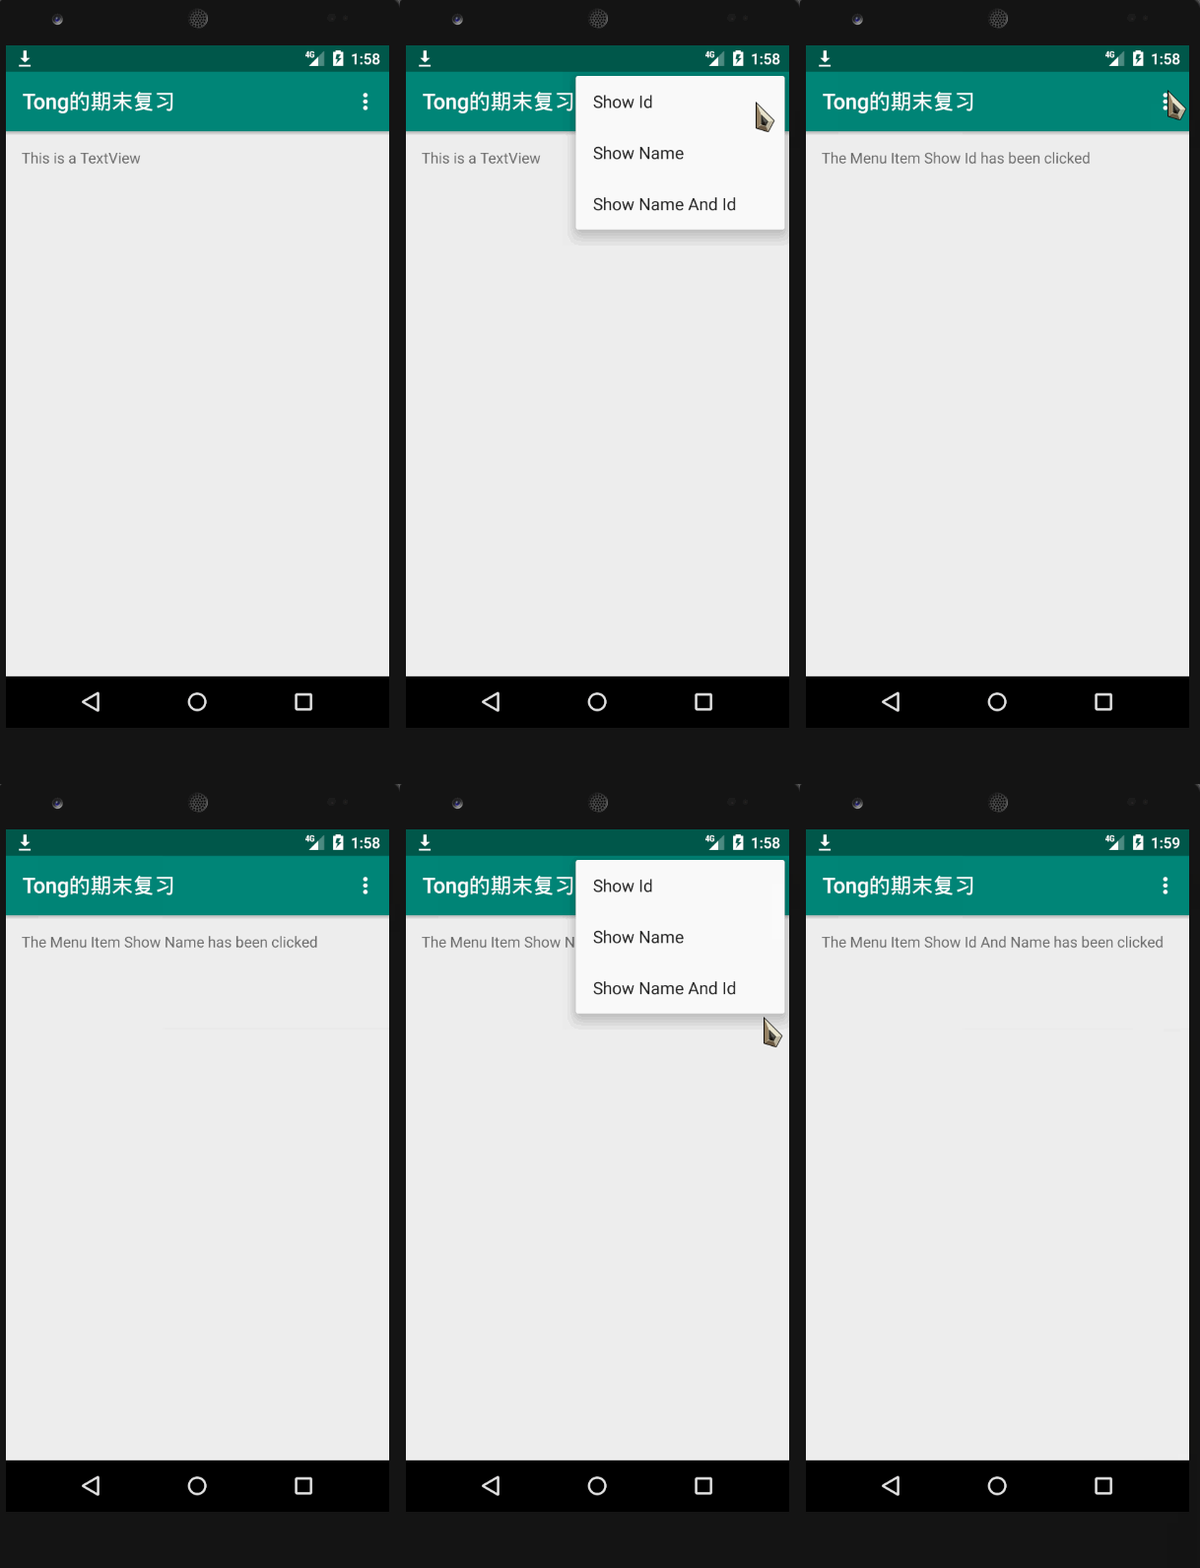
摘要
本题是简单的menu使用,仅仅使用到了menu的创建与基本应用
注意点1:Menu资源文件创建


注意点2: Menu在java代码中使用
OptionsMenuMenu的注册 这里要与另一个Menu区分开来 ContextMenu
- ContextMenu是android的context menu上下文菜单,选择某项VIEW后长按menu键,就会显示出来
- OptionsMenuMenu的所有者是Activity
public boolean onCreateOptionsMenu(Menu menu) {
        getMenuInflater().inflate(R.menu.t31_menu, menu);
        return super.onCreateOptionsMenu(menu);
}- 通过
item.getItemId()来获取被选中的Item
public boolean onOptionsItemSelected(@NonNull MenuItem item) {
        switch (item.getItemId()) {
            case R.id.t31_showName:
                tv.setText("TTY");
                break;
            case R.id.t31_showid:
                tv.setText("My ID");
                break;
            case R.id.t31_reset:
                tv.setText("");
                break;
        }
        return super.onOptionsItemSelected(item);
    }
task3-2

耗时 24:23:32
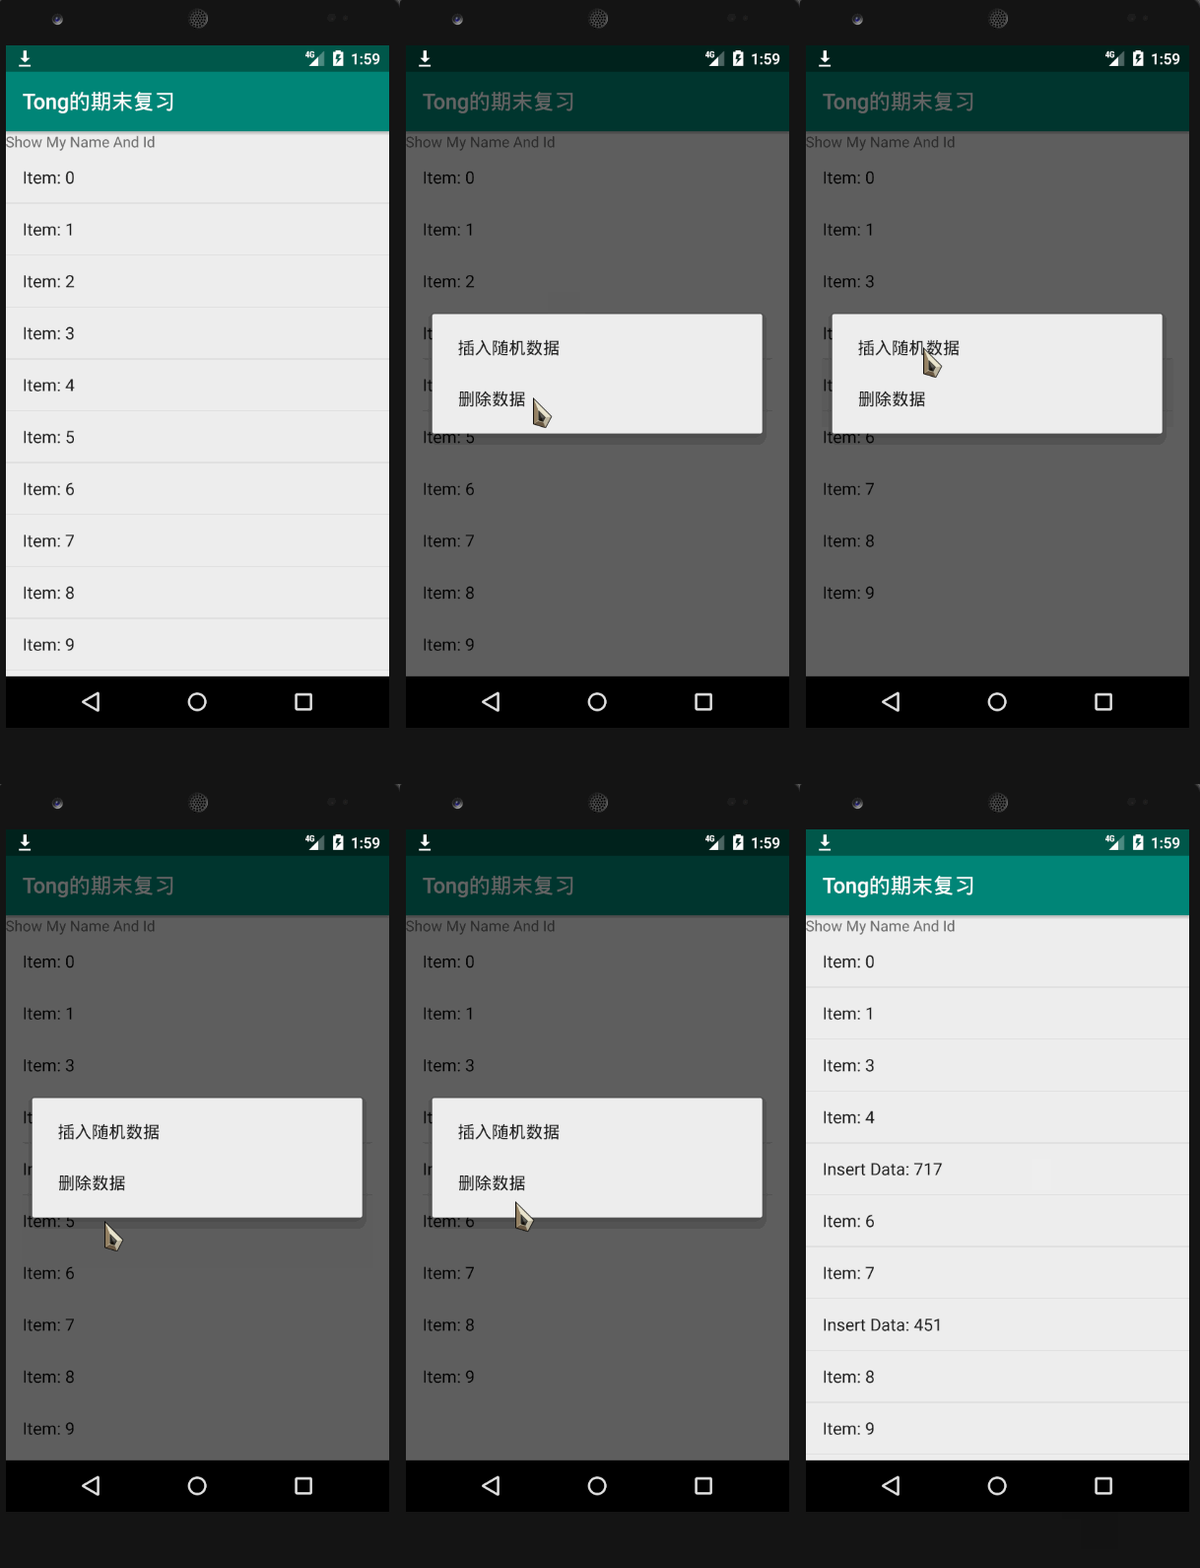
摘要
本题是基本上下文菜单的使用与注册,有几个点还是比较容易犯错的, 和上一题的OptionMenu类似,上下文菜单的注册方法和事件监听也是通过两个方法实现的
不同的是 OptionMenu是针对某个组件来说的,比如ListView,GradView,所以在使用的有2个点需要去注意
- 将上下文菜单绑定到相应的UI组件上
- 因为点击的时候是在对应的UI组件上点击,所以需要获取到点击的位置是哪个,在上下文菜单里面需要小小的一个类型转换才能通过MenuInfo来获取positon
本题时间花费的比较久是因为忘记了一个类型,通过Debug的方式找到,再加上几个小bug, 不过所幸最后还是盲敲解决了
注意点1: ContextMenu的注册
三个步骤
- onCreateContextMenu
- onContextItemSelected
- registerForContextMenu
注意点2: ContextMenu的位置获取
思路: 因为ContextMenu在注册的时候已经绑定到了组件上,如本题就绑定在了ListView上,那么我们需要获取到被点击的位置,就需要稍微花一点心思了,不能跟之前一样简简单单的用menu.position
首先onContextItemSelected方法可以让我们获取到被点击的Item,它有如下两个功能
- item.getItemId() 获取被点击的Item ID: 对应到 Menu layout 中的ID
- item.getMenuInfo() 获取该Item 对应的MenuInfo 对象 但是这个对象还需要强转一下才可以获取到position 如下
ContextMenu.ContextMenuInfo menuInfo = item.getMenuInfo();
AdapterView.AdapterContextMenuInfo menuInfo1 = (AdapterView.AdapterContextMenuInfo) menuInfo;
int pos = menuInfo1.position;
注意点3: 如何通过调试代码来想起需要转换的类型
1.设置断点

2.Debug
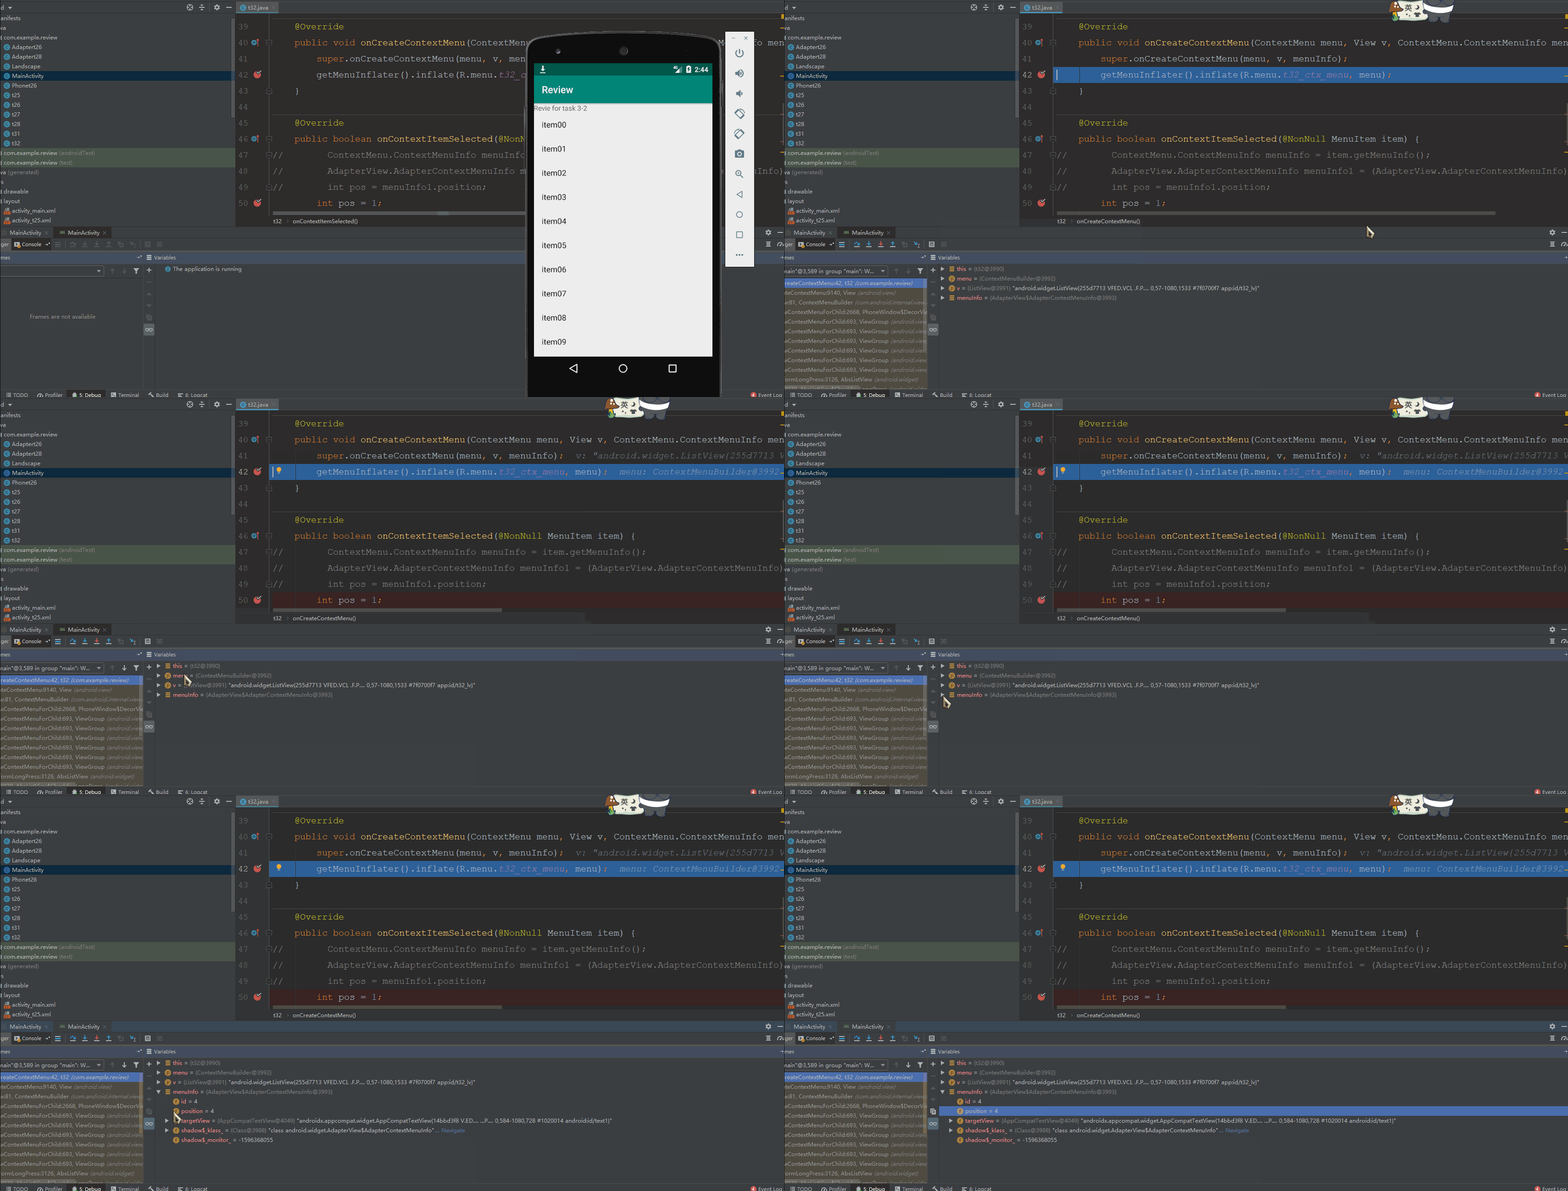
可以看到,这个对象具有positon属性

接下来就简单了,补全代码获取position即可
ContextMenu.ContextMenuInfo menuInfo = item.getMenuInfo();
AdapterView.AdapterContextMenuInfo menuInfo1 = (AdapterView.AdapterContextMenuInfo) menuInfo;
int pos = menuInfo1.position;
task3-3

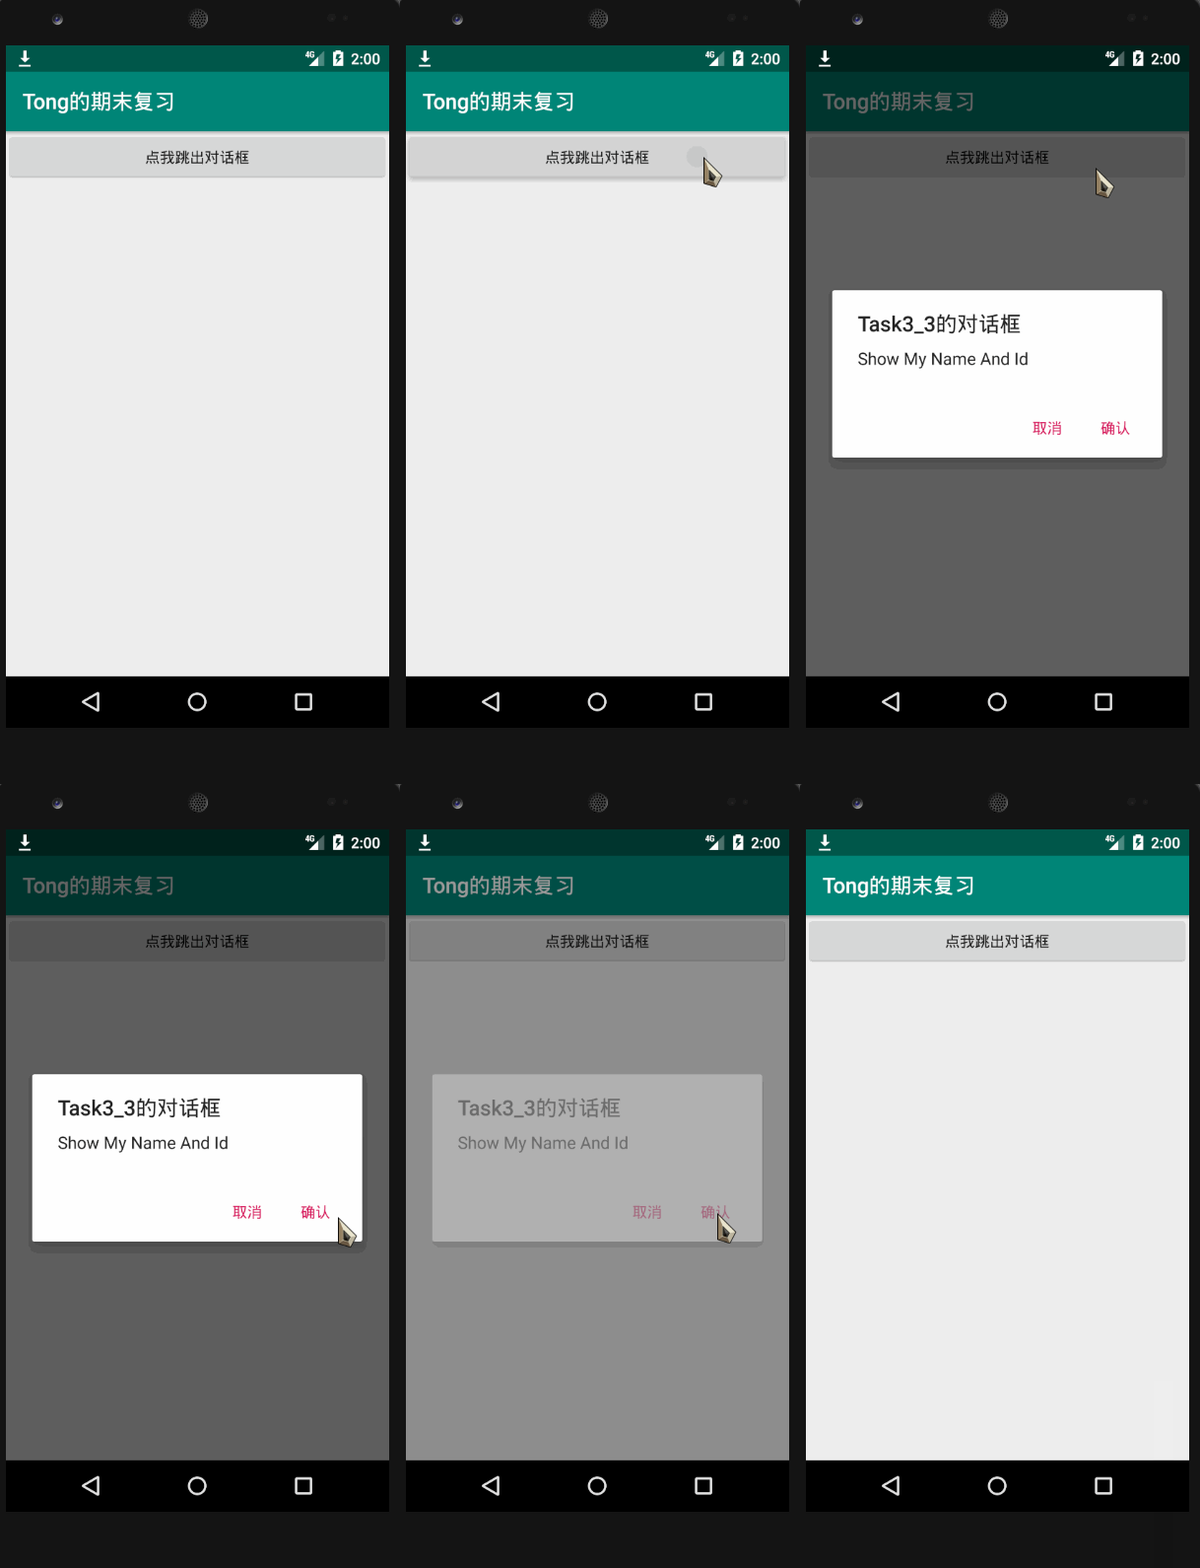
耗时: 3:37.90
这道题很基础,没什么难度,会创建AlertDialog就行了
注意点: AlertDialog的创建
主要通过AlertDialog.Builder来创建bl对象,通过bl来设置AlertDialog的各个属性
AlertDialog.Builder bl = new AlertDialog.Builder(this);
bl.setTitle("Dialog Title").setMessage("Review:My name and ID");
bl.setNegativeButton("CANCEL",null).
setPositiveButton("OK",null).show();这里如果想设置PositiveButton的具体功能,就把上面代码中的null改成Listen监听器即可
AlertDialog.Builder bl = new AlertDialog.Builder(this);
        bl.setTitle("Dialog Title").setMessage("Review:My name and ID");
        bl.setNegativeButton("CANCEL", new DialogInterface.OnClickListener() {
            @Override
            public void onClick(DialogInterface dialog, int which) {
                Toast.makeText(Review33.this, "BEING CLICKED", Toast.LENGTH_SHORT).show();
            }
        }).setPositiveButton("OK",null).show();
task3-4

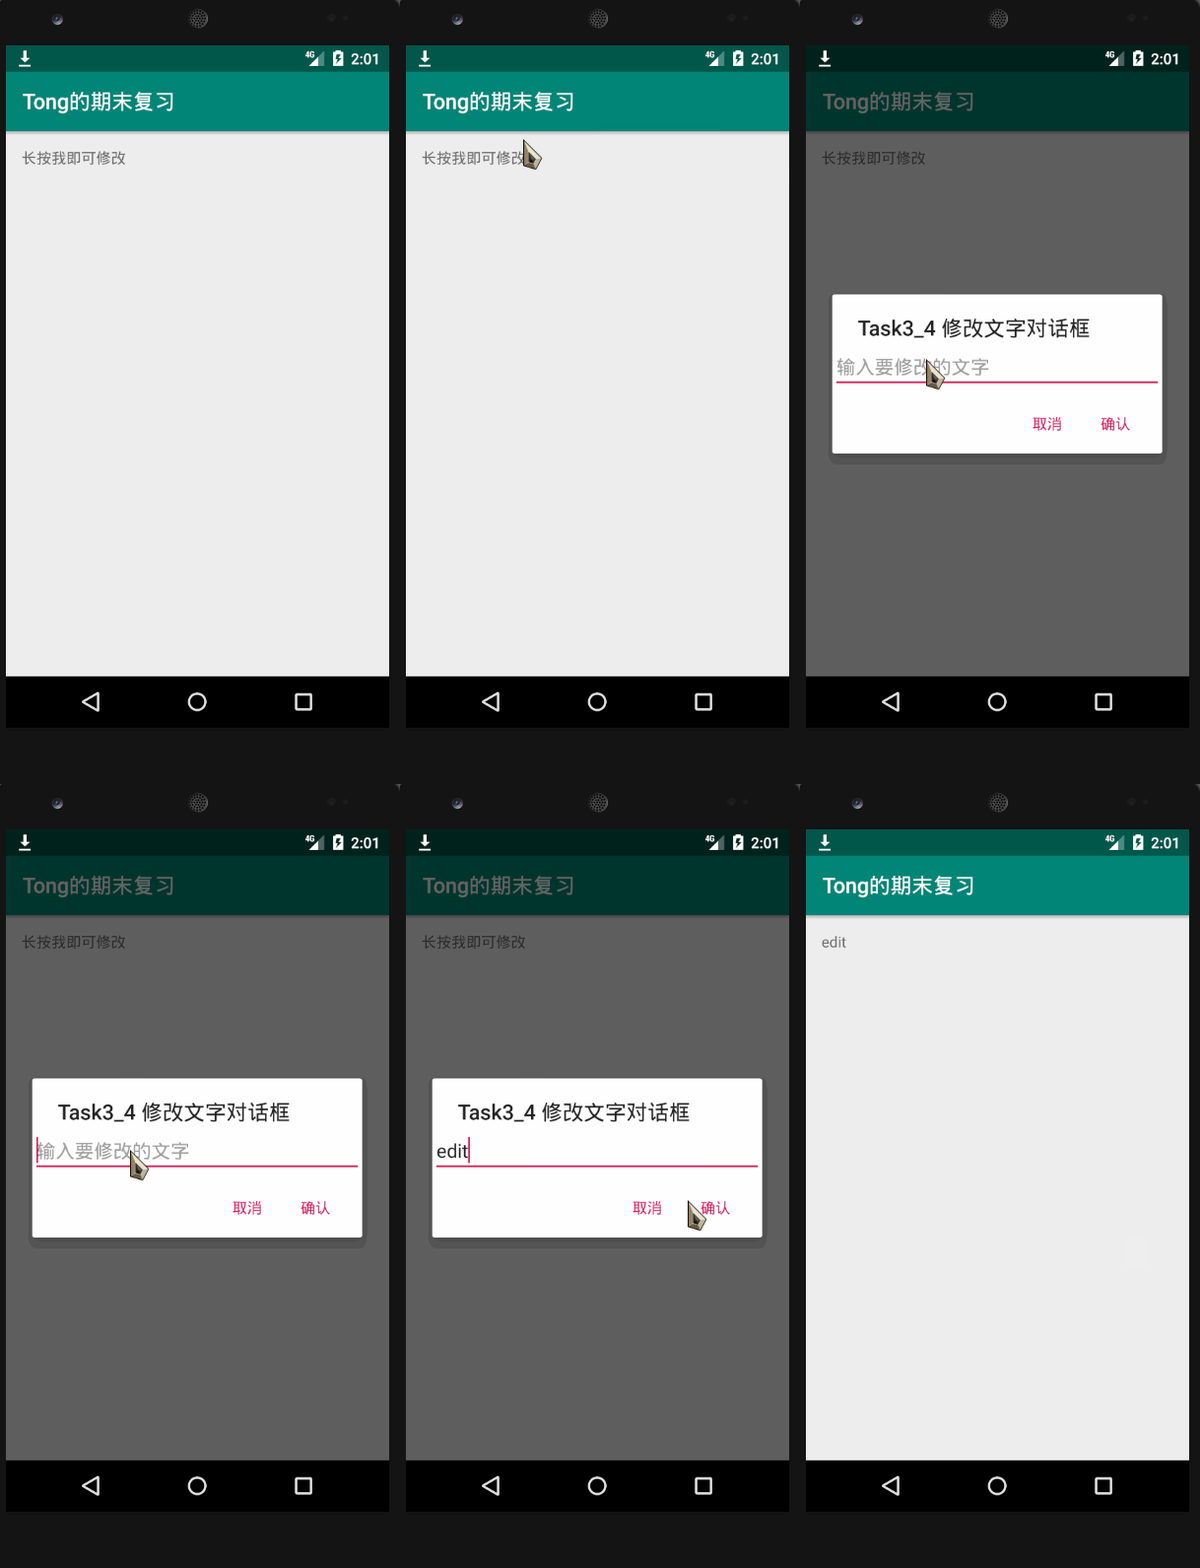
耗时: 6:16.77
注意点: AlertDialog的自定义布局
比起之前AlertDialog的创建,这里就多了一步
AlertDialog.Builder bl = new AlertDialog.Builder(this);
View view = LayoutInflater.from(this).inflate(R.layout.dialog_view_33, null, false);
// TODO
bl.setView(view);
唯一需要注意的地方是 在TODO的地方,获取alertDialog中的UI组件必须使用view.findViewById(),不然会找不到
task3-5

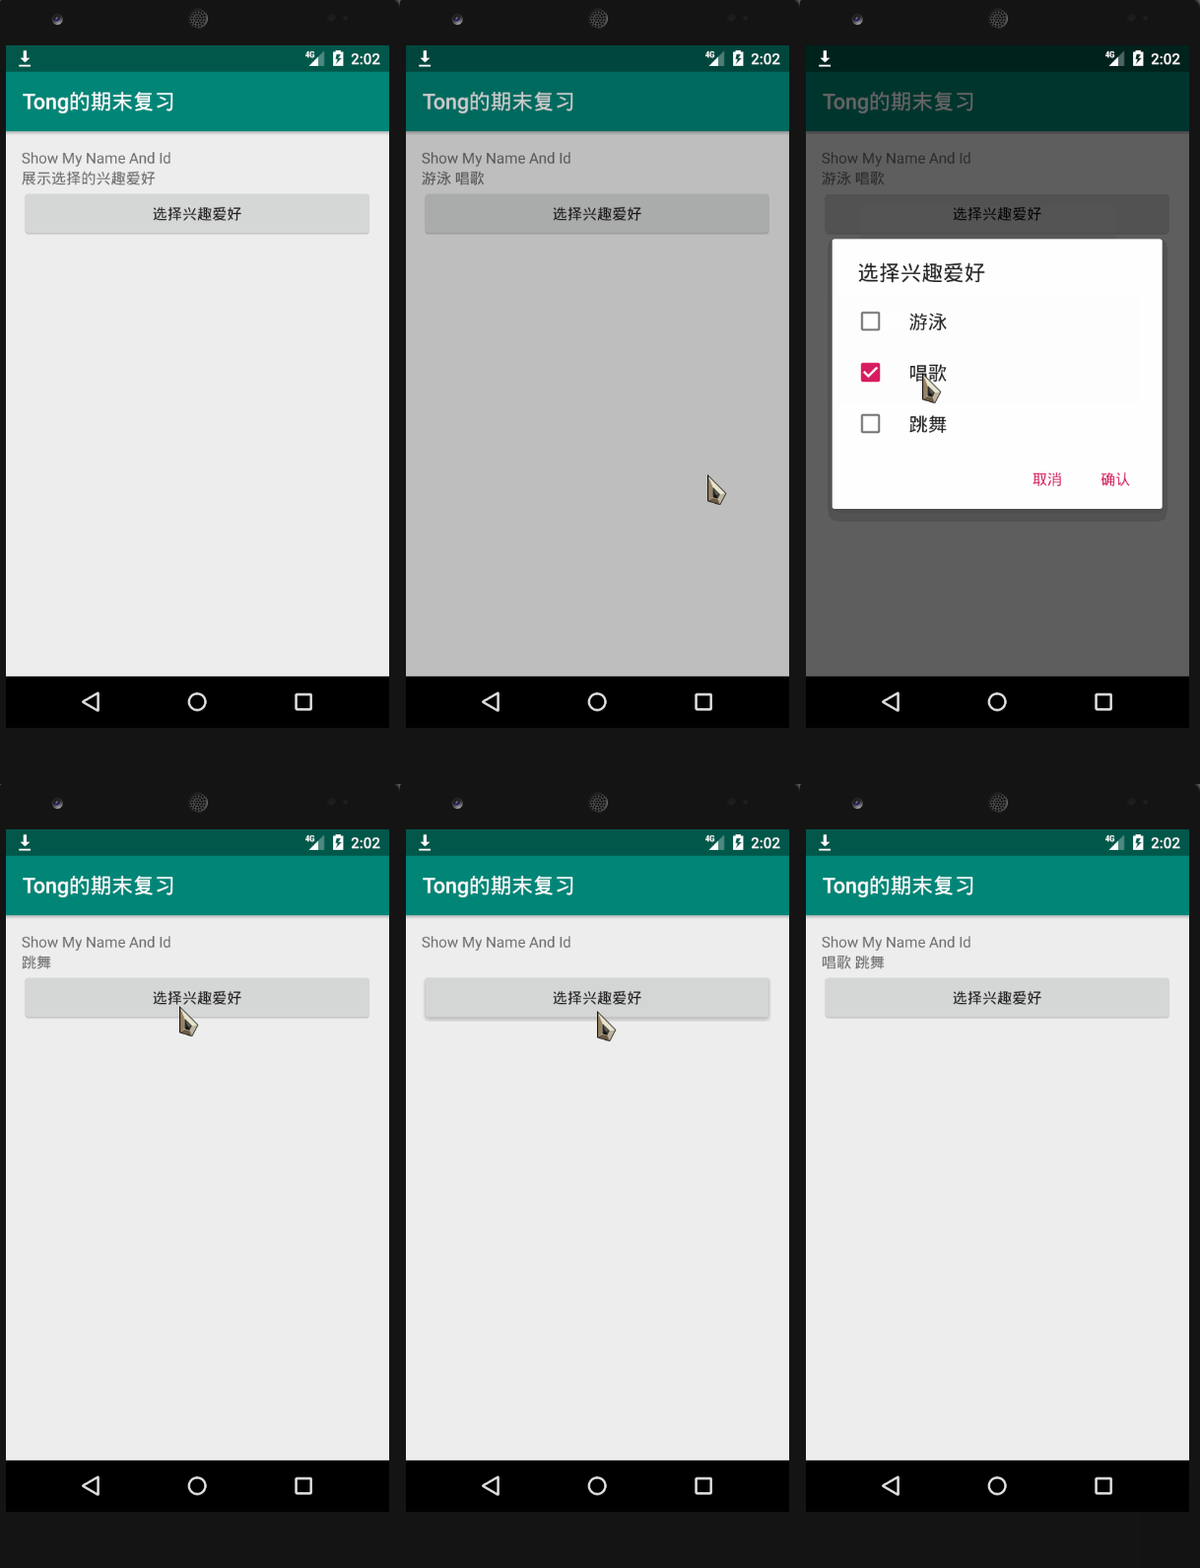
耗时: 7:10.56
本题可以选择使用自定义layout,在里面创建Checkbox的方法,也可以使用AlertDialog自带的多选框
两种形式均可实现
注意点: AlertDialog自带的多选框

OnMultiChoiceClickListener共有三个参数
- CharSequence[] items 代表选项的值
- boolean[] checkedItems 代表选项是否被选中(它的长度要和items的长度一致)
- android.content.DialogInterface.OnMultiChoiceClickListener listener 代表监听器 一般用来修改checkedItems 的boolems值
booleans[which] = isChecked;
bl.setMultiChoiceItems(data, booleans, new DialogInterface.OnMultiChoiceClickListener() {
            @Override
            public void onClick(DialogInterface dialog, int which, boolean isChecked) {
                booleans[which] = isChecked;
            }
        });
task4-1

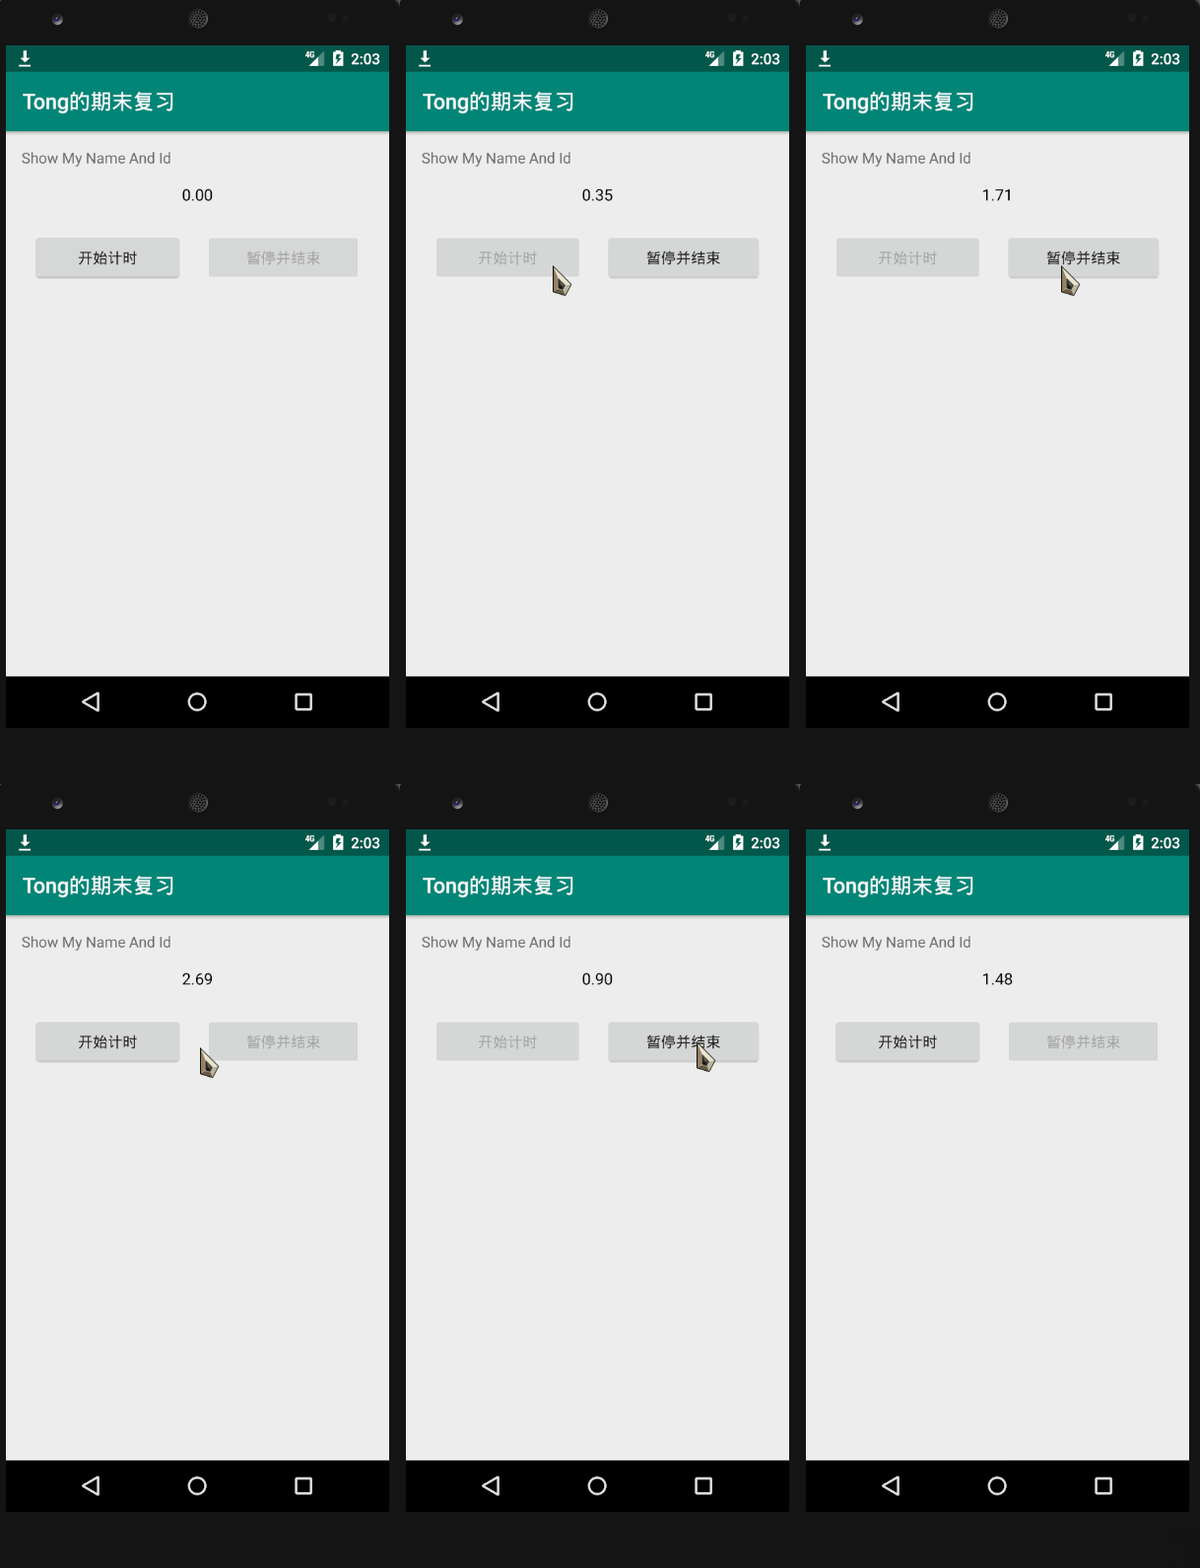
耗时: 13分钟
耗时: 13:16.474
注意事项
见下面的文章
安卓编程 多线程与Handler消息传递(附案例 计时器)
第一次做的时候忘记初始化AtomicBoolean对象
第二次做的时候忘记初始化Float对象
看报错信息后,解决问题
Task5-1(提示一次)

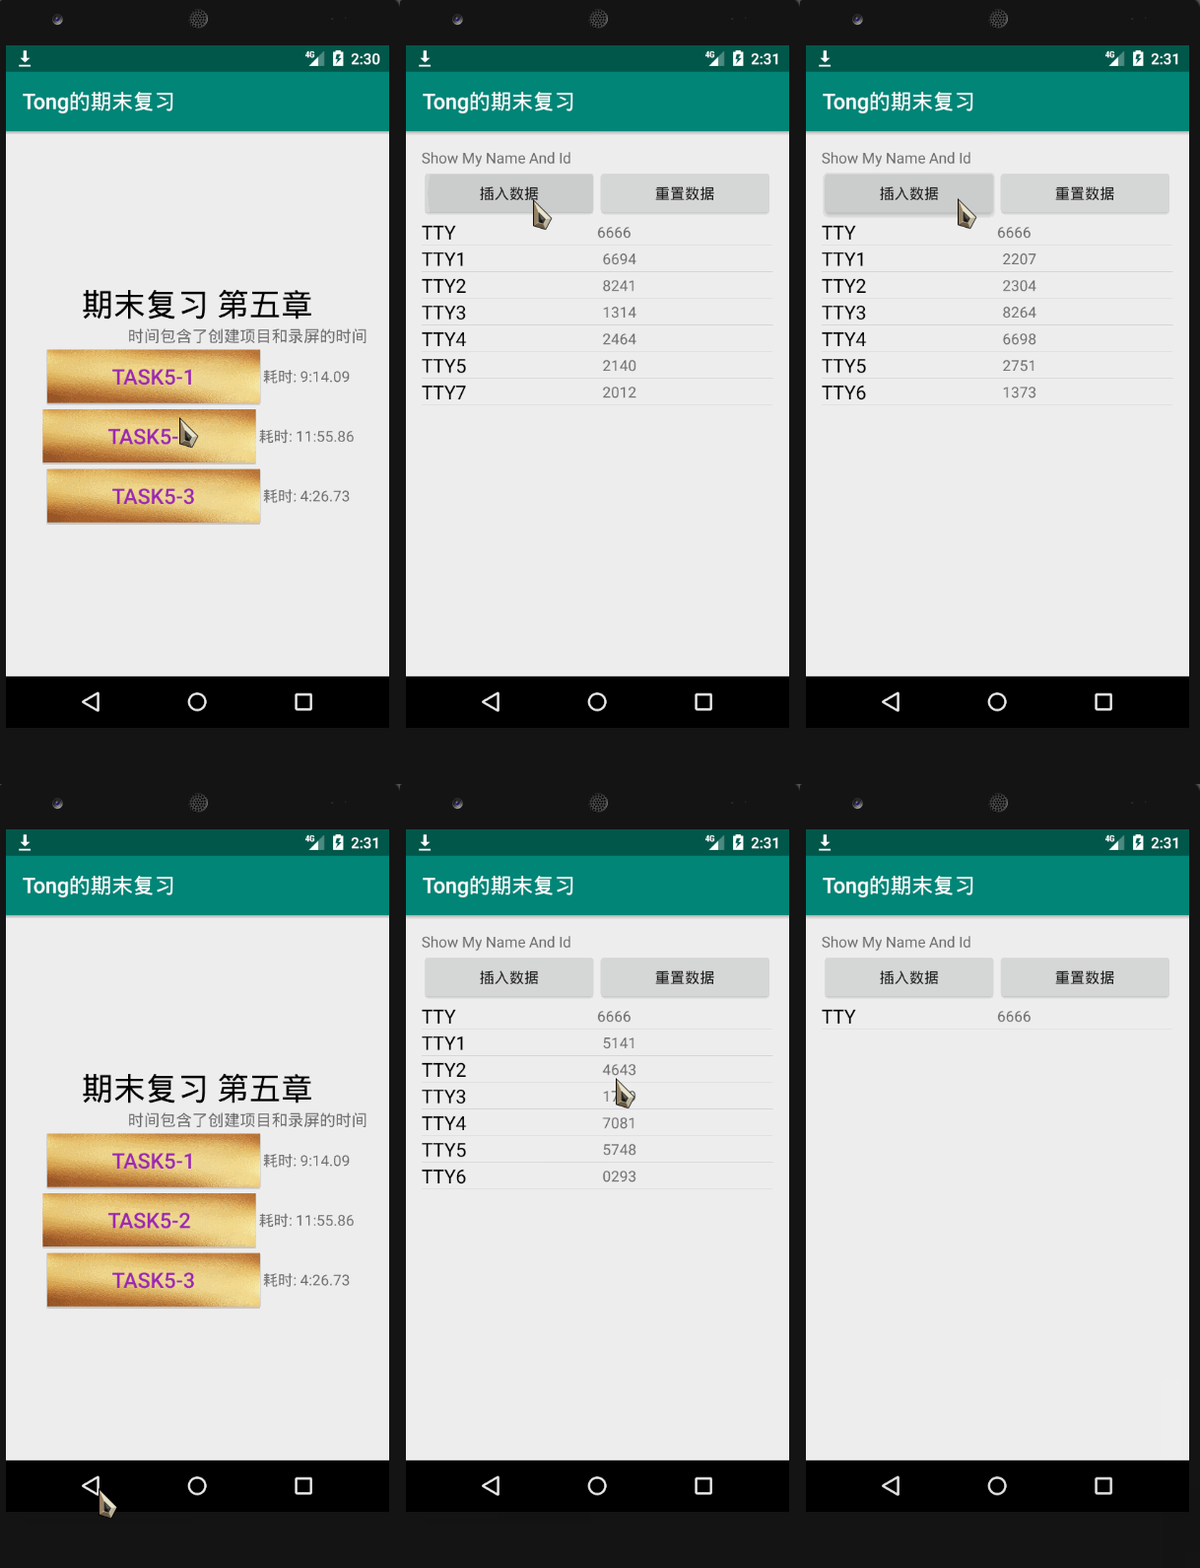
耗时: 40:33.539
耗时: 35:19.21
耗时: 22:13.70 (这种题目差不多要20分钟吧)
摘要
这个实验的耗时相对较长,并且在编程的过程中碰到了许多小问题
注意点1 编程思路
本题设计到了数据库的相关知识,如果想要盲敲的话,在理解SQLite数据库使用的基础上,还需要对代码的整体框架都有着一定的思路
本题的思路相对简单, 两个按钮实现数据的插入与重置,我的整体编程思路如下
- 将数据库有关的类和方法封装到一个
PhoneDatabase类中, 在里面实现insert,reset,selectAll的操作 -
PhoneDatabase的类中首先需要定义内部类继承SQLiteOpenHelper并实现其中的Oncreate与Upgrade方法 - 自定义两个layout文件 一个
main为主显示界面,一个row_view为SimpleCursorAdapter的显示样式 - 在java的主函数中 定义对象 PhoneDatabase 如何再根据按钮实现相关的方法
注意点2 Adapter的刷新
adapter.getCursor().requery(); 第二遍刷题的时候我没想起来这个,就重新设置了一个Cursor也可以实现
Cursor c1 = phoneDataBase.findAll();
adapter.swapCursor(c1);
注意点3 一些变量的类型
这里要注意创建SQLiteOpenHelper的时候version不能等于0,否则要报错,所以在初始化的时候另version为1
private static String Database_Name = "demo";
private static String Table_Name = "tty";
public static String KEY_NAME = "name";
public static String KEY_PHONE = "phone";
public long insert(String name, String phone)
public Cursor selectAll()注意点4 Java生成随机小数
%04d代表四位数字不足的用0来补new Random().nextInt(10000)生成一个10000内的数字
String phone = String.format("%04d", new Random().nextInt(10000));注意点5 DB文件的查看

data/data/项目名/database/下的db文件

右键保存

然后用工具来查看
注意点6 重复运行APP遇到的问题
第三遍练习的时候,我在第二遍的基础上删除代码重新测试时间,在这个过程中,因为开启的虚拟机是同一个,所以原先的数据库是依旧存在的,如果列名不一致的话会引发错误,最简单的办法就是先卸载APP再运行程序,或者在onCreate之前先执行 如果存在就删除表的操作;
Task5-2

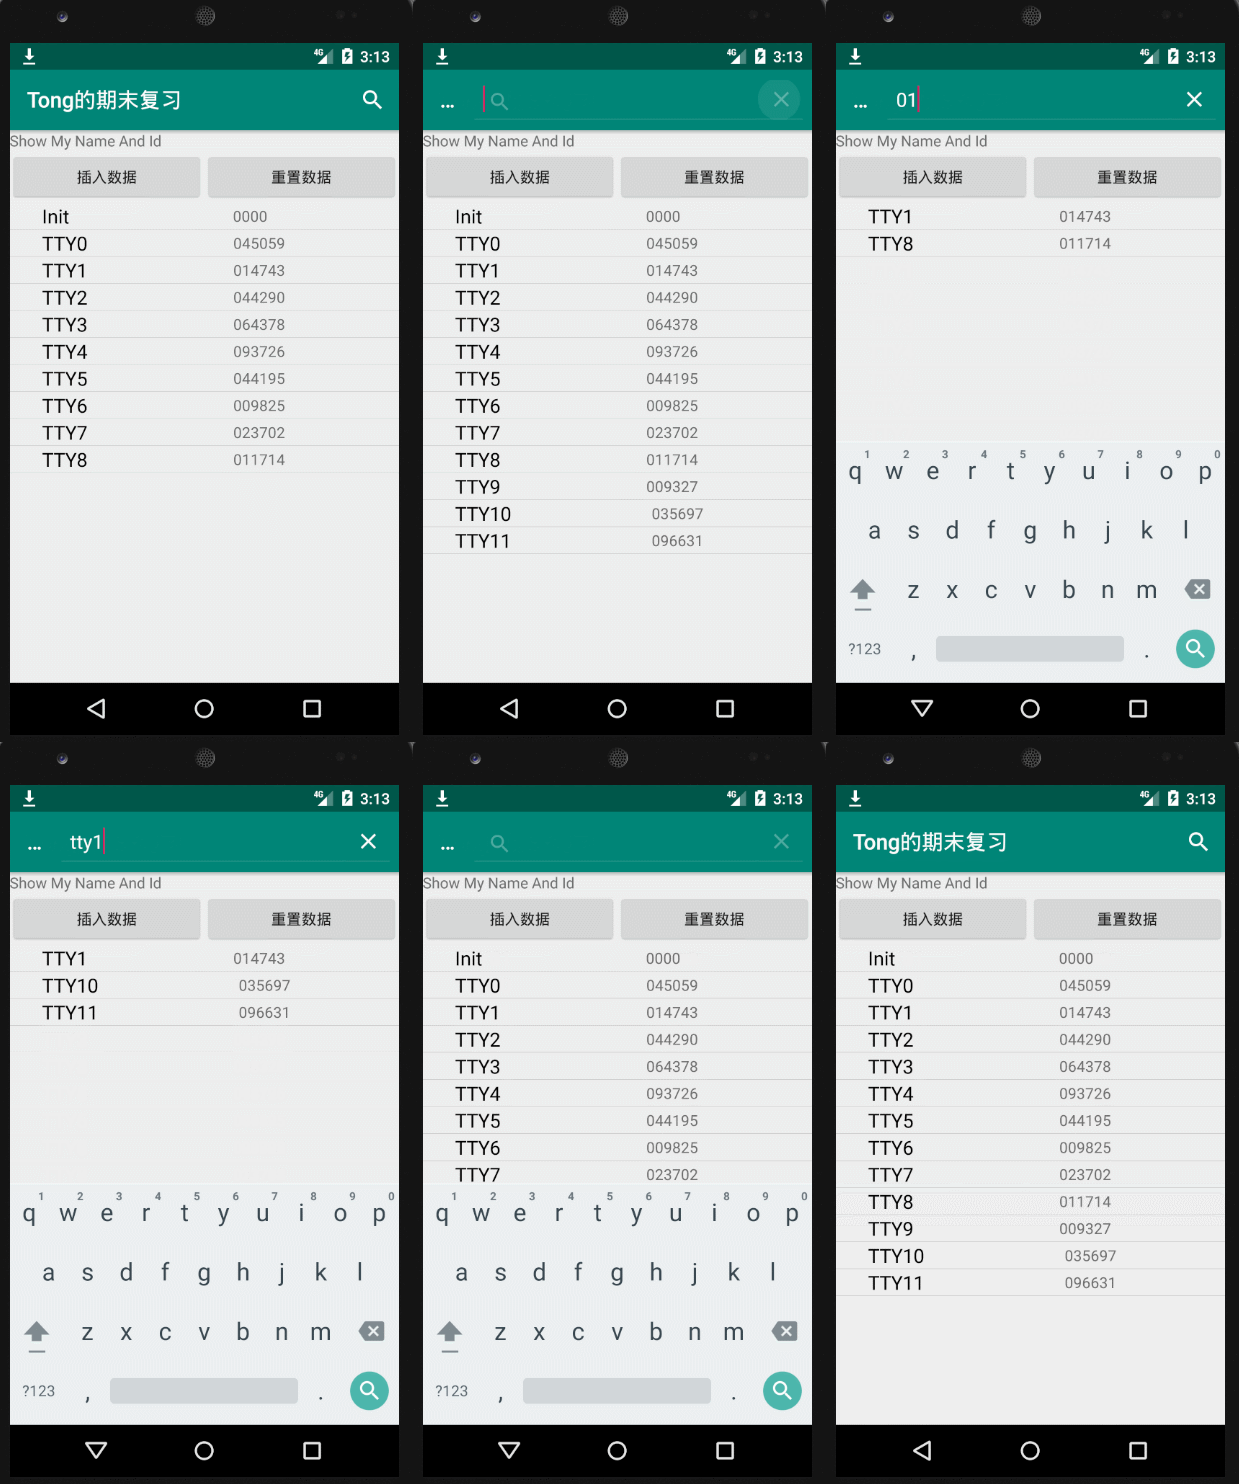
耗时: 5-1基础上7分钟
耗时: 34:31.18 分钟
摘要
本题在5-1的基础上增加了一个模糊查询的方法
多了个OptionMenu的SearchView组件使用
注意SearchView中要使用onQueryTextChange的方法,数据库的代码是 ? like %?%的格式
基本上会5-1的话这题就一个点比较容易出错,如下注意点1
注意点1: Menu的创建与SearchView的获取
public boolean onCreateOptionsMenu(Menu menu) {
	     getMenuInflater().inflate(R.menu.opt_search, menu);
	     MenuItem item = menu.findItem(R.id.menu_search);
	     SearchView searchView = (SearchView) item.getActionView();
}
getMenuInflater().inflate(R.menu.opt_search, menu);这句话要记住inflate就可以了MenuItem item = menu.findItem(R.id.menu_search); 其实跟findViewbyId类似
- 先通过
SearchView的Id找到SearchView所在的Item(findItem) - 再通过
item.getActionView找到对应的searchView(item.getActionView)
注意点2: Adapter中cursor的更换
swap 很明显是更换用的
adapter.swapCursor(cursor);Task5-3
CRUD for database

耗时: 在2的基础+49:22.75分钟
耗时: 50:10.29
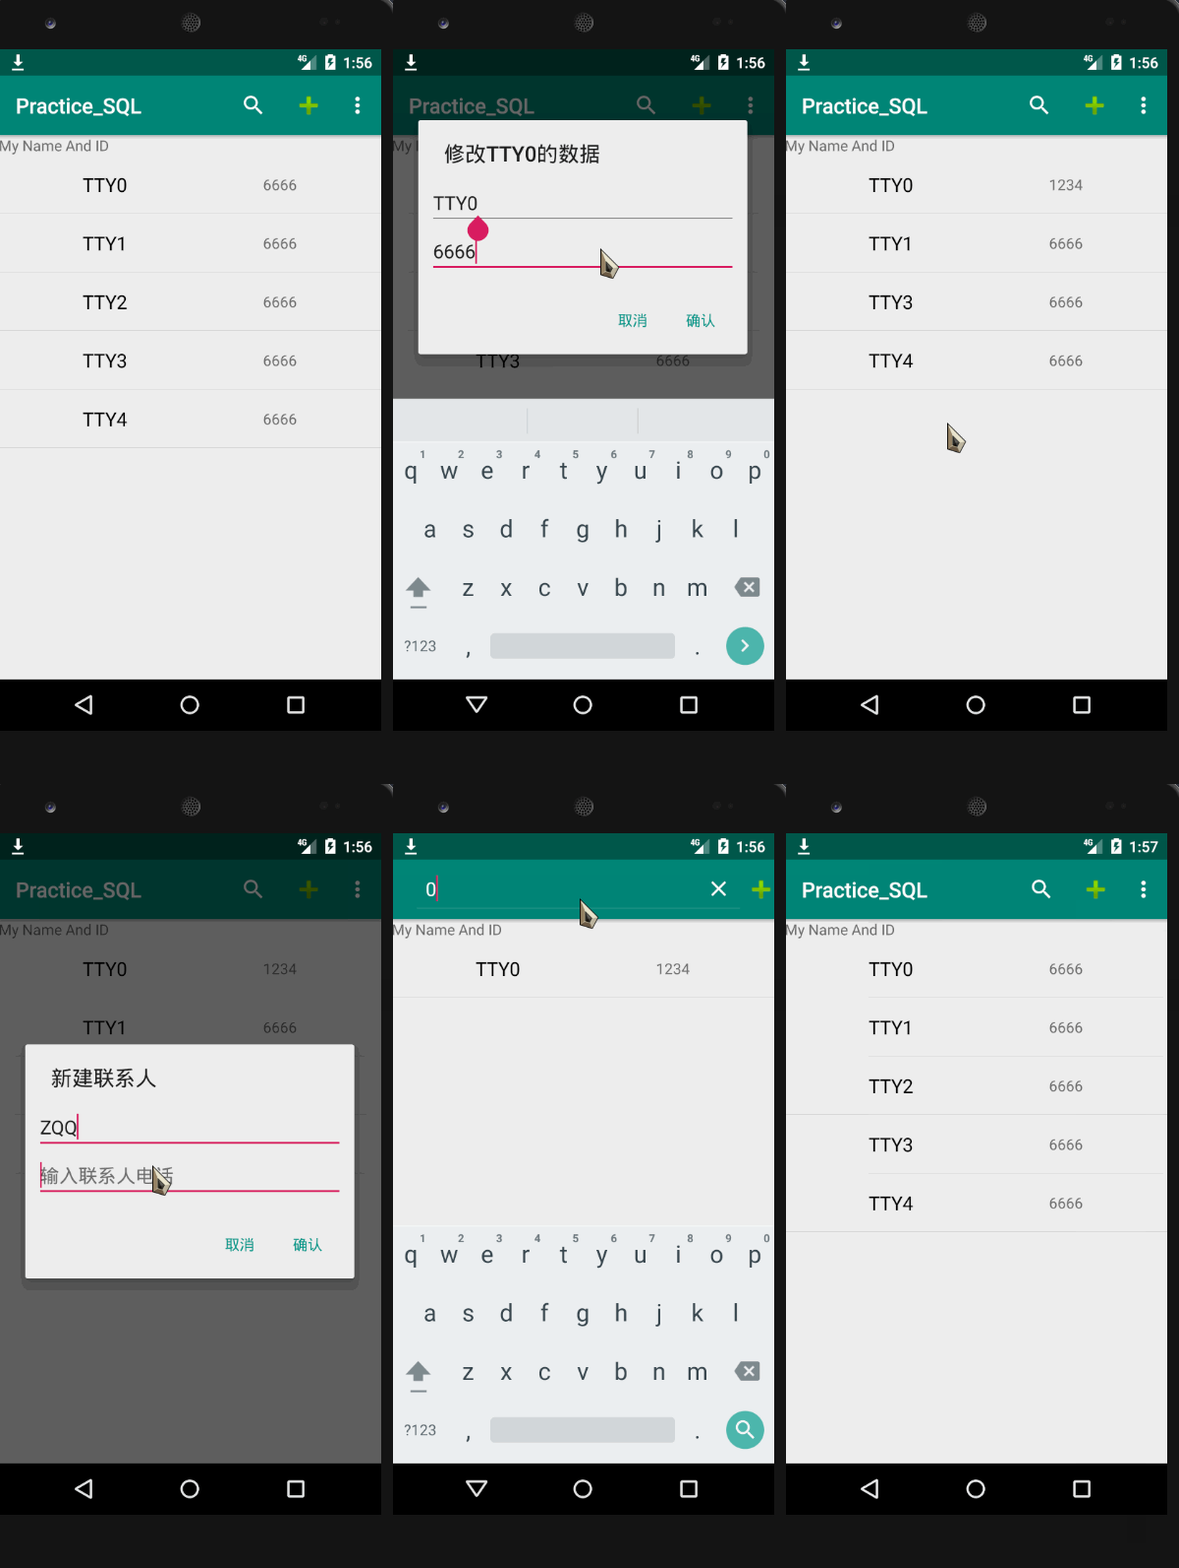
摘要
除了与adapter绑定的游标外,其他的游标用完最好关闭,否则比较占内存LayoutInflater方法可以将资源文件转换为一个View对象
本道题第一遍花的时间有点久
在创建CursorWrapper对象的时候可以先把游标移动到first的位置(因为这个功能只有在修改的时候要用)MenuItem item = menu.findItem(R.id.menu_search);这里又错了一次
注意点1:游标取数据的方法
先定位,后取数据(默认的位置在-1)
- 移动游标的位置有如下几种方法
moveToFirst()moveToNext()moveToPosition(int position)
- 取数据有如下几种方法
getColumnIndex(String columnName)getString(int columnIndex)
通用的步骤如下
已知要取的列名为KEY_NAME 带着数据的游标为 c
c.getString(c.getColumnIndex(KEY_NAME));注意点2: CursorWrapper类
它可以当做cursor来用,优点是可以实现一些自定义的功能,使得代码更加高效,否则就要用cursor一句一句的去写
在本题中,它的作用是实现了修改数据的时候显示指定ID的值,并显示在Dialog上
以及点击发送短信的时候显示phone字段
如果为了做出题目忘记了CursorWrapper怎么用可以不写
为了方便我在定义类的时候就添加了c.moveToFirst()方法

注意点3: AlertDialog中自定义监听器
对于弹出对话框,不知道要执行的是修改还是插入,所以可以使用一个监听器接口,把editText的内容回传到主线程中,再做相应的操作
其流程如下


注意点4: 自定义的AlertDialog
自定义一个Show方法来展示数据, 传入name,和 phone
将 name 和 phone设置到editText上
如果是修改,就传入数据
如果是新增,就传入空数据
注意点5:发短信
Intent intent = new Intent(Intent.ACTION_SENDTO, Uri.parse("smsto:" + "666"));Task 6-6

耗时: 19:50.27
摘要
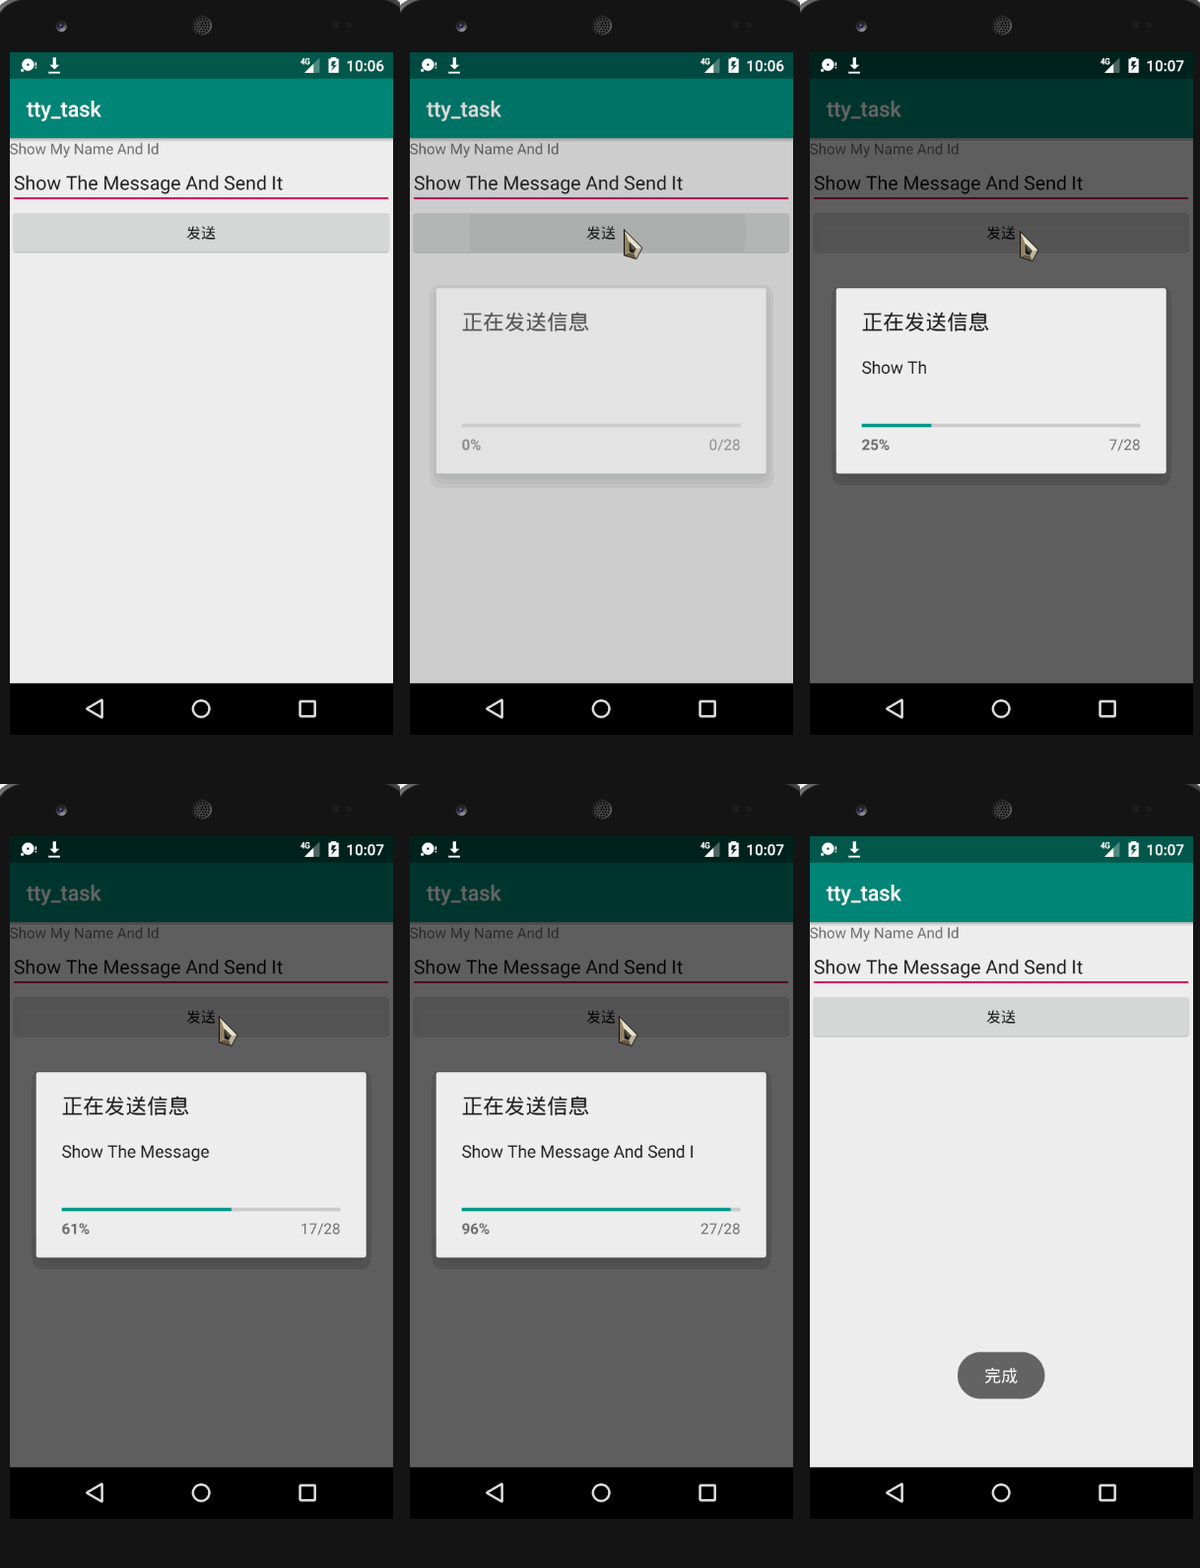
本题考查了AsyncTask与ProgressDialog的使用new Thread().sleep(300); 可以使得时间暂停300毫秒
注意点1: 名字的记忆
AsyncTaskProgressDialog
注意点2: AsyncTask的继承
需要三个类型 分别对应 doInBackground,onProgressUpdate,onPostExecute
注意点3: AsyncTask中方法执行的顺序与关系
- 1.
onPreExecute类似Init()方法 - 2.
doInBackground
- 在这个方法中通常使用循环,循环中的
publishProgress()方法会跳转到onProgressUpdate继续执行 - 而这个方法结束的时候有个return
-
onPostExecute方法是结束时的方法,接收的参数是doInBackground所return的东西
注意点4: AsyncTask方法的调用
在主方法中使用execute调用即可
ProjectTask projectTask = new ProjectTask(MainActivity.this,text);
projectTask.execute();
注意点5: ProgressDialog的初始化
放在onPreExecute中执行
其中progressDialog.setProgressStyle(ProgressDialog.STYLE_HORIZONTAL);比较重要,设置进度条的风格是横着的progressDialog.setMessage("");不能省略不然就没有Message的位置了
progressDialog = new ProgressDialog(context);
        progressDialog.setProgressStyle(ProgressDialog.STYLE_HORIZONTAL);
        progressDialog.setTitle("正在发送信息");
        progressDialog.setMessage("");
        progressDialog.setMax(text.length());
        progressDialog.show();


