
在日常开发过程中,这三种功能是再常见不过了,网上相关的文档也一大堆,不过未免让人眼花撩乱,因此记录做下整理!
(PS:目前相册选择照片和调用摄像头拍照已经实现了压缩,录制小视频暂未实现,哪位大佬有好的建议,请指教!)
实现步骤:
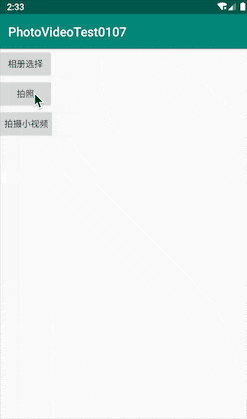
1.新建一个AndroidStudio项目。绘制MainActivity的xml文件,这里为了直观,我们放上几个按钮和图片就行。

main_activity.xml:
<?xml version="1.0" encoding="utf-8"?>
<LinearLayout xmlns:android="http://schemas.android.com/apk/res/android"
    xmlns:app="http://schemas.android.com/apk/res-auto"
    xmlns:tools="http://schemas.android.com/tools"
    android:layout_width="match_parent"
    android:layout_height="match_parent"
    android:orientation="vertical"
    tools:context=".MainActivity">

    <Button
        android:id="@+id/main_chooseAlbumBtn"
        android:layout_width="wrap_content"
        android:layout_height="wrap_content"
        android:padding="10dp"
        android:text="相册选择" />

    <Button
        android:id="@+id/main_takePhotoBtn"
        android:layout_width="wrap_content"
        android:layout_height="wrap_content"
        android:padding="10dp"
        android:text="拍照" />

    <Button
        android:id="@+id/main_takeVideoBtn"
        android:layout_width="wrap_content"
        android:layout_height="wrap_content"
        android:padding="10dp"
        android:text="拍摄小视频" />

    <ImageView
        android:id="@+id/main_photoTv"
        android:layout_width="300dp"
        android:layout_height="200dp"
        android:layout_margin="10dp"
        android:scaleType="fitXY" />

    <ImageView
        android:id="@+id/main_videoIv"
        android:layout_width="300dp"
        android:layout_height="200dp"
        android:layout_margin="10dp"
        android:scaleType="fitXY" />
</LinearLayout>
2.打开清单文件,配置以下拍照,读取存储内存等权限。
<uses-permission android:name="android.permission.READ_EXTERNAL_STORAGE" />
<uses-permission android:name="android.permission.WRITE_EXTERNAL_STORAGE" />
<uses-permission android:name="android.permission.CAMERA" />
3.回到MainActivity,设置控件的点击事件。
/**
 * 配置组件
 */
private void initViews() {
    chooseAlbumBtn = findViewById(R.id.main_chooseAlbumBtn);
    takePhotoBtn = findViewById(R.id.main_takePhotoBtn);
    takeVideoBtn = findViewById(R.id.main_takeVideoBtn);
    photoTv = findViewById(R.id.main_photoTv);
    videoIv = findViewById(R.id.main_videoIv);

    chooseAlbumBtn.setOnClickListener(this);
    takePhotoBtn.setOnClickListener(this);
    takeVideoBtn.setOnClickListener(this);
}
4.下面开始设置从相册选择照片的逻辑。
/**
 * 打开相册
 */
private void chooseAlbum() {
    Intent intent = new Intent(Intent.ACTION_PICK, MediaStore.Images.Media.EXTERNAL_CONTENT_URI);
    startActivityForResult(intent, ALBUM_REQUEST_CODE);
}
这里我们设置startActivityForResult用来获取回调,requestCode设为ALBUM_REQUEST_CODE。
此时就可以正常打开相册选择照片了。值得一提,因为调用的是系统原生的,因此不同机型的界面也都不一样。

选择完照片就可以返回MainActivity了,这时我们在onActivityResult中获取回调的照片。
@Override
protected void onActivityResult(int requestCode, int resultCode, @Nullable Intent data) {
    super.onActivityResult(requestCode, resultCode, data);
    if (resultCode == RESULT_OK) {
        switch (requestCode) {
            case ALBUM_REQUEST_CODE: //相册选择的回调
                Uri uri = data.getData(); //获取系统返回的照片uri
                String[] strings = {MediaStore.Images.Media.DATA};
                Cursor cursor = getContentResolver().query(uri, strings, null, null, null);
                cursor.moveToFirst();
                int index = cursor.getColumnIndex(strings[0]);
                String path = cursor.getString(index); //获取图片路径
                cursor.close();
                Log.d("fantasychong_path", path);
                break;
}
这下我们就可以获取返回的图片路径path,运行起来看下结果:

此时我们需要把path转换成bitmap,从而可以让其显示在界面上(或根据项目需求做相应处理)
Bitmap bitmap = BitmapFactory.decodeFile(path);
photoTv.setImageBitmap(bitmap);
运行起来。
哦豁,报错了,看下日志

顾名思义,是权限被拒绝了,Android在6.0起已经引入了动态权限获取,一些诸如拍照读取内存等敏感操作都要求先获取动态权限才能进行下一步操作,知道了原因,处理起来就方便多了。
我们在操作从相册选择照片时,加入读写内存的动态权限处理。
case R.id.main_chooseAlbumBtn: //相册选择
    if (ContextCompat.checkSelfPermission(this, Manifest.permission.WRITE_EXTERNAL_STORAGE) != PackageManager.PERMISSION_GRANTED ||
            ContextCompat.checkSelfPermission(this, Manifest.permission.WRITE_EXTERNAL_STORAGE) != PackageManager.PERMISSION_GRANTED) {
        ActivityCompat.requestPermissions(this,
                new String[]{Manifest.permission.WRITE_EXTERNAL_STORAGE,
                        Manifest.permission.READ_EXTERNAL_STORAGE}, MY_PERMISSION_ALBUM);
    } else {
        chooseAlbum(); //打开相册
    }
    break;
运行~

没问题!
由于是从相册直接选取的照片,对于部分照片可能出现90度旋转的问题,我们除了做一下压缩,还得做下旋转的处理。
/**
 * 处理旋转后的图片
 *
 * @param originpath 原图路径
 * @param context    上下文
 * @return 返回修复完毕后的图片路径
 */
public static String amendRotatePhoto(String originpath, Context context) {
    // 取得图片旋转角度
    int angle = readPictureDegree(originpath);
    // 把原图压缩后得到Bitmap对象
    Bitmap bmp = getCompressPhoto(originpath);
    // 修复图片被旋转的角度
    Bitmap bitmap = rotaingImageView(angle, bmp);
    // 保存修复后的图片并返回保存后的图片路径
    return savePhotoToSD(bitmap, context);
}
/**
* 把原图按1/10的比例压缩
*
* @param path 原图的路径
* @return 压缩后的图片
*/
public static Bitmap getCompressPhoto(String path) {
BitmapFactory.Options options = new BitmapFactory.Options();
options.inJustDecodeBounds = false;
options.inSampleSize = 4; // 图片的大小设置为原来的十分之一
Bitmap bmp = BitmapFactory.decodeFile(path, options);
options = null;
return bmp;
}在onActivityResult中处理图片。
Bitmap bitmap = BitmapFactory.decodeFile(PhotoBitmapUtils.amendRotatePhoto(path, MainActivity.this));
photoTv.setImageBitmap(bitmap);
5.从相册选取没问题了,接下来设置调用摄像头拍照。
先获取相机、读写内存的动态权限,调用方法
case R.id.main_takePhotoBtn: //摄像头拍照
    if (ContextCompat.checkSelfPermission(this, Manifest.permission.WRITE_EXTERNAL_STORAGE) != PackageManager.PERMISSION_GRANTED ||
            ContextCompat.checkSelfPermission(this, Manifest.permission.WRITE_EXTERNAL_STORAGE) != PackageManager.PERMISSION_GRANTED ||
            ContextCompat.checkSelfPermission(this, Manifest.permission.CAMERA) != PackageManager.PERMISSION_GRANTED) {
        ActivityCompat.requestPermissions(this,
                new String[]{Manifest.permission.WRITE_EXTERNAL_STORAGE,
                        Manifest.permission.READ_EXTERNAL_STORAGE,
                        Manifest.permission.CAMERA}, MY_PERMISSION_CAMERA);
    } else {
        takeCamera(); //打开相机拍照
    }
    break;
打开相机拍照代码如下:
/**
 * 打开相机拍照
 */
private void takeCamera() {
    Intent intent = new Intent(MediaStore.ACTION_IMAGE_CAPTURE);
    File file = new File(Environment.getExternalStorageDirectory(), "PhotoVideoTest");
    if (!file.exists()) {
        file.mkdir();
    }
    File photoFile = new File(file, PhotoBitmapUtils.getImageFileName());
    photoPath = photoFile.getAbsolutePath();
    Uri uri = FileProvider.getUriForFile(this, getPackageName() + ".fileprovider", photoFile);
    intent.putExtra(MediaStore.EXTRA_OUTPUT, uri);
    startActivityForResult(intent, CAMERA_REQUEST_CODE);
}
在onActivityResult中获取回调,依旧做压缩旋转处理。
case CAMERA_REQUEST_CODE: //摄像头拍照的回调
    Bitmap bitmap1 = BitmapFactory.decodeFile(PhotoBitmapUtils.amendRotatePhoto(photoPath, MainActivity.this));
    photoTv.setImageBitmap(bitmap1);
    break;
跑起来~
打开摄像头时报错了,看日志

意为我们需要在清单文件中声明一个provider
<provider
    android:name="androidx.core.content.FileProvider"
    android:authorities="com.fantasychong.photovideotest0107.fileprovider"
    android:exported="false"
    android:grantUriPermissions="true">

    <meta-data
        android:name="android.support.FILE_PROVIDER_PATHS"
        android:resource="@xml/provider_paths" />
</provider>
在res目录下新建一个xml文件夹,新建一个provider_paths文件。
<?xml version="1.0" encoding="utf-8"?>
<paths>
    <external-path
        name="external_storage_directory"
        path="." />
    <external-path
        name="cache"
        path="Android/data/com.fantasychong.photovideotest1227/cache" />
</paths>
跑起来,没问题了!(虚拟机有点卡。。。)
完美!
6.最后,我们来实现拍摄小视频
case R.id.main_takeVideoBtn: //摄像头录像
    if (ContextCompat.checkSelfPermission(this, Manifest.permission.WRITE_EXTERNAL_STORAGE) != PackageManager.PERMISSION_GRANTED ||
            ContextCompat.checkSelfPermission(this, Manifest.permission.WRITE_EXTERNAL_STORAGE) != PackageManager.PERMISSION_GRANTED ||
            ContextCompat.checkSelfPermission(this, Manifest.permission.CAMERA) != PackageManager.PERMISSION_GRANTED) {
        ActivityCompat.requestPermissions(this,
                new String[]{Manifest.permission.WRITE_EXTERNAL_STORAGE,
                        Manifest.permission.READ_EXTERNAL_STORAGE,
                        Manifest.permission.CAMERA}, MY_PERMISSION_CAMERA);
    } else {
        takeVideo(); //打开相机录像
    }
    break;
/**
* 打开相机录像
*/
private void takeVideo() {
Intent intent= new Intent();
//启动相机
intent.setAction(MediaStore.ACTION_VIDEO_CAPTURE);
intent.addCategory(Intent.CATEGORY_DEFAULT);
//创建文件
createVideoFile();
//添加权限
intent.addFlags(Intent.FLAG_GRANT_READ_URI_PERMISSION);
if (Build.VERSION.SDK_INT>= Build.VERSION_CODES.M){
videoUri= FileProvider.getUriForFile(this, getPackageName() + ".fileprovider", file);
}else {
videoUri= Uri.fromFile(file);
}
intent.putExtra(MediaStore.EXTRA_OUTPUT, videoUri);
startActivityForResult(intent, VIDEO_RESULT_CODE);
}/**
* 创建文件
*/
private void createVideoFile() {
//设置图片文件名,以当前时间的毫秒值为名称
String videoName= Calendar.getInstance().getTimeInMillis()+ ".mp4";
//创建图片文件
file = new File(Environment.getExternalStorageDirectory()
+ "/" + getPackageName() + "/", videoName);
//将图片的绝对路径设置给mImagePath,之后会用到
videoPath= file.getAbsolutePath();
//按设置好的目录层级创建
file.getParentFile().mkdir();
file.setWritable(true);
}最后在onActivityResult处理回调即可。
case VIDEO_RESULT_CODE: //摄像头录像的回调
    Log.d("fantasychong_video", videoPath);
    break;
跑起来,打印日志,成功!

至此全部完成,demo附上!
资源下载


