【Android Jetpack 学习之旅】--> Paging 的使用
原创
©著作权归作者所有:来自51CTO博客作者KevinDev0724的原创作品,请联系作者获取转载授权,否则将追究法律责任
不断学习,做更好的自己!💪
几乎所有的 Android 开发者都会遇到在 RecyclerView 加载大量数据的情况,如果是在数据库请求,需要消耗数据库资源并且需要花费较多的时间,同样的,如果是发送网络请求,则需要消耗带宽和更多的时间,无论处于哪一种情形,对于用户的体验都是糟糕的。
介绍
1. 学习资料
官方文档:Paging 谷歌实验室:官方教程 官方Demo:网络方式,数据库方式
2. 谷歌官方介绍
The Paging Library helps you load and display small chunks of data at a time. Loading partial data on demand reduces usage of network bandwidth and system resources.
3. Paging 架构

4. 优点
网上的分页解决方法挺多的,与他们相比,Paging 有什么优点呢?
-
RxJava 2 以及 Android Jetpack 的支持,如 LiveData、Room。 - 自定义分页策略。
- 异步处理数据。
- 结合
RecyclerView 等
实战
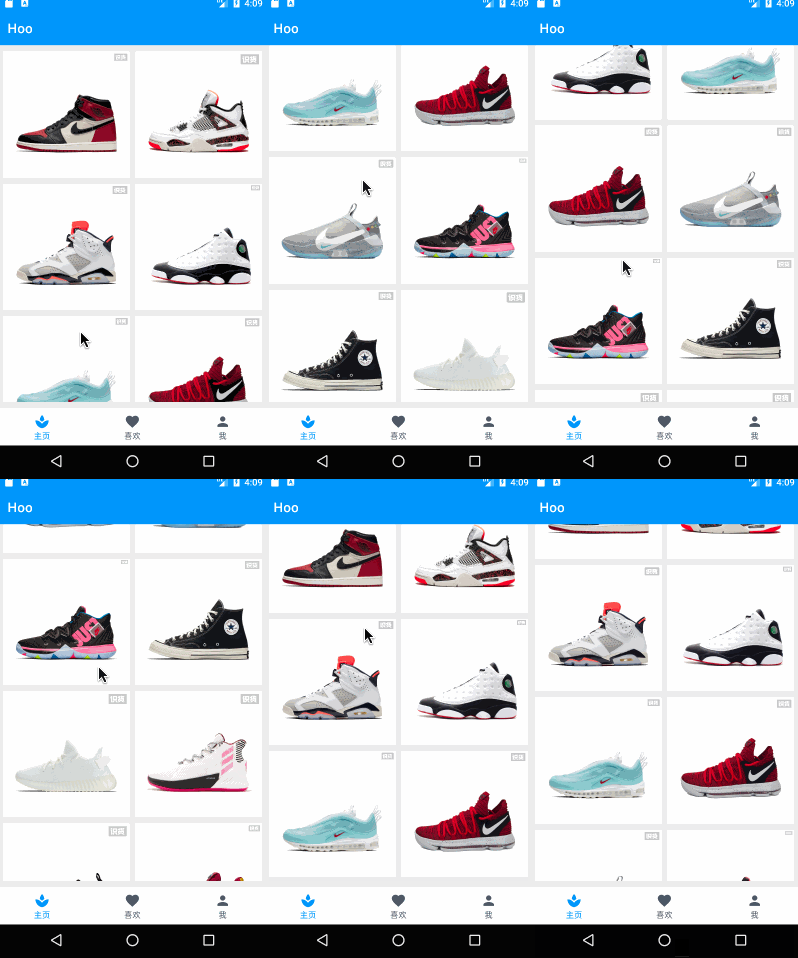
1. 效果图

2. 添加依赖
ext.pagingVersion = '2.1.0-alpha01'
dependencies {
    ...
    // paging
    implementation "androidx.paging:paging-runtime:$pagingVersion"
}
3. 创建数据源
1)非 Room 数据库
如果没有使用 Room 数据库,我们需要自定义实现 DataSource ,通常实现 DataSource 有三种方式,分别继承三种抽象类,它们分别是:
-
PageKeyedDataSource<Key, Value> 分页请求数据的场景 -
ItemKeyedDataSource<Key, Value> 以表的某个列为key,加载其后的N个数据(个人理解以某个字段进行排序,然后分段加载数据) -
PositionalDataSource<T> 当数据源总数特定,根据指定位置请求数据的场景
// 因为代表着不同方式,所以不需要看Dao层
class ShoeRepository private constructor(private val shoeDao: ShoeDao) {

    /**
     * 通过id的范围寻找鞋子
     */
    fun getPageShoes(startIndex:Long,endIndex:Long):List<Shoe> = shoeDao.findShoesByIndexRange(startIndex,endIndex)

   //... 省略
}

/**
 * 自定义PageKeyedDataSource
 * 演示Page库的时候使用
 */
class CustomPageDataSource(private val shoeRepository: ShoeRepository) : PageKeyedDataSource<Int, Shoe>() {

    private val TAG: String by lazy {
        this::class.java.simpleName
    }

    // 第一次加载的时候调用
    override fun loadInitial(params: LoadInitialParams<Int>, callback: LoadInitialCallback<Int, Shoe>) {
        val startIndex = 0L
        val endIndex: Long = 0L + params.requestedLoadSize
        val shoes = shoeRepository.getPageShoes(startIndex, endIndex)

        callback.onResult(shoes, null, 2)
    }

    // 每次分页加载的时候调用
    override fun loadAfter(params: LoadParams<Int>, callback: LoadCallback<Int, Shoe>) {
        Log.e(TAG, "startPage:${params.key},size:${params.requestedLoadSize}")

        val startPage = params.key
        val startIndex = ((startPage - 1) * BaseConstant.SINGLE_PAGE_SIZE).toLong() + 1
        val endIndex = startIndex + params.requestedLoadSize - 1
        val shoes = shoeRepository.getPageShoes(startIndex, endIndex)

        callback.onResult(shoes, params.key + 1)
    }

    override fun loadBefore(params: LoadParams<Int>, callback: LoadCallback<Int, Shoe>) {
       // ... 省略 类似loadAfter
    }
}

----------------------------------分割线-----------------------------------
/**
 * 构建CustomPageDataSource的工厂
 */
class CustomPageDataSourceFactory(val shoeRepository: ShoeRepository):DataSource.Factory<Int,Shoe>() {
    override fun create(): DataSource<Int, Shoe> {
        return CustomPageDataSource(shoeRepository)
    }
}
2)Room 数据库
直接在 Room 的 Dao 层中这样使用:
/**
 * 鞋子的方法
 */
@Dao
interface ShoeDao {
   //... 省略

    // 配合LiveData 返回所有的鞋子
    @Query("SELECT * FROM shoe")
    fun getAllShoesLD(): DataSource.Factory<Int, Shoe>
}
4. 构建 LiveData
想要获得 LiveData<PagedList> 则需要先创建 LivePagedListBuilder ,LivePagedListBuilder 有设分页数量和配置参数两种构造方法,设置分页数量比较简单,直接查看 Api 就可以使用,我们看看如何配置参数使用:
class ShoeModel constructor(shoeRepository: ShoeRepository) : ViewModel() {
    // 鞋子集合的观察类
    val shoes: LiveData<PagedList<Shoe>> = LivePagedListBuilder<Int, Shoe>(
        CustomPageDataSourceFactory(shoeRepository) // DataSourceFactory
        , PagedList.Config.Builder()
            .setPageSize(10) // 分页加载的数量
            .setEnablePlaceholders(false) // 当item为null是否使用PlaceHolder展示
            .setInitialLoadSizeHint(10) // 预加载的数量
            .build())
        .build()
}
5. 创建 PagedListAdapter
PagedListAdapter 就是特殊的 RecyclerView 的 RecyclerAdapter,跟 RecyclerAdapter 一样,需要继承并实现其方法,这里使用了 Data Binding:
/**
 * 鞋子的适配器 配合Data Binding使用
 */
class ShoeAdapter constructor(val context: Context) :
    PagedListAdapter<Shoe, ShoeAdapter.ViewHolder>(ShoeDiffCallback()) {

    override fun onCreateViewHolder(parent: ViewGroup, viewType: Int): ViewHolder {
        return ViewHolder(
            RecyclerItemShoeBinding.inflate(
                LayoutInflater.from(parent.context)
                , parent
                , false
            )
        )
    }

    override fun onBindViewHolder(holder: ViewHolder, position: Int) {
        val shoe = getItem(position)
        holder.apply {
            bind(onCreateListener(shoe!!.id), shoe)
            itemView.tag = shoe
        }
    }

    /**
     * Holder的点击事件
     */
    private fun onCreateListener(id: Long): View.OnClickListener {
        return View.OnClickListener {
            val intent = Intent(context, DetailActivity::class.java)
            intent.putExtra(BaseConstant.DETAIL_SHOE_ID, id)
            context.startActivity(intent)
        }
    }


    class ViewHolder(private val binding: RecyclerItemShoeBinding) : RecyclerView.ViewHolder(binding.root) {

        fun bind(listener: View.OnClickListener, item: Shoe) {
            binding.apply {
                this.listener = listener
                this.shoe = item
                executePendingBindings()
            }
        }
    }
}
ShoeDiffCallback
class ShoeDiffCallback: DiffUtil.ItemCallback<Shoe>() {
    override fun areItemsTheSame(oldItem: Shoe, newItem: Shoe): Boolean {
        return oldItem.id == newItem.id
    }

    override fun areContentsTheSame(oldItem: Shoe, newItem: Shoe): Boolean {
        return oldItem == newItem
    }
}
6. 监听数据
/**
 * 鞋子页面
 */
class ShoeFragment : Fragment() {

    // ... 省略

    override fun onCreateView(
        inflater: LayoutInflater, container: ViewGroup?,
        savedInstanceState: Bundle?
    ): View? {
        val binding: FragmentShoeBinding = FragmentShoeBinding.inflate(inflater, container, false)
        context ?: return binding.root
        val adapter = ShoeAdapter(context!!)
        binding.recycler.adapter = adapter
        onSubscribeUi(adapter)
        return binding.root
    }

    /**
     * 鞋子数据更新的通知
     */
    private fun onSubscribeUi(adapter: ShoeAdapter) {
        viewModel.shoes.observe(viewLifecycleOwner, Observer {
            if (it != null) {
                adapter.submitList(it)
            }
        })
    }
}
小结


