
废话不多说,直接上图,android手机防盗时序图:

其实简单的手机防盗非常好做,那么怎样才能起到防盗效果呢?防盗,防盗,别人顺走你的手机会用来干什么?多半会是自己用,那么盗贼在用你的手机的时候,最先改变的是什么呢?对了,SIM卡,也就是我们常说的电话卡,这就是一个状态的改变。有了这个变量我们这个防盗软件就非常好做了,我们只要得到SIM卡的唯一标识就OK了,那么SIM卡唯一的标识是什么呢?有人肯定会说,电话号码是唯一的标识,但实际上,我们一般的电话卡上面,根本不会有自己号码的记录,那么我们靠什么来做唯一标识呢?我google了下,我们常用的SIM卡上面会有一个IMSI码,百度百科是这样解释,国际移动用户识别码(IMSI:International Mobile SubscriberIdentification Number)是区别移动用户的标志,储存在SIM卡中,可用于区别移动用户的有效信息。其总长度不超过15位,同样使用0~9的数字。既然是唯一标识,那就好办了,我们android手机还是很强大的,androidSDK给我们提供了一个手机管理类(TelephonyManager类),这个类很强大,可以得到SIM卡的绝大数信息。好了,介绍就到这里了,现在开始我们的编程旅程吧!GO
先来观摩一下主要界面吧(PS:界面粗糙简单之极):
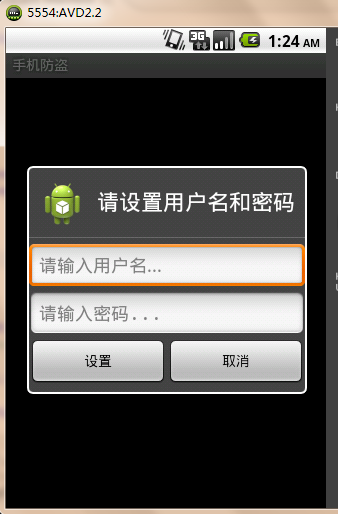
第一次启动软件:
进入主界面(PS:简单)
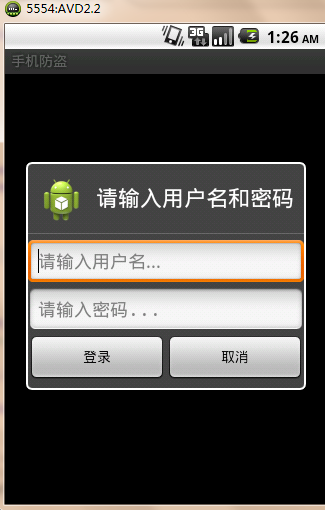
再次进入软件:
些微差别,不知道你发现没有(*^__^*)
开始防盗:
好了,界面看到这里,我把布局代码也贴一下吧,方便以后复习:
是不是很简单,呵呵,简单就对了,其实都没什么难的!
先来观摩一下主要界面吧(PS:界面粗糙简单之极):
第一次启动软件:
进入主界面(PS:简单)

再次进入软件:
些微差别,不知道你发现没有(*^__^*)
开始防盗:

好了,界面看到这里,我把布局代码也贴一下吧,方便以后复习:
- <!--Main.xml-->
- <RelativeLayout xmlns:android="http://schemas.android.com/apk/res/android"
- xmlns:tools="http://schemas.android.com/tools"
- android:layout_width="match_parent"
- android:layout_height="match_parent"
- android:paddingBottom="@dimen/activity_vertical_margin"
- android:paddingLeft="@dimen/activity_horizontal_margin"
- android:paddingRight="@dimen/activity_horizontal_margin"
- android:paddingTop="@dimen/activity_vertical_margin"
- tools:context=".MainActivity" >
- <EditText
- android:id="@+id/safeNumber"
- android:layout_width="match_parent"
- android:layout_height="wrap_content"
- android:hint="@string/safe_phone"
- />
- <Button
- android:id="@+id/btn_startSafe"
- android:layout_width="wrap_content"
- android:layout_height="wrap_content"
- android:layout_below="@id/safeNumber"
- android:layout_alignParentLeft="true"
- android:text="@string/start_safe"
- />
- <Button
- android:id="@+id/btn_modify"
- android:layout_width="wrap_content"
- android:layout_height="wrap_content"
- android:layout_below="@id/safeNumber"
- android:layout_alignParentRight="true"
- android:text="@string/modify"
- />
- </RelativeLayout>
- <!--Dialog.xml-->
- <?xml version="1.0" encoding="utf-8"?>
- <LinearLayout xmlns:android="http://schemas.android.com/apk/res/android"
- android:layout_width="match_parent"
- android:layout_height="match_parent"
- android:orientation="vertical" >
- <EditText
- android:id="@+id/et_UserName"
- android:layout_width="match_parent"
- android:layout_height="wrap_content"
- android:hint="@string/user_text"
- />
- <EditText
- android:id="@+id/et_Password"
- android:layout_width="match_parent"
- android:layout_height="wrap_content"
- android:password="true"
- android:hint="@string/password_text"
- />
- <LinearLayout
- android:orientation="horizontal"
- android:layout_width="match_parent"
- android:layout_height="wrap_content"
- >
- <Button
- android:id="@+id/btn_Ok"
- android:layout_width="wrap_content"
- android:layout_height="wrap_content"
- android:layout_weight="1"
- />
- <Button
- android:id="@+id/btn_cancle"
- android:layout_width="wrap_content"
- android:layout_height="wrap_content"
- android:layout_weight="1"
- />
- </LinearLayout>
- </LinearLayout>
是不是很简单,呵呵,简单就对了,其实都没什么难的!


