
1.建立运行用户
groupadd www
useradd -g www -s /sbin/nologin -M www
cd /usr/local/src
2.安装pcre
tar zxf pcre-8.12.tar.gz
cd pcre-8.12
./configure
make ; make install
3.安装nginx_ajp和nginx
unzip yaoweibin-nginx_ajp_module-v0.2.5-17-ge971b84.zip
tar zxf nginx-1.2.2.tar.gz
cd nginx-1.2.2
patch -p1 < ../yaoweibin-nginx_ajp_module-e971b84/ajp.patch
./configure --prefix=/usr/local/nginx --user=www --group=www --with-http_stub_status_module --with-http_ssl_module --without-mail_pop3_module --without-mail_imap_module --without-http_uwsgi_module --without-http_scgi_module --without-http_memcached_module --without-http_autoindex_module --without-http_ssi_module --add-module=../yaoweibin-nginx_ajp_module-e971b84
make ; make install
1.安装tomcat
cd /usr/local/src
tar zxf apache-tomcat-7.0.27.tar.gz
mv apache-tomcat-7.0.27 /usr/local/tomcat
2.安装jdk
tar zxf jdk-7u4-linux-x64.gz
mv jdk1.7.0_04 /usr/local/jdk
3.设置java、tomcat运行环境变量
vi /etc/profile
在文件最后加入如下内容:
#Set java & tomcat Environment
JAVA_HOME=/usr/local/jdk
export JAVA_HOME
JRE_HOME=/usr/local/jdk/jre
export JRE_HOME
CLASSPATH=/usr=/usr/local/tomcat/common/lib/:/usr/local/jdk/lib:/usr/local/jdk/jre/lib
export CLASSPATH
PATH=$PATH:/usr/local/tomcat/bin/:/usr/local/apache/bin:/usr/local/jdk/bin:/usr/local/jdk/jre/bin
export PATH
TOMCAT_HOME=/usr/local/tomcat
export TOMCAT_HOME
让环境变量立即生效:
source /etc/profile
(1)安装apr
wget http://archive.apache.org/dist/apr/apr-1.4.5.tar.gz
tar zxf apr-1.4.5.tar.gz
cd apr-1.4.5
./configure --prefix=/usr/local/apr
make
make install
(2)安装apr-iconv
wget http://archive.apache.org/dist/apr/apr-iconv-1.2.1.tar.gz
tar -zxf apr-iconv-1.2.1.tar.gz
cd apr-iconv-1.2.1
./configure --prefix=/usr/local/apr-iconv --with-apr=/usr/local/apr
make
make install
(3)安装apr-util
wget http://archive.apache.org/dist/apr/apr-util-1.3.10.tar.gz
tar zxf apr-util-1.3.10.tar.gz
cd apr-util-1.3.10
./configure --prefix=/usr/local/apr-util --with-apr=/usr/local/apr --with-apr-iconv=/usr/local/apr-iconv/bin/apriconv
make
make install
(4)安装tomcat-native
安装好tomcat7之后,tomcat-native已经在tomcat的bin目录下了,可以直接使用
cd /usr/local/tomcat/bin
tar zxf tomcat-native.tar.gz
cd tomcat-native-1.1.23-src/jni/native
./configure --with-apr=/usr/local/apr --with-java-home=/usr/local/jdk
make
make install
(5)设置 apr 的环境变量:
vi /etc/profile
在文件后面添加以下内容:
export LD_LIBRARY_PATH=$LD_LIBRARY_PATH:/usr/local/apr/lib
让配置生效: source /etc/profile
1.创建 nginx 配置文件
cd /usr/local/nginx/conf/
mv nginx.conf nginx.conf.bak
vi nginx.conf
加入如下内容:
user www www;
worker_processes 4;
worker_cpu_affinity 0001 0010 0100 1000;
error_log /usr/local/nginx/logs/nginx_error.log crit;
pid /usr/local/nginx/nginx.pid;
worker_rlimit_nofile 65535;
events
{
use epoll;
worker_connections 65535;
}
http
{
include mime.types;
default_type application/octet-stream;
charset utf-8;
server_names_hash_bucket_size 128;
client_header_buffer_size 2k;
large_client_header_buffers 4 4k;
client_max_body_size 8m;
sendfile on;
tcp_nopush on;
keepalive_timeout 60;
open_file_cache max=204800 inactive=20s;
open_file_cache_min_uses 1;
open_file_cache_valid 30s;
tcp_nodelay on;
gzip on;
gzip_min_length 1k;
gzip_buffers 4 16k;
gzip_http_version 1.0;
gzip_comp_level 2;
gzip_types text/plain application/x-javascript text/css application/xml;
gzip_vary on;
upstream tomcats {
server 192.168.8.11:8009 srun_id=jvm1;
server 192.168.8.12:8009 srun_id=jvm2;
#jvm_route $cookie_JSESSIONID reverse;
keepalive 10;
}
server
{
listen 80 default_server;
server_name _;
index index.htm index.html;
root /data/www/;
location / {
ajp_pass tomcats;
}
location /status
{
stub_status on;
}
location ~ .*\.(gif|jpg|jpeg|png|bmp|swf|js|css)$
{
expires 30d;
}
}
log_format access '$remote_addr - $remote_user [$time_local] "$request" '
'$status $body_bytes_sent "$http_referer" '
'"$http_user_agent" $http_x_forwarded_for';
access_log /usr/local/nginx/logs/access.log access;
}
192.168.8.11服务器:
1.在/usr/local/tomcat/conf/server.xml 中修改Enginx节点信息,大概在103行:
把<Engine name="Catalina" defaultHost="localhost">
修改成:
<Engine name="Catalina" defaultHost="localhost" jvmRoute="jvm1">
2.加入Cluster节点信息,大概在110行左右处加入如下内容:
<Cluster className="org.apache.catalina.ha.tcp.SimpleTcpCluster" channelSendOptions="8">
<Manager className="org.apache.catalina.ha.session.DeltaManager"
expireSessionsOnShutdown="false"
notifyListenersOnReplication="true"/>
<Channel className="org.apache.catalina.tribes.group.GroupChannel">
<Membership className="org.apache.catalina.tribes.membership.McastService"
address="228.0.0.4"
port="45564"
frequency="500"
dropTime="3000"/>
<Receiver className="org.apache.catalina.tribes.transport.nio.NioReceiver"
address="192.168.8.11"
port="4000"
autoBind="100"
selectorTimeout="5000"
maxThreads="6"/>
<Sender className="org.apache.catalina.tribes.transport.ReplicationTransmitter">
<Transport className="org.apache.catalina.tribes.transport.nio.PooledParallelSender"/>
</Sender>
<Interceptor className="org.apache.catalina.tribes.group.interceptors.TcpFailureDetector"/>
<Interceptor className="org.apache.catalina.tribes.group.interceptors.MessageDispatch15Interceptor"/>
</Channel>
<Valve className="org.apache.catalina.ha.tcp.ReplicationValve"
filter=""/>
<Valve className="org.apache.catalina.ha.session.JvmRouteBinderValve"/>
<Deployer className="org.apache.catalina.ha.deploy.FarmWarDeployer"
tempDir="/tmp/war-temp/"
deployDir="/tmp/war-deploy/"
watchDir="/tmp/war-listen/"
watchEnabled="false"/>
<ClusterListener className="org.apache.catalina.ha.session.JvmRouteSessionIDBinderListener"/>
<ClusterListener className="org.apache.catalina.ha.session.ClusterSessionListener"/>
</Cluster>
192.168.8.12服务器:
1.在/usr/local/tomcat/conf/server.xml 中修改Enginx节点信息,大概在103行:
把<Engine name="Catalina" defaultHost="localhost">
修改成:
<Engine name="Catalina" defaultHost="localhost" jvmRoute="jvm2">
2.加入Cluster节点信息,大概在110行左右处加入如下内容:
<Cluster className="org.apache.catalina.ha.tcp.SimpleTcpCluster" channelSendOptions="8">
<Manager className="org.apache.catalina.ha.session.DeltaManager"
expireSessionsOnShutdown="false"
notifyListenersOnReplication="true"/>
<Channel className="org.apache.catalina.tribes.group.GroupChannel">
<Membership className="org.apache.catalina.tribes.membership.McastService"
address="228.0.0.4"
port="45564"
frequency="500"
dropTime="3000"/>
<Receiver className="org.apache.catalina.tribes.transport.nio.NioReceiver"
address="192.168.8.12"
port="4000"
autoBind="100"
selectorTimeout="5000"
maxThreads="6"/>
<Sender className="org.apache.catalina.tribes.transport.ReplicationTransmitter">
<Transport className="org.apache.catalina.tribes.transport.nio.PooledParallelSender"/>
</Sender>
<Interceptor className="org.apache.catalina.tribes.group.interceptors.TcpFailureDetector"/>
<Interceptor className="org.apache.catalina.tribes.group.interceptors.MessageDispatch15Interceptor"/>
</Channel>
<Valve className="org.apache.catalina.ha.tcp.ReplicationValve"
filter=""/>
<Valve className="org.apache.catalina.ha.session.JvmRouteBinderValve"/>
<Deployer className="org.apache.catalina.ha.deploy.FarmWarDeployer"
tempDir="/tmp/war-temp/"
deployDir="/tmp/war-deploy/"
watchDir="/tmp/war-listen/"
watchEnabled="false"/>
<ClusterListener className="org.apache.catalina.ha.session.JvmRouteSessionIDBinderListener"/>
<ClusterListener className="org.apache.catalina.ha.session.ClusterSessionListener"/>
</Cluster>
3.测试目录负载均衡
在11、12服务器上建立测试目录,观察负载均衡情况。
mkdir -p /data/www/
cat /data/www/test.jsp
<%
System.out.println("Welcome tomcat_cluster session repication");
%>
4.启动各服务器服务
10服务器:
/usr/local/nginx/sbin/nginx
11、12服务器
startup.sh
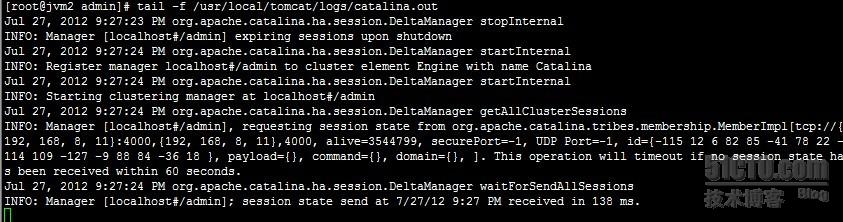
在浏览器上输入:192.168.8.10/test.jsp,然后分别在11、12服务器查看输出日志:
11服务器:


5.测试负载session
在/data/www目录下创建admin目录,再在admin目录下创建WEB-INF目录
mkdir -p /data/www/admin/WEB-INF
cd /data/www/admin/WEB-INF
vi web.xml
加入如下内容:
<web-app xmlns="http://java.sun.com/xml/ns/j2ee"
xmlns:xsi="http://www.w3.org/2001/XMLSchema-instance"
xsi:schemaLocation="http://java.sun.com/xml/ns/j2ee http://java.sun.com/xml/ns/j2ee/web-app_2_4.xsd" version="2.4">
<display-name>TomcatDemo</display-name>
<distributable/>
</web-app>
PS: <distributable/>这个必须加进去,不然也实现不了复制!
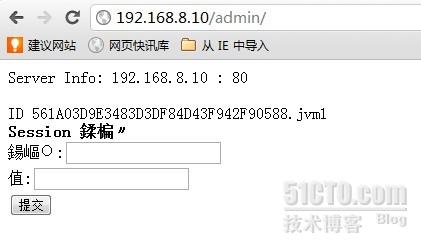
在admin目录下创建测试代码:
cat index.jsp
<%@ page contentType="text/html; charset=GBK" %>
<%@ page import="java.util.*" %>
<html><head><title>Cluster App Test</title></head>
<body>
Server Info:
<%
out.println(request.getLocalAddr() + " : " + request.getLocalPort()+"<br>");%>
<%
out.println("<br> ID " + session.getId()+"<br>");
// 如果有新的 Session 属性设置
String dataName = request.getParameter("dataName");
if (dataName != null && dataName.length() > 0) {
String dataValue = request.getParameter("dataValue");
session.setAttribute(dataName, dataValue);
}
out.print("<b>Session 列表</b>");
Enumeration e = session.getAttributeNames();
while (e.hasMoreElements()) {
String name = (String)e.nextElement();
String value = session.getAttribute(name).toString();
out.println( name + " = " + value+"<br>");
System.out.println( name + " = " + value);
}
%>
<form action="index.jsp" method="POST">
名称:<input type=text size=20 name="dataName">
<br>
值:<input type=text size=20 name="dataValue">
<br>
<input type=submit>
</form>
</body>
</html>


总结:
1.本文采用的是通过 nginx_ajp模块来实现tomcat负载均衡,nginx_ajp_module 是一个 Nginx 的第三方模块,用来使用 Ajp 协议连接后端的 Tomcat ,相当于 Apache 上的 mod_jk 模块。也可以通过nginx-upstream-jvm-route 这个模块来实现,方法类似!
2.对于session共享,还可以通过memcached来保存session!后面有时间会一一介绍!
3.至于前面的nginx调度器我这里只用一台,没有实现高可用,大家可以用nginx+keepalived来实现调度器的高可用,实现也比较简单。


