@TOC
业务需求
在app中登录后,扫web端的二维码,实现web端的自动登录
需求分析
1.websocket的传输协议这里就不多说了,要想实现扫码登录其实很简单,无非就是app端通过ws将登录信息传给web端,web端拿到登录信息后进行登录操作而已
效果演示
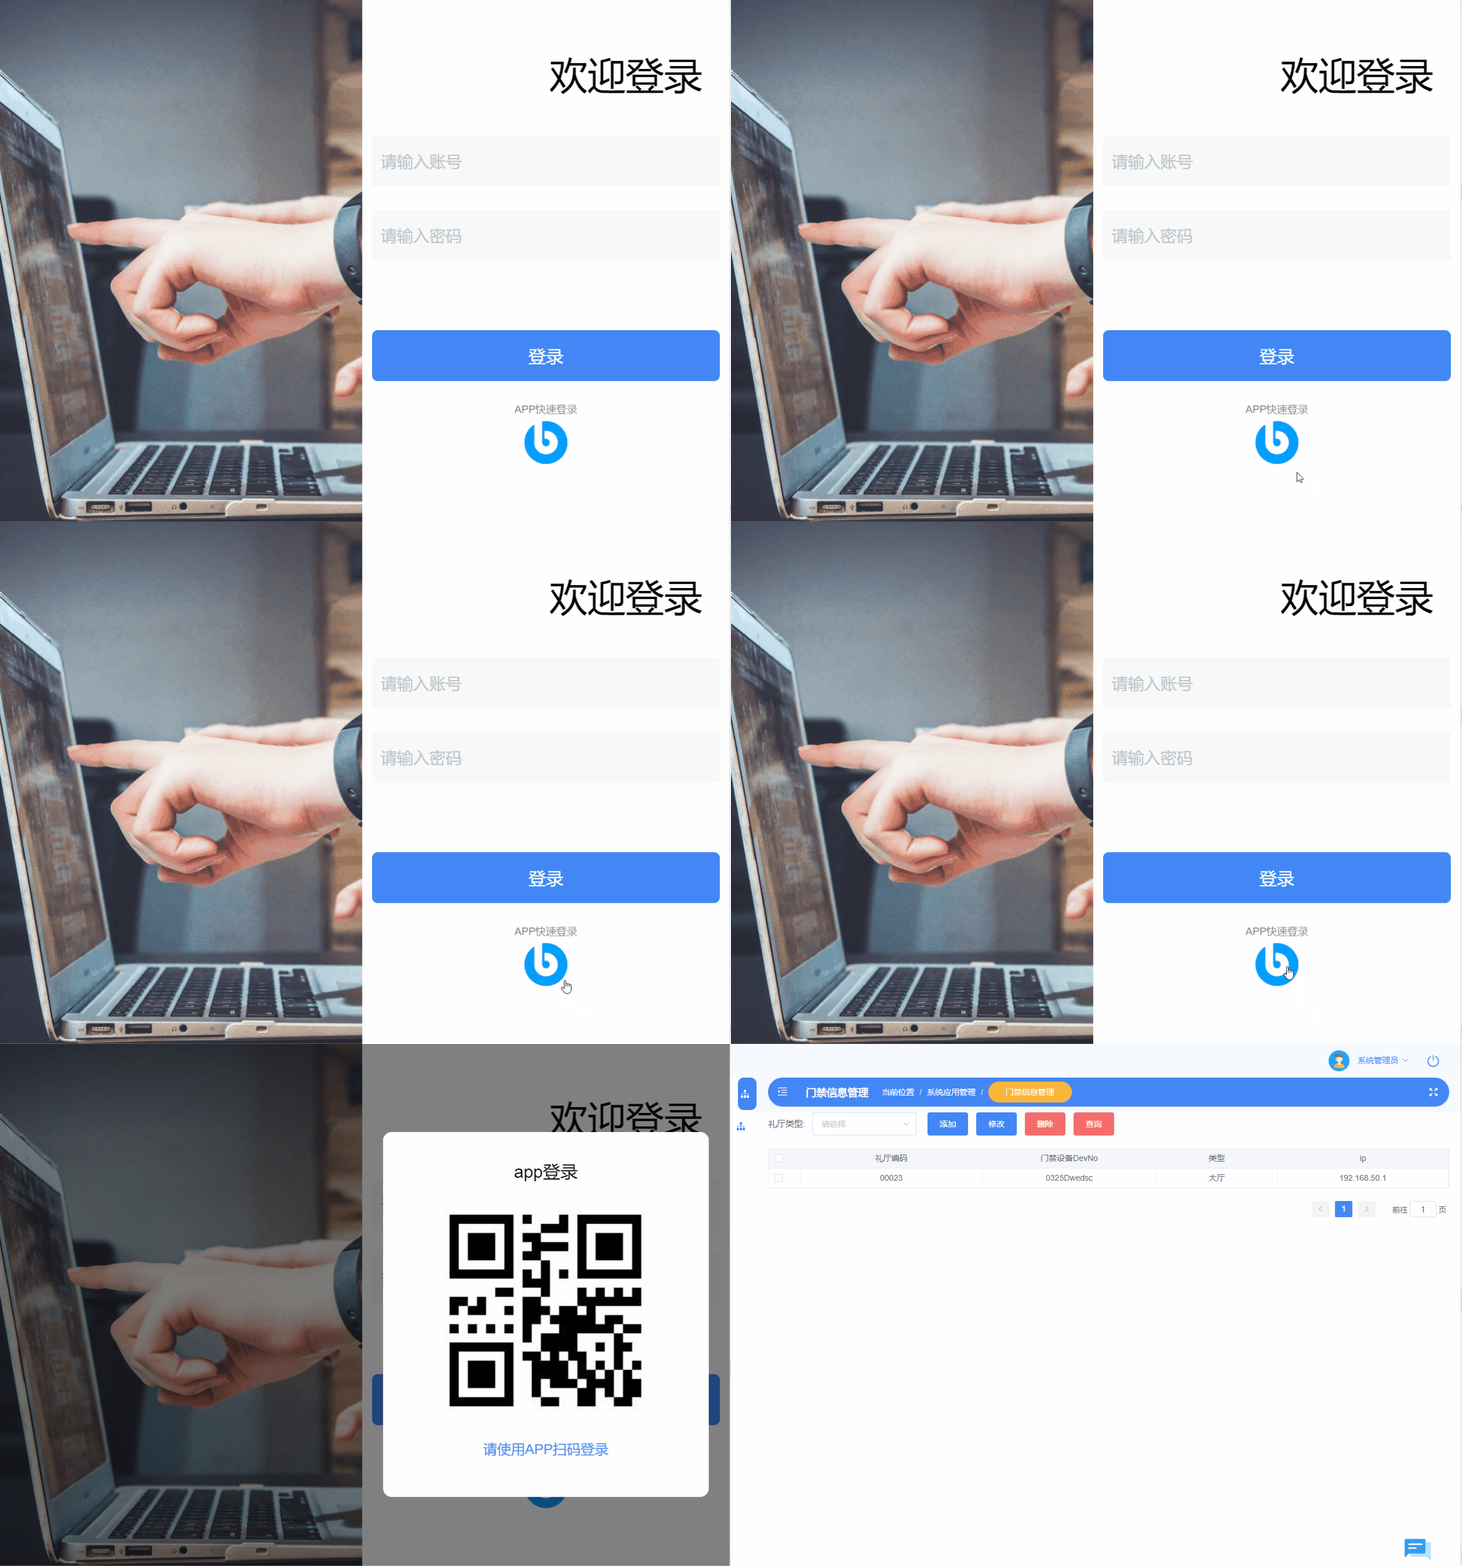
:point_down:1.web端演示

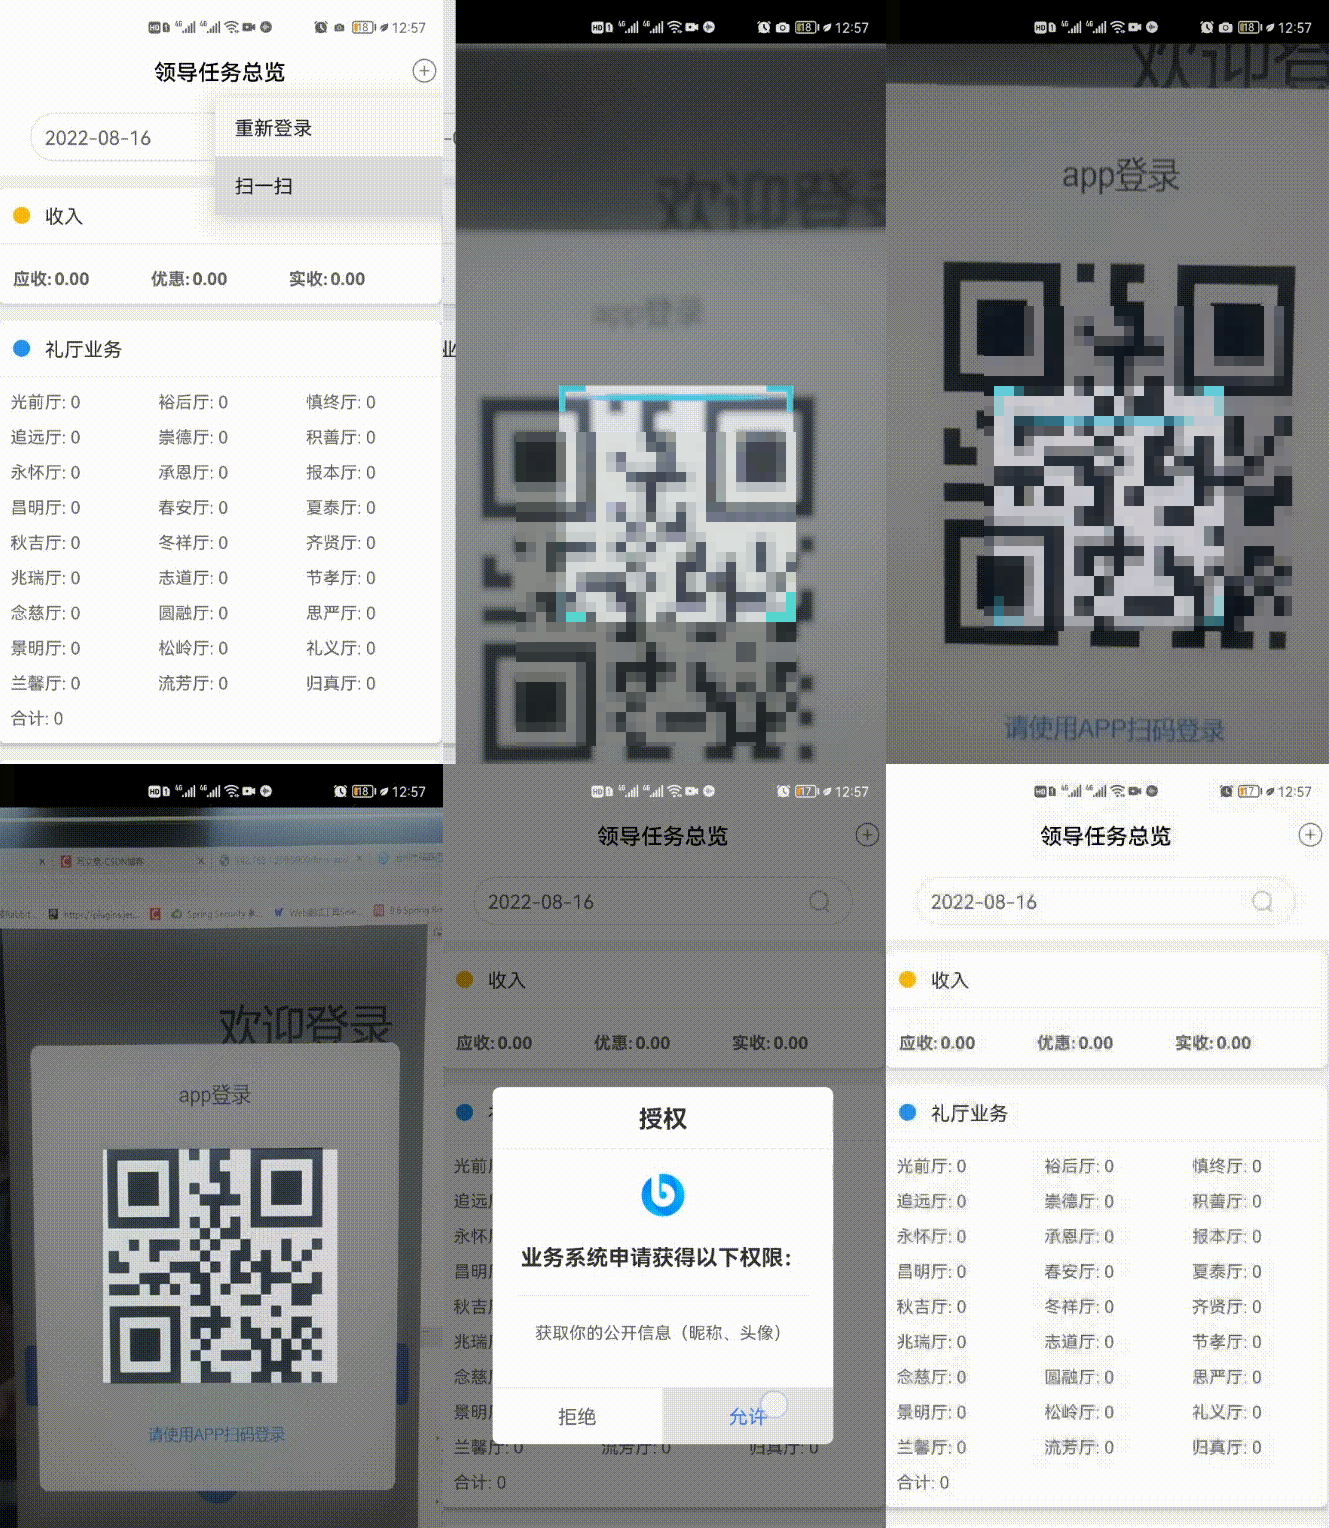
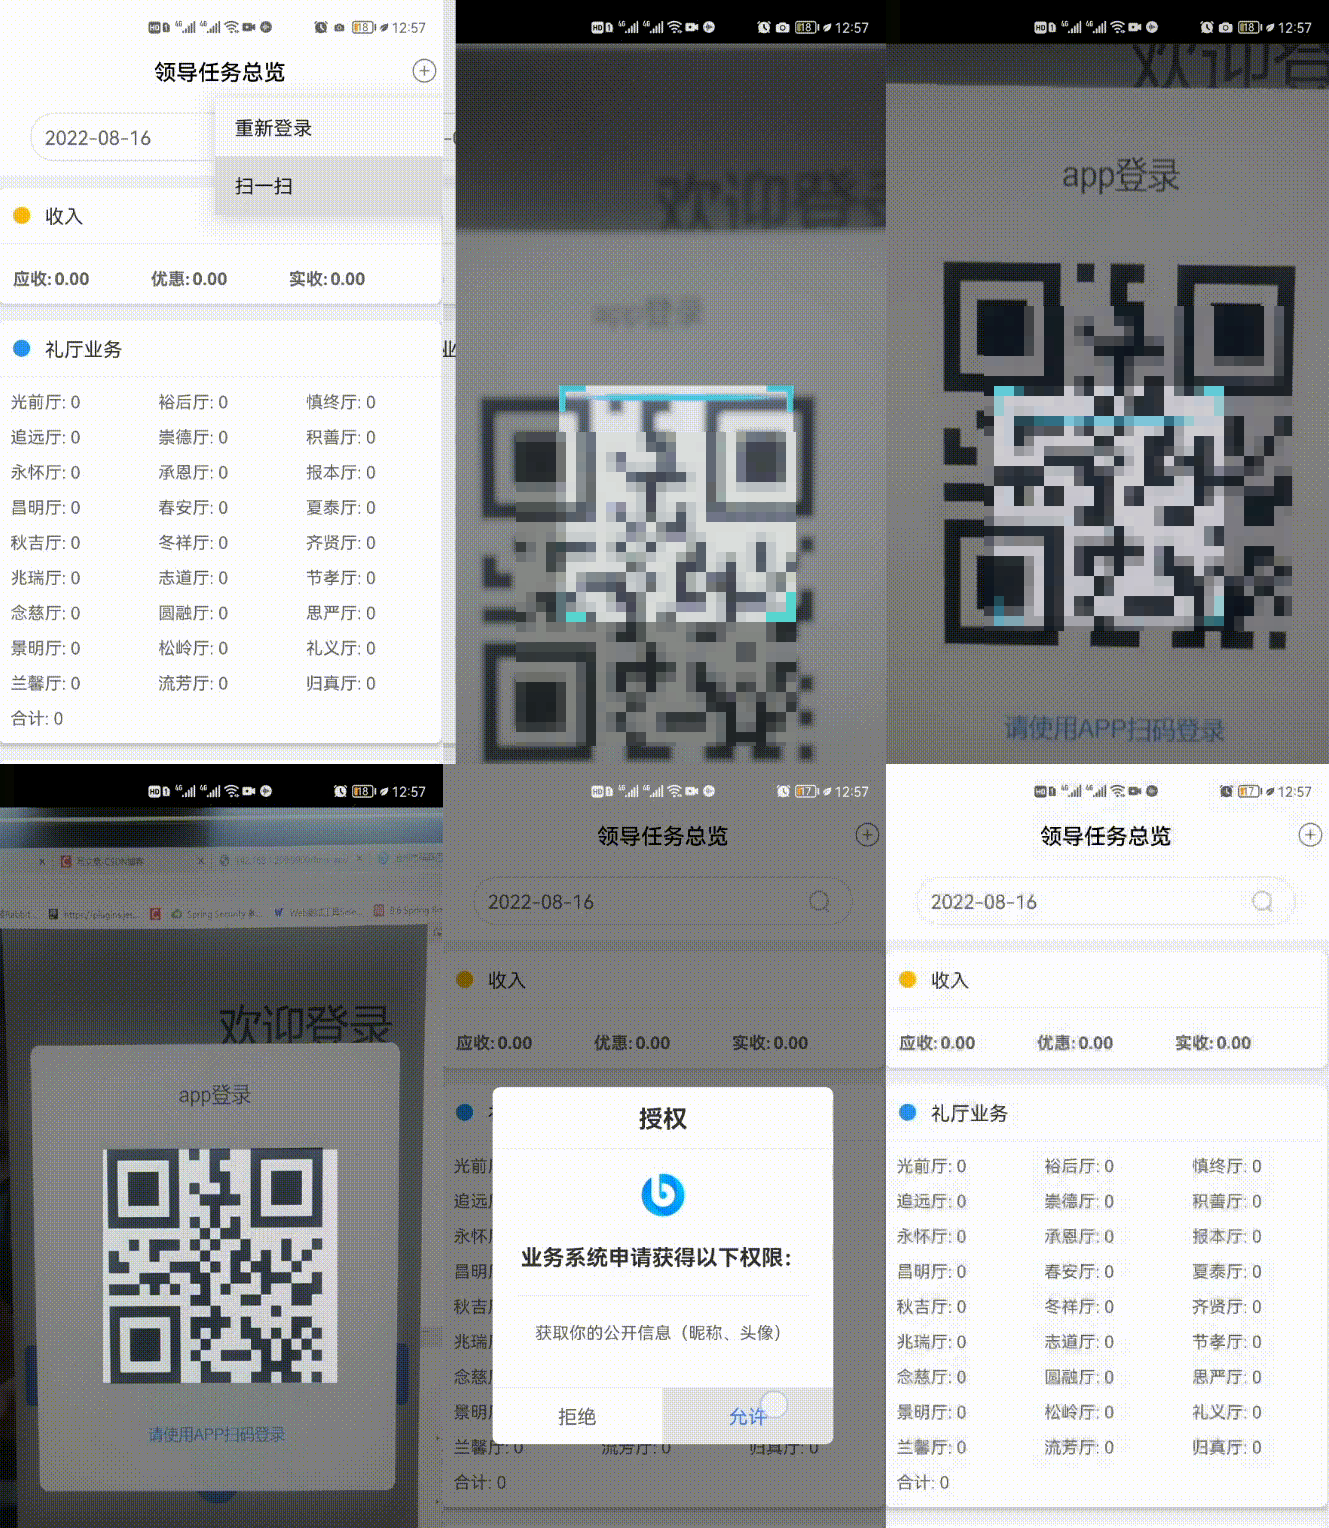
:point_down:2.APP端演示:

需求实现
业务流程图

业务流转图

代码实现
ps:代码有所修改,但核心代码存在,不影响业务的实现。
数据存在mongodb中,这个可自行选择处理,仅用于记录扫码授权记录
1.数据库设计
此处用于存储扫码登录记录信息,不保存也可以
auth_login
字段 | 说明 |
id | 主键 |
loginName | 登录名 |
wsSessionId | wsSessionId |
createTime | 创建时间 |
2.代码实现
1.web端代码
1.引入依赖
<dependency>
            <groupId>org.apache.tomcat.embed</groupId>
            <artifactId>tomcat-embed-websocket</artifactId>
            <version>9.0.39</version>
        </dependency>
        <!--二维码-->
        <dependency>
            <groupId>com.google.zxing</groupId>
            <artifactId>core</artifactId>
            <version>3.0.0</version>
        </dependency>
        <dependency>
            <groupId>com.google.zxing</groupId>
            <artifactId>javase</artifactId>
            <version>3.0.0</version>
        </dependency>
WebSocketConfig
@Configuration
public class WebSocketConfig {
    @Bean
    public ServerEndpointExporter serverEndpointExporter () {
        return new ServerEndpointExporter();
    }
}
ws服务
WebSocketServer
import com.alibaba.fastjson.JSONObject;
import com.jinmdz.fmis.api.global.CacheManager;
import org.slf4j.Logger;
import org.slf4j.LoggerFactory;
import org.springframework.stereotype.Component;
import javax.annotation.PostConstruct;
import javax.websocket.*;
import javax.websocket.server.ServerEndpoint;
import java.io.IOException;
import java.util.concurrent.CopyOnWriteArraySet;
import java.util.concurrent.atomic.AtomicInteger;

/**
 * @author lvyq
 * @version 1.0
 * @description: TODO
 * @date 2021/8/17 16:30
 */
@ServerEndpoint(value = "/ws/asset")
@Component
public class WebSocketServer {

    @PostConstruct
    public void init() {
        System.out.println("websocket 加载");
    }
    private static Logger log = LoggerFactory.getLogger(WebSocketServer.class);
    private static final AtomicInteger OnlineCount = new AtomicInteger(0);
    private static CopyOnWriteArraySet<Session> SessionSet = new CopyOnWriteArraySet<Session>();
    //缓存
    private static CacheManager cacheManager = new CacheManager();
    /**
     * 连接建立成功调用的方法
     */
    @OnOpen
    public void onOpen(Session session) {
        SessionSet.add(session);
        int cnt = OnlineCount.incrementAndGet(); // 在线数加1
        log.info("有连接加入,当前连接数为:{}", cnt);
        JSONObject mav = new JSONObject();
        mav.put("sessionId",session.getId().toString());
        SendMessage(session, mav.toJSONString());
    }

    /**
     * 连接关闭调用的方法
     */
    @OnClose
    public void onClose(Session session) {
        SessionSet.remove(session);
        int cnt = OnlineCount.decrementAndGet();
        log.info("有连接关闭,当前连接数为:{}", cnt);
    }

    /**
     * 收到客户端消息后调用的方法
     * @param message 客户端发送过来的消息
     */
    @OnMessage
    public void onMessage(String message, Session session) {
        log.info("来自客户端的消息:{}",message);
        try{
            JSONObject jsonObject = JSONObject.parseObject(message);
            String linkType = jsonObject.getString("linkType");
            //TODO 缓存session
            if (linkType.equals("auth")){
                //授权
                CacheManager.set("auth_"+session.getId(),session);
            }
        }catch (Exception e){
            e.printStackTrace();
        }
    }

    /**
     * 出现错误
     * @param session
     * @param error
     */
    @OnError
    public void onError(Session session, Throwable error) {
        log.error("发生错误:{},Session ID: {}",error.getMessage(),session.getId());
        error.printStackTrace();
    }

    /**
     * 发送消息
     * @param session
     * @param message
     */
    public static void SendMessage(Session session, String message) {
        try {
            log.info("sessionID="+session.getId());
            session.getBasicRemote().sendText(message);
        } catch (IOException e) {
            log.error("发送消息出错:{}", e.getMessage());
            e.printStackTrace();
        }
    }

    /**
     * @description: 授权登录,sessionId
     * @author: lvyq
     * @date: 2021/9/28 14:11
     * @version 1.0
     */

    public static void SendMessageBySessionId(String message,String seId) throws IOException {
        Session session=  CacheManager.get("auth_"+seId);
        String sessionId = "";
        if (session!=null){
            sessionId=session.getId();
        }
        for (Session s : SessionSet) {
            if(s.getId().equals(sessionId)){
                session = s;
                break;
            }
        }
        if(session!=null){
            SendMessage(session, message);
        }
        else{
            log.warn("没有找到你指定ID的会话:{}",sessionId);
        }
    }
}
CacheManager 是个缓存类,这里就不贴代码了,可自行自行百度或选择其它缓存服务
WebSocketController
import com.google.zxing.client.j2se.MatrixToImageWriter;
import com.google.zxing.common.BitMatrix;
import com.jinmdz.fmis.api.api.service.AuthLoginService;
import com.jinmdz.fmis.api.base.BaseController;
import com.jinmdz.fmis.api.util.QRCodeUtils;
import org.springframework.web.bind.annotation.*;
import javax.annotation.Resource;
import javax.servlet.http.HttpServletResponse;
import java.io.IOException;
import java.io.OutputStream;

/**
 * @author lvyq
 * @version 1.0
 * @description:
 * @date 2021/8/17 16:28
 */
@RestController
@RequestMapping("/ws")
public class WebSocketController extends BaseController {

    /**
     * @description: 生成二维码
     * @author: lvyq
     * @date: 2021/9/29 10:25
     * @version 1.0
     */
    @GetMapping(value = "/create/{content}")
    public void getCode(@PathVariable("content")String content , HttpServletResponse response) throws IOException {
        // 设置响应流信息
        response.setContentType("image/jpg");
        response.setHeader("Pragma", "no-cache");
        response.setHeader("Cache-Control", "no-cache");
        response.setDateHeader("Expires", 0);
        OutputStream stream = response.getOutputStream();
        BitMatrix bitMatrix = QRCodeUtils.createCode(content);
        MatrixToImageWriter.writeToStream(bitMatrix , "jpg" , stream);
    }


    /**
     * @description: 扫码成功-app端调用
     * @author: lvyq
     * @date: 2021/9/29 14:36
     * @version 1.0
     */
    @GetMapping("/scanCodeSuccess/{wsSessionId}")
    public void scanCodeSuccess(@PathVariable("wsSessionId") String wsSessionId) throws IOException {
        authLoginService.scanCodeSuccess(wsSessionId);
    }

    /**
     * @description: 扫码登录-APP端调用
     * @author: lvyq
     * @date: 2021/9/28 13:56
     * @version 1.0
     */

    @GetMapping("/authLogin/{userName}/{wsSessionId}")
    private void authLogin(@PathVariable("userName")  String userName,@PathVariable("wsSessionId") String wsSessionId) throws IOException {
        authLoginService.authLogin(userName,wsSessionId);
    }
}
AuthLoginService
import com.alibaba.fastjson.JSONObject;
import com.jinmdz.fmis.api.api.model.user.LoginData;
import com.jinmdz.fmis.api.base.BaseService;
import com.jinmdz.fmis.api.wrapper.SecurityWrapper;
import com.jinmdz.fmis.core.model.TokenInfo;
import org.springframework.stereotype.Service;
import javax.annotation.Resource;
import java.io.IOException;

/**
 * @author lvyq
 * @version 1.0
 * @description: 扫码授权登录
 * @date 2021/9/28 11:18
 */
@Service
public class AuthLoginService extends BaseService {

    @Resource
    private SecurityWrapper securityWrapper;

    /**
     * @description: 获取账号密码
     * @author: lvyq
     * @date: 2021/9/28 13:49
     * @version 1.0
     */
    public void authLogin(String userName,String wsSessionId) throws IOException {
        LoginData loginData = new LoginData();
        loginData.setUsername(userName);
        //根据账号获取用户信息。这里根据自身业务实现即可。重要!!!!
        TokenInfo tokenInfo = “获取用户信息”;
        if (tokenInfo!=null){
            JSONObject mav = new JSONObject();
            mav.put("state",true);
            mav.put("code",2);
            mav.put("msg","授权成功");
            mav.put("tokenInfo",tokenInfo);
            WebSocketServer.SendMessageBySessionId(mav.toJSONString(),wsSessionId);
        }

    }

    /**
     * @description: 扫码成功
     * @author: lvyq
     * @date: 2021/9/29 14:42
     * @version 1.0
     * @param wsSessionId
     */
    public void scanCodeSuccess(String wsSessionId) throws IOException {
        JSONObject mav = new JSONObject();
        mav.put("state",true);
        mav.put("code",1);
        mav.put("msg","扫码成功");
        WebSocketServer.SendMessageBySessionId(mav.toJSONString(),wsSessionId);
    }
}
2. APP端代码
这里逻辑比较简单,调用扫码,授权的接口即可代码有做删减更改,请根据自身开发环境处理相应业务信息
/**
* @description: 扫码授权
* @author: lvyq
* @date: 2021/9/28 14:04
* @version
1.0
*/
@PostMapping("/loginAuth")
public BaseResult loginAuth(@RequestBody AuthLogin data){
mongoTemplate.insert(data);//这里是mongodb保存用户信息,请自行处理
//在此处调用授权接口 http:192.168.1.1/ws/authLogin/{userName}/{wsSessionId}
BaseResult baseResult = new BaseResult();
baseResult.setCode(1);
baseResult.setMessage("操作成功");
return baseResult;
}
/**
* @description: 扫码成功
* @author: lvyq
* @date: 2021/9/29 14:36
* @version 1.0
*/
@PostMapping("scanCodeSuccess")
public BaseResult scanCodeSuccess(@RequestBody AuthLogin data){
//在此处调用授权接口 http:192.168.1.1/ws/scanCodeSuccess/{wsSessionId} 请自行处理
BaseResult baseResult = new BaseResult();
baseResult.setCode(1);
baseResult.setMessage("操作成功");
return baseResult;
}


