场景介绍
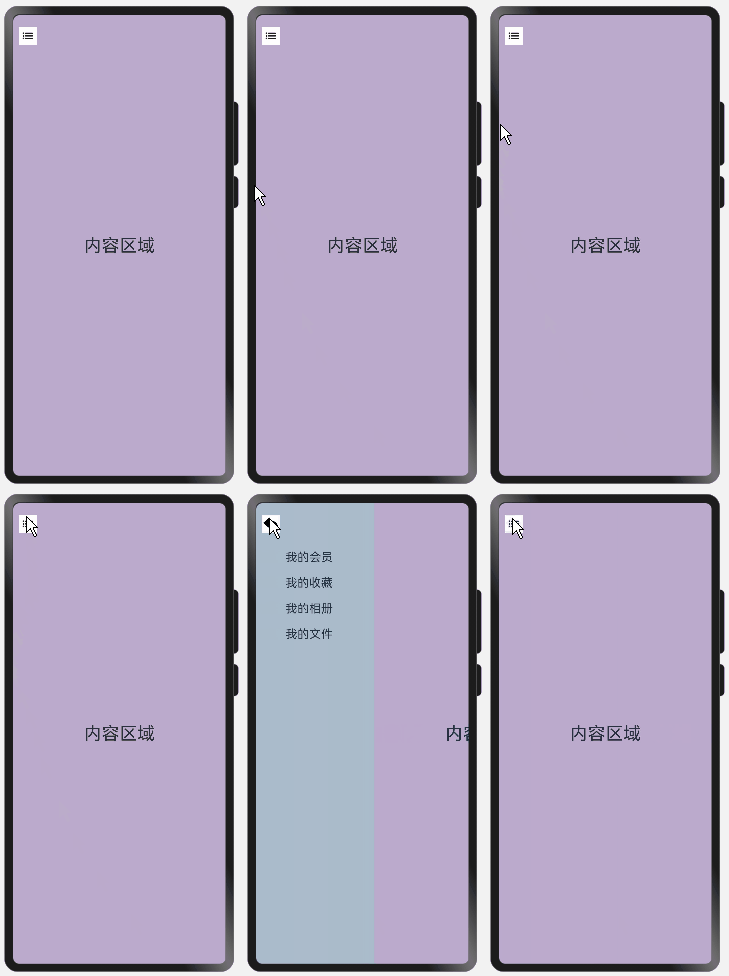
由于用户所需功能逐渐增多,传统的标签式导航在个别场景已经无法满足用户需求。当导航栏的空间放不下过多页签时,可以采用抽屉式导航,本例将为大家介绍如何通过SideBarContainer组件实现抽屉式导航。
效果呈现
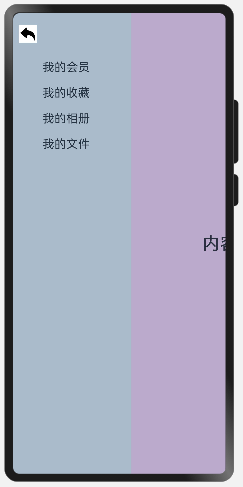
本例最终实现效果如下:

运行环境
- IDE:DevEco Studio 3.1 Beta1
- SDK:Ohos_sdk_public 3.2.11.9 (API Version 9 Release)
实现思路
- 通过SideBarContainer组件提供容器,通过子组件定义侧边栏和内容区,第一个子组件表示侧边栏,第二个子组件表示内容区。
- 调用showSideBar属性来设置不显示侧边栏,controlButton属性来控制完成侧栏的展示/收起。

开发步骤
-
创建内容区域文本组件。 首先创建内容区,具体代码块如下:
... // 内容区 Column() { Text("内容区域") .width("100%") .height("100%") .fontSize(30) .textAlign(TextAlign.Center) } .width("100%") .height("100%") .backgroundColor("#bbaacc") ... -
通过SideBarContainer所支持的showSideBar属性来设置不显示侧边栏,controlButton属性来控制完成侧栏的展示/收起。 具体代码块如下:
... .showSideBar(false) //默认不展示侧边栏,展示icon,用户点击调出 .controlButton({ left: 10, // 图标距离左侧宽度 top: 20, // 图标距离顶部高度 height: 30, // 图标高度 width: 30, // 图标宽度 icons: { shown: $r('app.media.back'), // 侧边栏展示时图标 hidden: $r('app.media.sidebar_shown'), // 侧边栏收起时图标 switching: $r('app.media.sidebar_shown') // 侧边栏切换过程图标 } }) ... -
创建侧边栏文本组件。 具体代码如下:
...
struct SideBarContainerExample {
@ State navList: Array<string> = ["我的会员", "我的收藏", "我的相册", "我的文件",]
  build() {
    SideBarContainer(SideBarContainerType.Embed) {
    //  侧边栏内容
      Column() {
        ForEach(this.navList, (item) => {
          Text(item)
            .width("100%")
            .fontSize(20)
            .textAlign(TextAlign.Start)
            .padding({ top: 20 })
        })
      }
    .height("100%")
    .padding({ top: 60, left: 50 })
    .backgroundColor("#aabbcc")
    }
...
  }
}
完整代码
示例完整代码如下:
@Entry
@Component
struct SideBarContainerExample {
  @State navList: Array<string> = ["我的会员", "我的收藏", "我的相册", "我的文件",]

  build() {
    // Embed:侧边栏占据内容空间 Overlay:侧边栏悬浮于内容之上
    SideBarContainer(SideBarContainerType.Embed) {
      // 侧边栏内容
      Column() {
        ForEach(this.navList, (item) => {
          Text(item)
            .width("100%")
            .fontSize(20)
            .textAlign(TextAlign.Start)
            .padding({ top: 20 })
        })
      }
      .height("100%")
      .padding({ top: 60, left: 50 })
      .backgroundColor("#aabbcc")
      // 内容区
      Column() {
        Text("内容区域")
          .width("100%")
          .height("100%")
          .fontSize(30)
          .textAlign(TextAlign.Center)
      }
      .width("100%")
      .height("100%")
      .backgroundColor("#bbaacc")
    }
    // 默认不展示侧边栏,展示icon,用户点击调出
    .showSideBar(false)
    .controlButton({
      // 图标距离左侧宽度
      left: 10,
      // 图标距离顶部高度
      top: 20,
      // 图标高度
      height: 30,
      // 图标宽度
      width: 30,
      icons: {
        // 侧边栏展示时图标
        shown: $r('app.media.back'),
        // 侧边栏收起时图标
        hidden: $r('app.media.sidebar_shown'),
        // 侧边栏切换过程图标
        switching: $r('app.media.sidebar_shown')
      }
    })
    // 侧边栏宽度
    .sideBarWidth(200)
    .width('100%')
    .height('100%')
  }
}
注意:模拟机与真机的预览有区别,在SideBarContainerType.Embed情况下,真机中内容区域是压缩,模拟器中内容区域是缺失。
总结
Tabs组件: 适用于导航栏固定在页面上下左右侧,入口分类数目不多,可以控制在5个以内,且用户需要频繁切换每一个页签的应用,比如微信、QQ等。
Navigation组件: 同样可以实现Tabs组件中导航栏位于底部的场景,根据需要显示隐藏导航栏,提供标题,菜单,返回等选项,使用户是使用时更加灵活。
sideBarContainer组件:主要的功能和内容都在一个页面里面,只是一些低频操作内容需要显示在其他页面里,可以把这些辅助功能放在抽屉栏里。屏幕较小时导航栏不占用空间。比如QQ,开发指导文档等。
本文作者:野生菌君


